The Duration of Nine Holes in Golf

Ready to hit the green? Find out the average duration of nine holes in golf and learn how factors like skill level, course layout, and weather conditions can affect your game. Plan your day and make the most of your golfing experience.

Ready to hit the green? If you’ve ever wondered about the duration of nine holes in golf, look no further! In this article, we’ll explore the average time it takes to complete a game on these smaller courses. Whether you’re a seasoned golfer or just starting out, understanding the expected duration can help you plan your day and make the most of your golfing experience. So, grab your clubs and let’s tee off into the world of nine-hole golf!

The Duration of Nine Holes in Golf

Factors Affecting Duration of Nine Holes

Skill Level of Golfers

The skill level of the golfers is one of the key factors that affect the duration of nine holes. Professional golfers, with their exceptional skills and experience, tend to complete nine holes in a relatively shorter time compared to amateurs or recreational players. This is because they have mastered their swings, have a better understanding of the course, and can make calculated decisions quickly, resulting in a faster pace of play.

Course Layout and Condition

The layout and condition of the golf course also play a significant role in determining the time taken to complete nine holes. A well-designed course with straightforward holes and minimal hazards will often allow for a quicker pace of play. On the other hand, a challenging course with numerous obstacles and long distances between holes may require more time for golfers to navigate, resulting in a longer duration for completing nine holes.

Number of Players

The number of players in a group can greatly influence the duration of nine holes. Generally, the more players there are, the longer it will take to complete the round. Each golfer needs to take their turn to tee off, hit their shots, and make their way to the green. Additionally, more players on the course can lead to more waiting time at each hole, especially during busy periods. Consequently, playing in smaller groups or opting for tee times with fewer players can help expedite the pace of play.

Pace of Play

The pace of play refers to the speed at which the golfers progress through the course. It is crucial for maintaining a consistent and efficient rhythm. When golfers take an excessive amount of time between shots or unnecessarily delay the game, the duration of nine holes can significantly increase. Conversely, maintaining an appropriate pace of play, where players move quickly between shots and minimize unnecessary delays, can help ensure a timely completion of the round.

Weather Conditions

Weather conditions can impact the duration of nine holes in golf. Inclement weather such as rain, strong winds, or extreme heat can slow down golfers’ progress. Difficult weather conditions can affect shot accuracy, force players to search for their balls more often, and even lead to course closures or delays. Therefore, it is important to consider the weather forecast before embarking on a round of golf to avoid any unnecessary disruptions and ensure a smoother and more efficient gameplay.

Socializing and Distractions

Engaging in socializing or getting distracted during a round of golf can also extend the time taken to complete nine holes. While it is enjoyable to spend time with fellow golfers and make new acquaintances, excessive conversation and unnecessary breaks can slow down the pace of play. Therefore, maintaining a balance between enjoying the social aspects of the game and staying focused on the task at hand can help ensure a timely completion of the round.

Average Time to Complete Nine Holes

Professional Golfers

For professional golfers, the average time to complete nine holes is relatively shorter compared to amateurs or recreational players. Their superior skills, extensive experience, and familiarity with the course enable them to navigate through each hole swiftly and efficiently. With their precise shots and quick decision-making, professional golfers can often complete nine holes in around one and a half to two hours.

Experienced Amateurs

Experienced amateurs, who possess a considerable amount of skill and knowledge of the game, tend to take slightly longer to complete nine holes compared to professionals. While they may not exhibit the same level of proficiency as professionals, their expertise and understanding of the sport allow for more efficient gameplay. On average, experienced amateurs can typically complete nine holes in around two to two and a half hours.

Recreational Players

Recreational players, including beginners and those who play golf primarily for leisure and relaxation, usually take the longest time to complete nine holes. These players may have varying skill levels and limited experience, which can significantly affect the pace of play. They may require more time to analyze shots, search for lost balls, and navigate hazards. As a result, recreational players often take around two and a half to three and a half hours to finish nine holes.

Strategies to Speed up Play

Preparation and Warm-up

Preparing adequately before starting a round of golf can help save valuable time and contribute to a faster pace of play. Arriving early at the course ensures that you have ample time for warming up, stretching, and practicing your swings. By being properly warmed up, you can start the game confidently and avoid unnecessary practice swings or delays during the round.

Ready Golf

Implementing the concept of “ready golf” can significantly speed up the pace of play. Ready golf means that golfers should play their shots as soon as they are ready, rather than strictly adhering to a traditional order. This approach eliminates unnecessary waiting time and keeps the game moving efficiently. Players should prioritize being ready to hit, regardless of their position in the order, to minimize any delays and allow for a smoother gameplay experience.

Course Management

Effective course management involves making smart decisions during a round to optimize efficiency. By carefully selecting clubs, identifying target landing areas, and strategizing shots, golfers can minimize unnecessary strokes, searching time, and course navigation. Having a clear plan for each hole and being mindful of the course layout and conditions can contribute to a quicker completion of nine holes.

Limiting Practice Swings

While practice swings can help golfers familiarize themselves with the mechanics of a shot, excessive practice swings can lead to time-consuming delays. By limiting the number of practice swings, golfers can maintain a steady pace of play without sacrificing their shot quality. Focusing on a few well-executed practice swings can provide sufficient preparation without causing unnecessary hold-ups.

Using Course Apps

Utilizing course apps or GPS devices that provide real-time information on the course layout and distances can enhance the pace of play. These technological aids help golfers make informed decisions quickly, reducing time spent on club selection and shot analysis. By having access to precise information and eliminating guesswork, golfers can navigate the course more efficiently and complete nine holes in a shorter time.

The Duration of Nine Holes in Golf

Factors that Can Slow down Play

Crowded Courses

Playing on a crowded golf course can significantly slow down the pace of play. When multiple groups are trying to complete their rounds simultaneously, it can lead to congestion and waiting times at each hole. The sheer volume of players can result in longer rounds, especially during peak hours or popular events. Choosing tee times during less busy periods or playing on less crowded courses can help mitigate delays caused by overcrowding.

Searching for Lost Balls

Golfers occasionally find themselves in situations where they need to search for lost balls. This can occur when shots veer off the fairway or land in areas with dense rough or hazards. The time spent searching for lost balls can significantly increase the duration of nine holes. While losing a ball is frustrating, implementing strategies such as playing provisional balls or using brightly colored golf balls can help reduce searching time and keep the game moving smoothly.

Difficult Course Conditions

Challenging course conditions, such as unusually long distances between holes, complex layouts, or uneven terrains, can contribute to a longer duration for completing nine holes. Navigating through multiple hazards, such as deep bunkers, water features, or thick rough, may require additional time for golfers to strategize and execute their shots. Adjusting club selection and shot approach according to the course conditions can help minimize delays caused by a challenging course layout or condition.

Slow Players in Front

Being stuck behind slow or inefficient players can significantly affect the pace of play. When the group in front takes an excessive amount of time between shots or frequently loses balls, it can create unnecessary waiting times for the players behind them. While these situations may be unavoidable at times, maintaining a positive and patient attitude can help alleviate any frustration and ensure a smoother progression through the course.

Multiple Hazards

Courses with numerous hazards, such as water bodies, deep bunkers, or heavily wooded areas, can contribute to a slower pace of play. Players may need to exercise caution, carefully analyze their shots, and take additional time to accurately navigate these obstacles. Familiarizing oneself with the course layout and developing strategies to minimize hazards can help expedite play and reduce the time spent managing difficult playing conditions.

Equipment Issues

Equipment malfunctions or issues during a round of golf can lead to delays and disrupt the pace of play. Problems with golf clubs, such as a broken club or a damaged grip, can affect shot accuracy and require time for repairs or replacements. Being prepared with spare equipment or regularly maintaining and inspecting clubs can help mitigate equipment-related delays and ensure a smoother gameplay experience.

Tips to Improve Pace of Play

Play as a Team

To promote a faster pace of play, golfers should approach the round as a team effort. Instead of adopting an individual mindset, players can coordinate and support each other throughout the game. By keeping track of each other’s shots, helping search for balls, or offering assistance when necessary, the group can collectively contribute to the efficient completion of nine holes.

Be Ready to Play

Being prepared to hit the ball promptly is crucial for maintaining a steady pace of play. Golfers should anticipate their turn, select the appropriate club, and visualize their shot while waiting. By doing so, they can quickly address the ball and proceed without unnecessary delays. Taking proactive steps, such as carrying extra tees and balls, can also help minimize disruptions caused by losing or misplacing equipment.

Keep an Eye on the Group Ahead

Maintaining awareness of the group ahead is essential to prevent congestion and delays. Golfers should ensure that they are not holding up the players behind them while being mindful of the pace of play of the group in front. By doing so, they can help maintain a consistent rhythm and contribute to an uninterrupted flow of the game.

Maintain a Steady Pace

Consistency and efficiency are key to improving the pace of play. Golfers should strive to maintain a steady pace throughout the round by minimizing idle time between shots and transitions. Walking briskly between holes, promptly reaching the next shot location, and exercising discipline in shot preparation and execution can collectively contribute to a faster completion of nine holes.

Be Efficient on the Green

The putting green is a crucial area where pace of play can be significantly improved. After reaching the green, golfers should be mindful of their actions and avoid unnecessary delays. Reading the green and assessing the putt efficiently, marking the ball when necessary, and taking few practice strokes can help streamline the process and ensure a seamless transition to the next hole.

Golf Etiquette and Time Management

Being Mindful of Others

One of the fundamental aspects of golf etiquette is being considerate and mindful of others on the course. This includes being aware of the pace of play and its impact on fellow golfers. By respecting the time and concentration of others, golfers can help create a more pleasant and efficient playing environment.

Being Respectful of Pace of Play

Respecting and adhering to the expected pace of play at a particular golf course is crucial for maintaining a smooth flow of the game. Courses often have guidelines or rules specifying the maximum time allowed for completing nine holes. By respecting and abiding by these guidelines, golfers can ensure that their gameplay aligns with the general expectations of the course.

Proper Use of Mobile Devices

The use of mobile devices can both enhance and hinder the pace of play in golf. While mobile apps and GPS devices can provide valuable assistance and enhance efficiency, excessive use of mobile devices for non-golf-related purposes can contribute to delays and distractions. Golfers should use their mobile devices responsibly and ensure that their usage does not interfere with the timely completion of the round.

Avoiding Excessive Delays

While delays and disruptions can sometimes be unavoidable, it is essential to proactively avoid excessive delays whenever possible. Minimizing time spent searching for lost balls, promptly fixing equipment issues, and adhering to the pace of play can collectively contribute to a smoother and more efficient round. By taking personal responsibility for time management, golfers can help create a positive playing experience for themselves and others.

Resources for Tracking Time

Golf Course Apps

Many golf courses provide dedicated mobile apps that offer features to track the time spent on the course. These apps typically incorporate GPS functionality, score tracking, and real-time updates on the pace of play. Utilizing such apps can help golfers monitor their progress, make informed decisions, and ensure they stay within the estimated completion time for nine holes.

Wearable Devices

Wearable devices, such as golf watches or fitness trackers, often include features that calculate and display the time taken to complete a round of golf. These devices utilize built-in GPS technology to track movements and monitor gameplay progress. By wearing such devices, golfers can conveniently monitor their pace of play and make necessary adjustments to maintain an optimal tempo.

Handheld Timers

For those who prefer a more traditional approach, handheld timers or stopwatches can be used to track the time taken for completing nine holes. These devices allow golfers to manually measure the duration of their rounds and compare them against their personal goals or the estimated time for golfers of their skill level. By closely monitoring their time, players can actively work towards improving their pace of play.

The Importance of Enjoying the Game

Balancing Speed and Enjoyment

While swift pace of play is desirable in golf, it is essential to strike a balance between speed and enjoyment. Rushing through a round may compromise shot technique, decision-making, and overall satisfaction with the game. It is crucial to find a pace that allows for a pleasant and fulfilling golfing experience while ensuring that the game does not unduly disrupt other golfers’ schedules.

Creating a Positive Experience

Efficient pace of play goes hand in hand with creating a positive experience for oneself and others. By being mindful of time management, adhering to golf etiquette, and promoting a friendly and supportive atmosphere, golfers can contribute to an enjoyable and harmonious playing environment. A positive experience fosters more enthusiasm for the game and encourages a greater participation in future rounds.

Fostering a Friendly Atmosphere

Golf is known for its social aspects and the opportunity to interact with others. By fostering a friendly and inclusive atmosphere on the course, players can have enjoyable interactions while maintaining a reasonable pace of play. Engaging in polite conversations, offering assistance when needed, and demonstrating sportsmanship can enhance the overall golfing experience for everyone involved.

Benefits of Playing Nine Holes

Quicker Time Commitment

Playing nine holes offers the advantage of a shorter time commitment compared to a full 18-hole round. This is particularly beneficial for golfers who have limited availability or prefer a faster-paced game. The reduced duration allows for a more convenient golfing experience without compromising the enjoyment and satisfaction derived from playing the sport.

Improved Focus and Concentration

A nine-hole round requires efficient decision-making and focused shot execution within a shorter timeframe. By playing a condensed round, golfers can enhance their ability to maintain concentration throughout the entire game. The need to strategize, adapt quickly to changing conditions, and assess shots promptly can sharpen mental acuity and improve overall performance.

Increased Physical Activity

Golf, albeit considered a leisurely sport, still provides valuable physical activity. Playing nine holes entails walking several kilometers, swinging a club, and engaging various muscle groups. By opting for a nine-hole round, golfers can enjoy physical exercise that offers health benefits, including improved cardiovascular fitness, muscle tone, and overall well-being.

Affordability

Compared to an 18-hole round, playing nine holes often offers a more affordable option for golfers. The reduced green fee for a shorter round allows individuals to enjoy the game while considering their budget. Additionally, the lower time commitment involved in nine holes can make golf more accessible to those with demanding schedules or other commitments.

Conclusion

The duration of nine holes in golf is influenced by several factors ranging from the skill level of golfers to the layout and condition of the course. Professionals typically complete nine holes in a shorter time compared to amateurs and recreational players. Strategies such as ready golf, effective course management, and limiting practice swings can contribute to a speedier pace of play. Factors that can slow down play include crowded courses, lost balls, difficult course conditions, and equipment issues. Maintaining proper golf etiquette, being mindful of time management, and utilizing resources like golf course apps or wearable devices can help track and improve the pace of play. Balancing speed and enjoyment, fostering a friendly atmosphere, and appreciating the benefits of playing nine holes provide golfers with a comprehensive outlook on optimizing their golfing experience. Ultimately, by implementing these strategies and cultivating a positive mindset, golfers can ensure a timely completion of nine holes while enjoying the game to its fullest.

How to Measure Golf Club Loft

Learn how to measure golf club loft and understand its impact on your shots. This guide provides various methods and tools to accurately measure loft angle, including using a protractor, a loft/lie machine, or a launch monitor. Whether you’re a beginner or a seasoned golfer, this article will help improve your game. Achieve a more precise and powerful swing by unlocking the secrets of golf club loft.

Have you ever wondered how to measure the loft of your golf club? Understanding the loft of your golf club is essential for achieving the perfect shot on the green. In this article, we will guide you through the process of measuring the loft of your golf club, providing you with all the necessary information to improve your golf game. Whether you are a beginner or a seasoned golfer, this article will help you understand the importance of measuring golf club loft and how it can impact your shots. So, let’s get started and unlock the secrets to a more precise and powerful swing!

How to Measure Golf Club Loft

Determining Loft Angle

Determining the loft angle of your golf clubs is important for understanding the characteristics of each club and optimizing your performance on the course. Whether you want to calculate the loft angle yourself or seek professional help, there are several methods and tools available to assist you in this process. In this article, we will explore different ways to measure club loft, including using the protractor method, a loft/lie machine, and a launch monitor. We will also discuss the factors that can affect club loft and delve into the connection between loft angles and wedges. Let’s dive in!

Understanding Loft Angle

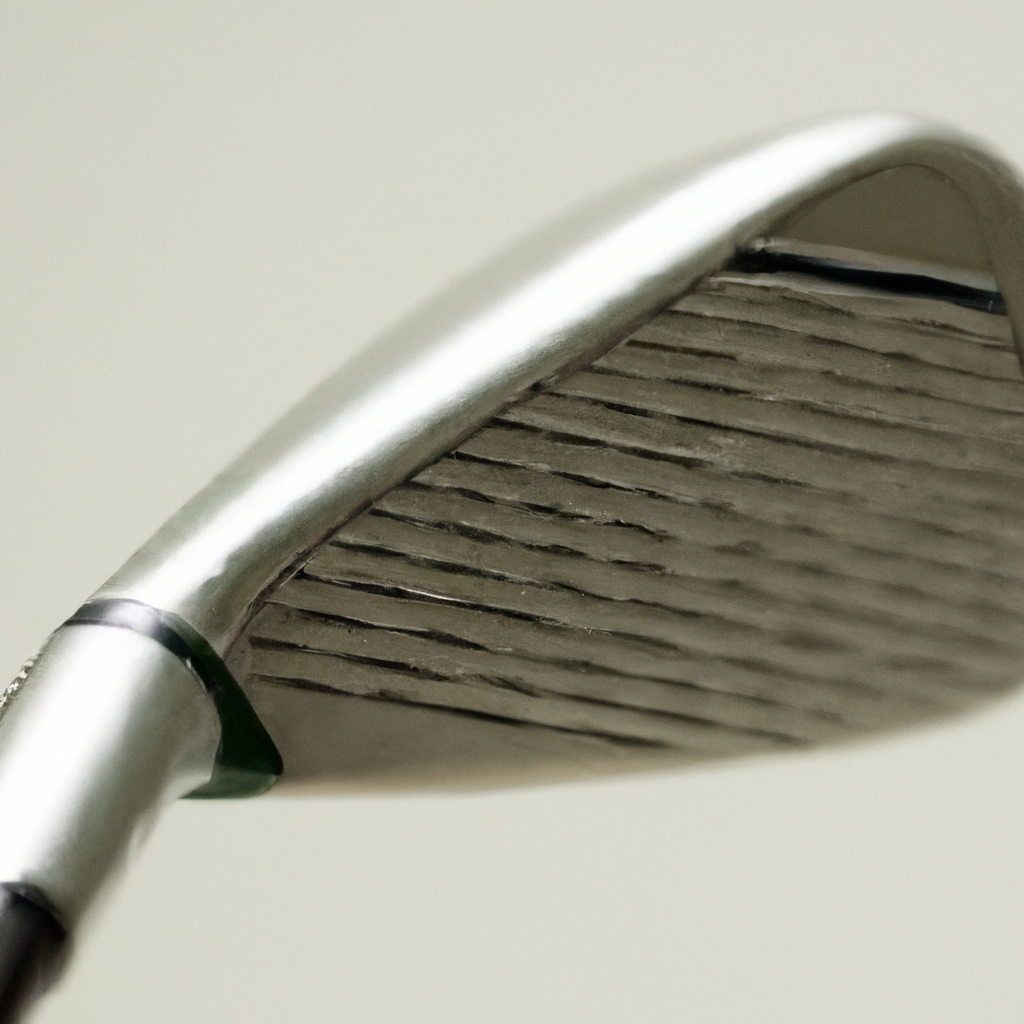
Before we delve into the methods of measuring loft angle, let’s start by understanding what loft angle actually means. Loft angle refers to the angle between the clubface and the shaft of a golf club. It plays a crucial role in determining how high and how far the golf ball will travel when struck with that particular club. The loft angle is usually printed or engraved on the clubhead, but it’s important to verify the stated loft angle using reliable measurement methods, as manufacturing tolerances can result in slight variations.

Finding the Loft Angle on Clubhead

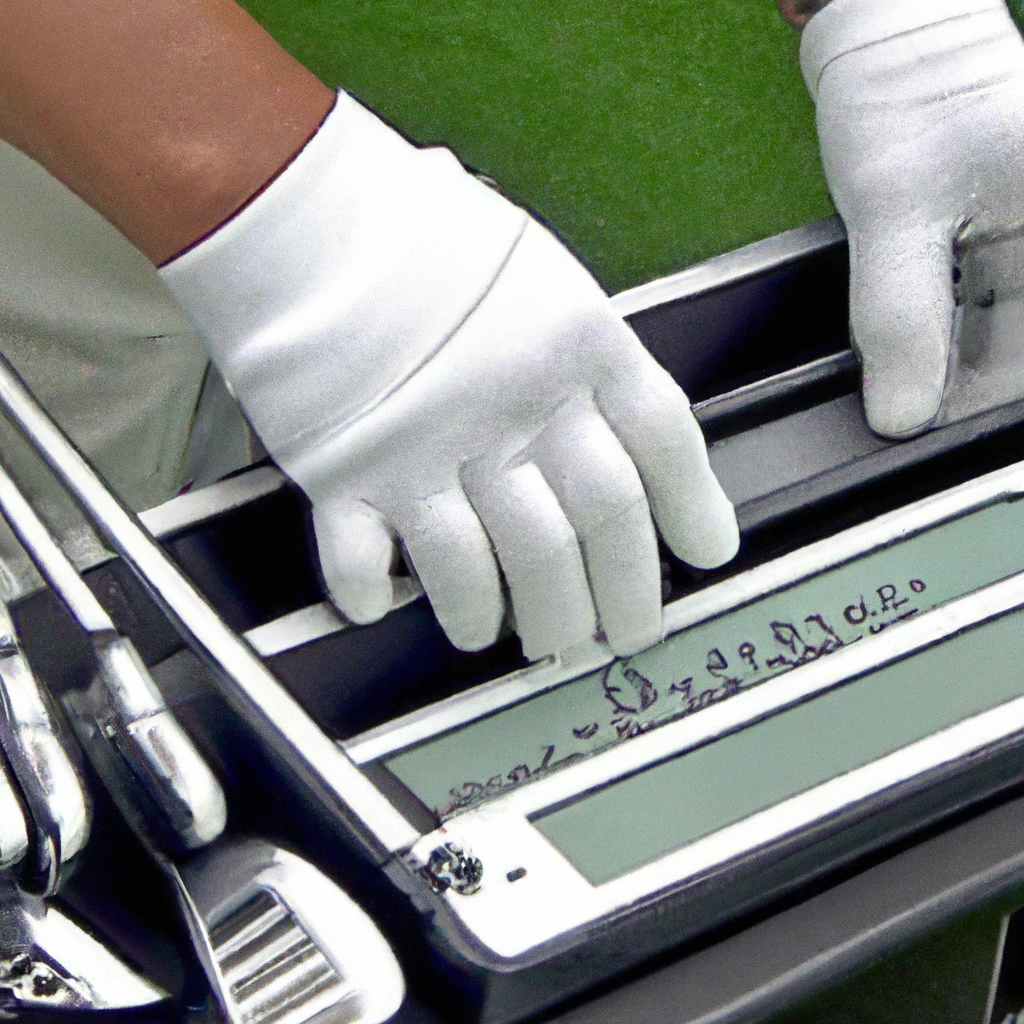
Most modern golf clubs have the loft angle printed on the clubhead. The print typically appears on the sole or the back of the clubhead, near the club number. If the number is not clearly visible, you may need to use a magnifying glass or a smartphone camera to read it. Additionally, some clubs may have loft angle markings on the hosel or the leading edge of the clubface. Take a moment to look for these markings on your clubs, as they can help you confirm the stated loft angle.

Using Loft Angle Measurement Tools

To obtain accurate measurements of loft angle, you can utilize various loft angle measurement tools available in the market. These tools provide a precise way to measure the loft angle of your clubs and can be helpful in adjusting and fine-tuning your equipment. Let’s explore a couple of popular methods for measuring loft angle in more detail.

Using Protractor Method

Requirements

To measure the loft angle using the protractor method, you will need a protractor, a ruler, and a flat surface to work on. Additionally, having an assistant or a tripod to hold the club steady can make the process easier and more accurate.

Process

Start by placing the club on the flat surface, ensuring that the clubface is perpendicular to the surface. Use the ruler to align the club shaft with the edge of the protractor, ensuring that the zero degree mark aligns with the center of the clubface.

Calculating Angle

Carefully read the loft angle by noting the corresponding degree on the protractor where the clubhead intersects. For example, if the clubhead intersects at 45 degrees on the protractor, the loft angle would be 45 degrees.

Repeat for Other Clubs

Repeat the process for all your clubs to determine their respective loft angles. Remember to use the same alignment and measurement techniques to maintain consistency. This will allow you to identify any variations in loft angles across your set of clubs.

Using Loft/Lie Machine

Requirements

A loft/lie machine is a mechanical device used to measure and adjust the loft and lie angles of golf clubs. To use this method, you will need access to a loft/lie machine, which can be found at some golf shops or club repair services.

Setup

First, mount the club securely in the machine, ensuring that it is positioned correctly with the clubface resting on the back pad. Adjust the machine to align the loft/lie measuring arm precisely with the clubface.

Measuring Loft Angle

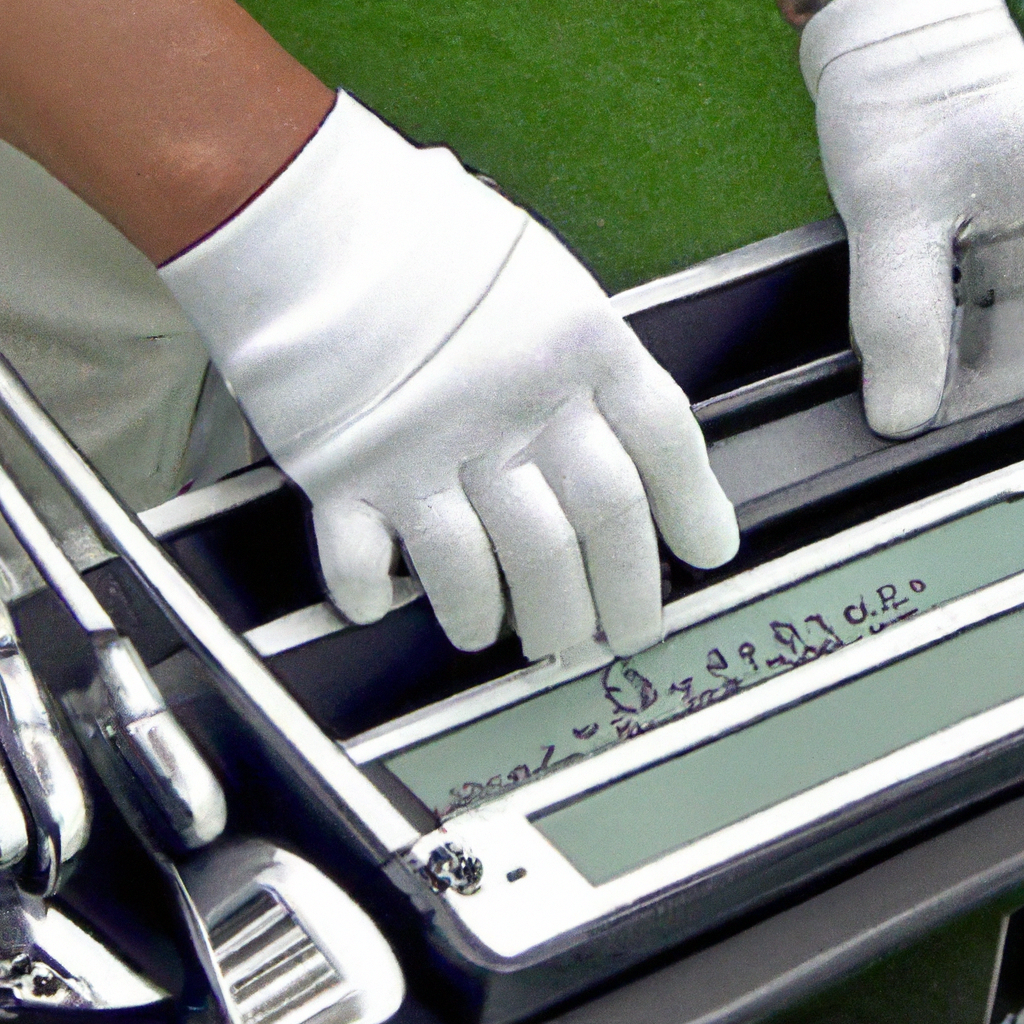
Activate the machine to make the measuring arm touch the clubface gently. The machine will provide a digital readout or a dial indicator to display the loft angle. Take note of the reading, as it represents the measured loft angle of the club.

Verifying Measurements

To verify the accuracy of your club’s loft angle, you can compare the measurement obtained from the loft/lie machine with the stated loft angle of the club. This will help you identify any discrepancies and determine whether adjustments need to be made.

How to Measure Golf Club Loft

Using Launch Monitor

Understanding the Technology

Launch monitors are advanced devices that utilize sensors and algorithms to measure various parameters of a golf shot, including clubhead speed, ball speed, launch angle, spin rate, and more. These devices provide comprehensive data that can be used to analyze swing performance and optimize club selection.

Measuring Loft Angle

Launch monitors can also measure the loft angle of your clubs. By capturing data on the launch angle of the ball during flight, the launch monitor can calculate the loft angle at impact. This method provides instant and accurate measurements, eliminating the need for additional tools or equipment.

Analyzing Data

In addition to measuring loft angle, launch monitors offer valuable insights into your swing mechanics and club performance. By analyzing the data provided by the launch monitor, you can identify areas for improvement, make educated equipment choices, and enhance your overall game.

Comparing Results across Clubs

Using a launch monitor can help you compare the loft angles of different clubs in your bag. This information can be particularly useful when determining the loft gaps between clubs and selecting the appropriate club for each shot. By understanding the loft variations across your set, you can make more informed decisions on the course and optimize your distance and control.

Seeking Professional Help

While the aforementioned methods provide reliable ways to measure loft angle on your own, it can sometimes be beneficial to seek professional assistance. Golf professionals, club fitters, and experienced golfers can offer valuable insights and expertise to help you optimize your loft angles and overall performance.

Professional Club Fittings

Professional club fittings entail working with a qualified club fitter who can analyze your swing mechanics, assess your needs, and recommend suitable equipment. During a club fitting session, the fitter may use specialized tools and launch monitors to measure and adjust club loft angles based on your swing characteristics. This personalized approach can result in a more optimized and tailored set of clubs for your specific game.

Consulting Golf Club Repair Services

Golf club repair services often employ skilled technicians who have the expertise and specialized equipment required to accurately measure and adjust loft angles. Whether you want to verify the stated loft angle of your clubs or make custom adjustments, these professionals can provide valuable assistance. They can also undertake loft angle adjustments to help you achieve the desired launch conditions and optimize your shots.

Getting Advice from Experienced Golfers

Experienced golfers who have a deep understanding of equipment and the game itself can offer valuable advice on loft angle selection. By observing your swing and evaluating your performance, these individuals can provide insights into loft angles that may benefit your specific playing style. Engaging in discussions with experienced golfers can broaden your knowledge on loft angles and help you make informed decisions when selecting or adjusting your clubs.

Factors Affecting Club Loft

Clubhead Design The design of the clubhead plays a significant role in determining the loft angle. Different clubhead designs, such as cavity back or blade-style irons, have varying weight distributions and center of gravity positions. These design characteristics can impact the launch angle and spin rate, ultimately affecting the loft angle and overall performance of the club.

Clubface Angle The clubface angle, often referred to as the “open” or “closed” position, can influence the loft angle at impact. A clubface that is open will add loft to the shot, while a closed clubface will reduce loft. Understanding and manipulating the clubface angle can help you fine-tune your loft angles and control your shots more effectively.

Shaft Characteristics The characteristics of the shaft, including its flex, length, and weight, can also affect the loft angle. A stiff shaft, for example, may result in a lower launch angle and reduce the effective loft of the club. It’s important to consider the interplay between the clubhead and the shaft when assessing and adjusting loft angles.

Player Swing Mechanics The dynamics of an individual’s swing mechanics, including swing speed, attack angle, and release timing, can impact the loft angle produced. Players with a steeper downswing may naturally de-loft the clubface, leading to lower launch angles. Understanding your swing mechanics and how they affect loft can help you make adjustments or select clubs that complement your unique swing characteristics.

Understanding Loft and Distance

Loft Angle and Ball Height The loft angle of a club has a direct impact on the height the ball will reach during its flight. A higher loft angle will generally result in a higher ball flight, while a lower loft angle will produce a lower trajectory. By understanding the relationship between loft and ball height, you can strategically select the appropriate club based on the circumstances and distances involved.

Implications for Carry Distance The loft angle also affects the carry distance of a golf shot. A higher loft angle can increase the carry distance, while a lower loft angle can produce a flatter trajectory and longer roll-out. When selecting a club, it’s important to consider the desired carry distance and adjust loft angles accordingly.

Impact on Shot Trajectory Shot trajectory refers to the path the ball takes from its launch to its landing. The loft angle plays a crucial role in determining the initial trajectory of the shot. By adjusting the loft angle, you can influence shot trajectory, allowing you to navigate hazards, achieve accurate landings, and approach the pin more effectively.

Effect on Overall Distance While loft angle can affect carry distance and shot trajectory, it is important to note that other factors, such as clubhead speed, ball spin, and launch conditions, also impact overall distance. The loft angle should be optimized in conjunction with these factors to achieve the maximum distance potential for each club in your set.

The Loft-Wedge Connection

Loft Gaps in Wedge Sets Wedge sets typically include a pitching wedge (PW), a gap wedge (GW), a sand wedge (SW), and a lob wedge (LW). Each of these wedges has a specific loft angle assigned to it. The loft gaps between these wedges ensure that there is a consistent distance separation between shots. However, it is essential to choose wedges with loft angles that suit your playing style and course conditions, as these factors can influence the desired loft combinations.

Determining Correct Loft Combination Selecting the correct loft combination for your wedge set is vital for optimizing your short game. It requires an understanding of your playing style, the distances you want to cover, and your ability to control each type of shot. Experimenting with different loft combinations and seeking professional advice can help you find the optimal mix that suits your preferences and maximizes your short game performance.

Effectiveness of Proper Loft Gapping By having the correct loft gaps in your wedge set, you can cover a wide range of distances with minimal adjustments to your swing mechanics. Proper loft gapping ensures that shots are consistent and predictable, allowing you to confidently execute shots around the greens. Investing time in determining the correct loft gapping will help you improve your scoring and increase your chances of making more putts.

Fine-tuning Loft with Adjustments Depending on your preferences and the shots you want to execute, you may consider making adjustments to the loft angles of your wedges. Increasing or decreasing the loft angles can alter the distance and trajectory of your shots, giving you more options to navigate various scenarios on the course. However, it’s important to note that loft adjustments should be made judiciously and preferably with the guidance of a professional or experienced golfer.

Importance of Loft Angles

Optimal Launch Conditions Understanding and optimizing loft angles is crucial for achieving optimal launch conditions. By launching the ball at the correct angle, you can maximize distance, control, and accuracy. A well-tailored loft angle will help you achieve the desired launch conditions, allowing the ball to soar through the air with precision.

Personalized Loft for Better Performance Each golfer has a unique swing style, and tailoring the loft angles to match your swing can significantly enhance your performance. By customizing your loft angles, you can maximize your potential distance and accuracy, leading to lower scores and a more enjoyable golfing experience.

Maximizing Distance and Control Accurate loft angles can have a substantial impact on both distance and control. By honing in on the optimal loft for your swing characteristics, you can unlock additional distance potential while ensuring consistency and control throughout your game. This translates to more confidence on the course and increased performance.

Influencing Shot Shape Loft angles can also influence shot shape. By manipulating the club’s loft, you can promote a fade or a draw, altering the curvature of your shots. This can be particularly helpful when trying to navigate challenging fairways or set up approach shots to specific pin locations. Understanding the relationship between loft angles and shot shape can give you an extra edge in your strategic decision-making on the course.

Common Misconceptions

Higher Loft for More Distance Contrary to common belief, a higher loft angle does not necessarily guarantee more distance. While a higher loft can result in a higher launch angle and increased carry, it can also generate more backspin, which may limit the roll-out distance. Optimizing the loft angle based on factors such as swing speed, attack angle, and ball characteristics is key to balancing both distance and control.

Unified Loft Angles across Brands Loft angles can vary across different club brands and models. This means that a 7-iron from one manufacturer may have a different loft angle than a 7-iron from another manufacturer. It is important to be aware of these variations and consider them when selecting new clubs or comparing loft angles between different sets.

Loft Angle and Club Selection Lastly, it’s worth noting that loft angle is just one of the many factors to consider when selecting a club. Other important factors include club length, shaft flex, and clubhead design. Understanding how loft angle interacts with these factors will help you make informed decisions when choosing the right club for a particular shot.

In conclusion, determining loft angles is a vital aspect of optimizing your golf game. By using the various methods and tools available, you can measure and adjust loft angles to suit your playing style and course conditions. Seeking professional help, understanding the factors affecting club loft, and recognizing the importance of loft angles in distance and control will enable you to make informed choices and improve your overall performance on the course. So, measure those loft angles, fine-tune your clubs, and watch your game soar to new heights!

Mastering the Art of Mini Golf Scoring

Mastering the Art of Mini Golf Scoring: Learn essential techniques and strategies to elevate your game, from equipment selection to putting skills.

In “Mastering the Art of Mini Golf Scoring,” you will discover the essential techniques and strategies to elevate your mini golf game to the next level. From analyzing the course layout to fine-tuning your shot accuracy, this article will guide you through the intricacies of mini golf scoring. Unleash your inner champion as we explore the key factors that can maximize your chances of achieving that elusive hole-in-one. Get ready to transform from an amateur player to a skilled master of the mini golf course.

Mastering the Art of Mini Golf Scoring

Choose the Right Equipment

Mini golf is a fun and exciting game that requires the proper equipment to fully enjoy and excel at. When it comes to choosing the right equipment, two key components stand out: the putter and the ball. Selecting the perfect putter and choosing the right ball can greatly impact your game and improve your overall performance. Additionally, it’s important to consider other equipment options that may enhance your mini golf experience.

Selecting the Perfect Putter

The putter is one of the most essential tools in mini golf, as it is primarily used for the delicate and precise act of putting the ball into the hole. When selecting a putter, it’s important to consider factors such as weight, grip, and length. A putter with a comfortable grip will allow for better control and a more confident stroke. Similarly, a putter with the right length will ensure that your stance and posture are correct, promoting a consistent and accurate putting technique.

Choosing the Right Ball

Choosing the right ball is equally crucial in mini golf. The ball’s weight, material, and texture can all have an impact on its performance. It’s recommended to choose a ball that feels comfortable in your hand and offers a good grip. Additionally, the weight of the ball should be manageable for you, as lighter balls may be harder to control, while heavier ones may result in fatigue. Experimenting with different ball materials and textures will help you determine the one that suits your game style and preferences best.

Consider Other Equipment Options

Apart from the putter and the ball, there are other equipment options that can add an extra level of enjoyment and challenge to your mini golf experience. Some courses offer specialized wedges, obstacle clubs, or even glow-in-the-dark balls for nighttime play. These unique equipment options can make your rounds of mini golf even more exciting and memorable. It’s worth exploring what additional equipment is available at your local mini golf course and trying them out to enhance your gameplay.

Understanding Mini Golf Rules

To truly master the art of mini golf scoring, it’s important to understand the rules of the game. Familiarizing yourself with the basic rules as well as the course-specific rules will ensure that you play the game correctly and avoid any penalties or disqualification.

Familiarize Yourself with Basic Rules

The basic rules of mini golf are relatively straightforward. The objective of the game is to complete each hole in as few strokes as possible. Each stroke counts as a single point, and the total number of strokes at the end of the game determines your score. Some general rules include starting each hole from the designated tee area, completing the hole by hitting the ball into the hole marked by a flag, and avoiding any penalties such as hitting the ball out of bounds or failing to complete the hole within a certain number of strokes.

Learn Course-Specific Rules

In addition to the basic rules, each mini golf course may have its own set of specific rules that players must adhere to. These rules can vary from course to course and may include regulations such as hitting the ball through certain obstacles, following a specific path, or dealing with special features like water hazards or sand traps. It’s important to take the time to read and understand the course-specific rules before starting your game to ensure a fair and enjoyable experience for all players.

Mastering the Fundamentals of Putting

Putting is the most crucial aspect of mini golf, as it determines the majority of your strokes. Mastering the fundamentals of putting will greatly contribute to your overall success on the course. Developing a consistent putting technique, understanding angles and slopes, mastering various putting styles, and perfecting distance control are all important aspects to focus on when working on your putting skills.

Developing a Consistent Putting Technique

Developing a consistent putting technique is essential for achieving accuracy and precision. Start by finding a comfortable stance that provides a stable foundation. Keep your feet shoulder-width apart and ensure that your weight is evenly distributed. Next, grip the putter with a light but firm grip, allowing for control and feel. Practice your putting stroke, aiming for a smooth and fluid motion. The key is to find a technique that works best for you and to practice it consistently to build muscle memory.

Understanding Angles and Slopes

Angles and slopes play a significant role in mini golf. Understanding how they can affect the trajectory and break of the ball will greatly improve your putting skills. Take the time to study the green and analyze the angles and slopes before making your shot. Aim to hit the ball at the correct angle to avoid bouncing off the edges or overshooting the hole. By considering angles and slopes in your approach, you’ll be better equipped to navigate the course and make precise putts.

Mastering Various Putting Styles

There are various putting styles that you can experiment with to find the one that suits your game best. From the traditional “pendulum” style to the unconventional “side-saddle” or “claw” grip, each style offers its own unique advantages. Choosing a putting style that feels comfortable and natural to you will greatly contribute to your overall confidence and consistency on the green. Practice different styles and observe how they affect your putting performance to determine which one works best for you.
Perfecting Distance Control

Distance control is a vital aspect of putting. Being able to judge the amount of force needed to reach the hole accurately will significantly impact your score. Practice putting from varying distances, focusing on controlling the power of your stroke. By honing your distance control skills, you’ll be able to putt with greater accuracy, reducing the likelihood of under or overhitting the ball. Consistent practice will enhance your ability to judge distances, allowing you to make more precise putts throughout the game.

Mastering the Art of Mini Golf Scoring

Analyzing the Mini Golf Course

To excel at mini golf scoring, it’s crucial to analyze the mini golf course before you begin your game. Studying the layout of the course, identifying potential challenges, and determining the optimal strategy will give you a competitive edge.

Study the Layout of the Course

Before you start your game, take a few minutes to walk around the mini golf course and carefully observe the layout. Pay attention to the placement and positioning of obstacles, the curves and slopes of the holes, and any potential hazards that may affect your shots. Understanding the layout of the course will help you plan your shots more effectively and anticipate any difficulties you may encounter throughout the game.


Identify Potential Challenges

During your analysis of the course, identify any potential challenges that may pose difficulties for you. These challenges could include narrow gaps, elevated areas, or strategically placed obstacles. By identifying these challenges in advance, you can develop strategies to navigate them more successfully. Consider alternative routes or methods of avoiding these challenges to optimize your gameplay and minimize the risk of losing unnecessary strokes.

Determine Optimal Strategy

Once you have a good understanding of the layout and challenges of the course, it’s time to determine your optimal strategy. Based on your observations, assess the most efficient way to complete each hole. Consider factors such as the shortest distance to the hole, the use of obstacles to your advantage, and potential paths that may offer a higher chance of success. Having a well-thought-out strategy before starting your game will help you make more informed decisions and ultimately improve your score.

Reading the Green

Reading the green is a crucial skill in mini golf. Observing grass breaks, assessing the speed of the green, and understanding the effects of slopes and obstacles will assist you in making more accurate and successful putts.

Observing Grass Breaks

Grass breaks refer to the direction in which the blades of grass grow on the green. By carefully observing the grass breaks, you can determine the natural direction that the ball will roll. Take note of any discernible patterns or slopes in the grass and use this information to guide your aim and judgment. Adjust your putting approach accordingly to counteract or utilize the effects of the grass breaks, giving you greater control over the ball’s path.

Assessing the Speed of the Green

The speed of the green refers to how fast or slow the ball rolls across the putting surface. Different factors, such as the length of the grass, moisture levels, or underlying layout, can affect the speed of the green. Take the time to assess the speed of the green before starting your game by observing the roll of the ball during practice putts. Adjust your stroke power and technique accordingly to accommodate the speed of the green, ensuring that your putts are neither too strong nor too weak.

Understanding the Effects of Slopes and Obstacles

Slopes and obstacles are common features found on mini golf courses that can significantly impact the path and break of your putt. When encountering slopes or obstacles, take a moment to assess their effects on your shot. Consider the angle at which the ball will hit the slope or obstacle and the subsequent changes in the ball’s trajectory. By strategically incorporating these elements into your putting strategy, you can redirect the ball to your advantage and navigate around potential obstacles, ultimately improving your overall score.

Gaining Control over Ball Bounces

Ball bounces can be unpredictable in mini golf, making it crucial to understand the factors that affect ball bounces, control the ball’s speed, and utilize walls and obstacles to your advantage.

Factors Affecting Ball Bounces

Several factors can affect the way a ball bounces in mini golf. The texture of the surface, the force applied to the ball, and the angle at which it hits an obstacle all contribute to the bounce. Experiment with different shot techniques and observe how the ball reacts to different surfaces and obstacles to understand the factors that influence its bounce. This knowledge will help you better anticipate and control the ball’s trajectory and ultimately make more successful shots.

Controlling the Ball’s Speed

Controlling the speed of the ball is crucial in mini golf, as it directly affects the accuracy and predictability of each shot. Adjusting the force applied to the ball when hitting it can help you control its speed. Practice hitting the ball with varying degrees of force to determine the optimal amount required for different putts. By mastering the control of the ball’s speed, you’ll be better equipped to navigate through the obstacles and challenges presented by the course.

Using Walls and Obstacles to Your Advantage

Walls and obstacles in mini golf can often be used strategically to redirect the ball or provide support. Carefully assess the layout of the course and identify opportunities where you can utilize walls and obstacles to your advantage. For example, bouncing the ball off a wall to avoid a direct obstacle or curving the ball around an obstacle can help you navigate the course more efficiently. Experiment with different shots and angles to harness the full potential of walls and obstacles, enhancing your overall performance.

Utilizing Bank Shots and Ricochets

Bank shots and ricochets are advanced techniques that can give you a competitive edge in mini golf. Understanding the physics behind bank shots, mastering ricochet techniques, and targeting strategic bouncing points are all essential skills to develop.

Understanding the Physics Behind Bank Shots

Bank shots involve hitting the ball against a wall or obstacle at such an angle that it bounces back towards the target. To execute a successful bank shot, you’ll need to understand the physics behind it. The angle at which the ball hits the wall, the force applied, and the angle at which it rebounds are all factors that contribute to the effectiveness of the shot. Experiment with different angles and force levels to determine the optimal approach for various bank shots. Mastering this technique will allow you to navigate around obstacles and make precise shots that would otherwise be difficult to achieve.

Mastering Ricochet Techniques

Ricochets involve hitting the ball against a surface or obstacle in a way that it rebounds off multiple surfaces before reaching the target. Mastering ricochet techniques requires practice and experimentation. Start by observing the course, identifying potential ricochet points, and planning your shots accordingly. Experiment with different angles and shot techniques to achieve the desired path and bounce. With time and practice, you’ll be able to execute ricochets with precision, providing yourself with new opportunities to score.

Targeting Strategic Bouncing Points

When planning your shots, identify strategic bouncing points that will redirect the ball towards your desired target. Look for areas on the course where the ball can bounce off walls, obstacles, or other features, allowing it to gain momentum or change direction. By strategically targeting these bouncing points, you can optimize your shots and overcome challenging sections of the course. Practice hitting the ball with the correct angles and force to consistently hit these strategic bouncing points, ultimately improving your game strategy and minimizing the number of strokes required to complete each hole.

Developing a Pre-Shot Routine

A pre-shot routine is an essential practice for any golfer – including mini golfers. Establishing a consistent routine, visualizing the shot, and practicing mental focus will help you maintain composure and approach each shot with confidence.

Establishing a Consistent Routine

Consistency is key when it comes to a pre-shot routine. Develop a routine that works for you and stick to it before every shot. This routine should include actions such as stepping up to the ball, taking a deep breath, aligning your body, and visualizing the intended trajectory of the shot. By establishing a consistent routine, you’ll create a sense of rhythm and familiarity that will boost your confidence and prepare you mentally and physically for each putt.

Visualizing the Shot

Visualization plays a crucial role in successful putting. Before executing a shot, take a moment to visualize the intended line and trajectory of the ball. Imagine the ball rolling smoothly towards the hole and focus on the desired outcome. This mental imagery helps to reinforce the putt in your mind, enhancing your concentration and improving overall shot execution. Incorporating visualization into your pre-shot routine will help you maintain focus and improve the accuracy of your putts.

Practicing Mental Focus

Mental focus is essential in mini golf, as it allows you to block out distractions and concentrate solely on the task at hand. During your pre-shot routine, take a moment to clear your mind of any distractions or negative thoughts. Focus on the present moment and the upcoming shot. Use techniques such as deep breathing and positive self-talk to maintain mental composure throughout the game. Practicing mental focus will empower you to make better decisions, execute shots more effectively, and ultimately improve your scoring.

Maintaining Concentration and Focus

In the fast-paced and often competitive environment of mini golf, maintaining concentration and focus is vital. Eliminating distractions, staying calm under pressure, and practicing mindfulness will ensure that you perform at your best throughout the game.

Eliminating Distractions

Distractions can be detrimental to your gameplay. It’s important to identify and eliminate any distractions that may interfere with your concentration. This can include external distractions such as noisy surroundings or other players’ movements, as well as internal distractions like negative thoughts or self-doubt. Find ways to minimize distractions, such as selecting quieter times to play, wearing noise-canceling headphones, or practicing meditation techniques to quiet the mind. By maintaining focus and eliminating distractions, you’ll be able to fully immerse yourself in the game and achieve optimal performance.

Staying Calm under Pressure

Mini golf can sometimes be a high-pressure environment, especially when playing competitively. Staying calm under pressure is essential for maintaining focus and making accurate shots. When faced with challenging shots or tricky situations, take a deep breath, compose yourself, and clear your mind of any unnecessary clutter. Remind yourself of your skills and capabilities, and have confidence in your abilities. The more you practice staying calm under pressure, the better equipped you’ll be to tackle challenging moments and consistently perform at your best.

Practicing Mindfulness

Mindfulness is a powerful technique that can significantly enhance your mini golf game. By practicing mindfulness, you train your mind to be fully present and aware of each shot, without judgment or attachment to the outcome. Embrace each moment on the course, focus on the sensations in your body, and pay attention to the sound of the ball rolling and the feel of the putter in your hands. Cultivating mindfulness will not only improve your concentration but also help you stay grounded, reduce anxiety, and enhance your overall enjoyment of the game.

Enhancing Muscle Memory and Technique

To truly excel at mini golf, enhancing muscle memory and technique is crucial. Through repetition and practice drills, you can improve accuracy and precision, perfect body alignment, and develop a smooth stroke that consistently produces desired results.

Repetition and Practice Drills

Repetition is key to developing muscle memory and improving technique in mini golf. Dedicate time to practicing your putting skills regularly, focusing on specific drills and exercises that target areas for improvement. For example, you can practice putting from various distances, work on specific shot techniques, or challenge yourself with obstacle-specific drills. The more you repeat these drills, the more your muscle memory will develop, allowing you to execute shots more naturally and consistently during actual gameplay.

Improving Accuracy and Precision

Accuracy and precision are essential for successful mini golf scoring. To improve these aspects of your game, focus on honing your sense of distance, refining your stroke mechanics, and practicing consistent follow-through. Experiment with different putting techniques and observe the effects on your accuracy and precision. With practice and attention to detail, you’ll gradually improve your ability to precisely control the roll and direction of the ball, leading to better overall scores.

Perfecting Body Alignment

Proper body alignment is crucial for executing accurate and consistent putts. Pay attention to your stance, ensure that your feet are parallel to the target line, and align your shoulders and hips accordingly. Practice putting with proper body alignment, aiming for a balanced and comfortable posture. By maintaining correct body alignment throughout your stroke, you’ll minimize the chances of misdirecting the ball and increase the likelihood of accurate putts.

Developing a Smooth Stroke

A smooth and fluid stroke is essential for consistent and reliable putting. Focus on developing a stroke that flows naturally while maintaining control and stability. Avoid jerky or abrupt movements that can disrupt the ball’s roll and direction. Practice a rhythmic pendulum-like motion, keeping your arms and wrists relaxed. By developing a smooth stroke, you’ll improve both consistency and confidence in your putting, resulting in better overall scores.

Mastering the art of mini golf scoring requires a combination of skill, strategy, and practice. By choosing the right equipment, understanding the rules, mastering the fundamentals of putting, analyzing the course, reading the green, gaining control over ball bounces, utilizing bank shots and ricochets, developing a pre-shot routine, maintaining concentration and focus, and enhancing muscle memory and technique, you’ll be well on your way to achieving low scores and enjoying a rewarding mini golf experience. So, grab your putter, select your ball, and get ready to step onto the mini golf course with confidence and skill!

5 Tips for Keeping Your Head Still in Your Golf Swing

Want to improve your golf swing? Learn five expert tips for keeping your head still, maintaining balance, and achieving consistent and accurate shots.

Imagine standing on the 18th hole, ready to take your swing and finish your round with a triumphant flourish. As you line up your shot, it’s crucial to maintain a steady head position throughout your entire golf swing. But how do you do it? In this article, we’ll share five expert tips to help you keep your head still and improve your golf game. Whether you’re a seasoned golfer or just starting out, these tips will provide you with valuable insights to elevate your swing technique and achieve more consistent and accurate shots.

5 Tips for Keeping Your Head Still in Your Golf Swing

1. Importance of keeping your head still in your golf swing

Why keeping your head still is crucial for a successful golf swing

When it comes to golf, keeping your head still throughout the swing is one of the most important factors for achieving consistency and accuracy in your shots. Your head acts as the anchor, providing stability and balance as you make your swing. If your head moves excessively during the swing, it can negatively impact your ability to make consistent contact with the ball and cause your shots to be inconsistent and unpredictable.

The impact of head movement on swing consistency

Head movement during the swing can greatly affect your swing consistency. If your head moves too much, it can alter your swing path and lead to inconsistent ball contact. This inconsistency can result in shots that veer off to the left or right, reducing both your accuracy and distance. By keeping your head still, you can ensure that your swing remains on the proper plane, allowing you to consistently strike the ball and produce more consistent shots.

The relationship between head movement and ball contact

Head movement plays a crucial role in determining the quality of your ball contact. When your head moves during the swing, it can cause your eyes to lose focus on the ball, resulting in poor contact. A stable head allows your eyes to stay focused on the ball, helping you maintain good ball contact and strike the sweet spot more consistently. By keeping your head still, you maximize your chances of making solid contact and achieving better distance and accuracy.

The role of head stability in maintaining balance and body alignment during the swing

Head stability is closely linked to maintaining balance and proper body alignment throughout the swing. When your head stays still, it acts as a reference point for the rest of your body, ensuring that your body rotates and moves in sync with your swing. This alignment promotes a more efficient transfer of power from your body to the club, leading to better shot execution. By maintaining head stability, you enhance your balance, improve your swing mechanics, and generate more power and control in your shots.

2. Proper posture and setup for head stability

The essential elements of a good golf posture

Achieving and maintaining a proper golf posture is essential for ensuring head stability throughout your swing. Start by standing with your feet shoulder-width apart, knees slightly flexed, and your weight balanced evenly between your feet. Bend forward from your hips, keeping your back straight, and allow your arms to hang naturally. This posture creates a solid base for your swing and sets the foundation for head stability.

The correct positioning of the head at address

At address, position your head so that it is directly above the ball or slightly behind it. This ensures that your eyes are focused on the ball and that your head remains in a stable position throughout the swing. Avoid tilting your head too far forward or backward, as this can disrupt your balance and stability.

The importance of maintaining a neutral spine angle

Maintaining a neutral spine angle is crucial for keeping your head still during the swing. Avoid excessive rounding or arching of your back, as this can impact your ability to maintain a stable head position. Instead, strive for a natural spine angle that allows your head to stay level and your eyes focused on the ball throughout the swing.

The role of grip and hand placement in promoting head stability

Proper grip and hand placement can significantly contribute to head stability. Ensure that your grip is secure but relaxed, as tension in your hands can lead to unnecessary head movement. Position your hands so that they are aligned with the clubface and maintain a consistent grip pressure throughout the swing. By establishing a solid hand position and grip, you improve your control over the club and minimize potential head movement.

The significance of alignment and target focus

Proper alignment and target focus go hand in hand with head stability. Before each shot, align your body parallel to the target line, with your feet, hips, and shoulders pointing in the desired direction. This alignment not only promotes a more stable head position but also improves your overall swing mechanics. Additionally, maintain a strong focus on your target throughout the swing, allowing your head to remain steady and helping you maintain accuracy and consistency.

3. Developing body awareness and control

The benefits of body awareness for head stability

Developing body awareness is crucial for maintaining head stability in your golf swing. When you are aware of your body positioning and movements, you can better control and minimize excessive head motion. Body awareness allows you to identify any irregularities in your swing and make the necessary adjustments to keep your head still and ensure a more consistent and accurate shot.

Exercises and drills to improve body control in the golf swing

There are several exercises and drills that can help improve your body control and ultimately enhance head stability in your golf swing. One effective drill is the “Feet Together” drill, where you practice swinging with your feet close together. This drill encourages proper weight transfer and body rotation, helping you maintain balance and minimize head movement. Another helpful exercise is the “Pause and Hold” drill, where you pause at the top of your backswing and hold the position for a few seconds. This drill promotes body control and stability, allowing you to keep your head still throughout the swing.

Building core strength and stability for better head positioning

A strong and stable core is essential for maintaining good posture and head stability in the golf swing. Engaging in exercises that target and strengthen your core muscles, such as planks, Russian twists, and kettlebell swings, can significantly improve your ability to keep your head still during the swing. Building core strength enhances your overall body control and stability, enabling you to maintain proper alignment and head position throughout the entire swing motion.

The relationship between hip rotation and head movement

Hip rotation plays a critical role in minimizing head movement during the golf swing. When your hips rotate properly through the backswing and downswing, your head is less likely to sway or move excessively. Focus on initiating your downswing with your lower body, allowing your hips to lead the movement. By emphasizing proper hip rotation, you can maintain a stable head position and achieve more consistent and accurate shots.

The role of proper weight distribution throughout the swing

Proper weight distribution is essential for maintaining head stability in the golf swing. During the swing, ensure that your weight shifts naturally from your back foot to your front foot, following the proper sequence of weight transfer. Distributing your weight correctly allows your body to move in sync with your swing, minimizing unnecessary head movement. Concentrate on maintaining a balanced weight distribution throughout the swing to enhance your control and stability, leading to more consistent and powerful shots.

5 Tips for Keeping Your Head Still in Your Golf Swing

4. Mindful focus and concentration techniques

How mental distractions can affect head movement

Mental distractions can have a significant impact on head movement during the golf swing. When your mind is preoccupied or distracted, it becomes more challenging to maintain focus on the ball and keep your head still. External distractions, such as noise or other players, as well as internal distractions, such as negative thoughts or anxiety, can all contribute to excessive head motion. It is crucial to develop techniques to maintain mental focus and block out distractions to optimize head stability.

The importance of maintaining focus on the golf ball

Maintaining a laser-like focus on the golf ball throughout the swing is vital for head stability. By keeping your eyes locked on the ball, you can ensure that your head stays still and your swing stays on the correct plane. Avoid the temptation to look up too early or follow the flight of the ball mid-swing, as this can disrupt your head position and compromise your shot accuracy. Train yourself to stay fully focused on the ball until well after impact, fostering head stability and consistent ball contact.

The role of breathing and relaxation techniques in promoting head stillness

Breathing and relaxation techniques can greatly contribute to head stillness during the golf swing. Deep diaphragmatic breathing can help calm the mind and reduce tension in the body, promoting a more relaxed and controlled swing. Incorporate breathing exercises, such as inhaling deeply on the backswing and exhaling smoothly on the downswing, to enhance your overall relaxation and stability. By cultivating a relaxed state, you can minimize unnecessary head movement and improve your swing consistency.

The benefits of visualization and pre-shot routines for head stability

Visualization and pre-shot routines are powerful tools for promoting head stability in the golf swing. By visualizing the desired swing and shot outcome before stepping up to address the ball, you can mentally prepare for a steady and controlled swing. Incorporate a consistent pre-shot routine that includes visualization, such as visualizing a still head throughout the swing, to enhance your focus and head stability. These techniques help you establish a mental blueprint for a stable and accurate swing, increasing your chances of success.

Strategies for staying present and avoiding excessive head movement

Staying present and in the moment is crucial for reducing excessive head movement in the golf swing. It is natural for the mind to wander during the swing, which can lead to unwanted head motion. To counter this, practice mindfulness techniques, such as focusing on your breath or a specific point on the ball, to anchor your attention in the present moment. By staying fully present, you can minimize distractions and keep your head still, allowing for a more consistent and controlled swing.

5. Seek professional guidance and feedback

The value of working with a golf instructor or coach

Working with a golf instructor or coach can provide invaluable guidance and feedback on maintaining head stillness in your golf swing. An experienced instructor can assess your swing mechanics, identify any head movement issues, and provide specific drills and exercises tailored to your needs. Their expertise and knowledge can fast-track your progress and help you establish good habits for head stability.

The benefits of video analysis for identifying head movement issues

Video analysis is a powerful tool for identifying and analyzing head movement issues in your golf swing. By recording your swing from different angles, you can observe and evaluate your head position and movement patterns. This visual feedback allows you to pinpoint any deviations from proper head stability and make the necessary adjustments. Utilize video analysis, either with the help of a professional or through self-analysis, to gain a clearer understanding of your swing and improve your head control.

Receiving feedback and corrective exercises tailored to your swing

Receiving feedback on your swing from a golf instructor or coach is essential for making the necessary corrections to promote head stillness. They can provide insight into your specific swing characteristics and recommend tailored exercises and drills to address any head movement issues. A customized approach ensures that your practice efforts are focused on improving your unique swing tendencies, leading to steady progress and improved head control.

The role of practice and repetition in establishing good habits

Practicing regularly and repeating proper swing mechanics is vital for establishing good habits and maintaining head control. Consistent practice allows you to reinforce the correct head position and stability by ingraining the desired movements into your muscle memory. Quality practice sessions, focused on head stillness and proper swing mechanics, provide the opportunity to refine your technique and build the necessary muscle control and coordination for a consistent swing.

The importance of patience and persistence in improving head control

Improving head control and maintaining stillness in your golf swing requires patience and persistence. Changing ingrained swing habits takes time, and progress may not be immediate. Understand that it is a gradual process and be patient with yourself as you work towards better head stability. Stay persistent in your practice efforts, and with consistent dedication, you will gradually develop the muscle memory and control necessary for a more controlled and still head position.

6. Common mistakes to avoid

Swinging too aggressively and losing head stability

One common mistake golfers make is swinging too aggressively, causing excessive head movement and instability. Trying to generate excessive power by overswinging can lead to an unstable body position and a loss of head control. Focus on maintaining a smooth and controlled swing that allows you to keep your head still throughout the motion. By prioritizing balance and stability over sheer power, you can improve your overall swing consistency.

Allowing the eyes to follow the ball mid-swing

Another mistake is allowing the eyes to follow the ball mid-swing, resulting in head movement and loss of stability. When your eyes track the ball during the swing, it is challenging to maintain a stable head position and concentrate on proper ball contact. Train yourself to keep your eyes focused on the ball until well after impact, maintaining a still head position throughout the swing for improved consistency and accuracy.

Improper weight transfer leading to head movement

Improper weight transfer during the swing can contribute to head movement. Failing to shift your weight correctly from your back foot to your front foot can cause your head to sway or shift off-center. Focus on maintaining a balanced weight transfer, feeling the weight transfer smoothly from your back foot to your front foot as you swing through the ball. Proper weight distribution enhances your stability and helps keep your head still, resulting in improved swing mechanics and more consistent shots.

Overthinking and tense muscles causing excessive head motion

Overthinking and tensing your muscles can lead to excessive head motion during the swing. When your mind is preoccupied with technical thoughts or your muscles are overly tense, it becomes challenging to maintain a still head position. Instead, strive for a relaxed and fluid swing by focusing on the target and letting your body execute the swing naturally. Loosen your grip and muscles, allowing the swing to flow and maintaining a stable head throughout.

Failing to maintain balance and stability throughout the swing

Failing to maintain balance and stability throughout the swing can result in head movement and inconsistencies in your shots. Balance is essential for keeping your head still, as any instability can cause unwanted motion. Practice balance exercises, such as standing on one leg or using a balance board, to improve your overall stability and enhance head control. By prioritizing balance in your swing, you can minimize head movement and achieve greater consistency and control.

7. Equipment considerations for head stability

The role of properly fitted golf clubs in promoting head control

Having properly fitted golf clubs can significantly contribute to head control and stability in your swing. Clubs that are too long or too short can lead to compensations in your swing, resulting in unwanted head movement. Consult with a professional club fitter to ensure that your clubs are the correct length, lie angle, and shaft flex for your swing. Well-fitted clubs promote a more natural swing motion, making it easier to maintain a stable head position and improve your overall swing performance.

The influence of club weight and shaft flex on swing stability

The weight and flex of your golf club can influence swing stability and head control. Heavier clubs may require more effort to swing and can potentially lead to additional head movement. On the other hand, a club with a shaft that is too stiff or too flexible for your swing may also affect your ability to maintain a stable head position. Experiment with different club weights and shaft flex options to find the combination that allows for optimal head stability and control.

The significance of grip size and texture for hand and arm stability

Grip size and texture play an essential role in promoting hand and arm stability, which can indirectly affect head control during the swing. If your grip is too small or too large, it can lead to tension and lack of control in your hands and arms. This tension can transfer to your upper body, including your head, causing unnecessary motion. Experiment with different grip sizes and textures to find the one that feels most comfortable and secure in your hands, allowing for better stability and control throughout the swing.

Using training aids and alignment tools to reinforce head stillness

Training aids and alignment tools can be valuable resources for reinforcing head stillness in your golf swing. For example, using a head alignment stick can help train your body to maintain a stable head position throughout the swing. This simple training aid acts as a visual guide, allowing you to monitor your head movement and make adjustments as needed. Additionally, alignment sticks and other tools can help you establish proper body alignment and target focus, further enhancing your head stability and overall swing consistency.

Choosing the right golf ball for optimal feedback and control

Selecting the right golf ball can provide valuable feedback and control during your swing. Different golf balls have varying levels of spin, compression, and feel, which can influence your swing mechanics and indirectly affect head motion. Experiment with different golf ball options to find the one that complements your swing style and provides the ideal combination of distance, control, and feedback. The right golf ball can help you achieve a more consistent and stable swing, leading to improved head control and better overall performance.

8. Incorporating drills and exercises into your practice routine

Specific drills to improve head stability in the backswing

Incorporating specific drills into your practice routine can help improve head stability in the backswing. One effective drill is the “Head Behind the Ball” drill, where you consciously keep your head slightly behind the ball throughout the backswing. This encourages a more centered rotation and minimizes excessive head movement. Incorporate this drill into your warm-up or practice sessions to develop a more stable and controlled backswing.

Exercises for maintaining head alignment during the downswing

To maintain head alignment during the downswing, incorporate exercises that promote rotational stability and control. One such exercise is the “Medicine Ball Rotation.” Stand with your feet shoulder-width apart, hold a medicine ball against your chest, and rotate your upper body from side to side, focusing on maintaining a still head position. This exercise enhances rotational strength and stability, helping you maintain proper head alignment during the downswing. Include this exercise in your strength and conditioning routine to improve your overall swing stability.

The benefits of mirror work and slow-motion swings for head control

Mirror work and slow-motion swings are beneficial techniques for improving head control in your golf swing. Utilize a full-length mirror to observe your swing and monitor your head position. Practice slow-motion swings, focusing on maintaining a steady and still head throughout the motion. This combination of visual feedback and intentional movement allows you to make necessary adjustments and develop muscle memory for improved head stability. Incorporate mirror work and slow-motion swings into your practice routine to enhance your awareness and control of head movement.

Incorporating balance and stability exercises into your warm-up

Incorporating balance and stability exercises into your warm-up routine can help prime your body for better head stability in the golf swing. Perform exercises such as single-leg stands, heel-to-toe walks, or yoga poses that require balance and core engagement. These exercises activate and strengthen the muscles responsible for maintaining stability, helping you establish a solid foundation for head control. By incorporating balance and stability exercises into your warm-up, you set the stage for a more centered and controlled swing.

Tracking progress and adjusting your practice regimen accordingly

Regularly track your progress and make adjustments to your practice regimen as needed to continually improve your head control. Keep a practice journal or use a golf app to record your practice sessions, noting any improvements or areas that require further work. Analyze your swing videos and compare them over time to identify any trends or changes in your head stability. With this feedback, adapt your practice routine, focusing on areas that need attention and continuously striving for better head control. Regular review and adjustment of your practice regimen contribute to ongoing improvements and ultimately lead to more consistent and stable head control.

9. Transferable skills: Applying head stability techniques to other aspects of the game

The role of head control in putting and chipping

Head control is just as important in putting and chipping as it is in the full golf swing. When putting, keeping your head still allows for better focus on the target line and improved stroke consistency. For chipping, a stable head promotes a more steady and controlled pendulum-like motion, resulting in cleaner contact and increased precision. The techniques and principles for head stability discussed earlier can be applied to these aspects of the game, helping you develop a more consistent and reliable short game.

Maintaining head stability when hitting fairway shots

Head stability remains crucial when hitting fairway shots, as it ensures proper alignment and contact with the ball. During fairway shots, focus on maintaining a still head position throughout the swing, allowing your body to rotate smoothly and maintaining a solid swing plane. This stability helps you strike the ball cleanly and accurately, increasing your chances of achieving the desired distance and accuracy.

The impact of head movement on driving accuracy

Head movement can significantly influence driving accuracy. Consistency in head position is essential for maintaining the proper swing plane and alignment required for accurate drives. By keeping your head still and your eyes focused on the ball, you can deliver a more consistent and repeatable club path and face angle at impact. This stability promotes a more accurate and controlled ball flight, leading to improved driving accuracy.

Adapting head stability techniques for different lies and conditions

Adapting head stability techniques to different lies and conditions is crucial for maintaining consistency in your golf swing. When faced with uneven lies, such as uphill, downhill, or sidehill lies, it becomes even more vital to keep your head still. Focus on adjusting your body alignment and swing plane to accommodate the lie while maintaining a stable head position. Similarly, in challenging weather conditions, such as strong winds, keeping your head still becomes paramount for maintaining control and stability throughout the swing.

Developing a consistent swing tempo through head stillness

Head stillness plays a crucial role in developing a consistent swing tempo. When your head remains stable throughout the swing, you establish a solid reference point, enabling you to maintain a consistent rhythm and timing. A consistent swing tempo is essential for generating power, maintaining balance, and achieving optimal ball contact. By prioritizing head stillness, you can develop a more repeatable and reliable swing tempo that enhances your overall performance.

10. Overcoming mental barriers and staying confident

The psychological hurdles of changing ingrained swing habits

Changing ingrained swing habits can present psychological hurdles that can impede progress. It is natural to feel resistance or frustration when trying to alter long-standing patterns. Recognize that change takes time, and setbacks are part of the learning process. Maintain a growth mindset, viewing challenges as opportunities for growth and improvement. With consistent effort and a positive attitude, you can overcome these mental barriers and successfully develop better head control in your golf swing.

Building trust in your swing with consistent head control

Building trust in your swing is essential for maintaining consistent head control. As you practice and refine your swing mechanics, you develop a sense of trust in your abilities, knowing that you can produce consistent and accurate shots. Consistently striving for stillness and control of your head reinforces that trust, as it becomes a reliable reference point for your swing. With time and practice, you can build a foundation of trust in your swing that allows for confident and controlled head positioning.

Cultivating a positive mindset and avoiding self-criticism

Cultivating a positive mindset is crucial for maintaining head control and overall performance in golf. Avoid self-criticism and negative self-talk that can undermine your confidence and focus. Instead, approach your practice and play with a mindset of self-compassion and patience. Emphasize the progress you have made and celebrate small victories along the way. By adopting a positive mindset, you can reduce mental distractions, maintain head control, and perform at your best.

The role of visualization and positive self-talk in promoting head stillness

Visualization and positive self-talk are powerful techniques for promoting head stillness. Before each swing, visualize yourself making a controlled and stable swing with a still head. See yourself achieving the desired outcome with confidence and accuracy. Additionally, use positive self-talk to reinforce the importance of head stillness and encourage yourself throughout the swing. By combining visualization and positive self-talk, you can enhance your mental focus and increase your ability to maintain a stable head position.

Utilizing relaxation techniques to mitigate tension and stress

Relaxation techniques can help alleviate tension and stress, contributing to improved head control in the golf swing. Incorporate relaxation exercises, such as progressive muscle relaxation or deep breathing, into your pre-shot routine or practice sessions. Relaxation techniques can help calm your mind, reduce physical tension, and optimize your focus. By maintaining a relaxed state, you can mitigate potential head movement caused by tension and stress, leading to improved swing consistency and performance.

In conclusion, keeping your head still in your golf swing is of utmost importance for achieving consistent and accurate results. By understanding the impact of head movement on swing consistency and ball contact, maintaining proper posture and setup, developing body awareness and control, practicing mindful focus and concentration techniques, seeking professional guidance, and avoiding common mistakes, you can enhance your head stability and ultimately improve your overall golf swing. With patience, persistence, and a positive mindset, you can establish good habits, transfer head stability techniques to other aspects of the game, and overcome mental barriers to unlock your full potential on the golf course.

The Ultimate Guide on How to Clean Golf Hats

Learn how to clean your golf hats like a pro with this ultimate guide. From choosing the right method to spot cleaning and removing odors, we’ve got you covered. Say goodbye to dirty hats and hello to pristine golf attire!

Are your golf hats in desperate need of a cleaning? Look no further! This ultimate guide will provide you with all the tips and tricks you need to keep your golf hats looking fresh and clean. From removing stubborn stains to preserving the shape of your caps, we’ve got you covered. So say goodbye to dirty hats and hello to pristine golf attire with our comprehensive guide on how to clean golf hats.

The Ultimate Guide on How to Clean Golf Hats

Choosing the Right Cleaning Method

When it comes to cleaning your golf hats, it’s important to choose the right cleaning method to ensure that you don’t damage the hat or alter its shape. The first step in this process is to identify the materials of your hat. Golf hats can be made from various materials such as cotton, polyester, straw, leather, or even mesh. Each material requires a different cleaning method to ensure the best results.

Next, it’s crucial to consider the manufacturer’s cleaning instructions for your hat. They often provide specific guidelines on how to clean and care for their hats. These instructions may include recommendations for hand washing, machine washing, spot cleaning, or professional cleaning. By following these instructions, you can ensure that your hat remains in good condition and retains its shape and color.

Lastly, before deciding on the cleaning method, it’s important to assess the condition of your hat. If your hat is heavily stained, damaged, or has delicate embellishments, you may need to opt for a more gentle cleaning method or consider professional cleaning. Conversely, if your hat is in relatively good condition with only minor stains or sweat marks, you can choose a cleaning method accordingly.

Hand Washing

Hand washing is a safe and effective method for cleaning most golf hats, especially those made of delicate materials or with intricate designs. Here’s a step-by-step guide on how to hand wash your hat:

  1. Gather the necessary supplies. You will need a bucket or sink, mild detergent, a soft brush or cloth, and lukewarm water.

  2. Pre-treat stains by applying a small amount of mild detergent directly to the stained areas. Gently rub the detergent into the stains using a soft brush or cloth.

  3. Fill the bucket or sink with lukewarm water and add a small amount of mild detergent. Swirl the water to create suds.

  4. Place your hat into the soapy water and gently agitate it to clean off dirt and grime. Avoid scrubbing too vigorously as it may damage the hat.

  5. Rinse the hat thoroughly with clean water to remove any soap residue. Ensure that all suds are completely washed away.

  6. Gently reshape the hat to its original form while it is still damp. Avoid wringing or twisting the hat as it can cause misshaping.

  7. Place the hat on a clean, dry towel and allow it to air dry naturally in a well-ventilated area, away from direct sunlight or heat sources. Ensure that the hat is placed on a towel or in a shape-preserving device to maintain its shape during the drying process.

Machine Washing

Machine washing can be a convenient option for cleaning golf hats made of more durable materials such as cotton or polyester. However, it’s important to take precautions to prevent any damage to your hat. Here’s a step-by-step guide on how to machine wash your golf hat safely:

  1. Prepare your hat by removing any detachable elements such as pins, badges, or decorations. These items can be hand washed separately.

  2. Select the right washing cycle on your washing machine. Choose a delicate or gentle cycle with cold water to minimize the risk of fabric damage.

  3. Use a gentle detergent suitable for the hat’s material. Avoid using harsh detergents or bleach that can fade or stain the hat.

  4. To protect the hat during the wash, place it inside a mesh laundry bag or pillowcase. This will prevent the hat from getting twisted or damaged by other clothes in the machine.

  5. Start the washing machine and allow it to complete the cycle.

  6. Once the wash cycle is finished, remove the hat from the laundry bag or pillowcase and inspect it for any remaining stains or dirt. If necessary, spot clean the hat using appropriate methods as discussed later in this article.

  7. To dry the hat properly, reshape it to its original form and place it on a clean, dry towel. Allow it to air dry naturally in a well-ventilated area, away from direct sunlight or heat sources. Ensure that the hat is supported and placed on a towel or in a shape-preserving device to maintain its shape during the drying process.

The Ultimate Guide on How to Clean Golf Hats

Spot Cleaning

Spot cleaning is a handy option for removing small stains or marks on your golf hats without having to clean the entire hat. Here’s how you can effectively spot clean your hat:

  1. Identify the stain on your hat. Different types of stains require different cleaning methods. For example, oil stains may require a degreaser, while sweat stains may need the use of a mild detergent.

  2. Choose a spot cleaning method suitable for the type of stain and hat material. For general stains, you can use a mild detergent mixed with water. Stubborn stains may require the use of specialized stain removers or techniques.

  3. Follow the instructions provided with the stain remover or mix a small amount of mild detergent with water. Create a soapy mixture and apply it directly to the stained area using a soft brush or cloth.

  4. Gently scrub the stained area in a circular motion, taking care not to damage the fabric or alter the shape of the hat.

  5. Rinse the area thoroughly with clean water to remove any soap residue.

  6. Pat the area dry with a clean towel or cloth. Check if the stain has been completely removed. If not, you may need to repeat the spot cleaning process or consider professional cleaning for stubborn stains.

Cleaning Sweatbands

Sweatbands in golf hats tend to absorb sweat, oils, and dirt over time, which can lead to unpleasant odors and stains. Cleaning the sweatbands regularly can help maintain the freshness and condition of your hat. Here’s how to clean the sweatbands in your golf hat:

  1. Remove the sweatbands from your hat. Most sweatbands can be easily detached from the hat for cleaning purposes. Check for any specific instructions provided by the manufacturer on how to remove the sweatband.

  2. Spray the sweatbands with a fabric stain remover. This will help to break down any oils or sweat stains present on the sweatband. Follow the instructions on the stain remover packaging for best results.

  3. Create a mild detergent solution by mixing a small amount of gentle detergent with water. Submerge the sweatbands in the solution and let them soak for a few minutes to loosen any remaining dirt or stains.

  4. Rinse the sweatbands thoroughly with clean water to remove any detergent residue.

  5. Gently squeeze out excess water from the sweatbands, ensuring not to wring or twist them as it may damage the fabric.

  6. Place the sweatbands on a clean, dry towel and allow them to air dry naturally. Avoid using direct heat or sunlight, as it can cause shrinkage or color fading.

By following these steps, you can effectively clean and maintain the sweatbands of your golf hats, ensuring maximum comfort and longevity.

Removing Odors

Over time, golf hats can develop unwanted odors due to sweat, dirt, or other external factors. However, there are several methods you can use to effectively eliminate these odors and restore freshness to your hat:

  1. Sunlight Odor Removal: Place your hat in direct sunlight for a few hours. Sunlight has natural deodorizing properties that can help eliminate odors. However, be cautious with hats made of delicate materials, as prolonged exposure to sunlight may cause fading or damage.

  2. Baking Soda Odor Absorption: Sprinkle a generous amount of baking soda inside your hat and leave it overnight. Baking soda has excellent odor-absorbing properties and can effectively neutralize unpleasant smells. In the morning, remove the baking soda by gently tapping and shaking the hat, followed by brushing off any residue.

  3. Freezing Odor Elimination: Place your hat in a sealed plastic bag and leave it in the freezer overnight. The extreme cold temperature can eliminate bacteria and odor-causing elements. After removing the hat from the freezer, allow it to come to room temperature before using or storing.

  4. Vinegar Deodorizing Method: Mix equal parts of white vinegar and water in a spray bottle. Lightly mist the interior of your hat with the vinegar solution. Vinegar helps neutralize odors by breaking down bacteria and odor-causing molecules. Allow the hat to air dry naturally before using or storing.

These odor-removal methods are safe to use on most golf hats but always test them on a small, inconspicuous area first to ensure they do not cause any damage or discoloration.

Cleaning Mesh Hats

Mesh hats are popular for their breathability and sporty look, but they can accumulate sweat stains and dirt over time. Here’s how to effectively clean your mesh hats:

  1. Removing Sweat Stains from Mesh: Mix a small amount of gentle detergent with water to create a soapy solution. Use a soft brush or cloth to scrub the sweat-stained areas gently. Rinse thoroughly with clean water to remove any soapy residue.

  2. Hand Washing Mesh Hats: Fill a sink or bucket with lukewarm water and add a small amount of gentle detergent. Submerge the mesh hat and gently agitate it to remove any dirt or stains. Rinse thoroughly with clean water and reshape the hat while it is damp. Allow it to air dry naturally in a well-ventilated area.

  3. Machine Washing Mesh Hats: Place the mesh hat inside a mesh laundry bag or pillowcase to protect it during the wash. Select a gentle or delicate cycle with cold water on your washing machine. Use a mild detergent suitable for the hat’s material. Once the wash cycle is completed, reshape the hat and allow it to air dry naturally.

Always follow the specific care instructions provided by the manufacturer for your mesh hat, as some hats may have specific cleaning requirements or may not be suitable for machine washing.

Cleaning Leather Hats

Leather hats require special care to maintain their appearance and durability. Here’s how to effectively clean and care for your leather golf hats:

  1. Spot Cleaning Leather: To remove minor stains or marks, use a damp cloth or sponge and gently clean the affected area. Avoid using excessive water or soaking the hat, as it can damage the leather. For stubborn stains, consult a professional leather cleaner.

  2. Hand Washing Leather: If your leather hat is heavily soiled and requires a thorough cleaning, it’s best to seek professional cleaning services. Leather hats are not typically recommended for hand washing, as excessive water can cause the leather to shrink or lose its shape.

  3. Conditioning Leather Hats: Regularly conditioning your leather hat is essential to maintain its suppleness and prevent cracking or drying. Use a specialized leather conditioner or cream and apply it evenly across the surface of the hat. Follow the instructions provided with the conditioner and allow it to dry completely before using or storing the hat.

It’s important to note that the specific cleaning and care requirements may vary depending on the type of leather used in your hat. Always check the manufacturer’s instructions or consult a professional leather cleaner for best results.

Cleaning Straw Hats

Straw hats are lightweight and perfect for sunny days on the golf course. However, they require gentle care and cleaning to preserve their shape and natural fibers. Here’s how to effectively clean your straw hats:

  1. Removing Dust and Debris: Gently brush your straw hat using a soft-bristled brush or a clean, dry cloth to remove any loose dust or debris. Start from the crown and work your way outward. Avoid using excessive force to prevent damaging the straw.

  2. Spot Cleaning Straw Hats: Mix a small amount of mild detergent with water to create a soapy solution. Dampen a soft cloth or sponge with the solution and gently blot the stained areas on the straw hat. Avoid rubbing or scrubbing, as it may cause the straw to unravel or deform.

  3. Deep Cleaning Straw Hats: If your straw hat requires a thorough cleaning, you can immerse it in lukewarm water with a small amount of mild detergent. Gently agitate the hat to remove dirt or stains. Rinse the hat thoroughly with clean water and reshape it while it is still damp. Allow it to air dry naturally in a well-ventilated area, away from direct sunlight or heat sources.

It’s important to remember that straw hats are delicate and require careful handling. Avoid excessive moisture, heat, or pressure that can damage the straw fibers or alter the hat’s shape.

Tips for Hat Care

To ensure the longevity and optimal condition of your golf hats, here are some essential tips for proper hat care:

  1. Avoid Heat and Direct Sunlight: Excessive heat and prolonged exposure to direct sunlight can cause fading, shrinkage, or deformation of your hat. It’s best to store your hats in a cool, dry place away from heat sources and protect them from sunlight when not in use.

  2. Avoid Harsh Chemicals: Harsh chemicals such as bleach or strong detergents should never be used on your golf hats, as they can damage the fabric, alter colors, or weaken the hat’s structure. Stick to mild detergents and spot cleaning methods recommended for your hat’s material.

  3. Storing Hats Properly: When storing your hats, it’s important to protect their shape. Use a hat rack, hat box, or specialty hat form to prevent them from getting crushed or losing their form. Avoid stacking heavy objects on top of your hats, as it can cause misshaping.

By following these tips and the recommended cleaning methods discussed above, you can keep your golf hats clean, fresh, and in great condition for many rounds of golf to come. Remember to always refer to the specific care instructions provided by the manufacturer for your hats to ensure the best results and longevity. Happy hat cleaning!

5 Methods to Start a Golf Cart Without a Key

Learn five clever methods for starting a golf cart without a key! From hot wiring to using a screwdriver, find out how to get back on the course in no time.

So you’ve found yourself with a golf cart and no key in sight? Don’t worry, we’ve got you covered! In this article, we’ll explore five clever methods for starting a golf cart without a key. Whether you’ve lost your key or simply want to know the tricks of the trade, these methods are sure to come in handy. From hot wiring to using a screwdriver, these creative solutions will have you back on the golf course in no time. So, let’s put on our thinking caps and discover how to start a golf cart without a key!

5 Methods to Start a Golf Cart Without a Key

Method 1: Hot Wiring the Golf Cart

What is hot wiring?

Hot wiring a golf cart refers to bypassing the ignition system to start the vehicle without a key. It involves manipulating the electrical connections to initiate the cart’s engine. This method is commonly used in emergency situations when a key is lost or inaccessible.

Tools needed

To hot wire a golf cart, you will need a few basic tools. These include:

  1. Wire cutters
  2. Wire strippers
  3. Insulated electrical tape
  4. A flathead screwdriver or a pair of pliers

Steps to hot wire a golf cart

  1. Locate the golf cart’s ignition switch, usually found on the steering column. Use your wire cutters to expose the wires connected to the ignition switch.

  2. Use the wire strippers to remove a small portion of the protective insulation from the wires.

  3. Identify the two wires responsible for the powering of the cart’s engine. These wires can be identified by their color or by referring to the golf cart’s wiring diagram. Once identified, twist them together securely.

  4. Cover the exposed wires with insulated electrical tape to prevent any short circuits or accidents.

  5. Use a flathead screwdriver or a pair of pliers to turn the cart’s engine on by manually engaging the starter solenoid or the starter motor. This will initiate the ignition process and start the golf cart.

Precautions to consider

While hot wiring can be a temporary solution, it is important to remember that tampering with a golf cart’s ignition system can result in damage to the cart or pose safety risks. It is advisable to seek professional assistance if you are not familiar with the inner workings of the vehicle.

Method 2: Using a Screwdriver

Using a screwdriver to start a golf cart

Another method to start a golf cart without a key is by using a screwdriver. This method involves bypassing the ignition switch using the screwdriver as a substitute for the key.

Step-by-step guide

  1. Locate the ignition switch on the golf cart’s steering column.

  2. Insert the screwdriver into the keyhole, making sure it fits securely.

  3. Turn the screwdriver as you would with a key in the ignition switch. Apply slight pressure and turn the screwdriver in a clockwise direction.

  4. The action of turning the screwdriver will engage the ignition switch, initiating the cart’s engine and starting the golf cart.

Safety measures

When using a screwdriver to start a golf cart, it is important to exercise caution and prioritize safety. Handle the screwdriver with care to avoid any injuries or damage to the ignition switch. Remember that this method should only be used as a temporary solution until a proper key or alternative ignition mechanism can be obtained.

Method 3: Bypassing the Ignition Switch

Understanding the ignition switch

The ignition switch is a crucial component in starting a golf cart. It is responsible for controlling the flow of electrical power to the engine and other essential systems. Bypassing the ignition switch allows for starting the golf cart without a key by directly providing power to the necessary components.

Tools required for bypassing

To successfully bypass the ignition switch, you will need the following tools:

  1. Wire cutters
  2. Wire strippers
  3. Insulated electrical tape
  4. Multimeter (optional, for testing purposes)

Steps to bypass the ignition switch

  1. Disconnect the golf cart’s battery to ensure safety during the bypassing process.

  2. Locate the ignition switch wires connected to the golf cart’s electrical system. These wires are usually found near the ignition switch or in the wiring harness.

  3. Cut the wires leading to the ignition switch, ensuring enough length is left for further manipulation.

  4. Use the wire strippers to remove a small portion of the protective insulation from the cut ends of the wires.

  5. Connect the freshly stripped ends of the wires, ensuring a secure and reliable connection.

  6. Insulate the connected wires with the use of electrical tape, providing protection against short circuits or accidental disconnections.

  7. Reconnect the golf cart’s battery to restore power.

  8. Test the ignition bypass by turning the key switch on. If the engine starts properly, the bypass was successful.

Important notes

It is crucial to exercise caution while bypassing the ignition switch, as any incorrect wiring connections can potentially damage the golf cart’s electrical system or cause safety hazards. If you are unsure about the process or lack the necessary skills, it is recommended to consult a professional golf cart mechanic for assistance.

5 Methods to Start a Golf Cart Without a Key

Method 4: Jumpstarting the Cart

How to jumpstart a golf cart

Jumpstarting a golf cart is a method commonly used when the battery is dead or incapable of starting the vehicle. This method requires the use of an external power source, such as another running golf cart or a portable jump starter.

Materials needed

To jumpstart a golf cart, you will need the following materials:

  1. Jumper cables
  2. Another golf cart with a charged battery or a portable jump starter

Step-by-step process

  1. Position the functioning golf cart or the portable jump starter near the one that needs jumpstarting. Make sure both carts are in neutral and the parking brake is engaged.

  2. Connect one end of the red jumper cable to the positive terminal of the dead cart’s battery.

  3. Connect the other end of the red jumper cable to the positive terminal of the charged battery or the positive terminal of the portable jump starter.

  4. Connect one end of the black jumper cable to the negative terminal of the charged battery or the negative terminal of the portable jump starter.

  5. Connect the other end of the black jumper cable to a metal part, such as a bolt or bracket, on the engine block of the dead cart. Be cautious to avoid any moving parts.

  6. Ensure all connections are secure and that the jumper cables are clear of any moving parts.

  7. Start the functioning golf cart or activate the portable jump starter, allowing it to supply power to the dead cart’s battery.

  8. Attempt to start the dead cart. If successful, allow it to run for a few minutes to recharge the battery.

Precautions for jumpstarting

Jumpstarting a golf cart requires proper precautions to ensure safety and prevent damage to the electrical system. Be cautious of the electrical connections and avoid touching any exposed metal parts. Additionally, carefully follow the instructions provided by the manufacturer of the portable jump starter, if using one.

Method 5: Seeking Professional Assistance

When to consider professional help

If you are not comfortable or experienced in handling the electrical components of a golf cart, it is advisable to seek professional assistance. Professional golf cart mechanics have the knowledge and expertise to diagnose and resolve key-related issues safely and effectively.

Choosing a reputable golf cart mechanic

When choosing a mechanic for your golf cart, consider the following factors:

  1. Experience: Look for mechanics who specialize in golf carts and have extensive experience in the field.

  2. Reputation: Read reviews or ask for recommendations to ensure the mechanic has a good reputation for quality work and customer satisfaction.

  3. Certifications: Opt for mechanics who hold industry-specific certifications, as these demonstrate their level of expertise and commitment to their craft.

  4. Price: Compare prices from different mechanics to ensure you are getting a fair and reasonable quote for the required services.

Costs and benefits of professional assistance

The costs of seeking professional assistance for starting a golf cart without a key can vary depending on the specific issue and the mechanic’s rates. However, the benefits of professional help include:

  1. Expertise: Professional mechanics possess the required knowledge and skills to resolve key-related issues effectively.

  2. Safety: Professionals are equipped with the necessary tools and follow safety protocols to avoid any damage to the golf cart or personal injury.

  3. Efficiency: Professional assistance saves time and eliminates the risk of incorrect troubleshooting methods that could exacerbate the problem.

Common Troubleshooting Tips

Check for loose connections

If your golf cart is experiencing starting issues, it is essential to check for loose connections. Ensure that all wires, terminals, and cables are securely connected to the battery and ignition system. Tighten any loose connections to restore the proper flow of electricity.

Inspect the battery

A dead or faulty battery can often be the cause of starting issues. Check the battery’s charge level using a multimeter or by using a battery load tester. If the battery is below the recommended level, consider recharging or replacing it.

Examine the key switch

Inspect the key switch for any signs of damage, corrosion, or wear. Clean the switch with electrical cleaner and a small brush to remove any dirt or debris that may be affecting its functionality. If the key switch is severely damaged, it may need to be replaced.

Verify the solenoid’s functionality

The solenoid plays a crucial role in the starting process of a golf cart. Ensure that the solenoid is receiving power by checking the connections and using a multimeter to test for voltage. If necessary, replace the solenoid to resolve starting issues.

Preventive Measures to Avoid Key-Related Issues

Always have a spare key

To prevent the hassle of starting a golf cart without a key, it is wise to have a spare key readily available. Keep a spare key in a secure and easily accessible location to avoid any inconvenience or delays.

Store keys in secure locations

When not in use, store your golf cart keys in a secure location to prevent theft or misplacement. Consider investing in a lockable key box or keeping the keys in your possession to minimize the risk of key-related issues.

Regularly maintain the ignition system

Frequently inspect and maintain your golf cart’s ignition system to ensure its proper functioning. Regularly clean and lubricate the key switch and other components to prevent dirt, dust, or moisture from interfering with the system’s operation.

Understanding the Risks Involved

Legal implications

Tampering with a golf cart’s ignition system or using methods to start the cart without a key may have legal implications. It is essential to comply with local laws and regulations to avoid any potential penalties or consequences.

Potential damage to the golf cart

Improperly starting a golf cart without a key or using temporary methods can cause damage to the electrical system, ignition switch, or other components. It is crucial to prioritize safety and consider seeking professional assistance when unsure or inexperienced.

Safety hazards to consider

Starting a golf cart without a key involves manipulating electrical connections and bypassing safety features. This can pose safety hazards, such as electrical shocks, short circuits, or fires. Exercise caution and consider professional help to mitigate these risks.

Importance of Properly Starting a Golf Cart

Safety of passengers and surroundings

Properly starting a golf cart ensures the safety of passengers and the surrounding environment. Reliable ignition systems help prevent unexpected stalling or malfunctions while driving, reducing the risk of accidents or injuries.

Ensuring the reliability of the vehicle

A golf cart with a properly functioning ignition system guarantees its reliability and performance. By regularly maintaining and starting the cart correctly, you can avoid breakdowns or starting issues, promoting a seamless golf cart experience.

Avoiding unnecessary expenses

By properly starting a golf cart, you can prevent damage to the vehicle’s electrical system, ignition switch, or other components. Avoiding costly repairs or replacements by following proper starting procedures can save you from unnecessary expenses in the long run.

Conclusion

Starting a golf cart without a key is possible through various methods, including hot wiring, using a screwdriver, bypassing the ignition switch, jumpstarting, or seeking professional assistance. Each method has its own set of advantages, disadvantages, and safety considerations. It is vital to prioritize safety, follow proper procedures, and consider professional help when necessary. By understanding the risks involved, regularly maintaining the ignition system, and practicing preventive measures, you can ensure the reliable and safe operation of your golf cart.

Avoiding Topping the Golf Ball

Avoid topping the golf ball with these practical tips! Improve your game and swing consistency with simple steps for beginners and experienced golfers.

Are you tired of consistently topping the golf ball and watching it roll embarrassingly short? Look no further! In this article, we will share some practical tips and techniques to help you avoid topping the golf ball and improve your game. Whether you are a beginner or an experienced golfer, these simple steps will guide you towards a more consistent and accurate swing. Say goodbye to frustration and hello to a more enjoyable golfing experience. Let’s get started!

Understanding the Basics of Topping the Golf Ball

Avoiding Topping the Golf Ball

Causes of Topping the Golf Ball

Topping the golf ball occurs when the club strikes the top portion of the ball instead of hitting it clean and solidly. This can be caused by a few different factors. One common cause is lifting the head too early during the swing, which leads to an upward strike. Another cause can be improper alignment and setup, which affects the angle of attack and contact with the ball. Lastly, a faulty swing technique, such as an incorrect wrist position or inconsistent tempo, can also contribute to topping the ball.

Consequences of Topping the Golf Ball

Topping the golf ball can have several negative consequences for your game. Firstly, the ball loses its intended trajectory and can travel significantly shorter distances, resulting in a loss of yardage. Secondly, the ball may roll along the ground rather than getting the desired flight, making it challenging to clear hazards or reach the greens. Additionally, topping the ball can negatively impact your confidence and overall enjoyment of the game. It is crucial to address and resolve this issue to improve your golfing experience.

Importance of Avoiding Topping the Golf Ball

Avoiding topping the golf ball is essential for achieving consistent and effective shots. When you make solid contact with the ball, your shots will have better distance, accuracy, and trajectory. By avoiding topping the ball, you increase the chances of hitting the ball cleanly and maximizing its potential. This can lead to improved scores, increased confidence in your game, and an overall more enjoyable experience on the golf course.

Developing Proper Alignment and Setup

Choosing the Right Golf Club

Choosing the right golf club is crucial to set yourself up for success and avoid topping the ball. Each club has a specific purpose and distance capability, and using the wrong club can introduce unnecessary difficulties. Consider factors such as distance to target, wind conditions, and personal skill level when selecting a club. By using the appropriate club, you can ensure that the ball is more likely to be struck correctly, minimizing the chance of topping it.

Positioning the Ball Correctly

Positioning the ball correctly in your stance is vital to avoid topping the golf ball. For longer shots, the ball should be positioned more towards the front foot, while for shorter shots, it should be slightly further back. Finding the right ball position allows the clubhead to make solid contact with the ball at the bottom of the swing arc, ensuring a clean strike and avoiding topping the ball.

Aligning Your Body with the Target

Proper alignment plays a significant role in avoiding topping the golf ball. When addressing the ball, ensure that your body is aligned parallel to the target line. This includes your feet, hips, and shoulders. Misalignment can lead to swing errors, such as swinging across the ball instead of through it, resulting in topped shots. By aligning your body correctly, you create a better path for the club to strike the ball squarely and reduce the chances of topping it.

Maintaining Proper Posture

Maintaining a proper posture throughout the swing is crucial for avoiding topping the golf ball. Begin with a slight knee flex and bend forward from the hips while keeping your back straight. This position helps maintain the club’s desired swing plane and promotes consistent contact with the ball. Avoid slouching or standing too upright, as it can disrupt your swing mechanics and lead to topping the ball.

Improving Your Swing Technique

Maintaining a Smooth Tempo

Maintaining a smooth tempo is key to avoiding topping the golf ball. Rushing or jerky movements during the swing can result in poor contact and topping the ball. Focus on maintaining a consistent and fluid motion from start to finish. Practice with a metronome or tempo trainer to develop a natural rhythm and tempo that allows for proper club-to-ball contact, minimizing the chances of topping the ball.

Keeping Your Head Down

Keeping your head down throughout the swing is vital for avoiding topping the golf ball. Lifting your head prematurely can cause an upward strike, resulting in a topped shot. Focus on keeping your eye on the ball until well after impact, allowing the club to make solid contact and minimizing the risk of topping the ball. Practicing with a mirror or with a partner can help reinforce the habit of keeping your head down during your swing.

Rotating the Hips and Shoulders

Proper hip and shoulder rotation is crucial for avoiding topping the golf ball. A lack of rotation can cause an uneven swing path and lead to topping the ball. Ensure that your hips and shoulders rotate smoothly throughout the swing, allowing the club to follow a proper plane and strike the ball correctly. Practice drills and exercises that promote proper rotation to improve your swing technique and avoid topping the ball.

Swinging with a Flat Left Wrist

Maintaining a flat left wrist (for right-handed golfers) throughout the swing is essential for avoiding topping the golf ball. A cupped wrist can lead to an upward strike, resulting in topped shots. Focus on keeping your lead wrist flat and firm throughout the swing, especially at impact. This promotes a more solid contact with the ball and reduces the chances of topping it.

Developing a Consistent Golf Swing

Practicing with a Swing Plane Stick

Practicing with a swing plane stick is an effective way to develop a consistent golf swing and avoid topping the ball. The swing plane stick provides a visual guide for a correct swing path, helping you maintain a proper angle of attack and square clubface at impact. Incorporate swing plane stick drills into your practice sessions to improve your swing mechanics and prevent topping the ball.

Working on Your Release Point

Working on your release point is crucial for developing a consistent golf swing. The release point refers to the moment when the clubhead squares up with the ball. If the release is early or late, it can result in poor contact and topping the ball. Focus on achieving a proper release point through practice and proper sequencing of the swing. This will help you make solid contact with the ball and avoid topping it.

Improving Balance and Weight Transfer

Improving your balance and weight transfer is essential for a consistent golf swing. Proper weight transfer allows for a more efficient strike, reducing the chances of topping the ball. Practice drills that focus on weight shift and maintaining balance throughout the swing. By improving your balance and weight transfer, you’ll develop a more consistent swing and minimize the risk of topping the ball.

Executing Proper Follow-through

Executing a proper follow-through is crucial for a consistent golf swing and avoiding topping the ball. The follow-through should be balanced and smooth, with the club finishing high and over the shoulder. A rushed or abbreviated follow-through can disrupt the swing’s rhythm and lead to topping the ball. Focus on maintaining a complete and balanced follow-through to ensure solid contact and minimize topping the ball.

Enhancing Your Timing and Rhythm

Avoiding Topping the Golf Ball

Finding the Right Timing

Finding the right timing is crucial for enhancing your golf swing and avoiding topping the ball. Timing refers to the sequence and synchronization of your swing components, including your body rotation and club movement. Practice your swing with a deliberate focus on timing, ensuring that each component works harmoniously together. By finding the right timing, you’ll improve your swing mechanics and reduce the chances of topping the ball.

Using a Metronome or Tempo Trainer

Using a metronome or tempo trainer can greatly enhance your timing and rhythm in golf. These tools provide audible cues that help you establish a consistent tempo and rhythm throughout your swing. Set the metronome or tempo trainer to a comfortable pace and use it during practice sessions to develop a natural and consistent swing. By incorporating these tools into your training, you’ll improve your timing and rhythm, leading to more solid contact with the ball and avoiding topping it.

Creating a Natural Rhythm

Creating a natural rhythm is essential for avoiding topping the golf ball. Each golfer has a unique rhythm that suits their swing and style of play. Practice and experimentation can help you discover your natural rhythm. Focus on maintaining a relaxed and fluid motion throughout your swing, allowing the club to move freely and strike the ball cleanly. By developing a natural rhythm, you’ll improve your swing consistency and reduce the likelihood of topping the ball.

Creating Better Contact with the Ball

Focusing on the Bottom of the Ball

Focusing on the bottom of the ball is crucial for creating better contact and avoiding topping it. Visualize the clubhead striking the bottom half of the ball during your swing. By focusing on this point of contact, you’ll promote a downward strike, resulting in a solid hit and preventing topping the ball. Practice with this visualization technique to improve your contact with the ball and minimize the chances of topping it.

Using the Correct Angle of Attack

Using the correct angle of attack is vital for creating better contact with the ball. The angle of attack refers to the club’s approach to the ball during impact. Aim to strike the ball with a slightly descending blow, allowing the club to make contact just before reaching the lowest point of the swing arc. This helps ensure solid contact and prevents topping the ball. Experiment with your swing to find the correct angle of attack that works best for you.

Avoiding Excessive Body Movement

Avoiding excessive body movement is essential for creating better contact with the ball. Overactive body movement can disrupt the club’s path and lead to topping the ball. Focus on maintaining a stable lower body and limited sway during your swing. This allows for a more consistent swing path and solid contact with the ball. By minimizing excessive body movement, you’ll improve your ball-striking ability and avoid topping it.

Developing Proper Grip and Hand Position

Understanding the Ideal Grip

Understanding the ideal grip is crucial for developing a proper golf swing and avoiding topping the ball. The grip is the connection between your hands and the club, and it greatly influences your swing mechanics. Achieve a neutral grip by placing the club in the fingers of your lead hand, with the V formed between your thumb and index finger pointing towards your rear shoulder. The trail hand should also be placed in the fingers, with the V pointing towards the center of your body. A proper grip promotes a square clubface at impact, resulting in better contact and preventing topping the ball.

Positioning Your Hands Correctly

Positioning your hands correctly on the club is essential for avoiding topping the golf ball. Ensure that your lead hand is placed on top of the club’s grip, with the back of your hand facing the target. The trail hand should be positioned underneath the lead hand, with the palm facing towards the target. This grip allows for proper wrist hinge and control throughout the swing, reducing the chances of topping the ball. Practice gripping the club correctly to improve your swing mechanics and ball contact.

Avoiding Gripping Too Tightly

Avoiding gripping the club too tightly is crucial for developing a proper golf swing and preventing topping the ball. A tight grip restricts movement and can lead to tension throughout your swing. Instead, aim for a relaxed and comfortable grip pressure that allows for a fluid swing. By avoiding gripping too tightly, you’ll maintain proper wrist hinge, reduce tension, and improve your overall ball-striking ability, minimizing the risk of topping the ball.

Utilizing Proper Weight Distribution

Understanding Weight Distribution in the Swing

Understanding weight distribution in the swing is essential for developing a consistent and powerful golf swing. During the setup, your weight should be evenly distributed between both feet. As you initiate the backswing, your weight should shift slightly towards the trail foot, then transition towards the lead foot during the downswing and impact. Proper weight distribution allows for a more efficient transfer of energy and better contact with the ball, minimizing the risk of topping it.

Keeping Weight Centered at Address

Keeping your weight centered at address is vital for maintaining proper balance and avoiding topping the golf ball. Position your body with an equal distribution of weight between both feet. This ensures stability and promotes a consistent swing plane. Avoid leaning too much towards your toes or heels, as it can disrupt your balance and lead to topping the ball. By maintaining centered weight at address, you’ll improve your overall swing mechanics and contact with the ball.

Shifting Weight during the Downswing

Shifting your weight properly during the downswing is crucial for avoiding topping the golf ball. As you transition from the backswing to the downswing, shift your weight from the trail foot to the lead foot in a smooth and controlled manner. This transfer of weight helps maintain the proper swing path and angle of attack, ensuring solid contact with the ball. Practice drills and exercises that promote proper weight transfer to develop a consistent swing and minimize the chances of topping the ball.

Mastering the Mental Game

Visualizing a Solid Shot

Visualizing a solid shot is a powerful technique to improve your golf game and avoid topping the ball. Before each swing, take a moment to visualize a successful shot, imagining the ball taking off with a perfect trajectory. This mental imagery helps program your mind and body for a successful swing, reducing the likelihood of topping the ball. By mastering the mental game and incorporating visualization techniques, you’ll develop a more consistent and confident golf swing.

Maintaining Confidence and Focus

Maintaining confidence and focus is crucial for avoiding topping the golf ball. A lack of confidence or focus can create doubt and tension during your swing, leading to poor contact and topping the ball. Develop a pre-shot routine that includes positive self-talk, deep breaths, and visualization to help maintain confidence and focus. By staying mentally present and confident, you’ll improve your chances of making solid contact with the ball and avoid topping it.

Overcoming Fear of Topping the Ball

Overcoming the fear of topping the ball is essential for improving your golf game. Fear can lead to physical and mental tension, disrupting your swing mechanics and negatively impacting your performance. Recognize that topping the ball is a common challenge that golfers face and that mistakes are a part of the learning process. Practice and repetition will help build confidence and overcome the fear of topping the ball. Embrace the opportunity to learn and grow from your mistakes, and with time, you’ll develop a consistent and confident golf swing.

Seeking Professional Instruction and Feedback

Working with a Golf Instructor

Working with a golf instructor can greatly benefit your game and help you avoid topping the ball. A qualified instructor can analyze your swing mechanics, provide personalized feedback, and offer drills and exercises to address any issues. They can also help you develop proper alignment, setup, and swing techniques that reduce the chance of topping the ball. Consider investing in professional instruction to improve your golf skills and prevent topping the ball.

Analyzing Your Swing with Video Feedback

Analyzing your swing with video feedback is a valuable tool for identifying swing flaws and avoiding topping the golf ball. Use a smartphone or camera to record your swing from different angles. Review the footage with a critical eye or seek professional feedback to spot any inconsistencies or areas for improvement. By analyzing your swing with video feedback, you’ll gain a better understanding of your swing mechanics and be able to make necessary adjustments to prevent topping the ball.

Receiving Individualized Tips and Drills

Receiving individualized tips and drills is essential for improving your golf swing and avoiding topping the ball. A golf professional can provide specific recommendations based on your swing characteristics and goals. They can offer customized drills and exercises that target your specific areas of improvement, allowing you to address swing flaws and prevent topping the ball effectively. Utilize the expertise of a golf professional to receive personalized instruction and develop a consistent and reliable golf swing.

In conclusion, avoiding topping the golf ball is crucial for improving your game and enjoying a more consistent and successful golf experience. By understanding the causes and consequences of topping the ball, developing proper alignment and setup, improving your swing technique, enhancing your timing and rhythm, creating better contact with the ball, developing proper grip and hand position, utilizing proper weight distribution, mastering the mental game, and seeking professional instruction and feedback, you can greatly reduce the chances of topping the ball. Practice these techniques and guidance to develop a consistent and effective golf swing that leads to better ball-striking and a more enjoyable game.

Understanding the Wiring of Golf Cart Batteries

Gain valuable insights into the wiring of golf cart batteries. Learn the basics, components, and troubleshooting techniques to optimize their performance and lifespan.

In this article, you will gain a clear understanding of how golf cart batteries are wired. Whether you are a golf enthusiast or just curious about the inner workings of these vehicles, this information will provide you with valuable insights. We will break down the wiring process, explaining the connections and components involved, so that you can confidently navigate the world of golf cart batteries. Whether you are a beginner or an experienced golfer, this knowledge will help you maintain and optimize your golf cart’s battery life. So, let’s get started and unlock the mystery behind the wiring of golf cart batteries!

Understanding the Wiring of Golf Cart Batteries

Understanding the Wiring of Golf Cart Batteries

Overview of Golf Cart Batteries

Golf cart batteries are essential components of electric golf carts, providing the power necessary to operate the vehicle. These batteries are typically deep-cycle batteries, designed to provide a steady amount of power over an extended period of time. Understanding how golf cart batteries are wired is crucial for maintaining their optimal performance and ensuring a longer lifespan for the batteries.

The Basics of Golf Cart Battery Wiring

Golf cart battery wiring refers to the configuration and connections of the batteries in the cart. It determines how the batteries are connected to one another and to other components, such as the motor and the charger. There are mainly two types of wiring configurations used in golf carts: parallel wiring and series wiring.

Parallel vs. Series Wiring for Golf Cart Batteries

In parallel wiring, the positive terminals of all the batteries are connected together, and the same goes for the negative terminals. This configuration increases the overall capacity of the battery pack, as the voltage remains the same but the total ampere-hour (Ah) capacity is doubled. Parallel wiring is advantageous when you want longer runtimes for your golf cart.

On the other hand, series wiring involves connecting the positive terminal of one battery to the negative terminal of the next battery in the pack. This configuration increases the overall voltage of the battery pack while keeping the capacity constant. Series wiring is beneficial when you need more power and torque for your golf cart.

Understanding the Wiring of Golf Cart Batteries

Components of Golf Cart Battery Wiring

To understand the wiring of golf cart batteries, it is important to familiarize yourself with the key components involved. These components include battery cables, connectors, pack configuration, and the battery charger and charging system.

Battery Cables and Connectors

Battery cables are responsible for carrying the electrical current between the batteries and the various components of the golf cart. They are typically made of high-quality copper or tinned copper to ensure efficient transmission of power. The cables should be properly sized to handle the current demands of the golf cart, and they must be securely connected to the battery terminals using reliable connectors.

Battery Pack Configuration

The battery pack configuration refers to how the batteries are physically positioned and wired together in the golf cart. It determines the overall voltage and capacity of the battery pack. The most common battery pack configurations include 36V, 48V, and 72V systems, which consist of either 6, 8, or 12 batteries respectively, depending on the desired voltage. It is important to consult the manufacturer’s guidelines or seek professional assistance to ensure the correct pack configuration for your golf cart.

Battery Charger and Charging System

Proper charging of the golf cart batteries is crucial for their longevity and performance. The battery charger and charging system play a significant role in this process. Golf cart battery chargers are designed to deliver the correct voltage and current required for charging the batteries effectively. It is important to use a charger specifically designed for golf cart batteries, as using an incompatible charger can result in damage to the batteries or even pose safety risks.

Troubleshooting Common Wiring Issues

Occasionally, golf cart owners may face wiring issues that can affect the performance of their batteries. Some common wiring issues include loose or corroded connectors, damaged cables, or improperly connected batteries. In such cases, it is important to troubleshoot and rectify the issues promptly. This may involve checking the connections, cleaning or replacing connectors, or seeking professional assistance if needed.

Maintenance and Safety Tips

To ensure the longevity and optimal performance of your golf cart batteries, regular maintenance is crucial. Here are some maintenance tips to keep in mind:

  • Keep the batteries clean and free of dirt, debris, and corrosion. Regularly inspect the battery terminals and clean them if necessary.
  • Check the water levels in the batteries regularly and add distilled water if needed. Proper water levels ensure effective battery performance.
  • Follow the manufacturer’s guidelines for charging and maintenance schedules.
  • Store the golf cart batteries in a cool and dry place to prevent extreme temperatures and moisture damage.
  • Always prioritize safety when working with golf cart batteries. Wear appropriate protective gear, such as gloves and goggles, when handling batteries or working on the wiring.

Upgrading and Modifying Golf Cart Battery Wiring

For golf cart enthusiasts who want to enhance the performance of their vehicles, upgrading and modifying the battery wiring can be an exciting option. This may involve changing the wiring configuration, upgrading to higher-capacity batteries, or installing additional accessories. However, it is important to thoroughly research and consult professionals before making any modifications to ensure compatibility, safety, and adherence to relevant regulations or guidelines.

In conclusion, understanding the wiring of golf cart batteries is essential for every golf cart owner. Whether you are maintaining the existing wiring or exploring upgrades, having a good grasp of the basics, components, and troubleshooting techniques can help ensure the optimal performance and longevity of your golf cart batteries. Remember to prioritize safety, follow maintenance guidelines, and seek professional assistance when needed. With proper care and attention, your golf cart batteries will continue to provide reliable power for many rounds on the green.

Master the Technique of Removing a Golf Grip

Learn how to remove a golf grip like a pro. Follow our step-by-step guide for effortless removal and replacement. Master the technique now!

Are you tired of the worn-out grip on your golf club? Fear not, because in this article, you will learn the essential technique of removing a golf grip like a pro. Whether you’re a seasoned golfer or just starting out, being able to remove and replace your golf grip is a skill that every player should have in their arsenal. With our step-by-step guide, you’ll be able to effortlessly remove your old golf grip and replace it with a fresh one, ensuring a comfortable and secure hold on your club. So, grab your golf club and let’s get started on mastering the technique of removing a golf grip!

Preparation

Before you can successfully remove a golf grip, you’ll need to gather the necessary tools. You’ll want to have a utility knife or grip knife, grip solvent, grip tape, adhesive, a clean cloth, and a vise or clamp. These tools will facilitate the grip removal process and ensure that you can complete the task effectively.

Once you have your tools ready, it’s essential to choose a suitable work area. Find a spacious and well-lit area where you can comfortably work on removing the grip. A flat surface, such as a workbench or table, is ideal. Having ample room to maneuver and lay out your tools will make the process much smoother and more enjoyable.

Master the Technique of Removing a Golf Grip

Step 1: Assess the Grip

To start the grip removal process, take a moment to inspect the current grip on your club. Look for any signs of wear and tear, such as cracks, tears, or peeling. If the grip is in poor condition or no longer provides the necessary grip and feel, it may be time to replace it. However, if the grip is still in good shape, you may be able to reuse it, especially if you want to experiment with different grips in the future.

When considering whether to replace a grip, it’s also crucial to think about the type of grip adhesive used. Some grips are installed using double-sided grip tape, while others may have a specific type of adhesive. If your current grip uses adhesive, removing it entirely without damaging the shaft can be more challenging. Keep this in mind as you move forward with the grip removal process.

Step 2: Remove the Old Grip

Now that you’ve assessed the grip and decided to remove it, it’s time to get the grip off your golf club. Start by positioning the club with the grip facing upright. Beginning from the top of the grip, use a utility knife or grip knife to cut the grip lengthwise. This action will allow you to peel off the grip more easily.

Peel off the grip slowly, exerting gentle pressure as you move downward. Be careful not to damage the club’s shaft during this process. If you encounter any tape or adhesive residue, take the time to remove it completely. Use a clean cloth and grip solvent to wipe away any sticky residues. The goal here is to have a clean and residue-free shaft for the new grip installation.

Step 3: Clean the Shaft

After removing the old grip, it’s essential to prepare the shaft for the new grip. This step involves cleaning the shaft thoroughly to ensure maximum adhesion of the new grip. Using grip solvent, apply a generous amount to a clean cloth. Wipe the solvent along the entire length of the shaft, removing any dirt, grease, or residue that might hinder the grip’s installation.

Stubborn adhesive or tape residue may require more intensive cleaning. In this case, apply grip solvent directly to the residue and let it sit for a few minutes. Then use the cloth to scrape away the residue gently. Be patient and persistent, but avoid using excessive force that could damage the shaft’s finish.

Master the Technique of Removing a Golf Grip

Step 4: Let the Shaft Dry

Once you’ve cleaned the shaft, it’s crucial to allow sufficient time for it to dry completely. The grip solvent needs time to evaporate fully before the new grip can be installed. This waiting period will ensure a secure and firm bond between the shaft and the grip adhesive. Depending on the solvent used and environmental conditions, it can take anywhere from 15 minutes to an hour for the shaft to dry thoroughly. Be patient during this step to avoid any complications down the line.

Step 5: Prepare the New Grip

Now that the shaft is clean and dry, it’s time to prepare the new grip. Start by choosing the desired grip for your club. Consider factors such as material, texture, and size to find a grip that suits your playing style and preferences. Take the opportunity to experiment with different grips and see which one provides the best feel and performance for your swing.

Once you’ve selected a grip, inspect it for any defects or imperfections. Look for any signs of damage, such as cuts, tears, or uneven surfaces. If you notice any issues, it’s best to replace the grip to ensure optimal performance. Additionally, give the grip a thorough wipe down with a clean cloth to remove any dust or debris that may have accumulated during storage.

Step 6: Apply Grip Tape

Grip tape is an essential component of installing a new grip. It helps provide a secure and stable connection between the grip and the shaft. To apply grip tape, start by wrapping it around the shaft in a spiral motion. Ensure that the tape is evenly distributed and covers the entire length of the region where the grip will be placed.

While applying the grip tape, be mindful of overlapping or leaving gaps. Overlapping can result in an uneven grip, while gaps can lead to an unstable connection. Take your time when applying the tape, making sure that it adheres securely to the shaft. This step sets the foundation for a successful grip installation.

Step 7: Apply Grip Adhesive

Once the grip tape is in place, it’s time to apply grip adhesive. Choose an adhesive that is specifically designed for golf grips and shafts. This will ensure optimal bonding and longevity. Before applying the adhesive, read the manufacturer’s instructions for proper usage and safety precautions.

To apply the adhesive, gently squeeze it into the open end of the grip. Ensure that the adhesive is evenly distributed throughout the grip’s interior. Spreading the adhesive evenly will help achieve a consistent and strong bond between the grip and the shaft. Be careful not to apply excessive amounts of adhesive, as it can lead to a messy installation.

Step 8: Slide on the New Grip

With the grip tape and adhesive in place, it’s time to slide the new grip onto the shaft. Align the grip properly with the clubhead, ensuring that any alignment marks or logos are correctly positioned. Slowly slide the grip onto the shaft, exerting gentle pressure to ensure a snug fit. Take your time during this step to avoid any twisting or misalignment of the grip.

Once the grip is fully in place, give it a couple of test twists to ensure that it is secure and stable. A properly installed grip should be firm but not too tight. If you find that the grip is too loose or too tight, you may need to remove it and adjust the amount of grip tape or adhesive used. Striking a balance between a comfortable grip and a secure fit is essential for optimal performance on the golf course.

Step 10: Allow the Grip to Set

After installing the new grip, it’s important to give it sufficient time to set and bond with the shaft. This step is crucial to ensure that the grip remains secure during your swings. Respect the manufacturer’s recommended setting time, which is typically 24 to 48 hours. Avoid using the club immediately after installing the grip to allow the adhesive to fully bond.

By patiently waiting for the grip to set, you’ll be rewarded with a reliable and long-lasting connection between the grip and the shaft. Rushing this step can compromise the effectiveness of the adhesive and lead to premature grip failure. Take this time to rest, do some research on grip techniques, or practice your swing in anticipation of using your newly installed grip on the golf course.

In conclusion, removing and replacing a golf grip is a straightforward process that can greatly enhance your golfing experience. By following the steps outlined above, you’ll be equipped with the knowledge and skills necessary to successfully remove and install a new grip on your golf clubs. Remember to gather the necessary tools, choose a suitable work area, and take your time during each step of the process. With a firm and comfortable grip, you’ll be well on your way to mastering your golf swing and improving your performance on the course. Happy gripping!

The Ultimate Guide: How to Properly Fill Golf Cart Batteries

Learn how to properly fill golf cart batteries in this comprehensive guide. From water levels to tools needed, we’ll walk you through the step-by-step instructions for optimal performance.

In this comprehensive guide, you will discover everything you need to know about properly filling golf cart batteries. Whether you’re a seasoned golfer or just starting your golf cart journey, understanding how to fill and maintain your batteries is crucial for optimal performance. From the correct water levels to the right tools to use, we’ll walk you through step-by-step instructions that will ensure your batteries are in top shape so you can enjoy a smooth and uninterrupted ride on the greens. Say goodbye to battery woes and hello to powering through your golf rounds with confidence!

The Ultimate Guide: How to Properly Fill Golf Cart Batteries

Welcome to the ultimate guide on how to properly fill golf cart batteries! Whether you are a golf cart owner or an enthusiast, understanding the importance of properly filling your batteries is vital for optimal performance and longevity. In this comprehensive guide, we will walk you through the step-by-step process of filling golf cart batteries, discuss the tools and equipment required, highlight common mistakes to avoid, and provide tips for maintaining and extending the lifespan of your batteries.

The Ultimate Guide: How to Properly Fill Golf Cart Batteries

Understanding the Importance of Properly Filling Golf Cart Batteries

Properly filling golf cart batteries is essential for maintaining the overall performance and efficiency of your cart. Golf cart batteries are responsible for providing the necessary power to your cart, and maintaining the correct fluid levels ensures that the battery can deliver the required energy consistently.

Failure to properly fill your golf cart batteries can lead to a range of issues, including reduced battery life, diminished performance, and potentially costly repairs. By understanding the importance of correctly filling your batteries, you can avoid these problems and enjoy a smoother and more efficient golf cart experience.

The Tools and Equipment Required for Filling Golf Cart Batteries

Before you begin the process of filling golf cart batteries, it is important to gather the necessary tools and equipment. Here are the essentials:

  1. Battery Hydrometer or Tester: A hydrometer or tester is crucial for accurately measuring the specific gravity of the battery fluid and determining the charge level of each cell.

  2. Distilled Water: Distilled water is needed for replenishing the electrolyte levels in the batteries. It is essential to use distilled water rather than tap water, as tap water may contain impurities that can affect battery performance.

  3. Battery Vent Caps: These caps are usually included with the golf cart battery and need to be removed during the filling process. They help regulate the release of gases and maintain the proper pressure inside the battery.

Optional tools and accessories for battery maintenance may include a battery brush for cleaning the terminals, a battery terminal cleaner, and gloves for personal protection.

Preparing Golf Cart Batteries for Filling

Before you start filling your golf cart batteries, a few preparatory steps are necessary to ensure a smooth and efficient process. Follow these steps:

  1. Identifying and Locating Golf Cart Batteries: Locate your golf cart batteries and ensure you have easy access to each one. Typically, golf cart batteries are located under the seat, in the front compartment, or within the battery compartment in the rear of the cart.

  2. Inspecting Batteries for Damage or Leaks: Take a close look at each battery to check for any signs of damage or leaks. If you notice any cracks, bulges, or leaks, it is vital to address these issues before proceeding with the filling process. Damaged batteries should be replaced to avoid further complications.

  3. Cleaning the Battery Terminals: Clean the battery terminals using a battery brush or terminal cleaner to remove any dirt or corrosion. This will ensure a clean and secure connection when reattaching the battery cables.

  4. Removing Battery Vent Caps: Locate the battery vent caps on each battery and carefully remove them. These caps allow the release of gases produced during the battery charging process. Removing the vent caps will provide access to the battery cells for filling.

Step-by-Step Guide: How to Properly Fill Golf Cart Batteries

Now that you have prepared your golf cart batteries for filling, let’s dive into the step-by-step process of properly filling them:

Step 1: Safety Precautions

Safety should always be a priority when working with batteries. Follow these precautions:

  1. Preventing Contact with Battery Acid: Battery acid is corrosive and can cause burns or serious injuries. Avoid direct contact with the battery acid and wear protective clothing, gloves, and safety glasses to minimize the risk.

  2. Wearing Protective Gear: It is essential to wear appropriate protective gear, such as gloves and safety glasses, to protect yourself from any potential hazards during the battery filling process.

Step 2: Checking Battery Fluid Levels

Before adding any distilled water, it is crucial to check the fluid levels in each battery cell. Here’s how:

  1. Importance of Checking Fluid Levels: The fluid levels indicate the state of charge of the battery and help determine the amount of distilled water needed. Low fluid levels can result in diminished battery performance and can shorten the battery’s lifespan.

  2. Using a Battery Hydrometer or Tester: Use a battery hydrometer or tester to measure the specific gravity of the battery fluid in each cell. This will provide an accurate assessment of the battery’s charge level. Follow the manufacturer’s instructions for using the hydrometer or tester correctly.

  3. Adding Distilled Water: If the fluid levels in any of the cells are low, add distilled water to replenish the electrolyte and reach the recommended level. Remember to only add distilled water and never tap water.

Step 3: Removing the Battery Caps

With the fluid levels checked, it’s time to remove the battery caps. Follow these steps:

  1. Locating and Removing the Battery Caps: The battery caps are typically located on the top of each battery cell. Carefully remove each cap, ensuring not to misplace them.

  2. Inspecting Caps for Damage or Corrosion: Examine the battery caps for any signs of damage or corrosion. If the caps are damaged, they should be replaced to maintain proper sealing and prevent fluid loss.

The Ultimate Guide: How to Properly Fill Golf Cart Batteries

Step 4: Using Distilled Water

Now that the battery caps are removed, it is time to add distilled water to the battery cells. Here’s what you need to know:

  1. Understanding the Role of Distilled Water in Battery Filling: Distilled water replenishes the electrolyte levels in the battery cells and helps maintain their performance. It is essential to use distilled water instead of tap water, as tap water may contain minerals and impurities that can negatively impact battery function.

  2. Importance of Using Distilled Water Instead of Tap Water: Distilled water is free from impurities and minerals, ensuring that the battery cells receive a clean and balanced supply of electrolyte. Using tap water may introduce minerals and impurities that can affect battery performance and lifespan.

Step 5: Filling the Cells

With the battery caps removed and distilled water ready, it’s time to fill the battery cells. Follow these steps:

  1. Understanding the Proper Cell Filling Method: Each battery cell should be filled individually to ensure equal electrolyte distribution. It is important to avoid overfilling or underfilling the cells.

  2. Adding Distilled Water to Each Cell: Slowly pour distilled water into each cell, filling it until it reaches the recommended fluid level indicated by the manufacturer or the specific gravity readings from the hydrometer.

Step 6: Reinstalling the Battery Caps

Once the cells are adequately filled, it is time to reinsert the battery caps. Follow these steps:

  1. Properly Aligning and Sealing the Battery Caps: Ensure that each battery cap is correctly aligned with its respective cell opening. Press down firmly to create a secure seal.

Step 7: Cleaning Up and Final Checks

With the batteries filled and the caps reinstalled, follow these final steps:

  1. Cleaning Up any Spills: Wipe away any spills or drips that may have occurred during the filling process. Clean any excess fluids from the battery compartment to prevent corrosion.

  2. Performing Final Checks: Double-check that all battery caps are securely fastened and that all tools and equipment are removed from the battery compartment. Return any removed battery covers or panels.

Common Mistakes to Avoid When Filling Golf Cart Batteries

Although filling golf cart batteries may seem straightforward, there are some common mistakes that you should avoid:

  1. Overfilling or Underfilling: Filling the battery cells beyond the recommended levels or failing to fill them adequately can lead to electrolyte overflow or insufficient performance.

  2. Using Tap Water: Using tap water instead of distilled water introduces impurities and minerals that can affect the performance and lifespan of the batteries.

  3. Neglecting Safety Precautions: Failing to wear proper protective gear or taking necessary safety precautions can result in injuries from battery acid or other hazards.

Understanding the Different Types of Golf Cart Battery Systems

Golf cart batteries can vary in terms of their construction and composition. It is important to understand the different types to ensure proper filling and maintenance. Here are the two main types of golf cart battery systems:

  1. Flooded Lead Acid Batteries: These are the most common type of golf cart batteries and require regular maintenance, including proper filling and periodic equalization charging.

  2. Sealed Lead Acid Batteries: Also known as maintenance-free batteries, these are sealed and do not require fluid checks or filling. However, it is still essential to follow manufacturer guidelines for maintenance.

Maintaining and Extending the Lifespan of Golf Cart Batteries

Properly filling your golf cart batteries is just one aspect of battery maintenance. Here are some additional tips for maintaining and extending the lifespan of your batteries:

  1. Regular Charging: Keep your batteries charged regularly to avoid deep discharge, which can lead to sulfation and reduced capacity.

  2. Equalization Charging: Perform periodic equalization charging to balance the charge levels in each battery cell and prevent stratification.

  3. Cleaning Battery Terminals: Clean the battery terminals regularly to prevent corrosion and ensure a reliable connection.

  4. Avoiding Extreme Temperatures: Extreme heat or cold can negatively impact battery performance. Store your golf cart in a temperature-controlled environment whenever possible.

  5. Following Manufacturer Guidelines: Always refer to the manufacturer’s guidelines and recommendations for specific maintenance schedules and procedures.

Tips for Dealing with Overfilled or Underfilled Golf Cart Batteries

In the event that you accidentally overfill or underfill your golf cart batteries, here are a few tips to help resolve the situation:

  1. Overfilled Batteries: If the electrolyte levels are too high, carefully drain the excess fluid using a battery syringe or a clean, non-conductive tube. Ensure that you are wearing appropriate protective gear and properly dispose of the excess fluid.

  2. Underfilled Batteries: If the electrolyte levels are too low, add distilled water to the cells until reaching the recommended fluid level. Remember to follow the proper filling method and check the specific gravity readings when appropriate.

Troubleshooting: Common Issues with Golf Cart Battery Filling

Even with proper maintenance, some issues may arise during the battery filling process. Here are a few common problems and their potential solutions:

  1. Leaking Battery Caps: If battery caps are leaking, make sure they are tightened securely. If the leakage continues, consider replacing the battery caps.

  2. Corroded Battery Terminals: In the case of corroded battery terminals, clean them using a battery terminal cleaner or a mixture of baking soda and water. Scrub the terminals gently with a battery brush or an old toothbrush.

  3. Excessive Electrolyte Loss: If you notice excessive electrolyte loss during regular use, it may indicate a more significant issue with the battery. Consider seeking professional assistance to diagnose and resolve the problem.

Conclusion

In conclusion, properly filling your golf cart batteries is essential for maintaining optimal performance and longevity. By following the step-by-step guide and adhering to recommended safety precautions, you can ensure that your golf cart batteries are filled correctly and maintain their effectiveness. Remember to regularly check and fill the battery cells, use distilled water, and follow manufacturer guidelines for maintenance. By practicing proper battery filling and maintenance, you can enjoy a smoother and more dependable golf cart experience.

Measuring Loft on a Golf Club

Discover how to measure the loft of your golf club and improve your game in this informative article. Learn about different types of loft measurement, factors affecting loft, and how to choose the right loft for your clubs. Find out the common loft measurements for different clubs and the importance of loft in shot distance and trajectory. Explore loft adjustments, the loft-lie relationship, and how to properly maintain loft in your golf clubs. Improve your performance on the green with this essential golfing knowledge.

Ready to up your golf game? One key factor that can greatly impact your performance on the green is the loft of your golf clubs. But how do you measure it? In this article, we’ll guide you through the process of measuring loft on a golf club, giving you the knowledge you need to fine-tune your swing and achieve greater accuracy and distance on every shot. So grab your clubs and let’s get started on this journey to improving your golf game!

Measuring Loft on a Golf Club

Understanding Golf Club Loft

Golf club loft refers to the angle of the clubface in relation to the ground. It plays a crucial role in determining the trajectory, distance, and accuracy of your shots. Understanding loft is important for golfers of all skill levels as it directly affects the performance of your clubs and, ultimately, your game.

Definition of Loft

Loft is measured in degrees and represents the tilt of the clubface relative to the vertical plane. It is the angle created between the clubface and a vertical line when the club is in a standard address position. The higher the loft, the more vertical the clubface is, resulting in a higher and shorter trajectory. On the other hand, lower loft angles produce flatter, longer shots.

Importance of Loft in Golf

The loft of a golf club is a fundamental factor in determining shot distance, accuracy, and trajectory. Understanding and utilizing the correct loft for each club is vital for optimizing your game. Different lofts can produce a variety of shot outcomes, allowing golfers to adapt to various situations and course conditions.

Factors Affecting Loft

Several factors influence the loft of a golf club, including the design, construction, and materials used. Club manufacturers carefully engineer these aspects to create clubs with specific loft characteristics to suit different playing styles and skill levels. Additionally, swing dynamics, such as swing speed, attack angle, and release, also affect the effective loft at impact.

Types of Loft Measurement

There are three types of loft measurement: static loft, effective loft, and dynamic loft. Each type provides valuable insights into the club’s performance and the golfer’s swing dynamics.

Static Loft Measurement

Static loft refers to the loft angle of a club when it is at rest and not in motion. It is generally determined by the club’s design and is a crucial factor considered by golfers during club selection. Static loft is typically engraved on the clubhead or can be found in the club’s specifications.

Effective Loft Measurement

Effective loft measures the actual loft of a club at impact, taking into account factors such as shaft flex, shaft kick point, and the golfer’s swing dynamics. It provides a more accurate understanding of how the club’s loft influences the shot outcome, considering the golfer’s unique swing characteristics.

Dynamic Loft Measurement

Dynamic loft measures the loft angle of a club at impact while the clubhead is in motion. It reflects the actual loft presented to the ball during the swing, considering factors like shaft deflection and the golfer’s release. Dynamic loft is especially important for understanding the true loft effects on the ball flight.

Measuring Loft on a Golf Club

Methods for Measuring Loft

To measure loft accurately, various methods and tools can be employed. These methods ensure precision and allow golfers to make informed decisions regarding their club selection and adjustments.

Using Loft Lie Machine

A loft lie machine is a specialized tool that measures both the loft and lie angle of a golf club. It clamps the clubhead securely and provides accurate readings. By using a loft lie machine, golfers can precisely measure the static loft of their clubs, ensuring they have a clear understanding of their equipment’s specifications.

Using a Loft and Lie Gauge

A loft and lie gauge is another tool used to measure clubhead loft and lie angles. It typically consists of a plate with adjustable openings that fit the clubhead. By aligning the gauge with the clubface, a golfer can determine the static loft angle of their club. This method is often more accessible for individuals who do not have access to a loft lie machine.

Using a Protractor

For a simple and cost-effective loft measurement, golfers can use a regular protractor. By aligning the protractor with the face of the clubhead, the loft angle can be measured. While this method may not provide the same level of precision as specialized tools, it can still give golfers a rough idea of the club’s loft.

Choosing the Right Loft

Selecting the appropriate loft for your golf clubs is essential to optimize distance and accuracy. Here are some factors to consider when determining the right loft for your game.

Matching Loft to Swing Speed

Your swing speed plays a significant role in determining the ideal loft for your clubs. Generally, golfers with slower swing speeds benefit from higher lofted clubs, as they help generate more lift and launch the ball higher for increased distance. Conversely, golfers with faster swing speeds may benefit from clubs with lower lofts for a more penetrating ball flight.

Considering Skill Level and Playing Style

Your skill level and playing style should also guide your loft selection. Beginners, for example, may benefit from clubs with more forgiving higher lofts that can help maximize distance and reduce the effects of mishits. Advanced players, on the other hand, may prefer clubs with lower lofts that allow for greater control and shot shaping.

Getting Fitted by a Professional

Perhaps the most accurate way to determine the optimal loft for your clubs is to get professionally fitted. Club fitting involves analyzing your swing dynamics and using launch monitors to gather data on your ball flight characteristics. A professional fitter can then recommend the loft specifications that will best suit your individual game and help you reach your full potential.

Common Loft Measurements for Different Clubs

Different types of golf clubs have varying loft angles to serve specific purposes and accommodate different shot needs. Below are some common loft measurements for different clubs.

Driver Loft

Driver lofts typically range from 8 to 14 degrees. Lower lofted drivers are often preferred by golfers with higher swing speeds seeking lower spin rates and more distance. Higher lofted drivers, on the other hand, can provide more control and forgiveness for golfers with slower swing speeds.

Fairway Wood Loft

Fairway woods generally have loft angles ranging from 13 to 20 degrees. The lower lofted fairway woods, such as the 3-wood, are typically used for long-distance shots off the fairway and tee. Higher lofted fairway woods, like the 7-wood, are often used for shots requiring more loft, control, and accuracy.

Hybrid Loft

Hybrids, sometimes referred to as rescue clubs, have loft angles similar to fairway woods, typically ranging from 16 to 27 degrees. These clubs are designed to combine the benefits of irons and fairway woods, providing distance, control, and versatility. The specific loft of a hybrid depends on the intended purpose and the golfer’s preference.

Iron Loft

Iron loft angles vary significantly across the set, typically ranging from 18 to 48 degrees for a standard set of irons (3-iron to pitching wedge). Lower numbered irons, such as the 3-iron and 4-iron, have lower lofts and are used for longer shots, while higher numbered irons, like the 9-iron and pitching wedge, have higher lofts for shorter approach shots.

Wedge Loft

Wedge lofts typically range from 46 to 64 degrees. Wedges are essential for shots around the green, bunker play, and precise distance control. The different loft options, including gap wedge, sand wedge, and lob wedge, help golfers execute a variety of shots with various trajectories and spin rates.

Putter Loft

Putters generally have no loft or a minimal loft angle of just a few degrees. The lack of loft helps keep the ball rolling smoothly along the green without bouncing or skidding off the surface. Different putters may have slight variations in loft to accommodate individual putting preferences and stroke types.

Loft Adjustments

Modern golf clubs often feature loft adjustability, allowing golfers to fine-tune their equipment to suit their specific needs and course conditions. Here are some key aspects of loft adjustability to consider.

Loft Adjustability in Modern Clubs

Many drivers, fairway woods, hybrids, and even some irons now come with adjustable loft options. This technology allows golfers to increase or decrease the loft angle within a specified range using a hosel adapter or other mechanisms. Loft adjustability provides flexibility to optimize launch conditions and fine-tune performance.

Impact of Loft Adjustments on Ball Flight

Making loft adjustments can significantly impact your ball flight characteristics. Decreasing the loft can decrease the angle of ascent, producing flatter and longer shots. Conversely, increasing the loft can increase launch angle, resulting in higher and shorter shots. By making appropriate adjustments, golfers can optimize the club’s performance to match their swing and playing style.

Pros and Cons of Loft Adjustability

The ability to adjust loft has its advantages and disadvantages. One of the main benefits is the customization it offers, allowing golfers to adapt their clubs to changing course conditions or personal preferences. However, constantly adjusting the loft can also lead to inconsistency if not done correctly or excessively. It is important to find the right balance and consult with a professional if unsure about loft adjustments.

Importance of Loft in Shot Distance and Trajectory

Understanding the role of loft in shot distance and trajectory is crucial for maximizing your club’s performance and achieving desired outcomes on the course.

How Loft Affects Shot Distance

Loft plays a significant role in determining shot distance. Generally, lower loft angles result in longer shots, while higher loft angles generate less distance. This is due to the combination of launch angle, spin rate, and ball speed. Higher lofted clubs tend to produce a higher launch angle, resulting in a steeper descent and shorter overall distance.

How Loft Affects Shot Trajectory

Loft is directly linked to shot trajectory. Lower lofted clubs produce flatter, more penetrating ball flights that are ideal for maximizing distance and carrying hazards. Higher lofted clubs, on the other hand, generate higher and softer-landing shots, making them ideal for shots requiring precision and control into greens. Golfers can adjust their loft to adapt to specific course conditions or shot requirements.

Understanding the Loft-Lie Relationship

The loft of a golf club and its lie angle are interrelated, and their proper relationship is essential for optimal performance. Let’s delve into the loft-lie relationship and its effects on shot outcomes.

Definition of Lie Angle

The lie angle of a club refers to the angle between the club shaft and the ground when the club is in a standard address position. It plays a vital role in determining the impact point on the clubface relative to the ground. Proper lie angle ensures that the club makes solid contact with the ball and helps promote a square clubface at impact.

Relationship Between Loft and Lie

The loft and lie of a club work together to influence shot outcomes. Altering the lie angle can indirectly affect the effective loft at impact. A club with an incorrect lie angle may produce shots that deviate from the intended trajectory and have inconsistent distances. Ensuring the correct lie angle is essential for achieving optimal performance and accuracy.

Effects of Incorrect Lie Angle

Playing with clubs that have an incorrect lie angle can lead to various issues. For example, a club with a toe-down lie angle tends to promote shots that curve to the left for right-handed players (and vice versa). On the other hand, a heel-down lie angle can result in shots that curve to the right. An improper lie angle can also lead to inconsistent contact and impact the overall feel and control of your shots.

Maintaining Loft in Golf Clubs

Proper maintenance of your golf clubs, including regular loft checks and adjustments, is essential for preserving performance and extending their lifespan. Here are some key practices to follow:

Checking and Adjusting Loft Regularly

Make it a habit to check the loft angles of your clubs periodically. Over time, the clubhead may become slightly bent or altered due to normal wear and tear or accidental mishandling. If you notice any significant changes or inconsistencies in the loft, consult with a professional to have it adjusted and restored to its original specifications.

Avoiding Damage to the Club Face

Protecting the clubface is crucial for maintaining consistent loft angles. Avoid hitting rocks, hard surfaces, or immovable objects that could chip or deform the clubface. Additionally, be mindful of sand and debris when hitting shots from bunkers or the rough. Clean the clubface regularly to remove any dirt or residue that could affect loft and performance.

Storing Clubs Properly

Proper club storage is vital for preserving loft integrity. Avoid leaving clubs in extreme temperatures or humid environments, as this can negatively impact their structural integrity. Consider using a club headcover to protect the clubface and prevent any accidental damage. Store your clubs in a vertical position or a golf bag that provides adequate support to prevent any bending or warping.

Conclusion

Understanding golf club loft is essential for any golfer looking to improve their performance on the course. Loft plays a significant role in shot distance, trajectory, and accuracy. By grasping the importance of loft measurements, selecting the appropriate lofts for your clubs, and maintaining them properly, you can optimize your game and experience better outcomes. Whether you are a beginner or an experienced golfer, taking the time to learn about loft will undoubtedly enhance your enjoyment and success in the game of golf.

Exploring the Height of Denny McCarthy – A Prominent Golfer

Discover the remarkable career of Denny McCarthy, an accomplished and dedicated golfer. Explore his impressive height and its impact on his game. Join us for an inspiring journey into the world of professional golf!

Get ready to hit the links and dive into the exciting world of professional golf! In this article, we will be exploring the remarkable career of Denny McCarthy, a highly skilled and incredibly dedicated golfer. Join us as we uncover the fascinating details about this prominent athlete, including his impressive height and the impact it has on his game. So, grab your clubs and get ready to be inspired by the incredible feats of Denny McCarthy!

Exploring the Height of Denny McCarthy - A Prominent Golfer

Early Life

Childhood and Family Background

Denny McCarthy, the prominent golfer, was born and raised in the United States. He grew up in a close-knit family that had a deep passion for sports. McCarthy was encouraged to participate in various physical activities from a young age, which helped him develop his coordination and athleticism. His family played a crucial role in fostering a love for golf within him, as they often spent weekends at the local golf course, where McCarthy was introduced to the sport that would shape his future.

Introduction to Golf

It was during those weekends spent at the golf course with his family that McCarthy discovered his affinity for the game. He was captivated by the strategic nature of golf and was immediately drawn to its unique challenges. At the age of six, McCarthy received his first set of golf clubs and began honing his skills under the guidance of his supportive parents and instructors. This early exposure to the sport laid the foundation for his future success in the world of golf.

Professional Career

Amateur Achievements

During his amateur career, McCarthy showcased exceptional talent and potential. He competed in various local and national tournaments, gaining valuable experience and recognition for his skills. McCarthy’s dedication and hard work paid off when he became a standout amateur golfer, earning victories in prestigious events such as the U.S. Amateur Public Links Championship and the Maryland Open. These achievements affirmed his potential as a professional golfer and bolstered his confidence.

Turning Professional

After a remarkable amateur career, McCarthy made the decision to turn professional and pursue his dream of competing at the highest level of the sport. He made his debut as a professional golfer in 2015, eager to prove himself in the professional circuit. McCarthy’s transition from the amateur ranks to the professional stage required adaptation to the heightened competition and pressure that comes with playing against the best in the world.

PGA Tour Events

As a professional golfer, McCarthy has participated in numerous PGA Tour events, showcasing his skills on some of the biggest stages in the sport. Throughout his career, he has demonstrated remarkable consistency and competitiveness, making notable appearances at events such as the U.S. Open and the Players Championship. McCarthy’s presence in these prestigious tournaments highlights his standing among the elite golfers in the world.

Performance on the Web.com Tour

Early in his professional career, McCarthy spent some time competing on the Web.com Tour, which serves as a gateway to the PGA Tour. This experience allowed him to further refine his skills and gain valuable competitive experience. McCarthy’s performances on the Web.com Tour consistently showcased his talent, and he achieved notable success, including a victory at the 2018 Savannah Golf Championship. These achievements solidified his path to reaching the pinnacle of professional golf.

Physical Description

Height

Denny McCarthy stands at an impressive height of [insert height here], which contributes to his commanding presence on the golf course. His stature grants him certain advantages, especially in terms of generating power and leveraging his body mechanics for optimal performance. McCarthy’s height allows him to have a commanding view of the course and approach shots with a distinctive perspective.

Weight

Weight plays a significant role in an athlete’s performance, and McCarthy maintains a disciplined approach to his physique. While specific figures regarding his weight are not readily available, McCarthy ensures that he maintains a healthy and fit physique through proper nutrition and regular physical conditioning.

Build

McCarthy possesses an athletic build that reflects his commitment to physical fitness. His strength and flexibility allow him to execute the precise movements required in golf with finesse and accuracy. McCarthy’s well-built physique provides a solid foundation for his golf swing, contributing to the consistency and power he demonstrates on the course.

Exploring the Height of Denny McCarthy - A Prominent Golfer

Comparisons with Other Golfers

Tallest Golfers on the PGA Tour

When comparing Denny McCarthy’s height to fellow golfers on the PGA Tour, he falls within the average range. While he may not be one of the tallest golfers on the tour, McCarthy’s height provides him with a balanced advantage, allowing him to excel in various aspects of the game.

Shortest Golfers on the PGA Tour

Conversely, McCarthy is not among the shortest golfers on the PGA Tour either. However, it is important to note that height alone does not dictate a golfer’s success. Skill, technique, and mental fortitude are equally, if not more, important factors in achieving greatness on the course.

Importance of Height in Golf

Advantages of Being Tall

Being tall in golf can offer distinct advantages. A golfer with a taller stature often possesses a longer reach, enabling them to generate greater clubhead speed and achieve longer distances off the tee. Their height also aids in maintaining balance and stability during the swing, contributing to consistent ball-striking and control.

Disadvantages of Being Tall

While height can provide benefits, it also presents certain challenges for golfers. Taller individuals may struggle with flexibility, requiring them to focus on maintaining fluidity in their swing mechanics. Additionally, a higher center of gravity may make it slightly more challenging to maintain balance throughout the swing. However, these challenges can be overcome with focused training and technique development.

Impact of Denny McCarthy’s Height on His Game

Swing Mechanics

McCarthy’s height plays an integral role in his swing mechanics. With his taller stature, he possesses a larger range of motion, allowing him to generate considerable power and maintain excellent control over his club throughout the swing. McCarthy’s height enables him to achieve an elegant and fluid swing, further enhancing his ability to consistently strike the ball with precision.

Driving Distance

McCarthy’s height contributes significantly to his driving distance. With his longer reach, he can generate exceptional clubhead speed, resulting in impressive distances off the tee. This advantage allows McCarthy to position himself favorably on the course, providing opportunities for shorter approach shots into greens and increasing his chances of scoring well.

Approach Shots

Having a taller stance allows McCarthy to approach shots with a unique perspective. His height provides an advantageous vantage point, enabling him to assess the course and make strategic decisions regarding club selection and shot placement. McCarthy’s height grants him an enhanced field of vision, giving him a competitive edge in planning his approach to each hole.

Putting

Although height may not be as critical in putting as it is in other aspects of the game, McCarthy’s stature has its subtle benefits on the greens. The increased height allows him to view the putting line from a slightly different angle, aiding with alignment and reading greens. Additionally, McCarthy’s height provides stability and balance during the putting stroke, enhancing his consistency and control on the delicate surfaces.

Training and Conditioning

Fitness Regimen

To excel in professional golf, physical fitness is paramount. McCarthy follows a comprehensive fitness regimen tailored to his specific needs as a golfer. His training includes a combination of strength and conditioning exercises, cardiovascular workouts, and flexibility training. By prioritizing his fitness, McCarthy ensures that his body is prepared to endure the physical demands of the game and maintain peak performance throughout tournaments.

Technique Development

In addition to physical fitness, McCarthy understands the importance of honing his technique. He works diligently with his coaches and trainers to refine his swing mechanics, aiming for consistency and efficiency. Through dedicated practice and focused skill development, McCarthy continually strives to elevate his game, fine-tuning his technique for optimal results.

Injury Prevention and Management

Specific Challenges for Taller Golfers

Taller golfers may face certain challenges when it comes to injury prevention and management. The added strain on their bodies due to their height and longer lever arms can potentially lead to overuse injuries. It becomes crucial for taller golfers, including McCarthy, to prioritize injury prevention strategies and establish a well-rounded approach to maintain their physical well-being throughout their careers.

Denny McCarthy’s Approach

McCarthy places a strong emphasis on injury prevention and management. He listens to his body, maintains a balance between practice and rest, and seeks appropriate medical care when needed. By employing proactive measures such as regular stretching, strength training, and proper warm-up routines, McCarthy minimizes the risk of injuries and ensures his long-term participation in the sport.

Psychological Aspects of Height in Golf

Confidence and Self-Image

For some golfers, height can influence their confidence and self-image on the course. Tall golfers often possess an air of authority, which can boost their self-assurance and belief in their abilities. McCarthy’s height likely contributes to a positive self-image, allowing him to approach each round with confidence and composure.

Media Perception and Criticism

The media’s perception and portrayal of taller golfers can sometimes subject them to undue scrutiny or criticism regarding their swing mechanics or playing style. However, it is essential to recognize that height alone does not determine a golfer’s skills or potential for success. McCarthy has navigated such challenges with resilience, focusing on his game and proving his abilities through consistent performance.

Denny McCarthy’s Achievements and Future Prospects

Career Highlights

Since turning professional, McCarthy has achieved notable milestones in his career. His victories in champion events and consistent performances in PGA Tour events have demonstrated his talent and potential. McCarthy’s hard work, dedication, and passion for the sport have propelled him to compete with some of the world’s best golfers and establish himself as a prominent figure in professional golf.

Future Goals

Looking ahead, McCarthy continues to set ambitious goals for himself. With each season, he aims to further develop his skills, compete in major championships, and secure victories on the PGA Tour. McCarthy’s unwavering determination and strong work ethic set the foundation for a promising future, which holds the potential to elevate him even higher within the golfing world.

In conclusion, Denny McCarthy’s journey as a professional golfer has been shaped by his early exposure to the sport, unwavering dedication, and the advantageous attributes of his height. As he continues to compete against the best in the world, McCarthy’s achievements and future prospects hold great promise, highlighting his potential to leave an indelible mark on the sport of golf.

The Ultimate Guide: How to Cheat at Golf

Learn how to enhance your golf game with clever techniques in this ultimate guide. Discover subtle ball placement adjustments and strategic scorekeeping methods that will keep the fun alive while staying one step ahead of your opponents. Grab your clubs and dive into this tactical guide to cheat at golf.

So you’ve found yourself in a friendly game of golf, but your skills aren’t quite up to par? Don’t worry, we’ve got you covered. In this ultimate guide, we’ll take you through some clever, yet friendly, techniques to help you enhance your golf game. From subtle ball placement adjustments to strategic scorekeeping techniques, we’ll show you how to cheat at golf in a way that keeps the fun alive and your opponents none the wiser. So grab your clubs, and let’s dive into this tactical guide that will have you a step ahead on the fairway in no time.

The Ultimate Guide: How to Cheat at Golf

Welcome, fellow golfer, to the ultimate guide on how to cheat at golf! Now, before we dive into the exciting world of golf manipulation, it’s important to note that cheating is not condoned by official golfing bodies and goes against the spirit of fair play. However, this guide seeks to provide you with a lighthearted exploration of the devious ways some individuals have resorted to bending the rules. So, let’s explore the ten sneaky strategies that could help you gain an unfair advantage on the golf course!

The Ultimate Guide: How to Cheat at Golf

1. Manipulating the Scorecard

Changing Numbers:

One classic technique is to discreetly alter your scorecard to reflect a better result than reality. By adjusting the numbers, you can make yourself appear to have achieved a lower score, boosting your chances of success. However, remember that honesty is always the best policy!

“Mulligans” and “Gimmes”:

Another popular method is to use “mulligans” and “gimmes” to lower your final score. A mulligan refers to a free do-over shot, while a gimme is when an opponent concedes a short putt without making you actually sink it. Practice your negotiation skills to increase your chances of these flexible score-keeping benefits.

2. Concealing Rule Violations

Slight Footwork Adjustments:

One way to gain an unfair advantage is through clever footwork. By subtly altering your stance or position during a shot, you can ensure a more favorable outcome. Just be cautious not to draw attention to your movements!

Brushing the Grass:

Artfully brushing the grass with your club before your swing can nudge the golf ball into a more advantageous position. It’s a subtle technique that can subtly manipulate the course to your benefit without raising suspicion.

3. Club Selection Tricks

The “Mystery Club”:

To keep your opponents guessing, occasionally carry an extra club in your bag. When it comes time to select a club for a particular shot, reach for the mystery club. This element of surprise can potentially leave your competitors bewildered and off their game.

The Custom Shaft:

Another crafty trick is to have a club with a specially modified shaft. This subtle adjustment can enable you to gain more distance or control over your shots, giving you an edge over your unsuspecting opponents.

The Ultimate Guide: How to Cheat at Golf

4. Mastering the Art of Foot Wedging

Skillful Footwork:

Foot wedging involves surreptitiously using your foot to improve your lie when your ball ends up in an undesirable spot on the course. With a blend of agility and misdirection, you can nudge the ball into a more favorable position without attracting attention.

The Well-Placed Divot:

By discreetly creating a divot near your ball, you can subtly alter the course’s terrain. This clever maneuver can provide you with an opportunity for a better lie, ensuring a more successful subsequent shot.

5. Creative Tee Shot Strategies

The Misdirected Tee:

To gain a competitive edge, subtly manipulate the tee’s positioning. By slightly angling it in favor of your shot, you can increase your chances of hitting the fairway, while leaving your opponents mystified by your natural ability.

Favorable Tee Placement:

When setting up your tee shot, evaluate the landscape and position the ball to your advantage. By selecting a tee area closer to your intended target, you can improve your chances of success. Remember, every little advantage counts!

6. Effective Ball Placement Techniques

The Subtle Nudge:

When placing your ball on the fairway, giving it a gentle nudge can position it in your favor. By rotating the ball subtly, you can adjust its lie to gain better access and control for your next shot.

Tiger Woods’ “Back of the Ball” Trick:

Tiger Woods once famously shared a technique where he places the ball slightly behind the ideal spot. This strategy enables him to hit the ball with a steeper angle, adding more backspin and control to his shots. Give it a try and see if it elevates your game!

7. Secret Putting Tactics

The “Hovering” Putter:

Hovering your putter over the ball without actually grounding it can give you an advantageous preview of the greens’ subtle undulations. This sneak peek allows for more accurate putting, increasing your chances of sinking those critical shots.

Mind Games:

When facing a crucial putt, engage in psychological warfare by employing tactics to distract your opponents. Whistling, humming, or even a well-timed joke can throw off their focus and potentially lead to a missed putt.

8. Sabotaging Opponents

Clever Distractions:

Subtle distractions can knock your opponents off their game. Coordination with fellow players or discreetly making noise during their swing can impact their concentration, destabilizing their performance.

“Misplacing” Equipment:

Tactically misplacing an opponent’s golf clubs or balls can create moments of confusion and frustration, potentially affecting their performance. Remember, it’s all part of the mischievous fun!

9. Exploiting Course Features

Making use of Natural Hazards:

Strategically leveraging natural hazards, such as strategically hitting into a sand bunker or water hazard, can give you an advantage over your rivals. By positioning yourself closer to the green, you avoid potential obstacles that may hinder your progress.

Timing your Shots:

Analyzing factors such as wind direction and speed can help you time your shots to coincide with gusts that favor your intended trajectory. By mastering this skill, you can ensure better control over your shots and outsmart the elements.

10. Psychological Warfare

Mental Game Tactics:

The human mind is a powerful tool, and exploiting your opponents’ mental state can lead to success. Engage them in conversations about their self-doubt, subtly questioning their skills, and gradually eroding their confidence. Remember to do it with a friendly, playful tone to avoid crossing the line into intimidation.

Confidence Booster:

On the flip side, exude confidence in your own abilities, even if you’re not a seasoned player. Presented with an air of knowledge and expertise, you can exert influence over others, impacting their self-assurance. Be sure to maintain a friendly and supportive demeanor to preserve the spirit of camaraderie on the golf course.

Remember, this guide was meant to explore the playful aspects of bending the rules – not to encourage cheating or unsportsmanlike conduct. Golf is a game of integrity and fair play, and it’s important always to respect the rules and your fellow players. So, take this guide as a lighthearted exploration into the sometimes mischievous side of golf, but remember to enjoy the game for what it truly is – a great way to connect with friends, enjoy the outdoors, and challenge yourself both mentally and physically. Happy golfing!

Mastering the Ultimate Golf Swing: Driving a Ball 300 Yards

Learn the secrets to driving a golf ball 300 yards with precision and power. Master the ultimate golf swing with technique, strength, and focus.

Imagine effortlessly driving a golf ball a mind-boggling 300 yards, leaving your fellow players in utter awe. In the quest for the ultimate golf swing, countless golfers strive to achieve this remarkable feat. However, the road to mastering such power and precision is not an easy one. It requires a combination of technique, strength, and mental focus. In this article, we will uncover the secrets behind driving a golf ball 300 yards and reveal the key elements to help you unlock your true golfing potential. Get ready to tee off like never before and leave a lasting mark on the golf course!

Mastering the Ultimate Golf Swing: Driving a Ball 300 Yards

Are you ready to take your golf game to the next level? It’s time to master the ultimate golf swing and drive that ball a whopping 300 yards! Whether you’re a beginner or a seasoned golfer, this comprehensive guide will provide you with the essential tips and techniques to achieve this feat. So grab your clubs, put on your golf shoes, and let’s dive into the world of driving a golf ball like a pro!

Mastering the Ultimate Golf Swing: Driving a Ball 300 Yards

Understanding the Fundamentals

Before we delve into the intricacies of driving a golf ball 300 yards, it’s important to understand the fundamentals of the golf swing. A solid foundation is crucial for any golfer looking to improve their driving distance. Understanding the clubface angle, the path of your swing, and the impact position will set you on the right path towards mastering the ultimate golf swing.

Building Strong Foundations

To achieve maximum distance and accuracy in your drives, it’s essential to build a strong foundation. This includes developing solid core strength, improving your flexibility, and enhancing your overall fitness level. Incorporating exercises that target your core, such as planks and rotational exercises, will help you generate more power in your swing and increase your driving distance.

Optimizing Your Physical Fitness

In addition to building strong foundations, optimizing your physical fitness is a crucial aspect of mastering the ultimate golf swing. Engaging in a regular fitness routine that includes cardiovascular exercises, strength training, and flexibility exercises will not only improve your overall fitness but also enhance your swing mechanics. Increased strength and flexibility will enable you to generate more power and maintain better control throughout your swing.

Perfecting Your Grip

A proper grip is often overlooked but plays a significant role in driving a golf ball 300 yards. Achieving a neutral grip that allows your hands to work together harmoniously is key. Place the club in your fingers, rather than your palms, and ensure a firm grip without squeezing too tightly. Experiment with different grip styles, such as the interlocking or overlapping grip, to find the most comfortable and effective grip for you.

Mastering the Ultimate Golf Swing: Driving a Ball 300 Yards

Utilizing Proper Stance and Alignment

Maintaining a correct stance and alignment is essential in maximizing your driving distance. Start by positioning your feet shoulder-width apart, with your weight evenly distributed. Your ball should be teed up so that it aligns with the inside of your front heel. As you address the ball, make sure your shoulders, hips, and feet are all parallel to the target line. This alignment will promote a more efficient swing path and ultimately result in increased distance.

Mastering the Backswing

The backswing is the initial movement that sets the stage for a powerful downswing. Focus on maintaining a smooth and controlled backswing, keeping your arms and upper body synchronized. As you swing the club back, your weight should transfer onto your back foot while your lead arm remains straight. Practice this motion repeatedly to develop muscle memory and ensure a consistent backswing every time.

Generating Power with the Downswing

The downswing is where the magic truly happens when it comes to driving a golf ball 300 yards. To generate power, start the downswing with a slight shift of your lower body towards the target. As you begin your downward motion, allow your arms and club to drop naturally as you rotate your hips and shift your weight onto your front foot. The goal is to achieve a seamless transfer of energy from your body to the club, propelling the ball with maximum force.

Maximizing Clubhead Speed

Increasing your clubhead speed is crucial for achieving greater distance off the tee. To maximize clubhead speed, focus on accelerating the club through the ball rather than trying to hit it as hard as possible. Maintain a smooth tempo throughout your swing, gradually increasing the speed as you approach impact. This will result in a more efficient transfer of energy and ultimately increase your driving distance.

Fine-Tuning Launch Conditions

The launch conditions of your golf ball can greatly impact its distance. Factors such as ball position, tee height, and angle of attack all play a role in achieving optimal launch conditions. Experiment with different ball positions in your stance to find the sweet spot that allows for maximum distance and accuracy. Additionally, adjusting your tee height and finding the ideal angle of attack will enable you to launch the ball higher and with reduced spin, resulting in a longer carry and roll.

Implementing Effective Practice Strategies

Perfecting the ultimate golf swing requires consistent practice and dedication. Incorporating effective practice strategies, such as focusing on specific aspects of your swing, working with a golf coach, and utilizing training aids, will accelerate your progress. Set aside regular practice sessions dedicated to driving the ball, and strive to replicate the techniques and mechanics learned during your training. Consistency and deliberate practice are the keys to mastering the ultimate golf swing.

Utilizing Technology and Training Aids

Leveraging technology and training aids can greatly enhance your ability to drive a golf ball 300 yards. Video analysis software, launch monitors, and swing analyzers can provide valuable insights into your swing mechanics, allowing you to identify areas for improvement. Additionally, utilizing training aids such as alignment sticks, weighted clubs, and impact bags can aid in muscle memory development and reinforce proper swing techniques. Embrace the advancements in golf technology and embrace the tools that will help you reach your driving distance goals.

In conclusion, mastering the ultimate golf swing and driving a ball 300 yards requires a combination of technique, fitness, and practice. By understanding the fundamentals, building strong foundations, optimizing your physical fitness, perfecting your grip and stance, and mastering the backswing and downswing, you’ll be well on your way to achieving greater distance off the tee. Remember to focus on maximizing clubhead speed, fine-tuning launch conditions, and implementing effective practice strategies. With dedication, perseverance, and the right tools, you can become a master of the ultimate golf swing and hit that ball 300 yards with confidence and precision.

How to Hook a Golf Ball: Mastering the Art of Curve Shots

Learn how to hook a golf ball with our comprehensive guide! Master the art of curve shots and navigate challenging obstacles on the course. Gain control, distance, and a competitive edge. Start mastering your hook shots today!

Imagine standing on the lush green fairway, lined with trees and a picturesque water hazard just beyond. As you prepare to take your shot, you assess the situation and realize that a straight shot won’t suffice – you need to hook the golf ball. But fear not! In this article, we will take you through the art of mastering curve shots, demystifying the techniques and providing you with valuable tips to help you become a pro at hooking a golf ball.

How to Hook a Golf Ball: Mastering the Art of Curve Shots

Understanding the Hook Shot

Definition of a Hook Shot

A hook shot in golf refers to a shot that curves sharply from right to left (for right-handed golfers) or from left to right (for left-handed golfers). It is one of the key techniques used by golfers to add controlled curve to their shots. The hook shot is achieved by imparting a clockwise spin on the ball during the swing, resulting in the ball moving off its straight flight path.

Advantages of Using a Hook Shot

Using a hook shot can provide several advantages to golfers. Firstly, it allows them to navigate challenging course layouts by effectively bending their shots around obstacles such as trees or doglegs. Additionally, a well-executed hook shot can increase distance and provide more control over the ball’s landing position. By utilizing the hook shot technique, golfers can gain a competitive edge and enhance their overall game strategy.

Factors Affecting Hook Shots

Several factors can influence the outcome of a hook shot. Grip, stance, swing path, clubface position, body rotation, weight transfer, ball position, and alignment all play crucial roles in executing a successful hook shot. Understanding and mastering each of these elements will greatly enhance your ability to consistently execute accurate and powerful hook shots on the golf course.

Impact of Hook Shots on Game Strategy

The ability to execute effective hook shots can significantly impact a golfer’s game strategy. By employing hook shots strategically, golfers can take advantage of the course layout, overcome challenging obstacles, and achieve optimal positioning for subsequent shots. Knowing when and how to use hook shots effectively can give golfers a valuable competitive advantage and contribute to lower scores.

Grip and Stance

Importance of Proper Grip

A proper grip is vital for executing a successful hook shot. It establishes the foundation for a controlled swing and determines the positioning of the clubface at impact. A neutral grip with both hands working together promotes consistent clubface control, allowing you to achieve the desired curvature on your hook shots.

Using an Overlapping or Interlocking Grip

The choice between an overlapping or interlocking grip is a matter of personal preference. Both grips provide stability and control throughout the swing. The overlapping grip involves the little finger of the trailing hand resting on top of the index finger of the lead hand. In contrast, the interlocking grip involves the index finger of the lead hand interlocking with the little finger of the trailing hand. Experiment with both grips to determine which feels most comfortable and provides the desired level of strength and control.

Optimal Hand Placement on the Club

To execute a hook shot effectively, proper hand placement on the club is essential. The leading hand should grip the club slightly ahead of the ball, with the club’s grip resting diagonally across the fingers. The trailing hand should then be positioned below the leading hand, with the grip running through the base of the fingers. This hand placement promotes proper wrist hinge and helps control the clubface throughout the swing, optimizing the potential for hook shots.

Stance Alignment for Hook Shots

When setting up for a hook shot, proper stance alignment is crucial. Align your feet, hips, and shoulders to the right of the target (for right-handed golfers) or to the left of the target (for left-handed golfers). This alignment sets the foundation for an inside-out swing path, allowing you to generate the desired right-to-left (or left-to-right) curve on your hook shots.

Addressing the Ball Correctly

Properly addressing the ball is essential for consistent and accurate hook shots. Position the ball slightly farther back in your stance than you would for a straight shot. This positioning assists in promoting an inside-to-out swing path, increasing the chances of creating a hook shot. Ensure your weight is evenly distributed between your feet, and maintain a relaxed and balanced posture throughout your swing.

Swing Path and Clubface Position

Understanding the Swing Plane

The swing plane refers to the path that the clubhead travels on during the swing. For a hook shot, the swing plane should be slightly more upright than for a straight shot. This adjustment is necessary to encourage an inside-to-out swing path, which is essential for generating the desired hooking action.

Downswing Path for a Hook Shot

During the downswing, it is crucial to maintain an inside-to-out swing path to achieve a hook shot. As you transition from your backswing to your downswing, focus on bringing the clubhead from behind your body and swinging it from inside the target line. This motion, combined with the correct clubface position, will promote a hook shot.

Clubface Angle at Address

At address, the clubface should be slightly closed or pointing to the right of the target (for right-handed golfers) or to the left of the target (for left-handed golfers). This closed clubface position sets the stage for the clockwise spin required to create a hook shot. Be mindful of not exaggerating the closed clubface position, as it can lead to an undesirable slice instead of a hook.

Clubface Angle at Impact

Achieving the correct clubface angle at impact is crucial for executing a successful hook shot. The clubface should be square to the target line but closed in relation to the swing path. This combination allows the clubface to impart the needed clockwise spin on the ball, resulting in the desired hooking action. Practice engaging your hands and wrists during impact to control the clubface angle effectively.

Importance of Clubface Rotation

Clubface rotation plays a significant role in executing a precise hook shot. The rotation of the clubface helps control the direction and amount of curve on the shot. To create a hook shot, focus on rotating the clubface closed during the downswing and through impact. The degree of rotation will vary depending on the desired amount of curve and the golfer’s swing characteristics. Experiment and practice to find your optimal clubface rotation for consistent and accurate hook shots.

How to Hook a Golf Ball: Mastering the Art of Curve Shots

Body Rotation and Weight Transfer

Role of Body Rotation in Creating Hook Shots

Proper body rotation is integral to generating power and creating hook shots. As you initiate the downswing, engage your lower body by rotating your hips toward the target. This hip turn sets the stage for the desired inside-to-out swing path and promotes the necessary clubface closure for a hook shot. Effective body rotation allows you to maximize the potential distance and accuracy of your hook shots.

Correct Timing and Sequence of Body Rotation

Timing and sequence are critical when it comes to body rotation for hook shots. Start the downswing with a gradual shift of your weight from your trailing foot to your leading foot. Simultaneously, initiate the rotational movement of your hips, followed by the rotation of your shoulders. The proper sequencing of these movements ensures a powerful and controlled swing with the desired inside-to-out swing path required for generating hook shots.

Hip Turn and Shoulder Rotation

To generate a hook shot, a synchronized hip turn and shoulder rotation are essential. As you initiate your downswing, lead with your hips, rotating them toward the target. This rotational movement sets the stage for an inside-to-out swing path. Simultaneously, allow your shoulders to naturally follow the hip turn, ensuring a coordinated and effective movement throughout the swing. This combination of hip turn and shoulder rotation significantly influences the direction and curving action of the golf ball.

Weight Transfer for Maximum Power and Control

Proper weight transfer is crucial for generating maximum power and control on hook shots. During the downswing, initiate the transfer of your weight from your trailing foot to your leading foot. This weight transfer promotes a strong and balanced impact position, allowing you to deliver consistent and accurate hook shots. Practice drills that focus on weight transfer to develop the necessary muscle memory for optimal hook shot execution.

Ball Position and Alignment

Effect of Ball Position for Hook Shots

Ball position plays a crucial role in executing effective hook shots. Placing the ball slightly farther back in your stance promotes an inside-to-out swing path required for creating hook shots. Experiment with different ball positions to find the optimal position that enables you to consistently achieve the desired curving action on your shots.

Different Ball Positions for Different Curve Amounts

Adjusting the ball position within your stance can allow you to control the amount of curve on your hook shots. Moving the ball slightly back in your stance promotes a greater curve, while moving it slightly forward can reduce the amount of curve. By experimenting with various ball positions, you can fine-tune your hook shots and tailor them to different course situations and shot requirements.

Importance of Proper Alignment

Proper alignment is critical for executing consistent and accurate hook shots. When aligning yourself for a hook shot, adjust your aim to the right of the target (for right-handed golfers) or to the left of the target (for left-handed golfers). Aligning yourself in this manner compensates for the expected curvature of your hook shots, ensuring that the ball ends up on target. Practice alignment drills to develop a reliable and repeatable alignment routine that enhances your hook shot execution.

Aiming for a Specific Target with a Hook Shot

Despite the curvature of a hook shot, it is still possible to aim for a specific target. By adjusting your alignment and visualizing your desired curve, you can aim slightly left of your intended target (for right-handed golfers) or slightly right of your intended target (for left-handed golfers). This compensatory alignment allows you to effectively navigate the ball around obstacles and place it precisely on target. Practice aiming for specific targets with your hook shots to develop a consistent and accurate shot-making skill.

Slicing and Hooking Drills

Creating a Hook Towel Drill

A hook towel drill is an effective training aid for developing the necessary release and clubface rotation for hook shots. Start by securing a towel between your leading arm and your chest, ensuring it stays in place throughout your swing. Practice your swing, making a conscious effort to rotate the towel toward your body during the downswing and through impact. This drill promotes the correct hand and clubface movement required for executing accurate and controlled hook shots.

Exercises to Promote Clubface Rotation

Clubface rotation is a crucial element in executing hook shots effectively. To promote clubface rotation, incorporate exercises that focus on wrist flexibility and strength into your training routine. Wrist curls, wrist hinge drills, and forearm rotation exercises can all contribute to improving your ability to rotate the clubface effectively during the swing. Make these exercises a regular part of your training regimen to enhance your hook shot execution.

Working with Alignment Sticks

Alignment sticks are versatile training aids that can greatly assist in developing proper alignment and swing path for hook shots. Incorporate alignment sticks into your practice sessions by placing them along your target line and parallel to your stance. Use the sticks to guide your swing path along an inside-to-out trajectory, helping you generate the desired curvature on your hook shots. Regular practice with alignment sticks will cultivate an ingrained sense of correct swing path and improve your ability to consistently execute hook shots.

Utilizing Swing Path Aids

Various swing path aids are available to help golfers develop the desired inside-to-out swing path required for executing hook shots. These aids can include devices that attach to the clubhead and restrict the swing path to the correct plane, as well as alignment rods that guide the path of the club during practice swings. Incorporating swing path aids into your training routine can accelerate the learning process and help you refine your hook shot technique.

Troubleshooting and Common Mistakes

Identifying Hooks vs. Slice Shots

Knowing the difference between hook shots and slice shots is essential for troubleshooting and correcting your swing. A hook shot curves from right to left (for right-handed golfers) or from left to right (for left-handed golfers), while a slice shot curves in the opposite direction. By observing the flight path and direction of your shots, you can identify whether you are consistently executing hook shots or inadvertently slicing the ball. This awareness allows you to target specific areas of improvement and make the necessary adjustments to achieve your desired shot shape.

Common Mistakes in Grip and Stance

Mistakes in grip and stance can greatly impact the execution of hook shots. One common mistake is gripping the club too tight, which restricts proper wrist hinge and limits clubface control. Another mistake is aligning the feet, hips, and shoulders parallel to the target line instead of adjusting for the desired inside-to-out swing path. Correct these grip and stance errors by practicing a relaxed grip and ensuring proper alignment for hook shots. Paying attention to these fundamentals will contribute to improved shot accuracy and consistency.

Swing Path Errors and How to Correct Them

Errors in swing path can lead to inconsistent and unreliable hook shots. Common swing path errors include an outside-to-in path, resulting in a slice or a pull, or an excessively inside-to-out path, leading to a hook or a push. To correct swing path errors, practice drills that promote the desired inside-to-out swing path. Focus on maintaining a balanced and connected swing, visualize the correct swing path, and use alignment aids to guide your club along the proper trajectory.

Fixing Clubface Positioning Issues

Clubface positioning issues can significantly affect the outcome of hook shots. One common mistake is starting with a clubface that is too closed or too open at address. Ensure that the clubface is square to the target line at address, but slightly closed in relation to the swing path to create a hook shot. Engage your hands and wrists during impact to consistently square the clubface, minimizing the chances of unintentional slices or pulls. Regular practice and visualizing the correct clubface position will help you correct clubface positioning issues and execute precise hook shots.

Addressing Body Rotation Problems

Problems with body rotation can lead to inconsistent and less effective hook shots. One common problem is initiating the downswing with the upper body instead of the lower body, resulting in an incorrect swing path. To address body rotation problems, focus on initiating the downswing with a gradual shift of the lower body, followed by the rotation of the hips and shoulders. Engage in exercises that promote lower body stability and flexibility to develop a powerful and well-coordinated body rotation for optimal hook shot execution.

Mastering Hook Shots

Practice Makes Perfect

Mastering hook shots requires consistent practice and dedication. Regularly allocate time to hone your hook shot technique on the driving range and practice green. Focus on developing a repetitive and reliable swing motion, paying attention to grip, stance, swing path, clubface position, body rotation, weight transfer, ball position, and alignment. Consistent and deliberate practice will refine your skills and allow you to execute hook shots with confidence and accuracy on the golf course.

Developing Consistency in Hook Shots

Consistency is key when it comes to hook shots. Aim to develop a repeatable swing motion that consistently produces the desired curvature on your shots. Analyze your swing and shot results, paying attention to the various factors that contribute to successful hook shots. Make any necessary adjustments to your grip, stance, swing path, or clubface position to achieve a more consistent outcome. Regularly practice and reinforce your technique to enhance your ability to consistently execute hook shots under various course conditions.

Progressing from Short to Full Swings

Start by practicing hook shots with short irons and gradually progress to longer clubs. Mastering hook shots with shorter clubs allows you to focus on control and accuracy before gradually introducing longer clubs, which require more power and precision. By starting with short swings, you can develop a solid foundation and build confidence in your ability to execute hook shots effectively. As you become comfortable with hooking shorter shots, gradually increase the length of your backswing and incorporate longer clubs into your practice sessions.

Fine-Tuning Your Hook Shot

Fine-tuning your hook shot involves refining and adjusting various aspects of your swing technique. Pay attention to the feedback provided by each shot, noting any inconsistencies or tendencies. Make gradual modifications to your grip, stance, swing path, or clubface position to optimize your hook shot performance. Take advantage of video analysis or seek advice from a golf professional to gain further insights. With continued practice and a commitment to improvement, you can refine your hook shot technique and enhance your overall golf game.

Applying the Hook Shot on Different Course Situations

Using Hooks to Navigate Tight Fairways

Hook shots can be invaluable when navigating tight fairways with strategically placed hazards. By employing a controlled hook shot, you can shape the ball around trees, bunkers, or water hazards, effectively minimizing the risk of costly penalties. Consider the course layout, take note of potential obstacles, and strategize how to best utilize your hook shots to navigate challenging fairways successfully.

Creating Hook Shots on Dogleg Holes

Dogleg holes, characterized by a sharp turn or bend, require precise shot placement to optimize scoring opportunities. Mastering the art of hook shots provides an advantage when playing these types of holes. By executing a well-controlled hook shot, you can shape your shots to follow the contours of the fairway and position yourself favorably for the subsequent shot. Analyze the dogleg hole layout, determine the ideal shot shape, and practice incorporating hook shots into your game strategy.

Hook Shots for Approach and Recovery Shots

Hook shots can be a valuable tool for executing approach and recovery shots. When faced with a challenging lie or an unfavorable position, a hook shot can help you regain control and position the ball back on the intended target line. By visualizing the desired curve and employing the appropriate technique, you can strategically navigate your way to a favorable outcome, avoiding potential hazards and optimizing your chances of recovering from challenging situations.

Adapting Hook Shots to Wind Conditions

Wind conditions have a significant influence on ball flight, including the degree of curvature on hook shots. By understanding how wind affects the ball’s trajectory, you can leverage hook shots to counteract or utilize the wind’s impact. Adjusting your alignment, ball position, and swing path accordingly, you can manipulate the ball’s flight to maximize control and take advantage of favorable wind conditions. Adaptability is key when playing in different wind conditions, and mastering the hook shot technique empowers golfers to adapt and excel in varying wind scenarios.

Advanced Techniques and Variations

Fade Shots vs. Draw Shots

Fade shots and draw shots are variations of hook shots that offer golfers additional shot shape options. While a hook shot produces a right-to-left (for right-handed golfers) or left-to-right (for left-handed golfers) curve, a fade shot curves the opposite way, from left to right (for right-handed golfers) or from right to left (for left-handed golfers). Draw shots and fade shots can be valuable additions to your shot repertoire, allowing you to navigate course conditions, strategically position shots, and optimize your chances of success in various scenarios.

Manipulating Hook Shots for Different Curves

Mastering the art of manipulating hook shots allows you to produce shots with varying degrees of curve. By adjusting grip pressure, clubface position, or swing path, you can manipulate the amount of curvature on your hook shots. This versatility allows you to adapt to the specific requirements of each shot, tailor your approach to different course situations, and optimize your shot-making capabilities.

Combining Hook Shots with Other Shot Types

Golfers can further enhance their shot-making skills by combining hook shots with other shot types. By seamlessly transitioning from a straight shot to a hook shot or incorporating hook shots into fades or draws, you gain the ability to adjust to ever-changing course conditions and target placements. Expanding your shot repertoire and understanding how to effectively combine different shot types empowers you to make strategic decisions and execute shots that best suit the situation at hand.

Using Hook Shots for Special Shots

The versatility of hook shots opens up possibilities for special shots that can be game-changers. From shots around trees to approach shots with specific targets, hook shots provide a valuable asset when faced with challenging or unique circumstances on the golf course. By developing your mastery of hook shots, you gain the ability to improvise and execute shots that most effectively meet the demands of a particular situation. Embrace the opportunities that hook shots present and let your creativity and skill shine on the course.

In conclusion, the hook shot is a valuable technique that can greatly enhance a golfer’s game. By understanding the various elements that contribute to successful hook shots and diligently practicing the necessary skills, you can develop consistency, control, and accuracy in executing hook shots. Whether navigating tight fairways, countering wind conditions, or adapting to various shot requirements, the mastery of hook shots empowers golfers to strategically shape their shots and optimize their overall performance on the golf course. Embrace the challenge, commit to practice, and enjoy the rewards of mastering the art of hooking a golf ball.

What to Wear to Top Golf

Looking for what to wear to Top Golf? Dress comfortably and stylishly for an enjoyable outing. Find the perfect tops, bottoms, shoes, and accessories here!

Heading to Top Golf and wondering what to wear? Look no further! Dressing comfortably and stylishly is the key to an enjoyable and successful outing at this trendy golfing destination. Whether you’re a pro or a beginner, finding the right outfit can make all the difference in your performance and overall experience. So, get ready to swing your clubs and have a blast while looking fabulous!

What to Wear to Top Golf

Tops

When it comes to choosing the perfect top for your visit to Top Golf, you have plenty of options to suit your style and comfort. Here are some top choices that are suitable for the casual and sporty atmosphere at Top Golf.

Collared Shirts

A classic collared shirt is always a stylish choice for a day at Top Golf. Opt for a polo shirt or a button-down shirt in breathable fabrics such as cotton or linen. Collared shirts not only give you a polished look but also provide the perfect balance between casual and put-together.

Casual T-shirts

If you prefer a more relaxed and laid-back style, a casual t-shirt is a great option. Choose t-shirts in soft and comfortable materials like cotton or jersey. Graphic tees with fun prints or designs can add a touch of personality to your outfit. Pair them with jeans, shorts, or skirts for a casual and effortless look.

Sweaters or Sweatshirts

If you’re visiting Top Golf during the colder months or in a chilly indoor environment, consider layering with a cozy sweater or sweatshirt. Opt for lightweight options that allow flexibility while swinging the golf club. Choose versatile colors and styles that can easily be paired with your bottoms for a comfortable and stylish look.

Tank Tops

For those scorching summer days when you want maximum breathability, a tank top is a great choice. Opt for tank tops made of moisture-wicking fabrics to keep you cool and dry even while you’re engaging in active gameplay. Pair them with shorts or skirts for a sporty and comfortable outfit.

Bottoms

Choosing the right bottoms is essential for both style and comfort when you’re swinging a golf club at Top Golf. Here are some options to consider.

Shorts

Shorts are the go-to choice for warm weather and active gameplay. Opt for comfortable and lightweight shorts that allow freedom of movement. Look for materials like cotton or breathable synthetic blends. Consider different lengths and styles to find the one that suits your comfort level and personal style.

Pants

When cooler temperatures roll in, or if you simply prefer a more covered look, pants are a versatile choice. Opt for lightweight and stretchy pants to ensure ease of movement during your swing. You can choose from options like chinos, joggers, or golf pants. Pair them with collared shirts or t-shirts for a casual yet put-together look.

Skirts

If you prefer a feminine and sporty look, skirts can be a great option for your Top Golf outfit. Choose skirts made of flexible and breathable fabrics that allow for a full range of motion. Opt for mini or midi lengths, and pair them with a collared shirt or a casual tee for a stylish and comfortable ensemble.

Capris or Cropped Pants

Capris or cropped pants can be an excellent choice if you want some extra coverage while still maintaining mobility. Look for cropped pants made of stretchy materials that allow you to move freely. Pair them with any top of your choice and complete the look with sneakers or casual shoes.

Shoes

Footwear plays a crucial role in your overall comfort and performance at Top Golf. Here are some shoe options to consider for your visit.

Sneakers

Comfortable sneakers are a staple for any casual and active outing, and Top Golf is no exception. Opt for sneakers with cushioning and good arch support to ensure long-lasting comfort while you swing and play. Look for breathable materials and rubber soles for excellent grip.

Golf Shoes

If you are a dedicated golfer or want to enhance your performance, investing in golf shoes can be a game-changer. Golf shoes are designed to provide stability, traction, and support during your swing. Look for shoes with removable spikes or replaceable soft spikes to adapt to different playing conditions.

Casual Shoes

If you prefer a more relaxed and laid-back look, casual shoes are a great option. Opt for comfortable loafers, boat shoes, or slip-on sneakers that are easy to put on and take off. Look for shoes with cushioning and non-slip soles for added comfort and safety.

Closed-Toe Shoes

While Top Golf is a casual and fun environment, it’s essential to prioritize safety. Avoid open-toed shoes like flip-flops and sandals and opt for closed-toe shoes instead. Closed-toe shoes provide protection for your feet while still allowing you to move comfortably and freely.

What to Wear to Top Golf

Outerwear

Depending on the weather or personal preference, you might want to consider layering with some outerwear options for your visit to Top Golf.

Jackets

If you’re visiting Top Golf during colder seasons or in an air-conditioned indoor area, a lightweight jacket is a practical and stylish choice. Opt for a jacket made of breathable materials that provide warmth without weighing you down. Choose versatile styles and colors that can easily be paired with your tops and bottoms.

Hoodies

A hoodie is a versatile and comfortable outerwear option for a casual and relaxed look at Top Golf. Choose a hoodie made of soft and cozy materials like cotton or fleece. Opt for neutral or bold colors that match your personal style and pair it with your favorite t-shirt or tank top.

Vests

Vests are a great option if you want to add warmth without feeling restricted in your movements. Opt for lightweight and insulated vests that provide insulation while still allowing you to swing and play comfortably. Layer them over collared shirts or sweaters for a stylish and practical outfit.

Cardigans

Cardigans are a fantastic layering piece for a more sophisticated and put-together look at Top Golf. Opt for lightweight cardigans made of breathable materials like cotton or linen. Choose neutral or vibrant colors that complement your outfit and pair them with collared shirts or dresses for a chic ensemble.

Accessories

Enhance your Top Golf outfit with some stylish and functional accessories. Here are some options to consider.

Hats or Caps

Protect yourself from the sun and add a touch of style to your outfit with hats or caps. Opt for wide-brimmed hats, baseball caps, or visors made of breathable materials like straw or cotton. Choose designs or colors that express your personality and provide shade for your face.

Sunglasses

Don’t forget to protect your eyes from the sun’s glare while enjoying a day at Top Golf. Invest in a good pair of sunglasses with UV protection. Choose sunglasses that suit your face shape and personal style to add a fashionable touch to your outfit.

Belts

Belts not only serve a functional purpose but also add a polished finish to your outfit. Opt for belts made of high-quality materials like leather or canvas. Choose neutral colors that can easily match with different pants or skirts. A well-fitted belt can enhance your overall look and keep your bottoms in place while you swing.

Gloves

If you’re an avid golfer or want to improve your grip, consider wearing golf gloves. Golf gloves provide better traction and help prevent blisters while swinging the club. Look for gloves made of breathable and flexible materials that offer a secure fit. Choose gloves that match your personal style and provide comfort throughout your game.

Dress Code Considerations

When preparing your outfit for Top Golf, there are several considerations to keep in mind to ensure you meet the dress code and remain comfortable throughout your visit.

Checking the Top Golf Dress Code

Before you head to Top Golf, it’s essential to check their dress code guidelines. While most Top Golf locations have a relaxed and casual dress code, some may have specific rules regarding attire. Make sure to review their website or contact the venue directly to ensure your outfit adheres to their dress code policy.

Considering Weather Conditions

Take into account the current weather conditions when selecting your Top Golf outfit. If it’s a hot and sunny day, choose lightweight and breathable fabrics that keep you cool. In colder weather, layering with jackets or sweaters ensures you stay comfortable throughout your visit.

Considering Your Comfort

Comfort should be a top priority when choosing your Top Golf outfit. Opt for clothes that allow freedom of movement and don’t restrict your swing. Choose materials that are breathable and moisture-wicking to keep you comfortable even during more active gameplay.

Considering Activities at Top Golf

Think about the activities you plan to engage in during your visit to Top Golf. If you’re focused on playing golf and improving your swing, prioritize clothing that enhances your performance. However, if you’re primarily there for a casual outing with friends, feel free to choose a more stylish and laid-back outfit.

Avoid These

To ensure a pleasant experience at Top Golf, there are a few items of clothing to avoid wearing.

Flip Flops

While flip flops may be comfortable for a day at the beach, they are not suitable for the active gameplay at Top Golf. Opt for closed-toe shoes that provide better support, protection, and stability.

High Heels

High heels may be fashionable, but they are impractical and potentially unsafe for Top Golf. Avoid wearing high heels as they can hinder your movement and make it difficult to swing the golf club comfortably.

Formal Wear

Top Golf has a casual and sporty atmosphere, so formal wear is generally not appropriate. Save your elegant dresses and suits for other occasions. Instead, opt for comfortable and casual attire that allows you to move freely.

Athletic Attire

While Top Golf involves playing golf, it’s not necessary to wear head-to-toe athletic attire. Leave the full sports gear for the golf course and opt for casual and comfortable clothing that reflects your personal style.

Dressing for Different Occasions

Depending on the occasion or purpose of your visit to Top Golf, you can tailor your outfit accordingly. Here are some outfit ideas for different occasions.

Casual Outing with Friends

For a casual outing with friends at Top Golf, prioritize comfort and style. Choose a casual t-shirt or tank top paired with shorts or jeans. Complete the look with comfortable sneakers or casual shoes. Add some accessories like a baseball cap or sunglasses for a relaxed and cool vibe.

Team Building Event

If you’re attending a team-building event at Top Golf, consider dressing slightly more polished while still maintaining comfort. Opt for a collared shirt paired with chinos or cropped pants. Finish off the look with closed-toe shoes or golf shoes for added style and functionality.

Special Occasions

If you’re celebrating a special occasion at Top Golf, embrace a more elevated and stylish ensemble. Opt for a dress or a skirt paired with a refined top. Complete your outfit with heels or dressy flats, and accessorize with statement jewelry or a clutch.

Date Night

Planning a date night at Top Golf? Dress to impress while keeping in mind the casual atmosphere. Opt for a stylish blouse or a fitted t-shirt paired with jeans or a skirt. Choose footwear that combines style and comfort, such as wedges or fashion sneakers. Add a touch of glam with some statement earrings or a stylish belt.

Style Tips

To ensure you look and feel your best at Top Golf, consider these style tips when putting together your outfit.

Layering

Layering is not only functional but also adds dimension and style to your outfit. Experiment with layering different tops, jackets, or cardigans to create a versatile and put-together look. Layering allows you to adjust your outfit according to the weather or changing activities at Top Golf.

Comfortable and Flexible Fabrics

When choosing your Top Golf attire, prioritize comfortable and flexible fabrics. Opt for materials like cotton, linen, or stretchy blends that allow for a full range of motion. It’s essential to wear clothes that you feel comfortable in, as it directly impacts your performance and enjoyment.

Staying True to Your Personal Style

While Top Golf has a casual atmosphere, don’t be afraid to let your personal style shine through. Choose clothes that reflect your personality and make you feel confident. Whether you prefer classic, sporty, or trendy looks, there are plenty of options to express your unique style at Top Golf.

Accessorizing

Accessorizing can elevate any outfit and add that extra touch of style. Choose accessories like belts, hats or caps, sunglasses, or jewelry to enhance your Top Golf ensemble. Accessories not only complement your outfit but also provide practical functionality, such as protecting you from the sun or keeping your bottoms in place.

Conclusion

With the right combination of tops, bottoms, shoes, outerwear, and accessories, you can create a stylish and comfortable outfit for your visit to Top Golf. Remember to prioritize your comfort, consider the dress code, and adapt your clothing choices to the weather and activities at hand. Whether you’re swinging a golf club, having a casual outing with friends, or attending a special occasion, there are plenty of options to help you look and feel your best at Top Golf. So dress up, have fun, and enjoy your time at this exciting and social golfing experience!

The Ultimate Guide to Extending Golf Clubs

The Ultimate Guide to Extending Golf Clubs – Improve your swing and performance on the green. Find all the information you need to extend golf clubs and enhance your game.

Are you looking to improve your golf game by adjusting your club length? Look no further! In “The Ultimate Guide to Extending Golf Clubs,” you’ll find all the essential information on how to extend golf clubs and enhance your swing. Whether you’re a beginner or an experienced golfer, this comprehensive guide will walk you through the steps to easily modify your clubs to fit your unique needs and maximize your performance on the green. Get ready to take your golfing skills to new heights with this ultimate resource!

The Ultimate Guide to Extending Golf Clubs

Why Extend Golf Clubs

Golf clubs are an essential tool for golfers of all skill levels. However, sometimes the standard club length may not be the ideal fit for every player. This is where the option to extend golf clubs becomes particularly useful. By extending your golf clubs, you can enhance your game, achieve more consistent swings, and potentially improve your overall performance on the course.

Advantages of Extending Golf Clubs

  1. Improved posture and alignment: When your clubs are properly extended to match your height and stance, you’ll have a more natural and comfortable posture. This can lead to better alignment with the target and ultimately result in more accurate shots.

  2. Increased club control: Extending your clubs enables you to have a better grip and control over the clubhead. This can enhance your ability to manipulate the club during the swing, leading to increased swing consistency and shot control.

  3. Greater distance and power: When your clubs are extended to the appropriate length, you can generate more power and clubhead speed. This can result in longer shots and improved distance on the course.

  4. Enhanced accuracy: With properly extended clubs, your swing mechanics can be optimized, allowing for better accuracy in both direction and trajectory. This can help you hit more shots on target and avoid errant shots.

Common Reasons for Extending Golf Clubs

  1. Height: Players who are taller or shorter than average may find that standard club lengths are not suitable for their body proportions. Extending clubs can ensure that the player’s arms are properly positioned and the clubhead is in the optimal position at impact.

  2. Comfort and posture: Everyone has individual preferences when it comes to grip size, club length, and overall feel. Extending clubs can help find a comfortable fit that promotes proper posture, reducing the risk of injury and increasing enjoyment on the golf course.

  3. Flexibility and swing characteristics: Golfers with unique swing characteristics, such as a particularly upright or flat swing plane, may benefit from club extensions. Adjusting the club length can help compensate for these swing tendencies and improve swing mechanics.

  4. Age and physical limitations: As we age, flexibility and mobility can decline, affecting our swing mechanics. By extending clubs and adjusting the fit, older golfers, or those with physical limitations, can still enjoy the game and maintain a consistent swing.

Considerations before Extending Golf Clubs

Assessing your Swing

Before deciding to extend your golf clubs, it is crucial to assess your swing. Pay attention to your swing speed, swing plane, and any consistency issues you may have. Understanding your swing characteristics will help you determine the appropriate adjustments needed for your clubs.

Consulting with a Professional

To ensure optimal results, it is recommended to consult with a professional club fitter or golf instructor. They have the expertise to assess your swing and recommend the best options for extending your clubs. They can also provide valuable insights into other aspects of your game that can improve alongside the club extension.

Understanding Club Specifications

Before making any modifications to your golf clubs, it is essential to understand the specifications of your current equipment. The standard length for most clubs varies depending on the manufacturer and club type. Knowing the standard length of your clubs will help you determine the extension required accurately.

The Ultimate Guide to Extending Golf Clubs

Methods to Extend Golf Clubs

There are several methods available for extending golf clubs, each with its benefits and considerations. The methods include grip extension, shaft extension, adapter installation, and purchasing longer clubs.

Grip Extension

What is Grip Extension?

Grip extension involves adding length to the grip end of the club without altering the shaft or clubhead. This method is relatively simple and cost-effective, making it an excellent option for those looking to extend their clubs without significant modifications.

How to Extend Grips on Golf Clubs

To extend grips on golf clubs, follow these steps:

  1. Determine the desired amount of extension: Measure the additional length you require, taking into account your height, swing characteristics, and comfort preferences.

  2. Remove the existing grip: Use a grip removal tool or a utility knife to carefully remove the grip from the club.

  3. Prepare the club shaft: Clean the shaft to remove any residue or adhesive left from the old grip.

  4. Apply grip tape: Wrap the shaft with double-sided grip tape, leaving enough space at the end for the new grip to be installed.

  5. Install the new grip: Apply grip solvent to the tape and the inside of the new grip. Slide the grip onto the shaft, aligning it with the desired position.

  6. Allow the grip to dry: Give the grip ample time to dry and secure itself to the club before using the club.

Pros and Cons of Grip Extension

Pros:

  • Cost-effective method
  • Quick and easy to apply
  • Does not require altering the clubhead or shaft

Cons:

  • May slightly alter the swing weight of the club
  • Grip extension alone may not address other fitting issues
  • Limited extension options, as excessive extension may result in grip and swing weight imbalances

Shaft Extension

What is Shaft Extension?

Shaft extension involves lengthening the shaft of a golf club to achieve the desired playing length. This method is suitable for players who require a more significant extension than what grip extension can provide. It allows for a seamless integration of the new length into the club while maintaining proper balance.

Different Types of Shaft Extensions

There are two primary types of shaft extensions:

  1. Metal shaft extensions: These extensions are made of lightweight metal and are inserted into the existing club shaft. They are usually secured with epoxy and provide a reliable extension solution.

  2. Composite or graphite extensions: These extensions are typically made of the same material as the club’s shaft, ensuring a consistent feel throughout the club. They are designed to fit precisely into the shaft and are secured with epoxy.

Steps to Extend Golf Club Shafts

To extend the shaft of a golf club, follow these steps:

  1. Determine the desired amount of extension: Similar to grip extension, determine the additional length you need based on your swing characteristics and preferences.

  2. Remove the clubhead: Using a clubhead removal tool, detach the clubhead from the shaft carefully.

  3. Prepare the club shaft: Clean the area where the extension will be inserted to ensure a proper bond.

  4. Insert the shaft extension: Apply epoxy to the inside of the club shaft and the extension. Insert the extension into the shaft, ensuring it is aligned correctly.

  5. Secure the extension: Allow the epoxy to cure as per the manufacturer’s instructions to achieve a strong bond.

  6. Trim the extension (if necessary): If the extension protrudes beyond the desired length, use a saw or a cutting tool to trim it down to the desired length.

  7. Re-attach the clubhead: Apply epoxy to the tip of the extension and re-attach the clubhead, aligning it properly with the shaft.

  8. Allow the epoxy to cure: Let the epoxy cure fully before using the club.

Advantages and Disadvantages of Shaft Extension

Pros:

  • Provides a more seamless extension compared to grip extension
  • Preserves swing weight and club characteristics
  • Suitable for players requiring more significant extensions

Cons:

  • Requires specialized tools and knowledge for proper installation
  • More time-consuming and complex compared to grip extension
  • May result in a slightly stiffer shaft due to increased length

Adapter Installation

What are Adapters?

Adapters, also known as ferrules, are small metal or plastic pieces that connect the clubhead to the shaft. They provide a convenient way to adjust the club’s playing length without significantly altering the existing shaft or clubhead. Adapters are commonly used in adjustable drivers and fairway woods.

How to Install Adapters for Golf Clubs

To install adapters for golf clubs, follow these steps:

  1. Determine the desired playing length: Just like the previous methods, determine the extension required based on your needs and preferences.

  2. Remove the existing adapter (if any): If your club already has an adapter, use a wrench or specialized tool to remove it, following the manufacturer’s instructions.

  3. Prepare the shaft: Clean the shaft where the adapter will be installed to ensure a proper fit.

  4. Apply epoxy (if necessary): Depending on the design of the adapter, you may need to apply epoxy to the inside of the adapter or the shaft to achieve a secure bond.

  5. Insert and align the adapter: Carefully slide the adapter onto the shaft, ensuring alignment with the desired playing length. Rotate the adapter if necessary to achieve the desired loft or lie adjustments.

  6. Secure the adapter: Follow the manufacturer’s instructions to tighten the adapter securely onto the shaft.

  7. Re-attach the clubhead (if necessary): Some adapters allow for easy detachment and re-attachment of the clubhead. If necessary, re-attach the clubhead, ensuring proper alignment with the adapter.

Benefits and Considerations of Adapter Installation

Benefits:

  • Provides a flexible and adjustable option for achieving the desired playing length
  • Allows for loft and lie adjustments in addition to length modifications
  • Preserves the original shaft characteristics and swing weight

Considerations:

  • Requires proper alignment and tightening to ensure stability and durability
  • Limited extension range depending on the design of the adapter
  • Additional moving parts may introduce more potential points of failure

Purchasing Longer Clubs

Choosing the Right Club Length

If you prefer a more straightforward and hassle-free approach, you can consider purchasing longer clubs that are already designed to accommodate various player heights. Many golf manufacturers offer clubs in different lengths to cater to individuals with varying height ranges. When selecting longer clubs, it is essential to try them out and ensure they suit your swing and playing style.

Factors to Consider when Buying Longer Clubs

When buying longer clubs, consider the following factors:

  1. Club selection: Determine the specific clubs that need to be longer, such as drivers, irons, or wedges. Focus on the clubs that will have the most significant impact on your game.

  2. Club fitting: Consult with a professional club fitter to ensure the longer clubs are properly fitted to your swing characteristics. They can help determine the appropriate lie angle, shaft flex, and clubhead design for optimal performance.

  3. Cost implications: Purchasing a complete new set of longer clubs can be a significant investment. Consider the cost implications and weigh them against the other extension methods available.

Testing and Fitting Longer Clubs

Before making a final decision on purchasing longer clubs, it is crucial to test and fit them appropriately. Visit a fitting center or schedule a club fitting session with a professional to ensure the selected clubs provide the desired playing experience. Testing different models and lengths will help you identify the best fit and ultimately enhance your overall performance on the course.

Adjusting Club Weight and Swing Weight

Understanding Weight Distribution in Clubs

Adjusting club weight is another aspect to consider when extending golf clubs. Each golf club has a specific weight distribution designed to optimize performance. When extending the length of a club, the overall weight and swing weight may be affected, potentially influencing the feel and performance of the club.

Ways to Adjust Club Weight

To adjust the club weight and swing weight after extending clubs, consider the following options:

  1. Adding weight to the clubhead: If the club feels too light after extension, adding weight to the clubhead can help restore the desired feel and swing weight. This can be achieved by using lead tape or purchasing clubhead weights designed for this purpose.

  2. Adjusting the grip weight: Grips come in different weights, and selecting a slightly heavier grip can help offset the change in balance caused by extending the club. It is important to note that grip weight adjustments may have a minimal impact on the swing weight.

Effect of Weight Adjustments on Swing

Proper weight distribution and swing weight are crucial for maintaining a consistent swing. When adjusting the weight of extended clubs, it is essential to find the right balance that optimizes your swing mechanics. Experimenting with different weight configurations and seeking professional advice can help you achieve the desired feel and performance on the course.

Potential Challenges and Solutions

Issues that may arise when Extending Golf Clubs

While extending golf clubs can provide numerous benefits, there are some potential challenges that you may encounter during the process:

  1. Altered swing weight: Extending the length of a club may result in a change in the swing weight, potentially affecting the feel and balance of the club during the swing.

  2. Potential shaft stiffness: Lengthening the shaft can lead to a slight increase in stiffness, as the overall length affects the properties of the shaft. This may affect the feel and feedback during the swing.

  3. Expense: Depending on the method chosen, extending golf clubs can be a costly investment, especially if purchasing longer clubs or seeking professional modifications.

Troubleshooting Tips and Solutions

To address these potential challenges, consider the following troubleshooting tips:

  1. Consult a professional club fitter or golf instructor to ensure the extension process is done correctly and to receive expert advice on managing swing weight and shaft stiffness.

  2. Experiment with different grip sizes and weights to optimize the feel of the club and counterbalance any changes caused by extending the shaft.

  3. Regularly assess and adjust your swing mechanics to adapt to the modified clubs and ensure optimal performance.

Conclusion

In conclusion, extending golf clubs can be a valuable solution for golfers looking to improve their game by achieving a more customized fit. Whether through grip extension, shaft extension, adapter installation, or purchasing longer clubs, there are various methods available to accommodate different player heights, preferences, and swing characteristics.

Before embarking on any extension method, it is crucial to assess your swing, consult with professionals, and understand the specifications of your current clubs. This will ensure you make informed decisions and achieve the desired improvements in posture, alignment, control, distance, and accuracy.

Additionally, considering weight adjustments and understanding potential challenges can further optimize the extended clubs to fit your unique needs. By taking the time to explore the options and seek guidance from experts, you can enhance your golfing experience and potentially elevate your performance on the course. So, go ahead and unlock your full potential by extending your golf clubs and enjoying the game even more!

Measuring the Length of a Golf Club

Discover the importance of measuring the length of a golf club and how it affects your swing. Learn the methods and tools for accurate measurement.

So you’ve picked up a golf club and you’re eager to improve your game – but before you start swinging away, it’s important to understand the importance of measuring the length of a golf club. The length of a golf club can greatly affect your swing and overall performance on the course, so it’s crucial to find the right fit for you. In this article, we will explore the various methods and tools used to measure the length of a golf club, allowing you to make informed decisions that will help elevate your game to new heights.

Measuring the Length of a Golf Club

1. Understanding Golf Club Length

Golf club length plays a crucial role in your game. The length of your golf clubs directly affects your swing, accuracy, and overall performance on the course. By understanding the importance of golf club length and how it influences your swing, you can make informed decisions when choosing or adjusting your clubs.

1.1 The Importance of Golf Club Length

The length of your golf clubs significantly impacts your swing mechanics. If your clubs are too long or too short, it can throw off your balance and timing, leading to inconsistent results. Properly fitted clubs that are the right length for your height, arm length, and swing style will help you achieve a more efficient and effective swing.

1.2 Effect of Club Length on Swing

The length of a golf club affects multiple aspects of your swing. A club that is too long can cause you to stand too upright or reach too far for the ball, resulting in a loss of control and accuracy. Conversely, a club that is too short can cause you to hunch over, leading to a restricted swing and decreased power.

In addition to affecting your posture, club length also affects the plane of your swing. The longer the shaft, the wider the swing arc, while a shorter club creates a narrower swing arc. Finding the optimal club length that allows you to swing comfortably and maintain proper mechanics is crucial for consistent ball striking.

1.3 Standard Lengths for Golf Clubs

Golf clubs come in various lengths to accommodate different players’ heights and swing characteristics. The standard length for drivers typically ranges from 43 to 46 inches, while the standard length for irons varies from 36 to 40 inches. Putter lengths can range from 32 to 36 inches, and fairway woods and hybrids generally fall between driver and iron lengths.

It’s important to note that these standard lengths may not be ideal for every golfer. Factors such as height, arm length, and personal swing preferences should be considered when determining the appropriate club length for an individual player.

2. Measuring Golf Club Length

Accurately measuring the length of your golf clubs is essential for determining if they are suitable for your swing. By following the proper measurement techniques, you can ensure that your clubs are the right length for optimal performance.

2.1 Tools and Equipment Needed

To measure your golf club length accurately, you’ll need a few tools and equipment:

  • A measuring tape or a golf club length ruler
  • A flat surface, such as a table or workbench
  • A straightedge or alignment tool
  • A marker or piece of masking tape

2.2 Measuring the Club Length

To measure the length of a golf club, follow these steps:

  1. Place the golf club on a flat surface, aligning the sole of the clubhead against the straightedge or alignment tool.
  2. Extend the measuring tape or golf club length ruler along the shaft of the club, starting from the heel or hosel to the end of the grip.
  3. Ensure the measuring tape is straight and not curved or tilted.
  4. Take note of the measurement at the end of the grip.

Repeat this process for each club you wish to measure, starting from the driver down to the putter.

2.3 Determining Ideal Club Length

Once you have measured the length of your clubs, you can compare them to the standard lengths or consult with a professional club fitter. Remember that your ideal club length may vary based on your height, arm length, and swing characteristics. Working with a club fitting expert can help you determine if any adjustments or customizations are necessary to achieve the optimal club length for your game.

3. Measuring Driver Length

The length of your driver has a significant impact on your tee shots. By measuring and understanding the specifications of your driver length, you can make informed decisions about your equipment and enhance your driving performance.

3.1 Driver Length Specifications

The standard length for drivers typically ranges from 43 to 46 inches. However, there is no one-size-fits-all solution when it comes to driver length. Factors such as your height, swing style, and playing ability should all be considered when determining the ideal length for your driver.

3.2 Steps to Measure Driver Length

To measure the length of your driver accurately, follow these steps:

  1. Place the driver on a flat surface, aligning the sole of the clubhead against the straightedge or alignment tool.
  2. Extend the measuring tape or golf club length ruler along the shaft of the driver, starting from the heel or hosel to the end of the grip.
  3. Ensure the measuring tape is straight and not curved or tilted.
  4. Take note of the measurement at the end of the grip.

3.3 Importance of Proper Driver Length

Having a properly fitted driver length can greatly impact your driving performance. A driver that is too long may lead to inconsistencies in your swing, making it difficult to find the sweet spot consistently. On the other hand, a driver that is too short may restrict your range of motion and limit your distance off the tee.

By measuring and adjusting your driver length as needed, you can find the optimal balance between control and distance, allowing you to maximize your potential off the tee.

Measuring the Length of a Golf Club

4. Measuring Iron Length

The length of your irons is crucial for consistent ball striking and accuracy. By understanding how to measure the length of your irons and its impact on your game, you can make informed decisions when selecting or customizing your iron set.

4.1 Iron Length Specifications

The standard length for irons varies from 36 to 40 inches. However, just like other clubs, the ideal length for your irons can vary based on personal factors like height, swing style, and playing ability.

4.2 Steps to Measure Iron Length

To measure the length of your irons accurately, follow these steps:

  1. Place the iron on a flat surface, aligning the sole of the clubhead against the straightedge or alignment tool.
  2. Extend the measuring tape or golf club length ruler along the shaft of the iron, starting from the heel or hosel to the end of the grip.
  3. Ensure the measuring tape is straight and not curved or tilted.
  4. Take note of the measurement at the end of the grip.

Repeat this process for each iron in your set.

4.3 Impact of Iron Length on Performance

The length of your irons significantly affects your swing mechanics and ball striking. Irons that are too long or too short can lead to inconsistencies in your swing plane and timing, resulting in mishits and loss of accuracy.

By measuring and ensuring the appropriate length for your irons, you can promote consistent ball striking, achieve better distance control, and enhance your overall performance with your iron shots.

5. Measuring Putter Length

The length of your putter is a critical element in your putting stroke. By understanding the specifications and measuring the length of your putter, you can optimize the performance of this crucial club on the greens.

5.1 Putter Length Specifications

Putter lengths can range from 32 to 36 inches. However, selecting the right putter length is not solely determined by standard measurements. Factors such as your putting stroke style, posture, and personal preference should be considered when determining the appropriate putter length for you.

5.2 Steps to Measure Putter Length

To measure the length of your putter accurately, follow these steps:

  1. Place the putter on a flat surface, aligning the sole of the putter head against the straightedge or alignment tool.
  2. Extend the measuring tape or golf club length ruler along the shaft of the putter, starting from the heel or hosel to the end of the grip.
  3. Ensure the measuring tape is straight and not curved or tilted.
  4. Take note of the measurement at the end of the grip.

5.3 Role of Putter Length in Putting Stroke

Having the correct length for your putter is crucial for a consistent and efficient putting stroke. A putter that is too long may cause you to choke down on the grip, altering your putting technique and decreasing your control. Conversely, a putter that is too short may cause you to hunch over excessively, resulting in an uncomfortable and restricted stroke.

By measuring your putter length and making any necessary adjustments, you can find the optimal length that allows for proper posture, alignment, and a smooth putting stroke.

6. Measuring Fairway Wood Length

The length of your fairway woods can affect your swing mechanics and ball flight. By measuring and understanding the specifications of your fairway wood length, you can make informed decisions about your equipment and optimize your performance on the fairways.

6.1 Fairway Wood Length Specifications

Fairway wood lengths generally fall between driver and iron lengths. Standard fairway wood lengths can vary depending on the manufacturer and model. The typical range for fairway woods is from 41 to 43 inches.

6.2 Steps to Measure Fairway Wood Length

To measure the length of your fairway wood accurately, follow these steps:

  1. Place the fairway wood on a flat surface, aligning the sole of the clubhead against the straightedge or alignment tool.
  2. Extend the measuring tape or golf club length ruler along the shaft of the fairway wood, starting from the heel or hosel to the end of the grip.
  3. Ensure the measuring tape is straight and not curved or tilted.
  4. Take note of the measurement at the end of the grip.

6.3 How Length Affects Fairway Wood Shots

Proper fairway wood length affects your ability to make a consistent and solid contact with the ball. A fairway wood that is too long or too short can make it challenging to strike the ball cleanly and increase the risk of mishits.

By measuring and adjusting the length of your fairway woods as needed, you can improve your swing mechanics, optimize your launch conditions, and enhance your overall performance with fairway wood shots.

7. Measuring Hybrid Length

The length of your hybrids can impact your shot-making abilities from various lies and distances. By understanding the specifications and measuring the length of your hybrids, you can fine-tune this versatile club and optimize your performance on the course.

7.1 Hybrid Length Specifications

Hybrid lengths typically fall between the lengths of fairway woods and irons. The standard length for hybrids can vary based on the manufacturer and model, ranging from 38 to 41 inches.

7.2 Steps to Measure Hybrid Length

To measure the length of your hybrid accurately, follow these steps:

  1. Place the hybrid on a flat surface, aligning the sole of the clubhead against the straightedge or alignment tool.
  2. Extend the measuring tape or golf club length ruler along the shaft of the hybrid, starting from the heel or hosel to the end of the grip.
  3. Ensure the measuring tape is straight and not curved or tilted.
  4. Take note of the measurement at the end of the grip.

7.3 Influence of Hybrid Length on Game

Selecting the proper hybrid length is crucial for versatile shot-making and consistency. A hybrid that is too long can be difficult to control, especially from tight lies or challenging situations. Conversely, a hybrid that is too short may limit your swing speed and distance potential.

By measuring and ensuring the appropriate length for your hybrids, you can optimize your shot-making abilities, fill the distance gaps in your bag effectively, and elevate the versatility of this valuable club.

8. Adjusting Club Length

Adjusting the length of your golf clubs is sometimes necessary to achieve the optimal fit for your swing. By understanding why adjusting club length is important and the methods to make adjustments, you can fine-tune your equipment for improved performance.

8.1 Why Adjusting Club Length is Necessary

Everyone has unique physical characteristics, swing styles, and preferences. Off-the-shelf clubs may not always provide the ideal fit for an individual player. Adjusting club length allows you to customize your clubs to match your specific needs, optimizing control, accuracy, and distance.

8.2 Methods to Adjust Club Length

There are several methods to adjust club length, including:

  1. Re-gripping: By adding or removing grip tape, you can slightly adjust the effective length of a golf club without altering the shaft itself.
  2. Extending or cutting the shaft: Adding or trimming the length of the shaft is a more significant adjustment that should only be performed by a professional club fitter. This method allows for precise customization of club length.
  3. Using adjustable clubs: Many modern clubs come with adjustable features that allow players to modify the length within a certain range. These clubs offer flexibility and convenience for players who prefer to make changes themselves.

8.3 Professional Club Fitting Services

For the most accurate and customized adjustments to your club length, it is recommended to seek the expertise of a professional club fitter. A club fitting session can provide valuable insights into your swing characteristics and help identify the ideal club length to maximize your potential on the course. Professional club fitters have the knowledge, experience, and equipment to make precise adjustments to your clubs for an optimized fit.

9. Common Mistakes in Measuring Club Length

Measuring club length accurately is essential to ensure proper club fitting. However, there are common mistakes that you should avoid when measuring club length to obtain the most accurate results.

9.1 Using Incorrect Reference Points

Using the wrong reference points when measuring club length can lead to inaccurate measurements. It is crucial to align the sole of the clubhead against a straightedge or alignment tool consistently to obtain reliable measurements.

9.2 Neglecting Grip Length in Measurement

When measuring club length, it is important to include the grip in the measurement. Neglecting to measure the grip length can lead to an incomplete measurement, resulting in inaccurate club length readings.

9.3 Ignoring Swing Characteristics

Measuring club length is not the only factor in determining the optimal fit for your swing. It is equally important to consider your swing characteristics, playing style, and preferences. These factors can influence the ideal club length for you and should be taken into account in addition to the measurements.

10. Conclusion

Understanding and measuring golf club length is crucial for achieving optimal performance on the course. The length of your clubs directly affects your swing mechanics, accuracy, and overall consistency. By following the techniques outlined in this article and considering the importance of club length in each type of club, you can enhance your game and find the perfect fit for your golf clubs. Remember, if you require more precise and tailored adjustments, consulting a professional club fitter will ensure that your clubs are customized to your unique swing characteristics and preferences.

Tips for Maintaining Golf Cart Batteries

Discover essential tips for maintaining golf cart batteries. Learn about proper charging, cleaning, inspecting, storing, disposing, watering, driving, and winter care.

Golf carts are a convenient and eco-friendly mode of transportation on the golf course, and taking proper care of their batteries is essential for optimal performance. In this article, we will guide you through some helpful tips on how to maintain your golf cart batteries, ensuring they stay charged and ready for your next round of golf. So, grab your iced tea, sit back, and let’s dive into the world of golf cart battery maintenance together!

Tips for Maintaining Golf Cart Batteries

1. Charging

When it comes to maintaining your golf cart batteries, proper charging is a crucial aspect. It ensures that your batteries perform optimally and have a long lifespan. Here are some tips to follow:

1.1 Regular charging

Make it a habit to charge your golf cart batteries regularly. After each use, plug in your charger and let it fully charge overnight. This will help prevent the batteries from discharging too much, which can lead to damage.

1.2 Avoid deep discharges

Deep discharges can be harmful to your batteries and significantly reduce their lifespan. Try to avoid allowing your batteries to discharge below 50% before recharging them. Regular charging will help in this regard as well.

1.3 Use the right charger

Using the right charger for your golf cart batteries is crucial. Ensure that the charger is compatible with your batteries and follows the manufacturer’s guidelines. Using the wrong charger can result in overcharging or undercharging, which can be detrimental to the batteries’ health.

1.4 Charge fully and avoid overcharging

It is essential to let your batteries charge fully before using them again. Avoid interrupting the charging process prematurely, as it can lead to incomplete charging cycles and reduced battery capacity. Similarly, overcharging your batteries can also be harmful. Once your batteries are fully charged, unplug the charger to prevent overcharging.

2. Cleaning

Regular cleaning of your golf cart batteries is essential to maintain their performance and prolong their lifespan. Follow these tips to keep your batteries clean and in top condition:

2.1 Regular cleaning

Make it a habit to clean your batteries regularly. Wipe away any dust, dirt, or debris that may have accumulated on the battery casing. This will prevent the buildup of grime, which can cause corrosion and hamper the battery’s performance.

2.2 Use water and mild detergent

When cleaning your golf cart batteries, use a mixture of water and mild detergent. Dip a soft cloth or sponge into the solution and gently scrub the battery casing to remove any stubborn dirt or stains. Avoid using harsh chemicals or abrasive materials that can damage the battery.

2.3 Dry thoroughly before use

After cleaning your batteries, ensure that they are thoroughly dried before using them again. Any leftover moisture can cause corrosion or damage to the battery terminals. Use a clean cloth to wipe away any remaining moisture and let the batteries air dry completely.

2.4 Prevent corrosion

Corrosion is one of the biggest enemies of golf cart batteries. To prevent corrosion, apply a thin layer of petroleum jelly or battery terminal protectant to the battery terminals after cleaning. This will create a barrier against moisture and minimize the risk of corrosion.

3. Inspecting

Regular inspection of your golf cart batteries is essential to identify any potential issues and address them promptly. Follow these tips to ensure that your batteries are in good condition:

3.1 Regular inspection

Set aside some time to inspect your golf cart batteries regularly. Look for any signs of damage, such as cracks, bulges, or leaks. Inspecting your batteries regularly will help you catch potential problems early on and prevent further damage.

3.2 Check for damages

During your inspection, pay close attention to the battery casing. Look for any visible damages or signs of wear and tear. If you notice any cracks or bulges, it might be an indication of internal damage, and the battery may need to be replaced.

3.3 Inspect for loose connections

Loose connections can impact the performance of your batteries and lead to poor electrical conductivity. Check the battery terminals and cables for any signs of loose connections. Tighten them if necessary to ensure a secure and reliable electrical connection.

3.4 Look out for leaks

Battery leaks can be a sign of internal damage and should be addressed immediately. Inspect your batteries for any signs of fluid leakage, such as wet spots or a pungent odor. If you notice any leaks, it is best to consult a professional and have the batteries replaced if necessary.

Tips for Maintaining Golf Cart Batteries

4. Storing

Proper storage of your golf cart batteries is crucial, especially during periods of non-use or the off-season. Follow these tips to ensure that your batteries remain in good condition while in storage:

4.1 Proper storage

When not in use, store your golf cart batteries in a dry and secure location. Consider investing in a battery storage box or rack to keep them organized and protected from any potential damage.

4.2 Store in a cool and dry place

Extreme temperatures can have a detrimental effect on your batteries. Store them in a cool and dry place, away from direct sunlight and any sources of heat or moisture. High temperatures can accelerate the self-discharge rate of the batteries and reduce their overall lifespan.

4.3 Keep batteries fully charged

Before storing your golf cart batteries, make sure they are fully charged. Batteries that are stored with a low charge can suffer from sulfate buildup, which can lead to irreversible damage. Keep an eye on the charge level and recharge as needed during prolonged periods of storage.

4.4 Use a battery maintainer

Consider using a battery maintainer or a trickle charger to keep your golf cart batteries properly maintained during storage. These devices provide a slow and steady charge to prevent the batteries from discharging and ensure they are ready for use when needed.

5. Disposing

At some point, you may need to dispose of your golf cart batteries due to age or irreparable damage. It is essential to follow proper disposal guidelines to ensure environmental safety. Here’s what you need to know:

5.1 Following disposal guidelines

When disposing of your golf cart batteries, always follow the disposal guidelines provided by your local authorities or recycling centers. Improper disposal of batteries can harm the environment and pose health risks.

5.2 Recycle batteries

Golf cart batteries are recyclable, and it is highly encouraged to recycle them instead of throwing them in the regular trash. Many recycling centers accept old batteries and have specific processes for handling and recycling them safely.

5.3 Contact local disposal facility

To find the nearest recycling center or appropriate disposal facility for your golf cart batteries, contact your local waste management or recycling authorities. They will be able to provide you with information on how to properly dispose of your batteries.

5.4 Properly remove and store in a safe place

Before disposing of your golf cart batteries, make sure to remove them from your cart safely. Follow the manufacturer’s instructions or seek professional assistance if needed. Once removed, store the batteries in a safe place, away from any potential hazards, until you can properly dispose of them.

6. Watering

Many golf cart batteries, particularly lead-acid batteries, require regular watering. Proper water levels are essential for the batteries to function optimally. Follow these tips for watering your golf cart batteries:

6.1 Checking water level

Regularly check the water level in your golf cart batteries. Open the battery caps and inspect the water level in each cell. It is crucial to maintain the water level above the minimum level indicated by the battery manufacturer.

6.2 Use distilled water

When adding water to your golf cart batteries, always use distilled water. Tap water or other types of water may contain impurities and minerals that can harm the battery cells. Distilled water ensures the purity and longevity of the batteries.

6.3 Add water after charging

To avoid dilution, it is recommended to add water to your batteries after the charging process. Once the batteries have been fully charged, check the water levels, and add distilled water if necessary. This helps maintain the integrity of the electrolyte solution within the battery cells.

6.4 Do not overfill

While it is essential to maintain the water levels in your golf cart batteries, be careful not to overfill the cells. Overfilling can lead to acid overflow during charging, causing damage to the battery and potentially hazardous situations. Follow the manufacturer’s guidelines for the appropriate water level height.

7. Driving

Proper driving habits can significantly impact the overall health and performance of your golf cart batteries. Follow these tips for safe and efficient driving:

7.1 Avoid excessive speeds

Excessive speeds can put a strain on your golf cart batteries, causing them to drain more quickly. Keep it at a reasonable speed level to preserve the battery capacity and ensure a longer runtime.

7.2 Do not overload the cart

Overloading your golf cart can put unnecessary stress on the batteries and impact their performance. Be mindful of the weight capacity of your cart and avoid exceeding it. Distribute the weight evenly to prevent uneven battery discharge.

7.3 Limit steep hill usage

Climbing steep hills can drain your batteries more rapidly due to increased power demand. Try to limit the usage of steep hills or inclines, as constant strain on the batteries can lead to reduced performance and a shortened lifespan.

7.4 Drive on designated paths

Stick to designated paths when driving your golf cart. Off-road driving or driving on uneven terrain can cause unnecessary vibrations, which can loosen connections and potentially damage the batteries. Following designated paths will ensure a smoother ride and minimize the risk of battery-related issues.

8. Maintenance

Regular maintenance is key to optimizing the performance and longevity of your golf cart batteries. Here are some maintenance tips to keep in mind:

8.1 Follow manufacturer’s instructions

Always refer to the manufacturer’s instructions or guidelines when performing maintenance tasks on your golf cart batteries. Each battery brand might have specific requirements or recommendations, and following them will ensure that you maintain your batteries correctly.

8.2 Regularly check battery voltage

Checking the battery voltage regularly can help you stay on top of the battery’s health and detect any potential issues. Use a digital voltmeter or a battery load tester to measure the voltage. Consult the battery manufacturer’s specifications to ensure the voltage is within the recommended range.

8.3 Clean terminals

Regularly cleaning the battery terminals is critical for maintaining good electrical conductivity. Use a battery terminal cleaner or a mixture of baking soda and water to remove any corrosion or buildup on the terminals. Ensure that the terminals are clean and free from any residue before reattaching the cables.

8.4 Test capacity

Periodically testing the capacity of your golf cart batteries can provide insights into their health and performance. Battery capacity tests can be conducted using specialized equipment or with the help of a professional. Knowing the battery capacity can help you assess when it’s time for replacement or other necessary actions.

9. Winter Care

When the colder months approach, it’s important to take extra precautions to care for your golf cart batteries. Follow these tips for winter care:

9.1 Store batteries indoors during extreme cold

Extreme cold temperatures can be detrimental to your golf cart batteries. If possible, store your batteries indoors during the winter months to protect them from freezing temperatures. Garages or storage areas with temperature control are ideal options.

9.2 Keep batteries fully charged

During winter storage, it is crucial to keep your golf cart batteries fully charged. Batteries that are left uncharged or at a low charge during the colder months can quickly lose capacity and suffer from irreversible damage. Monitor the charge level regularly and recharge if necessary.

9.3 Use insulation or battery blankets

To further protect your golf cart batteries from the cold, consider using insulation or battery blankets. These accessories provide additional insulation and keep the batteries at a more optimal temperature, reducing the risk of capacity loss due to extreme cold.

9.4 Keep the cart in a warm area before use

Before taking your golf cart out for a winter ride, make sure it has been stored in a warm area for a sufficient period. Cold batteries can hinder performance, and allowing the cart to warm up before use helps ensure that the batteries are operating at their best.

10. Troubleshooting

Even with proper maintenance, occasional issues may arise with your golf cart batteries. Here are some troubleshooting tips to help you identify and address common battery problems:

10.1 Identify common battery issues

Familiarize yourself with common battery issues, such as low capacity, slow charging, or excessive self-discharge. Knowing the symptoms can help you identify potential problems and take appropriate actions.

10.2 Check for loose or corroded connections

Loose or corroded connections can adversely affect the performance of your golf cart batteries. Regularly check the battery terminals and cable connections for any signs of looseness or corrosion. Clean the terminals if necessary and ensure a secure and reliable electrical connection.

10.3 Test battery voltage

If you are experiencing performance issues with your batteries, test the voltage to assess their health. A significant drop in battery voltage or voltage below the manufacturer’s recommended range might indicate a problem with the batteries.

10.4 Consult a professional if necessary

If you are unable to diagnose or address any battery issues on your own, do not hesitate to seek the assistance of a professional. A qualified technician or golf cart battery expert will be able to provide you with further guidance and help resolve any complex problems.

By following these comprehensive tips for maintaining your golf cart batteries, you can ensure their longevity, optimal performance, and a longer overall lifespan. Remember to always prioritize safety and, if unsure, seek professional advice for any concerns or issues related to your golf cart batteries. Happy golf carting!

Mastering the Golf Swing: How to Stay Down and Improve Your Game

Mastering the Golf Swing: Learn how to stay down and improve your game with valuable tips and techniques. Achieve better control, power, and performance on the course!

Are you struggling to improve your golf swing and wondering how to stay down? Look no further! In this article, we will share some valuable tips and techniques to help you master the golf swing and enhance your game. By focusing on staying down throughout your swing, you can achieve better control, greater power, and ultimately improve your overall performance on the golf course. So, let’s dive in and discover the secrets to a more successful golf swing!

Mastering the Golf Swing: How to Stay Down and Improve Your Game

Understanding the Importance of Staying Down on Your Golf Swing

When it comes to achieving a solid and consistent golf swing, staying down throughout the entire motion is crucial. Staying down refers to maintaining the proper body alignment, balance, and posture throughout the swing, and it directly affects the accuracy, power, and control of your shots. By understanding the importance of staying down on your golf swing, you can improve your game and take it to the next level.

Proper Body Alignment and Balance

Proper body alignment and balance are the foundations of a good golf swing. When addressing the ball, it’s essential to align yourself correctly with the target, keeping your feet, knees, hips, and shoulders parallel to the target line. By doing so, you set yourself up for a consistent and repeatable swing.

Balance is equally important and plays a significant role in maintaining stability throughout your swing. It involves distributing your weight evenly between your feet and finding your center of gravity. This balanced stance allows for a smooth transfer of weight during the swing, leading to increased power and control.

Maintaining a Stable Lower Body

Your lower body plays a crucial role in creating power and stability in your golf swing. By maintaining a stable lower body, you can effectively generate force and maintain control throughout the swing.

One way to achieve stability in the lower body is by ensuring that your knees are slightly flexed during the setup and throughout the swing. Flexed knees provide a solid foundation and allow for a smoother weight transfer from backswing to downswing.

Additionally, keeping your lower body stable involves resisting the urge to sway or slide laterally during the swing. Instead, focus on maintaining your posture and rotating around your spine. This stability ensures that your swing remains consistent, resulting in improved ball striking and accuracy.

The Role of Your Core Muscles

A strong and engaged core is essential for a powerful and consistent golf swing. The core muscles, including the abdominals, obliques, and lower back, provide stability and transfer energy from the upper body to the lower body and vice versa.

To engage your core during the swing, focus on maintaining good posture and activating your abdominal muscles. By doing so, you create a solid base for your swing and allow for a more efficient transfer of power. Incorporating exercises that target the core, such as planks and rotational exercises, can also help strengthen these muscles and improve your swing stability.

Developing Proper Hand Positioning

Proper hand positioning is crucial for achieving proper grip and control of the club throughout the swing. When gripping the club, make sure your hands are positioned neutrally, neither too far forward nor too far back. This neutral grip allows for better control and prevents unwanted manipulation of the clubface.

Additionally, pay attention to the pressure applied by your hands on the club. Gripping the club too tightly can restrict your swing and lead to tension in your arms and hands. Conversely, gripping too lightly can result in a lack of control. Find the balance that allows for a relaxed but firm grip, giving you control and consistency in your swing.

Mastering the Fundamentals of a Good Golf Swing

To develop a consistent and effective golf swing, mastering the fundamentals is essential. By focusing on grip, stance, tempo, and ball focus, you can lay a solid foundation for a powerful and accurate swing.

Grip the Club Correctly

One of the most critical fundamentals of a good golf swing is the correct grip. A proper grip ensures that the clubface remains square at impact, allowing for consistent and accurate ball striking.

When gripping the club, ensure that the club is placed diagonally across the fingers of your lead hand (left hand for right-handed golfers, right hand for left-handed golfers). The grip should be firm but not overly tense, with the “V” formed by your thumb and index finger pointing towards your rear shoulder.

Next, place your trail hand (right hand for right-handed golfers, left hand for left-handed golfers) on the club, overlapping the lead hand’s little finger. This overlapping grip provides stability and club control during the swing.

Establish a Solid Stance

A solid and balanced stance is the foundation for a consistent and powerful golf swing. When addressing the ball, position your feet shoulder-width apart and align them parallel to the target line.

Distribute your weight evenly between both feet and slightly favor the balls of your feet. This balanced stance allows for better weight transfer during the swing and maintains stability throughout.

Additionally, ensure that your knees are flexed slightly and your spine is straight. Maintaining this posture helps facilitate a proper rotation of the torso and promotes a solid and consistent swing.

Maintain a Consistent Tempo

The tempo of your golf swing refers to the rhythm and timing of your swing motion. A consistent and smooth tempo allows for better clubface control and more accurate ball striking.

To establish a consistent tempo, focus on maintaining a smooth and even rhythm throughout your swing. Avoid rushing or jerking the club during the backswing and downswing. Instead, strive for a seamless transition from backswing to downswing, with the same tempo and pace throughout.

You can practice your tempo by counting in your head or using a metronome to establish a consistent beat. By ingraining a consistent tempo into your swing, you can improve your timing and achieve better results on the course.

Keep Your Eyes on the Ball

Maintaining focus on the ball throughout your swing is crucial for accuracy and consistency. By keeping your eyes on the ball, you ensure that your clubface is aligned correctly at impact and that your swing stays on the desired path.

As you address the ball, fix your gaze on the back of the ball and maintain that focus throughout the swing. Avoid the temptation to look up early or follow the flight of the ball before completing your swing. Keeping your eyes on the ball allows for better concentration and improves your chances of solid ball striking.

Developing Power and Distance through a Proper Golf Swing

While accuracy and consistency are essential in golf, increasing power and distance can take your game to new heights. By incorporating specific techniques and focusing on generating power, you can maximize the potential of your swing.

Generating Speed with a Coiled Body

One way to develop power in your swing is by utilizing a coiling motion in your backswing. As you take the club back, focus on rotating your shoulders and upper body against a stable lower body. This coiling action stores energy and allows you to unleash it during the downswing, resulting in increased clubhead speed and distance.

To enhance this coiling action, work on improving your flexibility and rotational range of motion. Regular stretching exercises and mobility drills can help increase your ability to rotate, leading to a more powerful swing.

Utilizing Proper Shoulder Rotation

Shoulder rotation is a key component of a powerful golf swing. By properly rotating your shoulders during the backswing and downswing, you can generate more clubhead speed and achieve greater distance.

During the backswing, focus on turning your lead shoulder (left shoulder for right-handed golfers, right shoulder for left-handed golfers) behind the ball while maintaining a stable lower body. This rotation creates torque in your upper body, storing energy that can be released during the downswing.

As you transition into the downswing, allow your trail shoulder (right shoulder for right-handed golfers, left shoulder for left-handed golfers) to rotate aggressively towards the target. This aggressive rotation generates additional clubhead speed, resulting in longer and more powerful shots.

Creating Lag for Added Power

Lag refers to the angle between the club shaft and your lead arm during the downswing. Creating and maintaining lag in your swing is crucial for generating power and distance.

To create lag, focus on initiating the downswing by using your lower body and maintaining a firm lead wrist. As you start the downswing, resist the urge to release the club early and instead allow the clubhead to trail behind your hands. This delay in releasing the club creates stored energy and promotes a whip-like effect as you strike the ball.

Maintaining lag ensures that you’re transferring maximum power to the ball, resulting in longer shots. Practice drills that help you feel this lag and work on your timing and sequencing to optimize this power-producing element of your swing.

Engaging the Lower Body for Distance

To maximize the power and distance in your golf swing, it’s essential to engage your lower body effectively. By harnessing the power of your legs, hips, and glutes, you can generate significant force and achieve greater distance.

As you initiate the downswing, focus on initiating the movement with your lower body. Shift your weight onto your lead foot while driving your hips forward and rotating them towards the target. This lower body movement generates a powerful and efficient transfer of energy from the ground up, resulting in increased clubhead speed and distance.

Additionally, ensure that your lower body remains stable and balanced throughout the swing. Avoid excessive lateral movement or sliding, as it can disrupt your sequencing and decrease power transfer. By properly engaging your lower body, you can unlock its potential to enhance your golf swing’s power and distance.

Mastering the Golf Swing: How to Stay Down and Improve Your Game

Improving Accuracy and Control in Your Golf Swing

While power and distance are desirable, accuracy and control are equally important aspects of a good golf swing. By focusing on improving your aim, clubface control, and follow-through, you can enhance your ability to hit the ball where you want it to go.

Having a Target-Oriented Mindset

Accuracy begins with having a target-oriented mindset. Before every shot, visualize your intended target and focus on hitting the ball towards that target. By developing a clear mental image, you can align your swing and clubface correctly, leading to more accurate shots.

Additionally, maintaining a positive and confident attitude towards your target can improve your focus and decision-making on the course. Trust in your swing and commit to your chosen target, allowing your body to execute the swing without hesitation.

Aiming with Precision

Precision in aiming involves aligning your body and clubface correctly towards the target. When addressing the ball, ensure that your feet, knees, hips, and shoulders are parallel to the target line. This alignment helps set you up for a square and accurate impact with the ball.

Moreover, pay attention to the clubface’s alignment. The face of the club should be square to your target line, ensuring that you’re not inadvertently aiming left or right of your intended target. Developing a consistent and accurate alignment routine can help you confidently address the ball and increase your accuracy on the course.

Controlling the Clubface at Impact

The position and control of the clubface at impact have a significant influence on the ball’s trajectory and direction. Developing a solid impact position and clubface control is crucial for accuracy and consistency.

At impact, the clubface should be square to the target. To achieve this square impact, focus on maintaining good hand and wrist position throughout the swing. Avoid early or excessive release of the clubhead, as it can result in an open or closed face, leading to wayward shots.

Additionally, pay attention to your grip pressure as you approach impact. A light but firm grip allows for better control and manipulation of the clubface, leading to more accurate ball striking. Continued practice and awareness of your clubface control at impact can help you consistently hit your desired targets.

Implementing a Smooth and Controlled Follow-Through

The follow-through is often overlooked but plays a crucial role in maintaining control and accuracy throughout the entire swing. A smooth and controlled follow-through helps ensure that your swing remains on the desired path and promotes a consistent ball flight.

During the follow-through, focus on maintaining good posture and balance. Allow your body to naturally rotate towards the target, with your chest facing towards the sky. Avoid any sudden or jerky movements that can disrupt the flow of your swing.

Additionally, pay attention to the position of your arms and hands during the follow-through. Aim to keep your lead arm straight and extended, allowing for a full and complete finish to your swing. By implementing a smooth and controlled follow-through, you can enhance your swing’s accuracy and control.

Addressing Common Swing Faults and Correcting Them

Even the most skilled golfers experience swing faults from time to time. Recognizing and addressing these common swing faults is crucial for improving your game and preventing persistent issues that can hinder your progress.

Overcoming the Tendency to Lift the Ball

A common swing fault amongst beginner golfers is the tendency to lift the ball instead of striking down on it. This lifting motion results in poor contact and inconsistent ball flights.

To overcome this fault, focus on maintaining a downward strike on the ball. During your swing, envision hitting through the bottom of the ball and into the ground. This mental image encourages a descending blow, leading to better contact and increased control.

Additionally, pay attention to your setup and ball position. Position the ball slightly forward in your stance, ahead of the center of your chest. This forward ball position promotes a steeper angle of approach and encourages a downward strike.

Eliminating the Slice or Hook

The slice and hook are common shot shapes that can lead to significant accuracy problems. A slice refers to a shot that curves severely from left to right for right-handed golfers (or right to left for left-handed golfers), while a hook curves severely from right to left for right-handed golfers (or left to right for left-handed golfers).

To correct a slice, focus on improving your clubface alignment at impact. Ensure that the clubface is square to the target and avoid an open face at impact. Additionally, concentrate on a smoother swing path that promotes an inside-to-square-to-inside swing plane.

For those dealing with a hook, the opposite adjustments are required. Pay attention to your clubface alignment, making sure it’s not excessively closed at impact. Work on a more neutral swing path that avoids an inside-to-outside motion.

Seeking professional instruction or guidance can provide personalized feedback and tailored drills to help correct these swing faults effectively.

Preventing Early Extension of the Body

Early extension refers to the tendency of the lower body to move towards the ball during the downswing, disrupting your swing’s sequencing and balance. This fault can lead to inconsistent strikes and loss of power.

To prevent early extension, focus on maintaining your posture and staying in your address position throughout the swing. Avoid any excessive or premature movement towards the ball with your lower body. Instead, strive for a rotational motion where your upper body rotates around a stable lower body.

You can also incorporate drills that promote proper sequencing and lower body stability. For example, practice swings with a resistance band wrapped around your hips can help you feel the correct rotational movement while preventing early extension.

Avoiding Casting or Scooping the Ball

Casting refers to the premature release of the clubhead during the downswing, resulting in weak and inconsistent ball striking. Scooping, on the other hand, involves lifting the hands and scooping the ball at impact, leading to shallow contact and decreased power.

To avoid casting and scooping, focus on maintaining good wrist position throughout your swing. During the downswing, keep your lead wrist flat and your trail wrist bent. This position helps delay the release of the clubhead, creating lag and ensuring a descending strike at impact.

Practicing drills that promote proper wrist position, such as the “pump drill,” can help you ingrain this feeling. By eliminating casting and scooping from your swing, you can achieve more consistent and powerful ball striking.

Practicing and Drilling for a Better Golf Swing

Consistent practice is key to improving your golf swing and refining your skills. By incorporating purposeful repetitions, utilizing training aids and technology, working on alignment and setup, and practicing with a variety of clubs, you can optimize your practice sessions and make significant progress in your game.

Incorporating Purposeful Repetitions

When practicing your golf swing, aim for quality repetitions rather than mindless hitting. Each swing should have a specific goal or focus, whether it’s working on maintaining balance, improving ball striking, or refining a particular aspect of your swing.

Break your practice sessions into smaller segments, dedicating focused time to specific areas of improvement. This deliberate and targeted approach allows you to address weaknesses and make the necessary adjustments, leading to more significant improvements.

Using Training Aids and Technology

Training aids and technology can be valuable tools for refining your golf swing. They provide real-time feedback and help you develop proper mechanics, improve balance, and increase clubhead speed.

For example, a golf swing analyzer can track your swing metrics, such as clubhead speed, ball speed, and swing path. This data allows you to identify areas of improvement and track your progress over time.

Additionally, consider incorporating training aids such as alignment sticks, impact bags, or swing trainers into your practice routine. These aids provide physical feedback and help develop proper swing positions and mechanics.

Working on Alignment and Setup

Alignment and setup are fundamental elements of a good golf swing. Spending time working on your alignment and setup can greatly impact your swing consistency and accuracy.

During your practice sessions, focus on aligning your feet, knees, hips, and shoulders parallel to the target line. Use alignment sticks or visual markers to ensure your alignment is accurate.

Additionally, pay attention to your posture, spine angle, and ball position during your setup. Proper posture promotes a natural and efficient swing motion, while the correct ball position allows for solid contact.

Practicing with a Variety of Clubs

To develop a well-rounded golf swing, it’s essential to practice with a variety of clubs. Each club in your bag presents unique challenges and requires different swing mechanics and ball striking techniques.

Dedicate time to practicing with your driver, fairway woods, long irons, mid-irons, short irons, and wedges. This comprehensive approach allows you to develop consistency and adaptability across your entire set of clubs.

By incorporating a variety of clubs into your practice routine, you’ll become more comfortable and confident with each club, leading to improved shot-making and lower scores.

Developing a Pre-Shot Routine to Enhance Your Golf Swing

A pre-shot routine is a sequence of steps and rituals performed before every shot. By establishing a consistent pre-shot routine, you can enhance your golf swing’s overall consistency, mental focus, and shot execution.

Establishing a Consistent Routine

Your pre-shot routine should be consistent and repeatable, helping you transition from the planning phase to the execution phase comfortably. Develop a routine that works for you and encompasses the necessary elements to prepare for your shot effectively.

Your routine may include visualizing the desired shot, taking a practice swing, aligning yourself with the target, or checking your grip and posture. Stick to this routine consistently, as it helps calm nerves, build confidence, and create a sense of familiarity before each shot.

Visualizing the Desired Swing

Visualization is a powerful tool that can enhance your golf swing and improve shot execution. Before each shot, take a moment to visualize the desired flight path, trajectory, and landing spot of the ball.

Close your eyes and create a vivid mental image of the successful shot you want to hit. See the ball travel through the air and land exactly where you intend it to. By visualizing success, you program your mind and body to execute the swing necessary to achieve that desired outcome.

Focusing on Breathing and Relaxation

Maintaining a relaxed and focused state is vital for executing a good golf swing. Incorporate deep breathing exercises into your pre-shot routine to help calm your nerves and promote mental clarity.

Before stepping up to the ball, take a few deep breaths, inhaling through your nose and exhaling through your mouth. Pay attention to your breath, allowing it to slow down your heart rate and relax any tension in your body. This mindful breathing technique helps you stay present and focused throughout the swing.

Building Confidence through Mental Preparation

Confidence is key to a successful golf swing. Before each shot, consciously build confidence by reflecting on past successes or positive aspects of your game. Remind yourself of shots you’ve executed well or memorable rounds you’ve played.

Avoid dwelling on past mistakes or negative outcomes. Focus on the present moment and the specific shot at hand. By building confidence through positive mental preparation, you increase your belief in your abilities and set the stage for a successful swing.

Using Video Analysis to Improve Your Golf Swing

Video analysis is a valuable tool that can help you identify areas for improvement and make necessary adjustments in your golf swing. By recording and reviewing your swing, seeking professional feedback, and tracking progress over time, you can optimize your swing’s mechanics and performance.

Recording and Reviewing Your Swing

Recording your swing allows you to analyze your mechanics and identify areas for improvement that may not be apparent during the swing. Set up a camera or use a smartphone stand to capture your swing from various angles, such as face-on and down the line.

Review the footage in slow motion and pay attention to key elements such as grip, posture, alignment, swing plane, and impact position. Take notes and compare your swing to professional golfers or instructional resources to gain valuable insights into areas that require adjustment.

Identifying Areas for Improvement

Video analysis helps you identify specific areas in your swing that may need improvement. You may notice inconsistencies in your posture, balance, or swing mechanics that could be affecting your ball striking and overall performance.

Use the video analysis to pinpoint these areas and develop an action plan for improvement. Focus on one or two aspects at a time, and incorporate drills or exercises that address those specific areas. Tracking your progress over time will help you see how your adjustments are positively impacting your swing.

Seeking Professional Feedback

While self-analysis through video can be valuable, seeking professional feedback from a qualified golf instructor can provide additional insight and guidance. A golf instructor can offer expert analysis of your swing, identify areas for improvement, and provide personalized drills and exercises to help you make necessary adjustments.

A professional instructor can also help prioritize which areas of your swing to focus on first, ensuring that you’re making efficient progress towards your overall improvement goals. Working with a professional not only accelerates the learning process but also provides accountability and support throughout your journey.

Tracking Progress over Time

Video analysis allows you to track your progress over time by comparing your swings from different sessions. Regularly review your recorded swings to gauge improvements in your mechanics, swing path, and overall consistency.

By tracking your progress, you gain a tangible measure of your improvement and stay motivated to continue working on your golf swing. Celebrate small victories and milestones along the way, as they signify your dedication and progress towards becoming a better golfer.

Optimizing Your Physical Fitness for a Strong Golf Swing

Physical fitness plays a crucial role in your golf swing’s power, consistency, and overall performance. By optimizing your strength, flexibility, balance, and cardiovascular health, you can develop a strong and efficient golf swing.

Building Strength and Flexibility

Strength and flexibility are key components of a powerful and efficient golf swing. Incorporating strength training exercises, such as squats, lunges, and core exercises, enhances your stability and power throughout the swing.

In addition to strength, focus on developing flexibility, especially in your hips, shoulders, and spine. Regular stretching exercises, yoga, or Pilates can improve your range of motion and allow for a more fluid and unrestricted swing.

Incorporating Golf-Specific Exercises

Golf-specific exercises target the muscle groups used during the golf swing and help develop the specific movements and stability required for optimal performance.

Incorporate exercises that mimic the golf swing, such as rotational exercises using a resistance band or cable machine. Additionally, focus on stability exercises that challenge your balance and core strength, as these are key components of a consistent and controlled swing.

Working with a fitness professional experienced in golf-specific training can provide you with a customized workout program tailored to your specific needs and goals.

Improving Balance and Coordination

Balance and coordination are essential for a smooth and controlled golf swing. By incorporating balance training exercises, such as single-leg exercises or standing on stability devices, you can improve your stability and weight transfer during the swing.

Coordination exercises, such as ladder drills or medicine ball tosses, help enhance your body’s ability to precisely coordinate movements and timing. These exercises can translate directly to improved swing mechanics and ball striking.

Maintaining Overall Cardiovascular Health

Cardiovascular health is often overlooked but crucial for overall well-being and performance on the course. Maintaining a healthy cardiovascular system improves your endurance, focus, and energy levels during a round of golf.

Incorporate cardiovascular exercise into your routine, such as brisk walking, jogging, cycling, or swimming. Aim for at least 150 minutes of moderate-intensity aerobic activity per week, or alternatively, 75 minutes of vigorous-intensity aerobic activity.

By optimizing your physical fitness, you can enhance your golf swing’s power, consistency, and endurance. A strong and fit body allows you to execute the desired movements efficiently and helps prevent injuries on and off the golf course.

Seeking Professional Instruction and Guidance

While individual practice and self-improvement are valuable, seeking professional instruction and guidance can significantly accelerate your progress and help you avoid common pitfalls. Working with a qualified golf instructor, participating in golf clinics or workshops, and seeking individualized coaching can provide you with the support and expertise needed to reach your full potential.

Working with a Qualified Golf Instructor

A qualified golf instructor offers personalized instruction and guidance tailored to your specific needs and goals. They have the knowledge and experience to analyze your swing mechanics, correct swing faults, and provide drills and exercises for improvement.

Working with a golf instructor can help you understand the nuances of your swing, develop proper practice habits, and develop a clear improvement path. They can also provide on-course guidance, helping you navigate various situations and develop course management strategies.

Taking Advantage of Golf Clinics and Workshops

Golf clinics and workshops offer opportunities to learn and improve your golf swing in a group setting. These events are often led by professionals or teaching staff and cover various aspects of the game, from swing mechanics to short game skills.

Participating in golf clinics can expose you to different teaching methods, provide a social and supportive environment, and offer valuable practice and feedback opportunities. These events can be especially beneficial for beginner golfers looking to develop a solid foundation in their golf swing.

Participating in Golf Lessons or Camps

Golf lessons or camps provide access to concentrated and focused instruction over an extended period. Lessons can be tailored to your specific needs, allowing for intensive work on specific aspects of your golf swing within a short timeframe.

Camps offer a more immersive learning experience, typically spanning multiple days and incorporating various elements of the game. They provide an opportunity to fully immerse yourself in golf instruction, practice, and play, allowing for accelerated improvement.

Seeking Individualized Coaching

Individualized coaching provides a personalized and ongoing relationship with an experienced golf instructor. Through regular coaching sessions, you receive consistent guidance, feedback, and accountability, enabling continuous improvement.

Individual coaching can target specific areas of your golf swing, address swing faults, and develop a comprehensive improvement plan. Your coach becomes a trusted advisor and mentor, helping you navigate challenges and reach your full potential.

By seeking professional instruction and guidance, you benefit from their expertise, experience, and personalized approach. Whether you’re a beginner looking to build a solid foundation or an advanced player looking to fine-tune your swing, professional guidance can be instrumental in your golfing journey.

In conclusion, understanding and implementing the various aspects discussed in this article can significantly enhance your golf swing. By focusing on proper body alignment and balance, mastering the fundamentals, developing power and distance, improving accuracy and control, addressing common swing faults, practicing and drilling, developing a pre-shot routine, using video analysis, optimizing physical fitness, and seeking professional instruction, you can refine your swing mechanics, increase your consistency, and ultimately improve your game. Embrace the opportunity to develop a better golf swing and watch as your scores and enjoyment on the course improve. Happy golfing!

A Beginner’s Guide to Hooking Up Golf Cart Batteries

A beginner’s guide to hooking up golf cart batteries. Learn the step-by-step process, safety precautions, and troubleshooting tips for a smooth installation. Say goodbye to confusion and hello to smooth sailing on those fairways!

So, you’ve just purchased your very own golf cart and you’re excited to hit the green and cruise around the neighborhood. But before you can joyride in style, you need to tackle one important task – hooking up the golf cart batteries. Don’t worry if you’re new to this whole battery connection game, because we’ve got you covered. In this beginner-friendly guide, we’ll walk you through all the steps you need to know to successfully hook up your golf cart batteries. Say goodbye to confusion and hello to smooth sailing on those fairways!

A Beginners Guide to Hooking Up Golf Cart Batteries

Step 1: Gather Necessary Tools and Materials

To successfully hook up your golf cart batteries, you will need several tools and materials. It’s important to gather everything beforehand to ensure a smooth process. Here is a list of the items you will need:

Wrench or socket set

A wrench or socket set will be necessary to loosen and remove the battery cables from the old batteries and connect them to the new ones.

Safety goggles

When working with batteries, it’s crucial to protect your eyes from any potential hazards. Safety goggles will shield your eyes from any acid or debris that may come in contact with them.

Battery cleaner or baking soda

Over time, batteries can accumulate corrosion, which can hinder their performance. Using a battery cleaner or baking soda solution will help remove any buildup and ensure a clean connection.

Wire brush

A wire brush is essential for cleaning the battery compartment and removing any corrosion that may have formed on the terminals.

Distilled water

If your new batteries require water, distilled water should be used. This will help prevent any impurities or minerals from contaminating the battery.

Battery terminal cleaning tool

A battery terminal cleaning tool is specifically designed to clean the terminals of the batteries, ensuring a proper connection and optimal performance.

Rubber gloves

Rubber gloves are essential to protect your hands from any potential acid or chemicals present in the batteries.

Now that you have all the necessary tools and materials, you can proceed to the next step with confidence.

Step 2: Ensure Safety Precautions

Before you begin working with the batteries, it’s paramount to take proper safety precautions to prevent any accidents or injuries. Follow these guidelines:

Disconnect power source

Before starting any work, make sure to disconnect the power source to ensure a safe environment. This means turning off the golf cart and removing any ignition keys.

Put on safety goggles and rubber gloves

Protecting your eyes and hands is crucial when working with batteries. Put on your safety goggles to shield your eyes from any debris or acid. Additionally, wearing rubber gloves will provide a protective barrier against any chemicals you may come in contact with.

Work in a well-ventilated area

To avoid inhaling any fumes or gases that may be emitted from the batteries, it’s important to work in a well-ventilated area. Open windows or doors to allow fresh air to circulate.

Keep open flames and sparks away

Batteries contain flammable chemicals, so it’s important to keep any open flames or sparks far away from your work area. This includes cigarettes, candles, or any other potential sources of ignition.

By following these safety precautions, you can ensure a safe working environment throughout the battery hookup process.

Step 3: Remove Old Batteries

Now that you have taken appropriate safety measures, it’s time to remove the old batteries from your golf cart. Follow these steps:

Turn off the golf cart

Before you begin removing the batteries, make sure the golf cart is turned off and the ignition keys are removed. This will prevent any accidental electrical shock or damage.

Locate the battery compartment

The battery compartment is typically located beneath the seat or in the front or rear of the golf cart. Refer to your golf cart’s manual if you are unsure of its exact location.

Use a wrench or socket set to loosen and remove the battery cables

Using an appropriate wrench or socket set, loosen and remove the battery cables one at a time. Start with the negative (-) terminal and then remove the positive (+) terminal. It’s important to remove the cables in the correct order to prevent any potential electrical shock.

Carefully lift out the old batteries

Once the battery cables are disconnected, carefully lift out the old batteries from the compartment. Pay attention to their weight and take necessary precautions to avoid strain or injury.

Clean the battery compartment with a wire brush and battery cleaner

After removing the old batteries, the battery compartment may have accumulated dirt and corrosion. Use a wire brush and battery cleaner to clean the compartment thoroughly. This will create a clean surface for installing the new batteries.

By following these steps, you have successfully removed the old batteries from your golf cart and prepared the battery compartment for the next phase.

A Beginners Guide to Hooking Up Golf Cart Batteries

Step 4: Prepare New Batteries

With the old batteries removed, it’s time to prepare the new ones. Follow these steps to ensure proper installation:

Inspect the new batteries for any damage or leaks

Before proceeding, carefully inspect the new batteries for any signs of damage or leakage. It is important to ensure that the batteries are in good condition before installation.

Clean the terminals with a battery terminal cleaning tool

Using a battery terminal cleaning tool, clean the terminals of the new batteries. This will remove any manufacturing residues or corrosion, ensuring a good connection.

Add distilled water to the cells if needed

Check the manufacturer’s recommendations to determine if your new batteries require distilled water. If necessary, carefully add distilled water to the cells, following the specified fill levels. Do not overfill the cells, as it may lead to damage.

Ensure the correct placement of positive and negative terminals

Before placing the batteries into the compartment, ensure you identify the positive (+) and negative (-) terminals correctly. Proper alignment is essential for the batteries to function efficiently.

By following these steps, you are now ready to connect your new batteries in the next step.

Step 5: Connect Batteries

Now that you have prepared the new batteries, it’s time to connect them in your golf cart. Follow these steps for proper battery connection:

Place the new batteries into the compartment

Carefully place the new batteries into the battery compartment, ensuring that they fit securely. Take note of the orientation and positioning of the batteries to match the old ones.

Connect the positive terminals first

Starting with the positive (+) terminal, attach the battery cable securely. Use a wrench or socket set to tighten the connection, ensuring a snug fit. Repeat this process for each battery.

Tighten the battery cables securely with a wrench or socket set

After connecting the positive terminals, proceed to connect the negative (-) terminals. Again, use a wrench or socket set to tighten the connections properly.

Connect the negative terminals

Finish the battery connection process by attaching the negative (-) battery cables to the corresponding terminals on each battery. Ensure a secure and tight connection.

With the batteries connected, you are now ready to test the connections and ensure everything is functioning as expected in the next step.

Step 6: Test the Connections

To ensure successful battery installation, it’s important to test the connections and verify that everything is working correctly. Follow these steps:

Double-check all connections

Before turning on the golf cart, double-check all the battery connections. Ensure that every terminal is securely fastened and there are no loose or faulty connections.

Ensure the battery cables are tightened properly

Ensure that the battery cables are tightened properly using a wrench or socket set. Loose connections can result in poor performance or even damage to the batteries.

Verify there are no loose or exposed wires

Inspect the entire battery system, including the cables and wires, to ensure there are no loose or exposed wires. Loose or exposed wires can cause a short circuit or other electrical issues.

Turn on the golf cart to check if it powers up

Once all connections have been checked and verified, turn on the golf cart to test if it powers up successfully. If the golf cart powers up without any issues, congratulations! You have successfully hooked up your golf cart batteries.

To ensure the longevity and optimal performance of your new batteries, it’s important to also maintain and care for them properly.

Step 7: Maintain and Care for Batteries

Proper maintenance and care are crucial for preserving the lifespan and performance of your golf cart batteries. Follow these tips to keep your batteries in excellent condition:

Keep batteries clean and free of dirt or corrosion

Regularly inspect your batteries and clean them as needed. Remove any dirt or corrosion from the battery terminals using a wire brush and battery cleaner.

Inspect and clean the terminals regularly

Keeping the battery terminals clean is vital for maintaining a solid connection. Regularly inspect the terminals and clean them with a battery terminal cleaning tool to prevent corrosion buildup.

Avoid overcharging the batteries

Overcharging can significantly damage your batteries and reduce their lifespan. Use a battery charger suitable for golf cart batteries and follow the manufacturer’s instructions to avoid overcharging.

Use a battery charger suitable for golf cart batteries

Choosing the correct charger for your golf cart batteries is important. Ensure that the charger you use is specifically designed for golf cart batteries to avoid any damage or compatibility issues.

Replace batteries as needed

Batteries have a finite lifespan, and eventually, they will need to be replaced. Keep track of the battery’s performance and capacity over time, and replace them when necessary to maintain optimal performance.

By following these maintenance tips, you can prolong the life and performance of your batteries and avoid common pitfalls.

Common Mistakes to Avoid

When hooking up golf cart batteries, there are several common mistakes that should be avoided. These mistakes can lead to poor battery performance or even damage. Here are some common mistakes to steer clear of:

Mixing old and new batteries

Mixing old and new batteries can result in an imbalance in the electrical charge and capacity. It is best to replace all batteries at once to ensure consistent performance.

Ignoring corrosion on battery terminals

Corrosion on battery terminals can hinder the connection and degrade battery performance. Regularly inspect and clean the terminals to prevent corrosion buildup.

Not following proper safety precautions

Working with batteries can pose certain risks if proper safety precautions are not followed. Always wear safety goggles, rubber gloves, and work in a well-ventilated area to minimize potential hazards.

Using the wrong type of charger for golf cart batteries

Using the wrong type of charger can damage your batteries or even pose a safety risk. Ensure that you are using a battery charger specifically designed for golf cart batteries.

By avoiding these common mistakes, you can ensure a smooth and successful battery hookup process.

Troubleshooting Tips

Sometimes, despite following the correct steps, issues may arise with your golf cart batteries. Here are some troubleshooting tips to help identify and resolve any issues:

Check for loose or damaged wires

Inspect the entire battery system for any loose or damaged wires. Loose or broken wires can disrupt the electrical flow and affect battery performance.

Ensure the battery cables are securely connected

Double-check that all battery cables are securely connected to the terminals. Tighten any loose connections with a wrench or socket set.

Test the batteries individually

If you suspect a problem with a specific battery, you can test them individually using a battery tester. This will help identify any weak or faulty batteries that need to be replaced.

Consult a professional if problems persist

If you are unable to resolve the issues on your own, it’s advisable to seek professional assistance. A qualified technician can diagnose and repair any complex problems with your golf cart batteries.

By utilizing these troubleshooting tips, you can address and resolve any potential issues and ensure the optimal performance of your golf cart batteries.

Additional Tips and Considerations

Here are some additional tips and considerations to keep in mind when hooking up your golf cart batteries:

Refer to the golf cart’s manual for specific instructions

For detailed instructions specific to your golf cart model, always refer to the manufacturer’s manual. It will provide accurate information on battery specifications and installation procedures.

Consider using lithium-ion batteries for longer lifespan

If you’re looking for a longer lifespan and higher performance, consider upgrading to lithium-ion batteries. Although they may come at a higher cost, they offer superior efficiency and durability.

Properly dispose of old batteries at a recycling center

When replacing your old batteries, it’s important to dispose of them properly. Take them to a recycling center or contact your local waste management facility for guidance on proper battery disposal.

Regularly charge and maintain the batteries to prolong their life

To extend the lifespan of your golf cart batteries, make sure to charge them regularly, especially during periods of inactivity. Following proper charging and maintenance schedules will help maximize their life expectancy.

By following these additional tips and taking necessary precautions, you can ensure the longevity and optimal performance of your golf cart batteries.

In conclusion, hooking up golf cart batteries requires attention to detail, proper tools, and safety precautions. By following the comprehensive steps outlined in this guide and avoiding common mistakes, you can successfully replace and connect your golf cart batteries. Regular maintenance and care will ensure longevity and reliable performance, allowing you to enjoy many rounds of golf without any battery-related issues.