The Ultimate Guide to Clearing Your Hips in the Golf Swing

Unlock the secrets to clearing your hips in the golf swing with this ultimate guide! Improve your technique and power with valuable tips and techniques.

Have you ever wondered how to achieve that perfect swing in golf? Look no further! In “The Ultimate Guide to Clearing Your Hips in the Golf Swing,” you will discover the secrets to mastering the art of hip clearance. Whether you’re a beginner or an experienced golfer, this guide will provide you with valuable techniques and tips to help you improve your game. From understanding the importance of hip clearance to learning the proper body positioning, this article will equip you with the knowledge you need to enhance your golf swing and achieve greater accuracy and power. Get ready to elevate your golf game to new heights with the ultimate guide to clearing your hips in the golf swing.

The Ultimate Guide to Clearing Your Hips in the Golf Swing

Understanding the Importance of Clearing Hips in the Golf Swing

When it comes to the golf swing, hip clearance plays a crucial role in achieving proper technique and maximizing power. The hips act as the engine that drives the swing, transferring energy from your legs to your upper body and ultimately to the club. Clearing the hips refers to the rotation and lateral movement of the hips during the swing, allowing for a full and unrestricted release of power. This not only helps generate clubhead speed but also promotes proper sequencing and timing in the swing.

The Role of the Hips in the Golf Swing

The hips are the center of rotational power in the golf swing. They play a vital role in maintaining balance and stability while allowing for a full range of motion. During the backswing, the hips should rotate away from the target, creating torque and potential energy. As the downswing begins, the hips initiate the sequence of movements, driving the lower body forward and leading the upper body into a powerful release. Clearing the hips effectively allows for a smooth and efficient transfer of energy, resulting in greater distance and accuracy.

Benefits of Clearing Hips Properly

Proper hip clearance in the golf swing offers several benefits for golfers of all skill levels. First and foremost, it allows for increased power and distance. By maximizing the rotation and lateral movement of the hips, you can generate more speed and force in your swing, translating into longer drives and stronger iron shots. Clearing the hips also improves stability and balance, preventing common swing faults such as swaying or sliding. This promotes a consistent ball strike and helps maintain control throughout the swing. Additionally, proper hip clearance allows for better sequencing and timing of the swing, increasing the chances of hitting the ball squarely for improved accuracy.

Common Mistakes in Hip Clearance

While understanding the importance of clearing hips is essential, many golfers struggle with achieving proper hip clearance due to common mistakes. One common error is limited hip mobility and flexibility. Tightness in the hips restricts the range of motion and inhibits the ability to clear the hips fully. Another mistake is an early release of the hips, often referred to as “hip extension.” This occurs when the hips start to rotate too early in the downswing, resulting in a loss of power and accuracy. Overturning the hips is another common fault, wherein the hips rotate excessively, leading to an unbalanced and inconsistent swing. Addressing these mistakes and focusing on proper hip clearance can greatly improve your golf swing and overall performance.

Developing Flexibility and Mobility

Developing flexibility and mobility in the hips is crucial for achieving proper hip clearance. Key muscles for hip mobility include the hip flexors, glutes, and hamstrings. Stretching and warm-up exercises can help increase flexibility in these areas, allowing for greater hip rotation and lateral movement in the swing. Simple exercises such as hip circles and dynamic stretches can be incorporated into your pre-round routine to enhance hip mobility. Additionally, incorporating yoga into your fitness regimen can provide significant benefits for hip mobility, as well as overall strength and flexibility.

Key Muscles for Hip Mobility

To improve hip mobility, it is important to target the key muscles involved. The hip flexors, including the psoas and iliacus muscles, play a significant role in hip rotation. Stretching exercises such as lunges and kneeling hip flexor stretches can help lengthen and release tension in these muscles. The glutes, which consist of the gluteus maximus, medius, and minimus, contribute to both hip rotation and stability. Strengthening exercises such as glute bridges and lateral band walks can activate and strengthen these muscles. Lastly, the hamstrings, located at the back of the thigh, aid in hip extension and flexibility. Regular hamstring stretches can improve hip mobility and help prevent limitations in the swing.

Effective Warm-up and Stretching Exercises

Before engaging in any physical activity, it is essential to warm up and stretch to prepare your body for the demands of the golf swing. Dynamic stretches such as leg swings, torso rotations, and arm circles can increase blood flow, warm up the muscles, and improve joint mobility. These exercises should be performed in a controlled and fluid manner, gradually increasing the range of motion. It is also important to incorporate specific stretching exercises for the hips, such as hip rotations, figure-four stretches, and butterfly stretches. These stretches target the hip joints and surrounding muscles, promoting flexibility and mobility necessary for proper hip clearance in the golf swing.

Incorporating Yoga for Hip Mobility

Yoga can be a valuable addition to any golfer’s training regimen, particularly for improving hip mobility. Various yoga poses such as the Warrior poses, Triangle pose, and Pigeon pose can target the muscles involved in hip rotation and clearance. These poses not only promote flexibility but also help in building strength and stability in the hips. Additionally, practicing yoga can enhance body awareness and mindfulness, which can translate into improved control and focus in your golf swing. Consider incorporating yoga into your fitness routine to unlock the full potential of your hips and improve your overall golf performance.

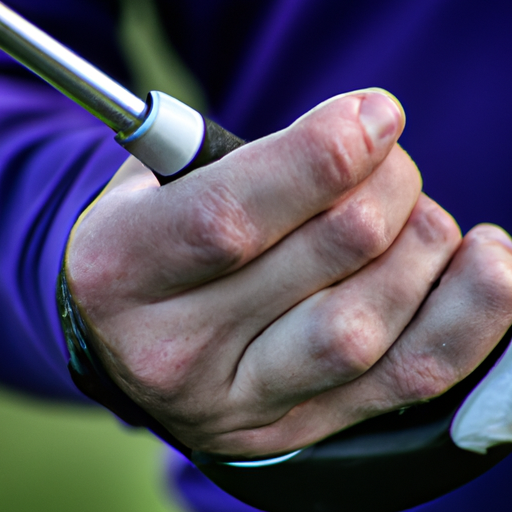
Proper Setup for Clearing Hips

Setting up correctly is crucial for allowing proper clearance of the hips during the golf swing. Addressing the ball with the correct stance and alignment helps establish the foundation for an efficient swing. First, ensure that your feet are shoulder-width apart, with the toes slightly flared out. This stance provides a stable base and allows for optimal hip rotation. Next, align your body parallel to the target line, with your shoulders, hips, and feet all pointing in the same direction. Proper alignment not only promotes consistent hip clearance but also aids in square contact with the ball. Lastly, maintain a slight forward tilt in your spine, known as the spine angle, to encourage a proper weight transfer and rotation of the hips throughout the swing.

Balancing Weight Distribution

Maintaining a balanced weight distribution is essential for efficient hip clearance. During the setup, the weight should be evenly distributed between both feet, with a slight bias towards the balls of your feet. This balanced setup allows for optimal stability and mobility in the hips. As you initiate the swing, the weight should shift gradually onto the inside of your back foot during the backswing, then transfer smoothly to the front foot during the downswing. This weight transfer enables a proper sequence of movements, with the hips leading the way. By maintaining a balanced weight distribution, you can effectively clear the hips and transfer power from the ground up, resulting in a more powerful and controlled swing.

Understanding the Correct Spine Angle

The spine angle is another crucial element in achieving proper hip clearance. The spine angle refers to the forward tilt or bend of the upper body at address. It is essential to maintain a consistent spine angle throughout the swing to ensure a proper transfer of energy and avoid any restrictions in hip rotation. At setup, the spine should be tilted slightly forward, maintaining a straight line from the top of the head to the tailbone. This position allows the hips to rotate freely and facilitates an efficient transfer of power from the lower body to the upper body. By understanding and maintaining the correct spine angle, you can enhance your ability to clear the hips and achieve a more powerful and consistent golf swing.

Mastering the Backswing

The backswing sets the foundation for a powerful and effective golf swing. Mastering the backswing involves balancing the movements of the upper and lower body while maintaining a coiled position that maximizes potential energy. Proper arm and shoulder movement play a crucial role in achieving the ideal backswing.

Balancing Upper and Lower Body Movements

To execute a balanced backswing, it is crucial to coordinate the movements of the upper and lower body. As you initiate the backswing, focus on coiling the upper body while allowing the hips to rotate naturally. The upper body should turn away from the target, with the shoulders turning under the chin. At the same time, the hips should rotate, maintaining their position without excessive lateral movement. Balancing the movements of the upper and lower body allows for a connected and synchronized backswing, setting the stage for a powerful downswing.

Maintaining a Coiled Position

Maintaining a coiled position in the backswing is instrumental in generating power and maximizing clubhead speed. The coil refers to the twisting motion created by the separation between the upper and lower body during the backswing. As you rotate the upper body away from the target, focus on keeping the lower body stable and resisting the urge to slide or sway. This coiled position can be likened to a tightly wound spring, ready to unleash energy in the downswing. By maintaining a solid and coiled position in the backswing, you can generate stored energy and unleash it with explosive power through the clearing of the hips in the downswing.

Creating Proper Arm and Shoulder Movement

Proper movement of the arms and shoulders is crucial in creating a balanced and effective backswing. As you turn the upper body away from the target, allow the arms to swing naturally, maintaining a relaxed and fluid motion. Avoid any excessive tension or forced movements that may restrict the rotation of the hips. The shoulders play a vital role in the backswing, rotating around the spine and providing stability and control. Focus on turning the shoulders under the chin, while keeping the upper body relatively centered over the lower body. By creating a seamless and coordinated movement of the arms and shoulders, you can achieve a powerful and efficient backswing that sets the stage for clearing the hips in the downswing.

Initiating the Downswing

The downswing is where the power and accuracy of the golf swing come to fruition. Initiating the downswing correctly is essential for unlocking the potential energy stored during the backswing and properly transferring it through the hips to the club.

Understanding the Kinetic Chain

The downswing is a dynamic and sequential movement that involves the transfer of energy from the lower body to the upper body and ultimately to the club. This transfer of energy is known as the kinetic chain. To initiate the downswing effectively, it is important to understand the sequence of movements involved in the kinetic chain. The downswing begins with a slight shift of weight onto the front foot while the hips start to rotate towards the target. This rotation of the hips then leads to the rotation of the torso and shoulders, followed by the arms, and finally, the release of the club. By understanding and utilizing the kinetic chain, you can generate maximum power and efficiency in your downswing.

Starting the Downswing with the Lower Body

To unleash the power stored in the backswing, it is crucial to start the downswing with the lower body, particularly the hips. As the weight shifts onto the front foot, initiate the downswing by rotating the hips towards the target. This lateral movement and rotation of the hips provide the foundation for mobilizing the rest of the body and transferring energy efficiently. It is important to emphasize the hip rotation and ensure that it starts before any arms or upper body movement. By starting the downswing with the lower body, you can effectively clear the hips and create a powerful and coordinated movement through the rest of the swing.

The Ultimate Guide to Clearing Your Hips in the Golf Swing

Generating Power from the Hips

Clearing the hips in the downswing is essential for generating power and clubhead speed. As the hips rotate towards the target, the energy stored in the coiled position is unleashed and transferred to the upper body and, ultimately, to the club. The hips act as the engine that powers the swing, providing the necessary torque and momentum. To fully maximize power from the hips, focus on maintaining a solid base and engaging the core muscles. The glutes and abdominal muscles play a significant role in generating power by stabilizing the lower body and assisting in hip rotation. By generating power from the hips, you can achieve greater distance, control, and consistency in your golf shots.

Clearing Hips in the Downswing

Clearing the hips in the downswing is a critical component of a powerful and effective golf swing. Proper hip clearance allows for efficient rotation and contribution of the lower body, maximizing power and accuracy. While maintaining flexibility and rotation in the hips is essential, proper timing and sequencing are equally important.

Maintaining Flexibility and Rotation in the Hips

To clear the hips effectively in the downswing, it is crucial to maintain flexibility and rotation in the hips. This can be achieved by continuing to focus on the key muscles involved in hip mobility, such as the hip flexors, glutes, and hamstrings. Regular stretching exercises, both before and after your golf rounds or practice sessions, can help maintain and improve hip flexibility. Additionally, incorporating exercises that specifically target hip rotation, such as pelvic rotations and hip twists, can further enhance rotational mobility in the hips. By maintaining flexibility and rotation in the hips, you can enhance your ability to clear the hips and generate power in the downswing.

Proper Timing and Sequencing

In addition to maintaining flexibility and rotation, proper timing and sequencing of movements are crucial for clearing the hips effectively in the downswing. It is essential to initiate the downswing with the lower body, specifically the hips, before initiating any upper body or arm movements. This ensures a synchronized and efficient transfer of energy through the swing. As the hips start the downswing, allow the torso, arms, and club to follow naturally, without any excessive or forced movements. Focus on maintaining a smooth and coordinated sequence of movements, with the hips leading the way. By mastering the timing and sequencing of movements, you can achieve proper hip clearance and unlock the full potential of your golf swing.

Avoiding Overturning or Early Hip Extension

When striving to clear the hips effectively, it is important to avoid two common mistakes: overturning and early hip extension. Overturning occurs when the hips rotate excessively, leading to an unbalanced and inconsistent swing. This can result in a loss of power and compromised control. To prevent overturning, focus on maintaining a stable lower body and allowing for a natural and controlled rotation of the hips. Early hip extension, on the other hand, refers to the premature straightening of the lower back and hips during the downswing. This can cause an inefficient transfer of energy and lead to inconsistent ball striking. To prevent early hip extension, focus on maintaining proper posture and keeping the lower body stable throughout the downswing. By avoiding these common mistakes, you can ensure proper hip clearance and achieve a more powerful and consistent golf swing.

Improving Hip Clearance Through Drills

To improve hip clearance in the golf swing, various drills can be incorporated into your practice routine. These drills specifically target hip rotation, weight transfer, and overall coordination of the swing. By incorporating these drills, you can enhance your ability to clear the hips effectively and improve your swing mechanics.

Hip Rotation Drills

Hip rotation drills focus on enhancing the range of motion and flexibility in the hips for optimal clearance. One effective drill is the seated hip rotation drill. Sit on a stability ball or chair with good posture and slowly rotate the hips from side to side. This drill can be performed with or without a club, allowing you to focus solely on hip rotation. Another beneficial drill is the standing hip rotation drill. Stand with your feet shoulder-width apart and your arms extended in front of you. Initiate the movement by rotating the hips to the right, following the rotation with the upper body and arms. Repeat the movement on the opposite side. These hip rotation drills can be performed as part of your warm-up routine or incorporated into your practice sessions to improve hip mobility and clearance.

Weight Transfer Drills

Weight transfer drills help promote a balanced and coordinated transfer of weight from the back foot to the front foot during the downswing. One effective drill is the step drill. Start by addressing the ball with a slightly open stance. Begin your backswing, and as you transition into the downswing, take a small step forward with your front foot, allowing your weight to follow. This drill emphasizes shifting the weight smoothly and incrementally, leading with the lower body. Another useful drill is the swing-within-a-swing drill. Start with a shortened backswing, creating a “mini” swing. As you initiate the downswing, focus on shifting your weight fully onto the front foot, emphasizing the weight transfer and hip clearance. These weight transfer drills can be practiced on the driving range or even in your backyard, reinforcing the proper sequence of movements and developing a more efficient swing.

Hip Bump and Slide Drills

Hip bump and slide drills are designed to improve the lateral movement and rotation of the hips during the golf swing. One effective drill is the wall drill. Stand with your back against a wall and assume your address position. As you initiate the downswing, focus on bumping your hips laterally against the wall, then sliding them towards the target as you rotate. This drill helps promote the proper lateral movement and hip clearance necessary for an effective swing. Another beneficial drill is the step-through drill. Start with a slightly closed stance and initiate the downswing by stepping forward with your front foot, allowing the hips to clear and rotate naturally. This drill reinforces proper hip movement and encourages a smooth and coordinated swing. Incorporating these hip bump and slide drills into your practice routine can enhance your ability to clear the hips effectively and promote a more powerful and controlled golf swing.

Working with a Golf Instructor

Working with a golf instructor can be highly beneficial in developing and refining your technique, including hip clearance. A professional instructor can provide personalized guidance, identify specific areas to improve, and offer tailored drills and exercises to enhance your hip clearance. From beginners to advanced players, receiving professional instruction can help ensure that you are utilizing proper mechanics, maximizing power, and achieving your full potential on the course.

Benefits of Professional Guidance

Professional guidance from a golf instructor offers numerous benefits for golfers of all levels. First and foremost, working with an instructor can help identify any swing faults or inconsistencies that may be hindering proper hip clearance. Through video analysis and observation, an instructor can pinpoint specific areas for improvement and provide corrective feedback. Additionally, an instructor can provide valuable insights and knowledge on proper technique and mechanics, ensuring that you are practicing and playing with optimal efficiency. Working with a golf instructor can also enhance your learning experience, as they can answer questions, provide guidance on various aspects of the game, and offer ongoing support and motivation.

Finding an Experienced Instructor

To find an experienced golf instructor, consider visiting your local golf club or driving range. Inquire about the instructors available and ask for recommendations from fellow golfers. Research online reviews and testimonials to gain insights into the experience and teaching style of potential instructors. Look for instructors who are certified or trained by recognized golf teaching organizations such as the PGA or LPGA. A good instructor should have extensive knowledge and experience in teaching all aspects of the game, including proper hip clearance. Take the time to interview potential instructors, asking about their teaching philosophy and approach to ensure they align with your goals and learning style.

Progressive Training Programs

Working with a golf instructor can also involve developing progressive training programs tailored to your specific needs and goals. These programs typically involve a combination of drills, exercises, and practice routines designed to enhance hip clearance and overall swing mechanics. The programs may span several weeks or months and include regular lessons and feedback sessions to track progress and make necessary adjustments. Progressive training programs allow for a structured and systematic approach to developing your skills, ensuring that you are consistently improving and reaching your desired outcomes.

Common Issues and Corrections

Understanding and addressing common issues related to hip clearance can greatly enhance your overall golf performance. Recognizing and correcting these issues can help alleviate swing faults and promote more consistent and powerful ball striking.

Slicing or Hooking Due to Poor Hip Clearance

One common issue related to poor hip clearance is slicing or hooking the golf ball. Slicing occurs when the clubface is open relative to the swing path, resulting in a left-to-right ball flight for right-handed golfers. Hooking, on the other hand, occurs when the clubface is closed relative to the swing path, resulting in a right-to-left ball flight for right-handed golfers. Both the slice and hook can be caused by improper hip clearance, often due to an overactive upper body or an early release of the arms. To correct slicing or hooking, focus on starting the downswing with the lower body, emphasizing proper hip rotation and lateral movement. This promotes a more neutral swing path and encourages the clubface to square up at impact, reducing the chances of slicing or hooking.

Lack of Distance and Power in Shots

Another common issue stemming from poor hip clearance is a lack of distance and power in shots. Inefficient hip clearance restricts the transfer of energy from the lower body to the upper body and, ultimately, to the club. This can result in weak and abbreviated swings, leading to shorter distances. To improve distance and power, focus on generating a complete and unrestricted hip clearance. This involves initiating the downswing with the lower body, maintaining balance and stability, and allowing for a full rotation and lateral movement of the hips. By clearing the hips effectively, you can maximize the transfer of power from the ground up, resulting in longer and more powerful shots.

Fixing Inconsistencies in Ball Flight

Inconsistencies in ball flight can also be attributed to poor hip clearance. When the hips do not clear properly, it can lead to swing faults and compensations that cause the ball to be struck inconsistently. For example, if the hips do not clear sufficiently and the upper body becomes too active, it can result in a variety of mishits, from thin shots to fat shots. To fix inconsistencies in ball flight, focus on maintaining a stable lower body and allowing for a full rotation and lateral movement of the hips. This promotes a more consistent and repeatable swing, leading to improved ball striking and a more predictable ball flight.

Practicing with Purpose

Practicing with purpose is essential for improving any aspect of your golf game, including hip clearance. Building muscle memory through repetition and incorporating specific exercises into your practice routine can significantly enhance your ability to clear the hips effectively.

Building Muscle Memory through Repetition

Repetition is key when it comes to building muscle memory and developing consistent and efficient hip clearance. Incorporate hip clearance drills into your practice sessions and perform them regularly to reinforce proper technique and movement patterns. Start with slow and controlled movements, focusing on the correct sequence and timing. Gradually increase the speed and intensity as you become more comfortable and confident. By practicing with purpose and repetition, you can train your body to consistently clear the hips in the golf swing, leading to improved performance on the course.

Incorporating Hip Clearance Exercises in Practice Routine

In addition to specific hip clearance drills, incorporating exercises that target hip mobility and strength can further improve your ability to clear the hips effectively. Exercises such as lunges, squats, and lateral band walks can strengthen the muscles involved in hip rotation and lateral movement. These exercises can be incorporated into your warm-up routine or performed during dedicated strength and conditioning sessions. By strengthening and mobilizing the hips, you can enhance your ability to clear the hips and generate power in the golf swing.

Monitoring and Analyzing Swing Data

Monitoring and analyzing swing data can provide valuable insights into your hip clearance and overall swing mechanics. Utilize video analysis tools or seek professional assistance to capture your swing from different angles. Analyze the footage to assess your hip clearance, posture, alignment, and sequencing of movements. Compare your swing to that of professional golfers or golfers with similar body types and playing styles. Pay attention to any discrepancies or areas for improvement. By actively monitoring and analyzing your swing data, you can identify specific areas to focus on in your practice sessions and track your progress over time.

In conclusion, understanding and implementing proper hip clearance in the golf swing is essential for maximizing power, distance, and accuracy. By emphasizing hip mobility, flexibility, and coordination, and focusing on proper mechanics and timing, you can unlock the full potential of your swing. From incorporating warm-up and stretching exercises to working with a golf instructor, practicing with purpose, and monitoring your swing data, there are various steps you can take to improve your hip clearance. By consistently addressing and refining your hip clearance, you can enhance your overall golf performance and enjoy greater success on the course.

Mastering the Technique: How to Hit Hybrid Golf Clubs

Mastering the Technique: How to Hit Hybrid Golf Clubs | Learn the key steps and tips to confidently and effectively hit hybrid golf clubs, elevating your performance to new heights.

If you’re a passionate golfer looking to improve your game, mastering the technique of hitting hybrid golf clubs is essential. These versatile clubs, designed to combine the best elements of both irons and fairway woods, can be a game-changer on the course. In this article, we’ll explore the key steps and tips to help you confidently and effectively hit hybrid golf clubs, elevating your performance to new heights. So, grab your clubs, get ready to dive into the world of hybrid golfing, and let’s get swinging!

Mastering the Technique: How to Hit Hybrid Golf Clubs

Choosing the Right Hybrid Golf Club

Hybrid golf clubs have gained popularity in recent years due to their versatility and ease of use. When choosing the right hybrid golf club, it’s essential to consider a few factors. Understanding the loft and shaft length, as well as analyzing the clubhead design, will help you make an informed decision.

Understanding Hybrid Golf Clubs

Hybrid golf clubs are designed to combine the best features of both irons and woods. They typically have a smaller, more compact head compared to a wood but have a longer shaft and more forgiveness than an iron. These features make them a great option for players looking for distance and accuracy.

Determining the Loft and Shaft Length

The loft of a hybrid golf club is an essential factor to consider. Hybrids with higher lofts, such as 18 to 21 degrees, are suitable for replacing long irons and hitting high shots. On the other hand, hybrids with lower lofts, around 15 degrees, are ideal for replacing fairway woods and hitting longer shots from the tee.

When it comes to the shaft length, it’s crucial to find the right balance between control and distance. A longer shaft can provide more clubhead speed and distance, but it may sacrifice control. Conversely, a shorter shaft may offer more accuracy but limit your distance.

Analyzing Clubhead Design

The design of the clubhead plays a vital role in the performance of a hybrid golf club. Look for a clubhead design that inspires confidence at address and promotes a smooth, consistent swing. Consider factors such as the size, shape, and weight distribution of the clubhead.

A larger clubhead can provide more forgiveness on off-center hits, while a smaller clubhead may offer more versatility and control. Additionally, the weight distribution of the clubhead can affect the club’s launch angle and trajectory. Finding a hybrid with the right balance between forgiveness and control will enhance your overall performance on the course.

Gripping the Hybrid Golf Club

Proper hand placement and grip pressure are essential aspects of gripping a hybrid golf club. Mastering these techniques will help you achieve better control and consistency in your shots.

Proper Hand Placement

To grip a hybrid golf club correctly, start by placing your non-dominant hand (left hand for right-handed players) on the club’s grip. Position your hand slightly to the side of the club so that the grip runs diagonally across your palm. Your thumb should be on top of the grip, pointing towards the clubhead.

Next, place your dominant hand (right hand for right-handed players) below your non-dominant hand, making sure both hands are connected. Your dominant hand’s thumb should fit snugly into the lifeline of your non-dominant hand.

Finding the Correct Grip Pressure

The grip pressure plays a crucial role in controlling the clubface and generating power in your swing. Ideally, you should maintain a firm grip, but avoid gripping the club too tightly, as it can hinder your swing and result in a loss of feel.

On a scale of 1 to 10, where 1 is the lightest grip and 10 is the tightest grip, aim for a grip pressure of around 5 or 6. This allows for a comfortable yet controlled grip that promotes a smooth and powerful swing.

Addressing the Ball

How you address the ball sets the foundation for a successful swing. Paying attention to your stance and alignment, as well as the ball position and clubface alignment, will help you consistently strike the ball cleanly.

Stance and Alignment

Start by positioning your feet shoulder-width apart, with your weight evenly distributed between them. Bend your knees slightly and tilt forward from your hips to create an athletic posture. This posture will provide stability and allow for an efficient transfer of power throughout your swing.

Ensure that your body is aligned parallel to the target line, with your feet, knees, hips, and shoulders all pointing in the same direction. Aligning yourself properly to the target line will enable you to swing the club on the desired path and increase the chances of hitting the ball straight.

Ball Position

The ball position for hybrid clubs varies depending on the shot you want to execute. For most standard shots, position the ball slightly forward of center in your stance. This allows for clean contact with the ball and optimal launch conditions.

Experiment with ball positions during your practice sessions to find the ideal placement that suits your swing and shot shape preferences. Moving the ball slightly back in your stance can help you hit lower shots, while moving it forward can promote higher shots.

Clubface Alignment

Before swinging, ensure that the clubface is square to the target line. One common alignment check is to align the leading edge of the clubface parallel to the target line. This promotes a straighter ball flight and minimizes the chance of slices or hooks.

Take a moment to align the clubface properly with your target before starting your swing. Consistently addressing the ball with a square clubface will lead to more accurate shots.

Mastering the Technique: How to Hit Hybrid Golf Clubs

Performing the Swing

A smooth and well-executed swing is crucial to achieve optimal results with your hybrid golf club. Paying attention to maintaining a smooth tempo, establishing the correct swing path, and executing proper weight transfer and balance will help you strike the ball with power and accuracy.

Maintaining a Smooth Tempo

A smooth tempo in your swing allows for better rhythm and control. Focus on a 3:1 tempo ratio, where the backswing takes three counts and the downswing takes one count. This tempo will help you maintain proper sequencing and generate maximum power through impact.

Avoid rushing your swing or trying to hit the ball too hard. Instead, focus on staying relaxed and swinging smoothly, allowing the club to do the work.

Establishing the Correct Swing Path

The swing path refers to the direction in which the clubhead travels during the swing. To hit successful shots with your hybrid club, establish an inside-out swing path. This means that the clubhead should approach the ball from slightly inside the target line and then move towards the target through impact.

Visualize a shallow arc as you swing, with the clubhead tracing a path just above the ground. This swing path promotes a powerful and accurate strike on the ball.

Weight Transfer and Balance

Proper weight transfer and balance are essential for generating power and maintaining control throughout your swing. As you swing back, transfer your weight onto your back foot, and then shift it back onto your front foot as you swing through the ball. This transfer of weight allows you to generate maximum power and create a smooth and efficient swing.

Maintaining balance throughout your swing is crucial for accuracy. Avoid excessive weight shifts or leaning too far in any direction. Instead, stay centered and balanced to consistently strike the ball cleanly.

Utilizing the Hybrid Club in Specific Situations

Hybrid clubs are incredibly versatile and can be a valuable asset in various on-course situations. Learning how to use them effectively from different lies, such as fairway shots, rough shots, and as a replacement for long irons, can greatly improve your game.

Fairway Shots

When faced with a fairway shot, a hybrid club can provide an excellent alternative to long irons or fairway woods. The high loft and forgiveness of hybrid clubs make them well-suited for launching the ball high and landing it softly on the fairway.

To hit a successful fairway shot with a hybrid club, focus on sweeping the ball off the turf. Position the ball slightly forward in your stance, maintain a smooth tempo, and ensure a shallow approach to the ball. This approach will allow the club to glide through the grass and make clean contact with the ball, resulting in a high and accurate shot.

Rough Shots

The forgiving nature of hybrid clubs makes them particularly effective in navigating through thick rough. Due to their weight and design, hybrid clubs can power through the rough and make clean contact with the ball, unlike irons that may get stuck or snagged.

When faced with a shot from the rough, position the ball slightly back in your stance to take advantage of the club’s weight. Take a slightly steeper swing, ensuring the clubhead gets through the thick grass and strikes the ball cleanly. This technique will help you escape the rough and advance the ball towards your target.

Long Iron Replacement

One of the primary purposes of a hybrid club is to replace long irons. Long irons can be challenging to hit and often result in inconsistent shots. Hybrid clubs, with their forgiving nature and lower center of gravity, provide an excellent alternative for players struggling with long irons.

When using a hybrid club as a replacement for long irons, focus on making a smooth and controlled swing. Position the ball slightly forward in your stance, similar to a fairway shot, and maintain a shallow approach to the ball. The hybrid’s larger clubhead and increased forgiveness will help you launch the ball high in the air and maintain accuracy.

Troubleshooting Common Issues

As with any golf club, there are common issues that players may encounter when using hybrid clubs. Understanding these issues and learning how to troubleshoot them can greatly improve your performance with hybrid clubs.

Slicing the Ball

Slicing, or a shot that curves excessively from left to right for right-handed players (or right to left for left-handed players), is a common issue when using hybrid clubs. To reduce or eliminate slicing, focus on a few key fundamentals.

First, check your grip. Ensure that your grip is not too weak, meaning that your hands are rotated too far to the left (right for left-handed players). A stronger grip can help square the clubface at impact and minimize slicing.

Next, pay attention to your swing path. A slicing shot is often the result of an out-to-in swing path. To correct this, visualize swinging from inside the target line. Practice swinging along an imaginary inside-out path, ensuring that the clubhead travels towards the target through impact.

Hooking the Ball

Hooking the ball, or a shot that curves excessively from right to left for right-handed players (or left to right for left-handed players), is another common issue with hybrid clubs. Rectifying this issue requires focusing on your setup and swing mechanics.

First, check your alignment. Ensure that your body is not aiming too far to the right of the target (left for left-handed players) as this can promote a hooking swing path. Align yourself parallel to the target line to help ensure a straighter ball flight.

Next, evaluate your swing path. A hooking shot is often the result of an inside-to-out swing path. To correct this, visualize swinging from outside the target line. Focus on swinging along an imaginary outside-in path, which helps square the clubface and minimizes the chances of hooking the ball.

Low Ball Flight

If you’re experiencing consistently low ball flights with your hybrid club, it might be due to a few factors, including ball position, angle of attack, and swing speed.

First, check your ball position in your stance. If the ball is positioned too far back, it can lead to a lower launch angle and a subsequent low ball flight. Experiment with moving the ball slightly forward in your stance to encourage a higher launch.

Next, evaluate your angle of attack. A steep angle of attack can result in a low ball flight. Focus on sweeping the ball off the turf rather than hitting down on it aggressively. This shallower angle of attack will help launch the ball higher into the air.

Lastly, consider your swing speed. A slower swing speed can result in a lower ball flight. If you’re struggling with a consistently low ball flight, consider working on improving your swing speed through strength and flexibility exercises or seeking professional instruction.

High Ball Flight

On the other end of the spectrum, a consistently high ball flight with your hybrid club can also be problematic, as it may sacrifice distance and control. Similar to a low ball flight, several factors can contribute to a high ball flight.

First, check your ball position. If the ball is positioned too far forward in your stance, it can lead to a higher launch angle and too much height on your shots. Experiment with slightly moving the ball back in your stance to encourage a more penetrating ball flight.

Next, evaluate your angle of attack. A shallow angle of attack can result in a higher ball flight. Focus on hitting down on the ball slightly to reduce the launch angle and promote a more controlled ball flight.

Lastly, consider your clubhead’s loft. If your hybrid club has higher loft options, it may be worth considering a hybrid with a lower loft to help bring down the ball flight. Adjusting the loft can help optimize the trajectory and make it more suitable for your desired shot shape and distance.

Fat Shots

Fat shots, where the club strikes the ground before the ball, can be frustrating and result in poor contact and distance. Addressing a few key factors can help reduce the occurrence of fat shots with your hybrid club.

First, evaluate your ball position. Placing the ball too far back in your stance can cause the clubhead to strike the ground before making contact with the ball. Experiment with moving the ball slightly forward in your stance to ensure cleaner contact.

Next, focus on maintaining a consistent swing tempo. Rushing your swing or attempting to hit the ball too hard can disrupt your timing and lead to fat shots. Stay relaxed, maintain a smooth tempo, and allow the club to do the work.

Lastly, pay attention to your weight transfer and balance. A proper weight transfer is essential for striking the ball cleanly. Avoid excessive weight shifts or leaning back during your swing, as this can lead to fat shots. Instead, stay centered, maintain a balanced posture, and focus on a downward strike on the ball.

Practicing with Hybrid Golf Clubs

To improve your proficiency with hybrid golf clubs, regular practice sessions are essential. Incorporating range sessions, on-course practice, and visualization techniques into your practice routine will greatly benefit your overall performance.

Range Sessions

Range sessions provide an opportunity to focus on specific aspects of your hybrid club play. They allow you to refine your swing mechanics, experiment with different shot shapes, and develop a consistent feel for your club. During range sessions, consider the following practice drills:

  • Alignment and aiming exercises: Set up alignment poles or visual markers on the range to ensure that your body is aligned parallel to the target line.
  • Ball position drills: Practice hitting shots with the ball positioned at various points in your stance to understand the impact on the ball flight.
  • Swing tempo drills: Use a metronome or count in your head to establish a consistent 3:1 tempo ratio for your swings.
  • Target-oriented drills: Set specific targets or practice hitting to specific yardages to develop accuracy and distance control.

On-Course Practice

While range sessions allow for focused practice, on-course practice enables you to apply your skills in a real playing environment. During practice rounds or casual play, focus on using your hybrid club strategically in various situations. Experiment with different shots, course management strategies, and decision-making processes. On-course practice will help you gain confidence, adaptability, and a better understanding of the strengths and capabilities of your hybrid clubs.

Visualization Techniques

Visualization can be a powerful tool to improve your performance with hybrid clubs. Before each shot, take a moment to visualize the desired shot shape, trajectory, and landing spot. Imagine the ball soaring through the air and landing precisely where you want it to. Visualization helps train your mind to focus on the desired outcome and enhances your ability to execute the shot effectively.

Understanding Distance Gaps

To optimize your performance with hybrid clubs, understanding the distance gaps between your clubs is crucial. Determining carry yardages and controlling shot distances will help you choose the right club for each situation and improve your scoring ability.

Determining Carry Yardages

To determine the carry yardages with your hybrid clubs, record the distance each club carries during range sessions or on-course play. Focus on hitting shots with a smooth tempo and your normal swing. Take note of the average distance for each club and create a reference guide for yourself.

To fine-tune your carry yardages, consider factors such as temperature, wind conditions, and course elevation. These variables can impact the ball’s flight and distance, so adjust your club selection accordingly to compensate for any variations from your normal distances.

Controlling Shot Distances

Controlling shot distances with your hybrid clubs is a valuable skill that allows you to adapt to different situations and pin positions. To improve your distance control, consider the following techniques:

  • Partial swings: Experiment with taking shorter backswings and follow-throughs to produce shorter shots. This technique allows you to control the distance by altering the length of your swing while maintaining consistent tempo and control.

  • Grip pressure: Adjusting your grip pressure can also help control shot distances. A slightly firmer grip can result in less clubhead rotation and a shorter ball flight, while a lighter grip can promote more speed and distance.

  • Swing speed: Practice varying your swing speed with your hybrid clubs to understand their impact on shot distances. Experiment with swinging more aggressively or more smoothly to gauge the changes in ball flight and distance.

Improving Accuracy with Hybrid Clubs

While hybrid clubs offer forgiveness and distance, developing accuracy is equally important for consistent performance. Improving your clubface control, understanding shot dispersion patterns, and practicing proper alignment will enhance your accuracy with hybrid clubs.

Clubface Control

Clubface control is a critical aspect of accurate ball striking. Pay attention to your grip and ensure that your hands are not too passive or too active during the swing. A neutral grip allows for better clubface control at impact.

Additionally, focus on maintaining a square clubface throughout the swing. Practice drills that help develop a consistent clubface position at address and throughout the swing. With proper clubface control, you’ll be able to consistently strike the ball with the intended shot shape and direction.

Shot Dispersion Patterns

Understanding your shot dispersion patterns can provide valuable insights into your game and help you make better strategic decisions on the course. During range sessions or on-course play, pay attention to the direction and distance variations of your hybrid shots.

Take note of the dispersion patterns for different swing speeds, shot shapes, and swing tendencies. This understanding will allow you to better assess potential risks and select the appropriate club for each situation.

Alignment

Proper alignment is fundamental to accuracy with hybrid clubs. Ensure that your body is parallel to the target line during the setup and that the clubface is square to the target. Deviations from proper alignment can lead to off-target shots and inconsistency.

Practice alignment drills on the range and during practice rounds. Use alignment rods or visual markers to establish consistent alignment habits. The more comfortable you become with aligning yourself correctly, the greater your chances of hitting accurately with your hybrid clubs.

Fine-Tuning Your Hybrid Golf Club Performance

To optimize your hybrid golf club performance, consider making club adjustments and exploring custom fitting options. These steps will help you personalize your equipment to suit your swing and playing style.

Club Adjustments

Hybrid golf clubs often come with adjustable features that allow you to fine-tune their performance. Explore the settings on your hybrid club, such as loft, lie angle, and weight placement, to find the optimal configuration for your game.

Experiment with different loft settings to determine the ideal launch conditions for your desired shot shape and distance. Adjust the lie angle to ensure that the sole of the club sits flush with the ground at impact. Lastly, experiment with weight placement to influence the club’s forgiveness, trajectory, and overall performance.

Consult the manufacturer’s instructions or seek professional guidance to make club adjustments properly and effectively.

Custom Fitting

Custom fitting is an excellent option to maximize your hybrid club’s performance. A professional club fitter can analyze your swing characteristics, such as swing speed, tempo, angle of attack, and shot tendencies. They can then recommend the optimal shaft, loft, and clubhead design for your hybrid clubs.

During a custom fitting session, you’ll have the opportunity to test various combinations and receive expert advice tailored to your game. Taking advantage of custom fitting ensures that your hybrid clubs are perfectly suited to your swing, promoting better performance, distance, and accuracy on the course.

In conclusion, mastering the technique of how to hit hybrid golf clubs entails understanding the club’s features, adopting proper hand placement and grip pressure, addressing the ball with precision, executing a smooth swing, and utilizing them in different on-course situations. Troubleshooting common issues, practicing diligently, understanding distance gaps, improving accuracy, and fine-tuning your hybrid golf club’s performance are all crucial aspects of becoming proficient with hybrid clubs. By following these guidelines, you’ll be well-equipped to make the most out of your hybrid golf clubs and elevate your game on the course.

Improve Your Golf Swing and Stop Hitting Behind the Ball

Improve your golf swing and stop hitting behind the ball with valuable tips and techniques. Achieve more accurate and satisfying shots on the course.

If you find yourself consistently hitting behind the golf ball and want to improve your swing, you’ve come to the right place. In this article, you’ll discover valuable tips and techniques to help you address this common issue head-on. By implementing these strategies and making small adjustments to your swing, you’ll be well on your way to achieving more accurate and satisfying shots on the golf course. Say goodbye to mis-hits and hello to better ball striking – let’s get started!

Improve Your Golf Swing and Stop Hitting Behind the Ball

Understanding the Problem

Causes of hitting behind the ball

Hitting behind the golf ball can be the result of several factors. One common cause is an improper grip, where the hands are too far behind or in front of the clubface at impact. This can lead to the clubhead descending too steeply into the ground, causing the club to strike the turf before making contact with the ball. Another cause can be a poor posture and stance, where the player is too hunched over or too upright, which can throw off the swing plane and result in hitting behind the ball. Additionally, misalignment can also contribute to hitting behind the ball, as it can cause the golfer to swing on an incorrect path.

Consequences of hitting behind the ball

Hitting behind the golf ball not only affects the distance and accuracy of your shots but can also lead to various other issues. One of the major consequences is a loss of power. When the club strikes the ground before the ball, it can decrease the clubhead speed and rob you of the energy needed for an effective shot. Moreover, hitting behind the ball can also result in inconsistency in ball striking, leading to erratic shots and difficulty in controlling the trajectory and spin. This can be frustrating and hinder your ability to perform consistently on the golf course.

Improving Technique

Grip

A proper grip is essential in preventing hitting behind the ball. Ensure that your grip is neither too strong nor too weak. A neutral grip, where the “V” formed by your thumb and index finger points towards your right shoulder (for right-handed golfers), provides a balanced and controlled grip. Experiment and adjust your grip until it feels natural and allows you to maintain control throughout your swing.

Stance and Posture

Proper stance and posture play a crucial role in maintaining a consistent swing and preventing hitting behind the ball. Stand with your feet shoulder-width apart, knees slightly flexed, and your weight evenly distributed on both feet. Your spine should be straight, and your arms should hang naturally. Avoid slouching or leaning too far forward, as this can affect the swing plane and lead to hitting behind the ball.

Alignment

Alignment refers to the positioning of your body and clubface in relation to the target. Proper alignment helps ensure that your swing follows the correct path and reduces the chances of hitting behind the ball. To align yourself correctly, aim the clubface towards your target and align your feet, hips, and shoulders parallel to the target line. Take a moment to visually confirm your alignment before beginning your swing.

Backswing

A smooth and controlled backswing is crucial for avoiding hitting behind the ball. Focus on maintaining a wide arc and proper wrist hinge as you take the club back. Avoid excessive wrist cocking or a flat backswing, as these can disrupt the swing plane and lead to hitting behind the ball. Practice your backswing mechanics to develop consistency and control.

Downswing

The downswing is where the power and accuracy of your shot are generated. To prevent hitting behind the ball, initiate the downswing by shifting your weight properly from your back foot to your front foot. This weight transfer helps ensure that the club strikes the ball before the ground. Keep your leading arm straight and your wrists firm, allowing the clubhead to approach the ball on a shallow descent. Maintaining a smooth tempo and avoiding rushing the downswing will also help you strike the ball cleanly.

Weight Transfer

Proper weight transfer is essential for a fluid and effective golf swing. During the backswing, shift your weight onto your back foot, and then smoothly transfer it onto your front foot during the downswing. This transfer of weight helps ensure that your swing bottoms out at the ball, preventing you from hitting behind it. Practice drills that focus on weight transfer, such as starting with your weight on your back foot and gradually shifting it to your front foot, to develop a consistent and efficient weight shift.

Follow-through

The follow-through is often overlooked but is critical in preventing hitting behind the ball. After making contact with the ball, extend your arms fully and swing the club through towards your target. A complete and balanced follow-through helps ensure that the clubhead remains on the correct path and minimizes the chances of hitting behind the ball. Practice finishing your swing with a smooth follow-through to improve your overall technique.

Mastering Timing and Rhythm

Understanding the importance of timing

Timing is crucial in any successful golf swing. Proper timing ensures that the clubhead strikes the ball cleanly and prevents hitting behind the ball. It involves the coordination of various moving parts, including the backswing, downswing, and weight transfer. Developing a good sense of timing allows you to maximize power, accuracy, and distance.

Developing a consistent tempo

Consistency in tempo is key to improving your timing and preventing hitting behind the ball. Find a rhythm and tempo that feels comfortable for you and allows you to maintain control throughout your swing. Practice swinging with a metronome or counting out a consistent beat to develop a sense of timing and rhythm. Remember, a smooth and even tempo leads to better consistency and impact position.

Drills to improve timing and rhythm

To improve your timing and rhythm, incorporate specific drills into your practice routine. One effective drill is the “Mirror Drill.” Begin by setting up in front of a mirror and make slow, controlled swings while focusing on your alignment, grip, and swing mechanics. This visual feedback will help you develop a better sense of timing and prevent hitting behind the ball. Another helpful drill is the “One-Handed Swing.” By practicing swinging with only one hand, you can improve the synchronization of your body and arms, leading to better timing and a cleaner strike.

Addressing Common Mistakes

Rushing the swing

One common mistake golfers make is rushing their swing. When you rush the swing, it becomes challenging to sync up the various components of the swing, such as the backswing and downswing. This can lead to hitting behind the ball. Take your time during your setup and consciously focus on maintaining a smooth and controlled swing tempo. Patience and proper pacing will help you avoid rushing and improve your ball striking.

Swinging too hard

Attempting to hit the ball harder often results in poor contact and hitting behind the ball. Instead, focus on swinging with smooth acceleration and control. Allow the club to generate the necessary power naturally through proper technique, timing, and weight transfer. By swinging within yourself and maintaining a fluid motion, you will achieve better contact and reduce the likelihood of hitting behind the ball.

Lack of focus

Maintaining focus throughout your swing is essential to prevent hitting behind the ball. Mental distractions can disrupt your timing and rhythm, leading to poor contact. Clear your mind before you swing, and focus on the task at hand. Visualize the desired shot and trust your technique. By staying present and focused on each swing, you will enhance your chances of striking the ball cleanly.

Poor weight distribution

Improper weight distribution can contribute to hitting behind the ball. Ensure that your weight is evenly distributed between both feet during setup and throughout your swing. During the backswing and downswing, focus on shifting your weight smoothly from your back foot to your front foot. Practice drills and exercises that promote proper weight distribution to improve your balance and prevent hitting behind the ball.

Developing Proper Weight Shift

Understanding weight transfer

Weight transfer refers to the shifting of your body weight from one foot to the other during the swing. It plays a crucial role in preventing hitting behind the ball. During the backswing, the weight shifts onto the back foot, loading it with energy. Then, during the downswing, the weight smoothly transfers onto the front foot, allowing for a clean strike on the ball.

Importance of weight shift in the swing

Proper weight transfer is essential for several reasons. Firstly, it helps you maintain balance and stability throughout your swing. Secondly, it ensures that the clubhead reaches the ball before the ground, preventing hitting behind the ball. Lastly, weight shift facilitates power generation by allowing the body to rotate and transfer energy efficiently. Developing a consistent and effective weight shift will significantly improve your ball striking.

Exercises and drills to improve weight shift

Several exercises and drills can help you improve your weight shift and prevent hitting behind the ball. One effective drill is the “Feet Together Drill.” Begin by taking your normal stance and address the ball. Then, bring your feet together, which will force you to focus on shifting your weight properly during the swing. This drill helps develop a more efficient weight transfer and reinforces the importance of balance and stability.

Another useful exercise is the “Weight Transfer Drill.” Start with your feet shoulder-width apart and your weight evenly distributed. Swing back normally, feeling your weight transfer onto your back foot. Then, initiate the downswing by shifting your weight smoothly onto your front foot and striking the ball. Repeat this exercise to develop muscle memory for proper weight transfer and prevent hitting behind the ball.

Maintaining Balance and Stability

Importance of balance in the swing

Maintaining balance throughout your swing is vital for consistent ball striking and to prevent hitting behind the ball. An off-balance or unstable swing can lead to poor contact and lack of power. Balance allows you to stay grounded, maintain control, and transfer energy efficiently through the swing.

Proper weight distribution

Proper weight distribution is key to maintaining balance and preventing hitting behind the ball. During your setup, ensure that your weight is evenly distributed between both feet. As you swing, focus on shifting your weight smoothly from your back foot to your front foot. Imagine drawing an imaginary line from the center of your feet and strive to keep your weight centered throughout the swing. By maintaining proper weight distribution, you will enhance your balance and stability.

Exercises to improve balance and stability

Several exercises can help you improve your balance and stability, thereby reducing the likelihood of hitting behind the ball. One effective exercise is the “Single Leg Stand.” Stand on one leg with your knee slightly flexed and your foot slightly off the ground. Maintain your balance and hold this position for several seconds before switching to the other leg. This exercise challenges your stability, strengthens your core muscles, and improves your overall balance.

Another great exercise is the “Balance Board Drill.” Stand on a balance board or a wobble board with both feet shoulder-width apart. Try to maintain your balance as the board moves and tilts. This drill helps improve your proprioception and stability, translating into better balance throughout your golf swing. Incorporate these exercises into your practice routine to enhance your balance and stability on the course.

Using the Correct Clubs

Choosing the right club

Using the correct club is crucial in preventing hitting behind the ball. Different clubs have different lofts, lengths, and designs, which affect how they interact with the ground and the ball. Take the time to understand the characteristics of each club in your bag and choose the one that best suits the shot at hand. A club with a higher loft, such as a wedge, is generally more forgiving and less likely to make contact with the ground before the ball.

Understanding club dynamics

Understanding the dynamics of your clubs can help you prevent hitting behind the ball. Each club has a specific “bounce” angle, which refers to the curvature on the sole of the clubhead. A higher bounce angle helps the club glide through the ground more smoothly and reduces the chances of hitting behind the ball. Conversely, a lower bounce angle can increase the likelihood of striking the ground before the ball. Take the time to learn about the bounce angles of your clubs and how they affect your shots.

Impact of club selection on swing

The club you select can significantly impact your swing mechanics and the likelihood of hitting behind the ball. The length, weight, and design of each club influence the path and angle of your swing. Heavy clubs may promote a steeper swing, which increases the risk of hitting behind the ball. Conversely, lighter clubs can promote a shallower swing path, reducing the chances of hitting behind the ball. Experiment with different clubs and find the ones that allow you to strike the ball cleanly and avoid hitting the ground first.

Analyzing and Correcting the Swing Path

Identifying swing path issues

The swing path refers to the direction in which the clubhead travels during the swing. An incorrect swing path can contribute to hitting behind the ball. One common swing path issue is the “over-the-top” or “outside-in” swing, where the club moves across the target line from outside to inside. This path can cause the clubhead to descend too steeply into the ground, resulting in hitting behind the ball.

Common swing path errors

Several swing path errors can lead to hitting behind the ball. Apart from the over-the-top swing, another common mistake is an excessive inside-to-out swing path, also known as a “slice.” This path can cause the club to strike the ground too far from the ball, resulting in a weak and erratic shot. Additionally, an overly steep or flat swing plane can also contribute to hitting behind the ball. Identifying and correcting these swing path errors is crucial for improving your ball striking consistency.

Drills and techniques to correct swing path

Numerous drills and techniques can help you correct your swing path and prevent hitting behind the ball. One effective drill is the “Alignment Stick Drill.” Place an alignment stick or golf club on the ground, parallel to your target line, during your setup. This visual aid helps you track your clubhead path during the swing accurately. Focus on swinging the club along the alignment stick, ensuring that it stays on the correct path and avoids hitting behind the ball.

Another useful technique is the “Gate Drill.” Set up two tees or alignment sticks slightly wider than the width of your clubhead, a few inches in front of the ball. Practice swinging the club through the gate without hitting the tees. This drill helps promote a shallow and on-plane swing path, preventing hitting the ground before the ball. Combine these drills with proper swing mechanics and repetitions to gradually adjust your swing path and improve your ball striking.

Developing a Consistent Pre-shot Routine

Importance of a pre-shot routine

A consistent pre-shot routine is crucial for maintaining focus, preparing mentally, and preventing hitting behind the ball. A pre-shot routine helps you set up for success by providing a structured process to follow before each shot. It allows you to establish a rhythm and create a clear mindset, enhancing your chances of striking the ball cleanly.

Components of an effective pre-shot routine

A well-designed pre-shot routine consists of several key components. Firstly, begin by visualizing the shot you intend to hit. Imagine the trajectory, target, and desired outcome. This mental visualization helps you program your mind for success. Next, focus on your alignment, grip, and posture, ensuring that everything is in place. Take a deep breath to relax and clear your mind. Lastly, take a final look at your target, reaffirm your visualized shot, and commit to your swing. Consistently following these components in your pre-shot routine will improve your mental approach and reduce the chances of hitting behind the ball.

Creating and practicing your own routine

Creating your own pre-shot routine is a personal process that should align with your preferences and playing style. Experiment with different components and sequences until you find a routine that feels comfortable and prepares you for each shot. Once you have established your routine, practice it repetitively during your practice sessions and on the course. Practicing your pre-shot routine helps build muscle memory and reinforces the focus and mental clarity required to prevent hitting behind the ball.

The Role of Mental Game

Managing frustration and anxiety

Golf can be a mentally challenging game, and dealing with frustration and anxiety is crucial for preventing hitting behind the ball. When you become frustrated or anxious, you are more likely to rush your swing, lose focus, and make mistakes. Recognize these emotions and develop strategies to manage them effectively. Take deep breaths, visualize successful shots, and consciously remind yourself to stay calm and patient. By managing your emotions, you can maintain a clear mind and prevent hitting behind the ball.

Visualizing successful shots

Visualization is a powerful tool that can enhance your performance and prevent hitting behind the ball. Before each shot, take a moment to visualize a successful outcome. Imagine hitting the ball cleanly, hearing the crisp sound of impact, and seeing it fly toward your intended target. By vividly picturing successful shots in your mind, you program your brain and body to execute the desired swing and reduce the chances of hitting behind the ball.

Techniques for staying focused

Maintaining focus throughout your round is essential for preventing hitting behind the ball. Develop techniques to stay focused on each shot. One effective technique is to establish small goals for each shot, such as focusing on the target or a specific swing thought. By breaking down your round into smaller components, you can remain present in the moment and prevent your mind from wandering. Additionally, practice mindfulness and be aware of any distractions that may arise. The more you train your mind to stay focused, the better equipped you will be to prevent hitting behind the ball.

In conclusion, hitting behind the golf ball can be a frustrating problem to overcome. However, by understanding the causes and consequences of hitting behind the ball and implementing the techniques and drills mentioned in this article, you can improve your golf swing and prevent hitting behind the ball. Remember to focus on your grip, stance, alignment, backswing, downswing, weight transfer, and follow-through to develop a more consistent swing. Mastering timing and rhythm, addressing common mistakes, developing proper weight shift, and maintaining balance and stability will also help you avoid hitting behind the ball. Additionally, use the correct clubs, analyze and correct the swing path, develop a consistent pre-shot routine, and work on your mental game to further refine your skills and prevent hitting behind the ball. With dedication, practice, and a positive mindset, you can improve your golf swing and enjoy a more rewarding experience on the golf course.

The Perfect Guide to Making a Golf Ball Cake

Learn how to make the perfect golf ball cake with this comprehensive guide. From choosing the right ingredients to mastering fondant, this article has all the steps you need. Impress your friends and family with a unique and delicious dessert that looks just like a golf ball!

You are about to embark on an exciting baking adventure as you learn how to make the perfect golf ball cake. Whether you are a golf enthusiast or simply looking to impress your friends and family with a unique and delicious dessert, this guide will provide you with all the necessary steps to create a cake that looks just like a golf ball. From selecting the right ingredients to mastering the art of fondant, this article will be your trusty companion on your journey to baking greatness. So grab your apron and get ready to tee off into the world of baking!

The Perfect Guide to Making a Golf Ball Cake

Are you ready to impress your friends and family with a stunning and delicious golf ball cake? Whether you’re hosting a golf-themed party or surprising a golf enthusiast with a special treat, creating a golf ball cake is easier than you think. By following this comprehensive guide, you’ll learn everything you need to know – from choosing the right ingredients to adding the finishing touches. So, put on your apron and get ready to show off your cake decorating skills!

The Perfect Guide to Making a Golf Ball Cake

Choosing the Right Ingredients

To ensure your golf ball cake turns out perfectly, it’s important to start with high-quality ingredients. Here are the key elements you’ll need:

Cake mix

Begin by selecting a cake mix that suits your preferences. Vanilla or white cake mixes work best for creating the traditional golf ball color, but feel free to experiment with other flavors if you’d like. Make sure to follow the instructions on the box and bake the cake accordingly.

Icing

For a golf ball cake, you’ll need a white icing to create the base color of the golf ball. It’s essential to choose a smooth and spreadable icing that can be easily shaped and textured. Consider using a buttercream or cream cheese icing for a delicious and visually appealing result.

Food coloring

While white icing forms the base color of the golf ball, it’s important to have food coloring on hand for adding any necessary shading or highlights. Gel-based food colorings are recommended, as they provide vibrant colors without altering the consistency of the icing.

Fondant

To achieve the golf ball texture and design, you’ll need fondant. Fondant is a pliable icing that can be shaped, rolled, and molded to create various cake decorations. Make sure to choose a white fondant for your golf ball cake.

Edible decorations

Finally, gather any edible decorations you’d like to use to enhance the appearance of your golf ball cake. Consider using edible pearls, sugar crystals, or other small ornaments that resemble golf ball embellishments. These will add an extra touch of elegance and realism to your creation.

Preparing the Cake

Before embarking on the creative process, it’s crucial to prepare the cake properly. By following these steps, you’ll ensure a sturdy and well-shaped foundation for your golf ball cake.

Baking the cake

Once you’ve chosen your cake mix and prepared the batter, follow the instructions for baking the cake. It’s recommended to use a round cake pan to achieve the shape of a golf ball. Ensure that the cake is fully baked and has cooled to room temperature before continuing.

Crumb coating

To create a smooth base for the fondant, it’s essential to apply a crumb coat. This involves covering the entire cake with a thin layer of icing to seal in any loose crumbs. Spread a thin layer of icing all over the cake using a spatula or butter knife.

Shaping the cake

Now comes the exciting part of shaping the cake to resemble a golf ball. Use a sharp knife to trim any uneven edges and create a round shape. Remember, a golf ball is not a perfect sphere but has a slightly flattened bottom. Take your time to achieve the desired shape.

Refrigerating the cake

Once the cake has been shaped, place it in the refrigerator for at least 30 minutes. Chilling the cake not only helps it hold its shape better but also makes it easier to work with when applying the icing and fondant.

Creating the Golf Ball Texture

The texture of a golf ball is what makes it instantly recognizable. By following these steps, you’ll be able to recreate this distinctive texture on your cake.

Covering the cake in white icing

Start by covering the chilled cake with a layer of white icing. Use a spatula or an offset icing knife to spread the icing evenly over the entire cake, making sure to smooth out any lumps or bumps. The icing should be thick enough to completely cover the cake but thin enough to allow the fondant to adhere to it.

Using a textured sponge

To create the dimples that are characteristic of a golf ball, you’ll need a textured sponge. Gently press the sponge onto the surface of the cake, using light and even pressure. Work your way around the entire cake, applying the sponge in a random pattern. This will create an authentic golf ball texture.

Marking the dimples

Using a toothpick or the end of a paintbrush, carefully mark small indentations in the areas where the dimples should be. These marks will serve as a guide when applying the fondant later on.

Adding shading and highlights

To add depth and realism to the golf ball texture, apply shades and highlights using food coloring. Using a small brush or even a cotton swab, lightly dab darker shades of food coloring into some of the dimples. Then, using a clean brush or finger, lightly blend a lighter shade of food coloring around the edges of the dimples to create highlights. This will give the golf ball cake a more three-dimensional appearance.

The Perfect Guide to Making a Golf Ball Cake

Adding the Golf Ball Design

Now that you’ve achieved the perfect golf ball texture, it’s time to add the golf ball design using fondant. Follow these steps to create an eye-catching and professional-looking golf ball cake.

Creating a stencil

Start by creating a stencil that resembles the design of a golf ball. You can find printable templates online or create your own by drawing circles on a piece of cardboard or sturdy paper. Cut out the circles to form the stencil.

Coloring the fondant

Take a portion of the white fondant and knead it until it becomes pliable. Add a small amount of food coloring to achieve a soft gray color. Remember to add the coloring gradually, as it is easier to darken the fondant later than to lighten it. Knead the fondant until the color is evenly distributed and fully mixed.

Applying the stencil

Place the stencil on top of the cake and press it gently against the icing. Using a small knife or fondant tool, trace around the edges of the stencil to create the outline of the golf ball design. Carefully remove the stencil.

Smoothing out the design

With the outline of the golf ball design in place, it’s time to fill in the rest of the design. Roll out the colored fondant into a thin, even layer. Carefully place the rolled fondant over the outlined design on the cake, making sure to smooth it out gently to avoid any air bubbles. Trim away any excess fondant around the edges of the design.

Filling in the Dimples

To complete the golf ball cake, it’s important to fill in the dimples with royal icing. Follow these steps to achieve a polished and professional finish.

Preparing royal icing

Royal icing is the ideal choice for filling in the dimples of the golf ball cake. It is a thick and smooth icing that can be piped easily. Prepare a small batch of royal icing according to the recipe or using a pre-made mix.

Piping the icing into the dimples

Transfer the royal icing into a piping bag fitted with a small round tip. Carefully pipe the icing into each dimple, ensuring that it fills the entire depression. Start from the center and work your way outward to avoid any excess icing spilling over the edges.

Smoothing out the icing

Once all the dimples have been filled, use a small spatula or the back of a spoon to smooth out the royal icing. Gently spread the icing across the surface of the cake, making sure it fills in any gaps and covers the entire dimpled area. Aim for a smooth and even finish.

Adding the Finishing Touches

Now that the golf ball cake is nearly complete, it’s time to add those final touches that will truly make it stand out. Here are some ideas to consider:

Painting the dimples

To give your golf ball cake an extra touch of realism, consider painting the dimples with an edible silver or pearl luster dust. Mix the dust with a small amount of vodka or clear extract to create a paint-like consistency. Using a small brush, carefully apply the dust to the dimples, giving them a shiny and metallic appearance.

Adding writing or logos

If you’re personalizing the cake for a specific occasion or event, consider adding writing or logos using edible ink or colored icing. This can be done using small piping bags with fine tips or specialty decorating pens. Choose colors that complement the overall design of the cake.

Applying final decorations

To add a decorative element to the golf ball cake, consider adding some final edible decorations. Place edible pearls or sugar crystals around the base of the cake for an elegant touch. You can also add edible golf tees, miniature golf clubs, or sugarpaste flowers to enhance the overall presentation.

Alternative Design Options

Although the traditional golf ball cake is a classic choice, there are several alternative design options you might want to explore. Consider these ideas for your next golf-themed event:

Creating a golf course cake

Instead of focusing solely on the golf ball, you can create an entire golf course cake. Use a rectangular cake as the base and decorate it to resemble a golf course. Add buttercream icing that resembles grass, create sand traps using crushed cookies, and even include small marzipan or fondant golfers.

Making a golf bag cake

For a unique twist, consider making a golf bag cake. Use a rectangular or square cake as the base and carve it into the shape of a golf bag. Cover the cake in fondant or buttercream icing and use additional fondant or modeling chocolate to create the details of the golf bag, such as zippers, handles, and pockets.

Designing a golf-themed cupcakes display

If you’re looking for individual servings, consider creating a golf-themed cupcakes display. Bake cupcakes in golf-themed liners and decorate them with green frosting to resemble grass. Add small fondant golf balls, flags, or even tiny golf clubs as cupcake toppers. Arrange the cupcakes on a tiered stand to create a visually appealing centerpiece.

Tips for Success

While the process of creating a golf ball cake can be exciting, it’s essential to keep a few things in mind to ensure a smooth and enjoyable experience. Here are some tips for success:

Planning ahead

Before you begin, take the time to plan out your cake design and gather all the necessary ingredients and tools. This will help you stay organized and avoid any unnecessary stress during the decorating process.

Working with chilled cake

Chilling the cake before applying the icing and fondant helps it hold its shape better and makes it easier to work with. Take breaks to re-chill the cake if needed, especially during warmer weather, as this will prevent the icing and fondant from melting.

Using the right tools

Invest in good-quality cake decorating tools, such as spatulas, rolling pins, and textured sponges, to achieve professional results. These tools will make the process easier and more enjoyable.

Taking breaks

Cake decorating can be a time-consuming process, so it’s important to take breaks when needed. This will help you stay focused and avoid getting overwhelmed by the intricate details of the cake.

Being patient

Creating a golf ball cake requires attention to detail and patience. Take your time throughout the process and don’t rush, as this will ensure a beautifully finished product.

Common Mistakes to Avoid

While creating a golf ball cake is a fun and rewarding experience, it’s also important to be aware of some common mistakes that could affect the final result. Here are a few things to avoid:

Uneven shaping

Take your time when shaping the cake to ensure it is symmetrical and resembles a golf ball. Uneven shaping can result in an unbalanced and lopsided cake.

Not chilling the cake enough

Chilling the cake is crucial to maintain its shape and make it easier to work with. Skipping or reducing the chilling time could lead to a cake that is difficult to ice and cover with fondant.

Applying too thick fondant

When rolling out the fondant, make sure it is thin and even. Applying overly thick fondant can result in a heavy and dense texture, and it may be more challenging to achieve the desired golf ball design.

Rushing the decorating process

Cake decorating is an art that requires time and patience. Rushing the process may result in sloppy and less polished results. Take your time and enjoy the creative journey.

Conclusion

Congratulations! You’ve now learned how to create an impressive golf ball cake from start to finish. By following this comprehensive guide, you can confidently tackle this cake decorating challenge and impress both yourself and others with your skills. Whether you choose to stick with the classic golf ball design or explore alternative options, you’re sure to create a visually stunning and delicious centerpiece for any golf-themed event. So, gather your ingredients, roll up your sleeves, and have fun creating your very own golf ball masterpiece!

How to Charge an 8 Volt Golf Cart Battery

Learn how to charge an 8 Volt Golf Cart Battery step-by-step. Choose the right charger, inspect the battery, prepare the charging area, and more.

You’ve just finished a relaxing round of golf and now it’s time to make sure your trusty golf cart is ready for the next adventure. But wait! Your 8 volt golf cart battery is running low on power. No need to worry, because in this article, we’ll show you the step-by-step process of how to charge your 8 volt golf cart battery. By following these simple instructions, you’ll have your golf cart up and running in no time, ready to hit the greens again. So let’s get started and give your golf cart the power it needs for more enjoyable rides.

How to Charge an 8 Volt Golf Cart Battery

How to Charge an 8 Volt Golf Cart Battery

Choose the Right Charger

When it comes to charging your 8 volt golf cart battery, the first step is to choose the right charger. You want to ensure that the charger you select is specifically designed for 8 volt batteries. Using a charger that is not compatible with your battery can result in slower charging times, decreased battery performance, and even potential damage to the battery. So, take the time to read the specifications and choose a charger that is suitable for your 8 volt golf cart battery.

Inspect the Battery

Before you start the charging process, it’s essential to inspect your 8 volt golf cart battery carefully. Look for any signs of damage, such as cracks or leaks. Also, check the battery terminals to ensure they are clean and free from corrosion. If you notice any issues with the battery, it’s important to address them before proceeding with the charging process. Failing to do so can impact the efficacy of the charging and overall battery performance.

Prepare the Charging Area

Next, you’ll want to prepare the charging area for a smooth and efficient charging process. Start by finding a well-ventilated area, preferably outdoors or in a well-ventilated garage. Make sure the area is clean and free of any flammable materials. It’s also a good idea to have a fire extinguisher nearby, just in case. Lastly, ensure that the charging area is clear of any obstacles that may interfere with the charging process.

How to Charge an 8 Volt Golf Cart Battery

Connect the Charger

Once the charging area is ready, it’s time to connect the charger to your 8 volt golf cart battery. Begin by locating the battery terminals, which are usually labeled as positive (+) and negative (-). Take the charger’s positive cable and connect it to the positive battery terminal, ensuring a secure connection. Then, connect the charger’s negative cable to the negative battery terminal. Remember to always follow the charger’s instructions for proper connection to avoid any accidents or damage.

Adjust Charging Settings

Most modern chargers come with adjustable charging settings that allow you to optimize the charging process for your 8 volt golf cart battery. Depending on the charger model, you may be able to adjust the charging voltage or select a specific charging mode. It’s crucial to consult the charger’s manual and follow the recommended settings for your battery. Using the wrong settings can result in undercharging or overcharging, both of which can shorten the battery’s lifespan.

Set the Charging Duration

After adjusting the charging settings, it’s time to set the charging duration for your 8 volt golf cart battery. While it may be tempting to charge the battery for as long as possible, it’s important to follow the manufacturer’s recommendations. Overcharging can cause damage to the battery, while undercharging can lead to reduced battery capacity. By adhering to the recommended charging duration, you’ll ensure that your battery receives the optimal charge it needs to perform at its best.

Monitor the Charging Process

Once the charging process begins, it’s essential to monitor it closely. Keep an eye on the charger’s display or indicators to ensure that the charging is progressing as expected. If you notice any unusual sounds, smells, or excessive heat, it’s crucial to stop the charging process immediately and consult the charger’s manual for troubleshooting advice. Regular monitoring will allow you to catch any potential issues early on and prevent further damage to your 8 volt golf cart battery.

Disconnect the Charger

Once the charging duration has elapsed, it’s time to disconnect the charger from your 8 volt golf cart battery. Start by turning off the charger and unplugging it from the power source. Then, disconnect the charger’s cables from the battery terminals in the reverse order of how they were connected. Be sure to handle the cables with care and avoid touching any exposed metal parts to prevent electric shock. Once the charger is safely disconnected, you can proceed to the next step of maintaining your battery.

Perform Regular Maintenance

To ensure the longevity and optimal performance of your 8 volt golf cart battery, it’s crucial to perform regular maintenance. This includes keeping the battery clean and free from dirt and debris, checking the battery terminals for corrosion, and tightening any loose connections. It’s also a good idea to periodically check the battery’s water levels and add distilled water if necessary. Following these maintenance practices will help extend the life of your battery and prevent any unnecessary issues down the road.

Troubleshooting Tips

Even with proper care and maintenance, issues with your 8 volt golf cart battery may arise. In such cases, it’s helpful to have some troubleshooting tips in mind. If you’re experiencing slow charging, check the charger’s input voltage to ensure it matches your power source. If the battery is not holding a charge, it may be time to replace it. Additionally, if you notice any unusual behavior from the battery, such as rapid voltage drops or excessive heating, it’s best to consult a professional for further guidance.

In conclusion, properly charging your 8 volt golf cart battery is essential for maintaining its longevity and optimum performance. By following the steps outlined above – choosing the right charger, inspecting the battery, preparing the charging area, connecting the charger correctly, adjusting the charging settings and duration, monitoring the charging process, disconnecting the charger safely, performing regular maintenance, and utilizing troubleshooting tips when needed – you can ensure that your 8 volt golf cart battery delivers reliable power for all your golfing adventures. So, get your charger ready, take care of your battery, and enjoy the smooth and efficient operation of your golf cart!

7 Tips to Stop Flipping the Golf Club

Discover seven expert tips to put an end to flipping the golf club and improve your game. From grip to lower body stability, these techniques will transform your swing. Don’t miss out on unleashing your true potential on the course!

Are you tired of constantly flipping the golf club during your swing? Frustrated with the lack of control and inconsistency in your shots? Well, fret no more! In this article, you will discover seven tips that will help you put an end to that dreaded flipping motion and improve your golf game. Whether you’re a beginner or a seasoned golfer, these simple yet effective techniques will have you hitting the ball with power and precision in no time. So, grab your golf clubs and get ready to unleash your true potential on the course!

7 Tips to Stop Flipping the Golf Club

Tip #1: Grip the Club Properly

Check your hand position

Proper hand position is essential in preventing club flipping in golf. Make sure your left hand (for right-handed players) is positioned on the club with your thumb resting on the top, forming a “V” shape between your thumb and index finger. Your right hand should then be placed under the left hand, with the same “V” shape formed by your thumb and index finger pointing towards your right shoulder. Checking and adjusting your hand position will help you establish a solid foundation for your swing.

Ensure a neutral grip

While checking your hand position, it is equally important to ensure a neutral grip. A neutral grip means that both hands are positioned squarely on the club, with neither hand dominating the other. This allows for better control and stability throughout your swing. To achieve a neutral grip, place your left thumb slightly to the right side of the center of the grip, and position your right hand so that it mirrors the position of your left hand. This neutral grip will discourage flipping and promote a more consistent swing.

Practice grip pressure

Finding the right balance of grip pressure is crucial to avoiding club flipping. Gripping the club too tightly can restrict your wrist and forearm movement, leading to flipping. On the other hand, gripping the club too lightly can result in a lack of control. Experiment with different grip pressures during your practice sessions to find the sweet spot that allows for a relaxed, yet firm hold on the club. Maintaining a consistent grip pressure will help you maintain control and avoid flipping.

Tip #2: Maintain a Proper Posture

Address the ball correctly

The way you address the ball at the start of your swing can greatly impact your ability to avoid flipping. Make sure to position yourself so that the ball is aligned with the center of your stance. Keep your feet shoulder-width apart and your knees slightly flexed. Bend forward from the hips, maintaining a straight spine angle, and extend your arms comfortably. By addressing the ball correctly, you set yourself up for a more consistent and efficient swing motion.

Keep a straight spine angle

Throughout your swing, it is essential to maintain a straight spine angle. If your spine angle collapses or becomes excessively upright, it can lead to a chain reaction of compensations, causing you to flip the club. Focus on keeping your back straight and your head in a neutral position throughout your swing. This will help you maintain stability and prevent unnecessary movements that may result in flipping.

Distribute weight evenly

Proper weight distribution is another key element in preventing club flipping. When addressing the ball, distribute your weight evenly between your feet. As you swing, maintain this balanced weight distribution, avoiding any excessive shifting or leaning towards one side. By distributing your weight evenly, you establish a solid foundation and promote stability, ultimately reducing the likelihood of flipping the club.

7 Tips to Stop Flipping the Golf Club

Tip #3: Focus on Lower Body Stability

Strengthen your lower body

Maintaining stability in your lower body is crucial for a consistent and controlled swing. Incorporate exercises that target your legs, hips, and core into your fitness routine. Strengthening these areas will provide a solid base for your swing and help prevent unnecessary movement that may lead to flipping. Squats, lunges, and rotational exercises can all contribute to improved lower body stability on the golf course.

Maintain balance throughout the swing

Ensure that you maintain balance throughout your swing by staying centered and grounded. Avoid any excessive lateral movement or shifting of weight from side to side. Focus on a smooth and controlled swing, using your legs as a stable foundation. By maintaining balance, you can reduce the risk of flipping and improve your overall ball-striking consistency.

Avoid excessive lower body movement

While it’s important to have a stable lower body, it’s equally important to avoid excessive movement. Swinging with excessive lower body rotation or lateral movement can disrupt your swing plane and lead to flipping the club. Aim for controlled and efficient movements, focusing on using your lower body as a source of power rather than relying on excessive movement. This will help you maintain control and prevent flipping.

Tip #4: Initiate the Downswing Properly

Start the downswing with your lower body

One of the main causes of club flipping is initiating the downswing with the hands and arms rather than the lower body. To avoid flipping, focus on starting your downswing with a subtle shift of weight from your back foot to your front foot. Allow your lower body to lead the motion, initiating the rotation of your hips and generating power. By starting the downswing with your lower body, you promote a more natural and fluid swing, reducing the tendency to flip the club.

Keep your hands passive

During the downswing, it is crucial to keep your hands passive and let the club do the work. Avoid the urge to forcefully release the club or manipulate it with your hands. Instead, focus on maintaining a relaxed grip and letting the momentum of the swing carry the club through impact. Keeping your hands passive will help prevent flipping and contribute to a smoother transition between the backswing and the downswing.

Maintain a smooth transition

A smooth transition between the backswing and the downswing is essential in preventing flipping. Avoid any sudden or jerky movements that may disrupt the flow of your swing. Focus on maintaining a consistent tempo and rhythm throughout your swing, allowing for a seamless transition. By ensuring a smooth transition, you promote a more controlled and accurate swing, reducing the likelihood of flipping the club.

Tip #5: Improve Hand-Eye Coordination

Train your eyes to follow the ball

Good hand-eye coordination is key to a successful golf swing. Train your eyes to focus on the ball from the moment you address it until after impact. Avoid lifting your head or looking up prematurely, as this can lead to flipping and poor contact with the ball. Practice keeping your eyes fixed on the ball throughout your swing, improving your hand-eye coordination and promoting better ball-striking consistency.

Develop a consistent pre-shot routine

Having a consistent pre-shot routine can help improve your hand-eye coordination and reduce the likelihood of flipping. Establish a routine that includes visualizing your shot, aligning your body and clubface, and taking a few practice swings. By incorporating a pre-shot routine into your game, you create a sense of familiarity and focus, allowing for better coordination between your hands and eyes.

Practice visualization techniques

Visualization is a powerful tool for improving hand-eye coordination in golf. Before each shot, take a moment to visualize the desired outcome and the flight of the ball. Imagine yourself executing a smooth, controlled swing without flipping the club. Visualization helps create mental imagery that your body can then translate into physical actions. By practicing visualization techniques, you can enhance your hand-eye coordination and improve your overall performance on the course.

Tip #6: Utilize Training Aids

Use alignment sticks

Alignment sticks are versatile and effective training aids for improving your swing mechanics and preventing flipping. They can be used to ensure proper alignment of your body and clubface during address and throughout your swing. Place alignment sticks on the ground to create visual guides for your feet, hips, and shoulders. By consistently using alignment sticks in your practice sessions, you can develop muscle memory and reinforce correct swing mechanics.

Experiment with impact bags

Impact bags are another useful training aid for tackling club flipping. These bags are designed to simulate the feeling of striking a golf ball and encourage the correct hand and club position at impact. Practice hitting the impact bag with a square clubface and a controlled downswing. This will help train your muscles to maintain proper form and avoid flipping, transferring the correct impact position to your regular swing.

Try a weighted club

Using a weighted club in your practice routine can help improve club control and prevent flipping. The additional weight of a weighted club promotes a more muscular and coordinated swing. Practice swinging with a weighted club repeatedly, focusing on maintaining a smooth transition from the backswing to the downswing. This exercise will reinforce proper swing mechanics and build strength, reducing the likelihood of flipping the club during regular swings.

Tip #7: Seek Professional Instruction

Consult a golf instructor

If you are struggling with flipping the club, seeking professional instruction is highly recommended. A certified golf instructor can provide personalized guidance and analyze your swing mechanics to identify specific areas of improvement. They will have the expertise to offer tailored tips and drills to help you overcome your flipping tendencies. Consulting a golf instructor is a valuable investment in improving your technique and achieving a more consistent swing.

Take lessons to improve technique

Enrolling in golf lessons is another effective way to address the issue of club flipping. Through structured lessons, you will have the opportunity to work with an instructor on a regular basis, receiving ongoing feedback and guidance. Lessons will cover various aspects of the game, including grip, posture, swing mechanics, and mental approach. By consistently working on your technique with a qualified instructor, you can develop the necessary skills and habits to prevent flipping and achieve a more controlled swing.

Receive personalized feedback

One of the major benefits of professional instruction is the ability to receive personalized feedback. A golf instructor will be able to pinpoint specific areas of concern in your swing and provide corrective measures tailored to your individual needs. They can offer hands-on guidance, using video analysis and other training aids to help you visualize and understand the necessary adjustments. Personalized feedback is crucial in effectively breaking the habit of flipping the club and developing a more consistent and controlled golf swing.

Conclusion

By implementing these seven tips, you can significantly reduce or eliminate the issue of flipping the golf club. Remember to grip the club properly, maintain a proper posture, focus on lower body stability, initiate the downswing properly, improve hand-eye coordination, utilize training aids, and seek professional instruction. While each tip individually contributes to a better swing, combining them will yield the best results. Consistency and practice are key. With time and dedication, you can break the habit of flipping the club and enjoy a more consistent and controlled golf swing. So get out on the course, implement these tips, and watch your game improve!

A Step-by-Step Guide: How to Measure Your Wrist-to-Floor Length for Golf

Discover how to measure your wrist-to-floor length for golf in this easy-to-follow guide. Learn how this measurement can impact your swing and overall performance. Grab a tape measure and get started!

So you’re eager to improve your golf game and want to ensure that your clubs are properly fitted to your unique measurements. One critical measurement that often gets overlooked is the wrist-to-floor length, which can greatly impact your swing and overall performance. In this step-by-step guide, we will walk you through the process of accurately measuring your wrist-to-floor length for golf, providing you with the knowledge and confidence to make informed club purchases. Whether you’re a seasoned golfer or just starting out, understanding and optimizing this measurement can make a world of difference in your game. So grab a tape measure and let’s get started!

A Step-by-Step Guide: How to Measure Your Wrist-to-Floor Length for Golf

If you’re a golf enthusiast looking to improve your game, one of the key aspects to consider is having the right golf club length. Finding a club that matches your height and swing can significantly impact your performance on the course. One method to determine the appropriate club length for you is by measuring your wrist-to-floor length. In this step-by-step guide, we will outline the process of measuring your wrist-to-floor length accurately. So let’s get started!

A Step-by-Step Guide: How to Measure Your Wrist-to-Floor Length for Golf

Step 1: Prepare the Necessary Tools

Before you begin measuring your wrist-to-floor length, it’s essential to gather a few tools to ensure accurate results. You’ll need the following items:

Golf club

Start by grabbing one of your golf clubs. It’s best to choose a club that you feel comfortable swinging, such as your favorite iron or hybrid.

Ruler or measuring tape

A ruler or measuring tape will come in handy when measuring the distance from your wrist to the floor. Make sure it’s long enough to provide an accurate measurement.

Pen or pencil

Having a pen or pencil nearby will allow you to jot down your measurements for future reference.

Sheet of paper

Grab a sheet of paper to write down your wrist-to-floor measurements. This will help you keep track of your findings and compare them to the standard club sizing charts later on.

Step 2: Find a Flat Surface

Once you have your tools ready, it’s time to find a suitable flat surface to stand on and take your measurements. It’s essential to choose an area that offers stability and enough space for your golf club.

Clear a tabletop or countertop

Clearing a tabletop or countertop can provide an ideal flat surface for this task. Ensure that the area is free from any objects that may obstruct your movements.

Ensure the surface is level and uncluttered

To obtain accurate measurements, it’s crucial to work on a level surface. Remove any items that may cause instability or impede your ability to stand straight during the measurement process.

Step 3: Assume the Correct Posture

Now that you have a proper workspace, let’s focus on assuming the correct posture to ensure accurate measurements.

Stand straight with feet shoulder-width apart

Position yourself near the edge of the flat surface with your feet shoulder-width apart. Distributing your weight evenly on both feet will help maintain stability throughout the measurement process.

Relax your arms by your sides

To get an accurate measurement, it’s essential to relax your arms completely. Allow them to hang naturally by your sides, ensuring there is no tension in your shoulders or hands.

Maintain a natural posture without slouching

Keep your posture in a natural position, avoiding any slouching or exaggerated postures. Maintaining a relaxed and straight posture is essential to obtain consistent and reliable measurements.

A Step-by-Step Guide: How to Measure Your Wrist-to-Floor Length for Golf

Step 4: Hold the Golf Club

With your posture in check, it’s time to grab your golf club and ensure a proper grip.

Grip the club with both hands

Hold the golf club with both hands, placing them comfortably around the handle. Find a grip that feels natural to you, allowing for a secure hold without straining your hands or wrists.

Place your palms around the handle

Position your palms around the handle of the golf club, making sure they are aligned evenly. Placing both hands in a comfortable position will contribute to consistent measurements.

Ensure a comfortable, but firm grip

While it’s crucial to have a comfortable grip on the club, it’s equally important to ensure a firm hold. Avoid gripping the club too tightly, as this may introduce unnecessary tension into your swing.

Step 5: Position the Clubhead

Now that you have the club in hand, let’s move on to positioning the clubhead correctly.

Rest the clubhead on the floor

Place the clubhead on the floor while keeping a grip on the handle. Ensure that the shaft is in an upright position, perpendicular to the ground.

Align it parallel to your body

Align the clubhead parallel to your body by keeping it in line with your feet. This alignment will help you obtain an accurate measurement by ensuring consistent placement during the process.

Ensure the clubface is square to the target

Check that the clubface is square to the target, meaning it is neither open nor closed. A square clubface position will provide a more precise measurement, allowing for better club fitting accuracy.

Step 6: Measure the Distance

With your golf club properly positioned, it’s time to measure the distance from your wrist to the floor.

Place the end of the ruler or measuring tape on the floor

Take the end of the ruler or measuring tape and place it on the floor, ensuring it is stable and secure.

Align it vertically with the inside of your lead wrist

Bring the ruler or measuring tape vertically towards your lead wrist, ensuring it is aligned with the inside of your wrist. The inside of your wrist should be in contact with the measuring tool.

Hold it straight up to touch your wrist lightly and record the measurement

Hold the ruler or measuring tape straight up until it gently touches your lead wrist. Make sure not to press too hard, as this may skew your measurement. Once the ruler is in position, read the measurement and record it on your sheet of paper.

Step 7: Record the Measurement

Take a moment to write down the wrist-to-floor measurement you obtained from Step 6. Ensure that you note whether the measurement is in inches or centimeters for future reference.

Step 8: Repeat for Accuracy

To enhance the accuracy of your measurement, it’s recommended to perform the process two or three times and take the average of your findings.

Perform the measurement two or three times

Repeat Steps 6 and 7 two or three more times to obtain additional measurements. This repetition will help eliminate any inconsistencies and ensure that you have reliable data.

Take the average of the measurements for added precision

After you’ve completed multiple measurements, calculate the average value by adding all the measurements together and dividing by the total number of measurements performed. This average will provide a more precise wrist-to-floor length for your club fitting process.

Step 9: Compare to Standard Club Sizing Charts

Now that you have your wrist-to-floor measurements, it’s time to compare them to standard club sizing charts to determine the appropriate club length for your swing.

Find a golf club fitting chart online or consult a professional club fitter

Search for a golf club fitting chart online, as many reputable golf websites provide comprehensive charts for club sizing. Alternatively, you can consult a professional club fitter who will have the expertise to guide you through the club selection process.

Match your wrist-to-floor measurement to the appropriate club length

Refer to the club sizing chart and identify the club length that corresponds to your wrist-to-floor measurement. This will provide valuable insights into the ideal club length that suits your physical attributes and swing characteristics.

Step 10: Visit a Golf Store or Club Fitter

Armed with your wrist-to-floor measurement and insights from the club sizing charts, it’s time to visit a golf store or club fitter for expert guidance.

Bring your wrist-to-floor measurement

Ensure that you have your wrist-to-floor measurement handy when you visit the golf store or club fitter. This measurement will help the professionals understand your specific needs and provide better recommendations tailored to your swing.

Ask for assistance in selecting the right golf club length for your swing

When you arrive at the golf store or club fitter, don’t hesitate to ask for assistance. Explain your wrist-to-floor measurement and the club length recommendation from the sizing chart. The professionals will guide you through choosing the right golf club length that optimizes your swing and enhances your performance on the golf course.

By following this step-by-step guide, you can accurately measure your wrist-to-floor length for golf and make informed decisions about selecting the right club length for your swing. Remember, having a properly fitted golf club can significantly contribute to improving your gameplay, so invest the time and effort to find the perfect fit. Happy golfing!

How to Start Your Golf Cart

Learn how to start your golf cart with ease and get your game back on track. This comprehensive guide provides simple steps and troubleshooting tips, ensuring a smooth and hassle-free start every time. Whether you’re a seasoned golfer or just starting out, this article is a must-read for all golf cart owners. Start your golfing adventure today!

Picture this: you’re out on a beautiful sunny day, ready to hit the golf course and enjoy a relaxing round of golf. The only problem is, your trusty golf cart won’t start. Frustration may start to set in, but fear not! In this article, we will guide you through the simple steps you need to take to start your golf cart and get your day back on track. Whether you’re a seasoned golfer or just starting out, knowing how to start your golf cart is a crucial skill that will ensure your game goes smoothly. So let’s get started and make sure you’re ready to hit the course in no time.

How to Start Your Golf Cart

If you’re eager to get out on the golf course or simply take a leisurely ride around your neighborhood, it’s important to know how to start your golf cart properly. By following a few simple steps, you can ensure a smooth and hassle-free start every time. Whether you’re a new owner or just need a refresher, this comprehensive guide will walk you through the process in a friendly and easy-to-understand manner.

How to Start Your Golf Cart

Preparation

Before you start your golf cart, it’s crucial to perform a quick inspection to ensure everything is in order. Taking a moment to check the battery, fuel level, seat, parking brake, and for any obstructions will help prevent any unexpected issues from arising.

Check the battery

First, inspect the battery to ensure it has enough power. If it appears to be low, consider charging it before starting the cart to avoid any potential interruptions during your ride.

Inspect the fuel level

Next, take a look at the fuel gauge to ensure you have enough gasoline for your intended trip. It’s always a good idea to keep the tank filled to prevent running out of fuel mid-ride.

Adjust the seat

Comfort is key when operating a golf cart. Adjust the seat to a position that feels comfortable for you, allowing for easy access to the pedals and controls. This will enhance your overall driving experience.

Ensure the parking brake is engaged

Before starting the cart, make sure the parking brake is engaged. This will prevent the cart from rolling unexpectedly and ensure your safety.

Check for any obstructions

Finally, take a quick walk around your golf cart to check for any obstructions in the path or on the seat. By doing so, you can prevent any mishaps or damage to the cart.

Starting Procedure

Once you’ve completed the necessary preparations, you’re ready to start your golf cart. Follow these steps to ensure a successful and smooth start every time.

Insert the key into the ignition

Locate the ignition switch and insert the key. Ensure the key is fully inserted and turned to the ‘On’ position.

Turn the key to the ‘On’ position

Once the key is in the ‘On’ position, you’ll notice that the cart’s lights and accessories will turn on. This indicates that the golf cart’s electrical system is functioning properly.

Press down on the brake pedal

To engage the starter, press down on the brake pedal firmly. This ensures that the cart remains stationary while you start the engine.

Engage the choke (if applicable)

If your golf cart is equipped with a choke, engage it before starting the engine. The choke helps to enrich the fuel-air mixture, especially when the engine is cold.

Turn the key to the ‘Start’ position

With your foot firmly on the brake pedal, turn the key to the ‘Start’ position. The cart’s engine should start revving, indicating a successful start.

Release the key after engine starts

Once the engine has started, release the key. It will automatically return to the ‘On’ position, allowing the engine to continue running smoothly.

Allow the engine to warm up

To ensure optimal performance, it’s important to allow the engine to warm up for a few minutes. This will help lubricate its components and prepare it for your ride.

Troubleshooting

Occasionally, you may encounter issues when starting your golf cart. Here are some troubleshooting tips to help you identify and address common problems.

Check battery connections

If your cart is not starting, the first thing to check is the battery connections. Ensure that they are secure and free from corrosion. Cleaning any buildup or tightening loose connections may resolve the issue.

Ensure fuel valve is open

If the engine fails to start or sputters, check that the fuel valve is open. A closed or partially closed valve can restrict fuel flow and prevent the engine from running smoothly.

Inspect spark plugs

Faulty or dirty spark plugs can cause the engine to misfire or not start at all. Inspect the spark plugs for signs of wear or buildup. Cleaning or replacing them as needed can improve engine performance.

Check ignition switch

If you’re experiencing intermittent or no power when turning the key, the ignition switch may be faulty. Inspect the switch for any signs of damage or wear and consider replacing it if necessary.

Verify safety interlock switches

Many golf carts are equipped with safety interlock switches that prevent the engine from starting in certain situations, such as when the parking brake is not engaged or the seat is not occupied. Double-check these switches to ensure they are functioning correctly.

How to Start Your Golf Cart

Maintenance

Regular maintenance is essential to keep your golf cart running smoothly and ensure its longevity. By following a few routine tasks, you can avoid potential issues and maximize the lifespan of your cart.

Regularly charge the battery

To maintain a healthy battery, it’s important to regularly charge it, especially during periods of inactivity. Follow the manufacturer’s recommendations for charging frequency to prevent battery degradation.

Keep fuel tank filled

Maintaining a consistent level of gasoline in the fuel tank can prevent moisture buildup and the formation of sediment. This helps keep the engine running smoothly and reduces the risk of clogs.

Clean air filter

A clean air filter allows for proper airflow to the engine, preventing dust and debris from entering. Regularly inspect and clean or replace the air filter as needed to ensure optimal performance.

Inspect and replace spark plugs

Over time, spark plugs can wear out or become dirty, leading to engine performance issues. Regularly inspect the spark plugs and replace them when necessary to maintain smooth and efficient operation.

Check tire pressure

Properly inflated tires not only provide a smoother ride but also contribute to the overall stability and control of the golf cart. Regularly check the tire pressure and adjust as needed to ensure optimal performance.

Safety Tips

When operating a golf cart, safety should always be a top priority. Follow these safety tips to ensure a secure and enjoyable ride for both you and your passengers.

Always wear a seatbelt

Just like when driving a car, wearing a seatbelt in a golf cart is crucial for your safety. Securely fasten your seatbelt before driving to reduce the risk of injury in the event of a sudden stop or collision.

Observe speed limits

Different areas may have specific speed limits for golf carts. It’s important to adhere to these speed limits to maintain control and reduce the risk of accidents.

Use turn signals when necessary

If your golf cart is equipped with turn signals, use them whenever you need to make a turn or change lanes. This helps ensure that other drivers or golfers are aware of your intentions.

Avoid steep inclines or declines

Golf carts are not designed to handle steep inclines or declines safely. Always avoid these terrains to prevent potential accidents or damage to the cart.

Keep hands and feet inside the cart

To prevent accidents and injuries, keep your hands and feet inside the cart at all times. Avoid sticking limbs out or placing them near moving parts of the cart.

Upgrading Your Golf Cart

If you’re looking to enhance the performance, comfort, or functionality of your golf cart, here are some popular upgrades to consider.

Upgrade to lithium batteries

Lithium batteries offer several benefits over traditional lead-acid batteries, including longer lifespan and quicker charging times. Consider upgrading to lithium batteries to improve your cart’s range and overall performance.

Install a rearview mirror

Adding a rearview mirror to your golf cart can greatly enhance your visibility and safety. It allows you to see vehicles or golfers approaching from behind, reducing the risk of collisions.

Add headlights and taillights

Installing headlights and taillights on your cart is not only essential for safety during nighttime driving but also adds a stylish touch. Bright lights ensure excellent visibility, allowing you to navigate in low-light conditions with ease.

Upgrade tires and rims

Upgrading your golf cart’s tires and rims can improve its traction, handling, and overall ride quality. Choose tires with the appropriate tread pattern for your desired terrain and opt for stylish rims to enhance the cart’s appearance.

Install a stereo system

If you enjoy listening to music while cruising around, consider adding a stereo system to your golf cart. This allows you to play your favorite tunes and enhance your overall driving experience.

Driving Etiquette

When using your golf cart on the golf course or in your community, it’s important to follow proper driving etiquette. By respecting others and adhering to specific guidelines, you can ensure a pleasant experience for everyone.

Yield to pedestrians

As a golf cart driver, it’s important to yield to pedestrians on both the golf course and public paths. Slow down or stop to allow individuals to cross safely, and always be mindful of their presence.

Keep a safe distance from other carts

Maintaining a safe following distance from other golf carts is crucial to prevent collisions. Give yourself ample space to react to sudden stops or maneuvers by keeping a safe distance from the cart in front of you.

Follow specified paths

If you’re using your golf cart on designated paths or trails, be sure to stay within the boundaries and respect any posted rules or signs. This prevents unnecessary damage to the cart and promotes a harmonious environment for all users.

Avoid distractions while driving

To maintain focus and ensure your safety, avoid distractions while operating your golf cart. This includes refraining from using your phone, adjusting the stereo, or engaging in any activity that takes your attention away from the road.

Be courteous to other golfers

When playing golf or using the cart on a golf course, always be considerate of other golfers. Avoid driving through fairways, stay quiet when near players, and be mindful of the pace of play to maintain a positive atmosphere for all.

Storing Your Golf Cart

Proper storage is essential to keep your golf cart in excellent condition during periods of inactivity. Follow these steps to ensure your cart remains in top shape when not in use.

Park in a dry, covered area

Whenever possible, park your golf cart in a dry, covered area to protect it from the elements. This prevents rusting, fading of the paint, and damage caused by exposure to rain, sun, or snow.

Disconnect the battery

To preserve the battery’s charge and prevent unnecessary draining, disconnect it during long periods of storage. This helps maintain the battery’s lifespan and ensures it is ready for use when needed.

Fill up the gas tank

Before storing your cart, fill up the gas tank to prevent moisture buildup and the formation of sediment. Add a fuel stabilizer to maintain the quality of the gasoline during the storage period.

Check tire pressure before storing

Before storing your golf cart, check the tire pressure and adjust it as necessary. Over time, tires can lose air, and maintaining the appropriate pressure prevents flat spots and improves their lifespan.

Cover the cart to protect it from dust

Lastly, cover your golf cart with a specifically designed cover to protect it from dust, dirt, and debris. This prevents unnecessary wear and tear and keeps the cart looking clean and presentable.

Legal Considerations

When operating a golf cart, it’s essential to comply with all relevant laws and regulations. Here are some legal considerations to keep in mind.

Verify local regulations

Different areas may have specific regulations regarding golf cart usage. Research and familiarize yourself with the local laws to ensure compliance and avoid potential fines or penalties.

Obtain necessary permits or licenses

In some areas, you may need permits or licenses to operate a golf cart legally. Check with the local authorities to determine if you need any special documentation before driving your cart.

Comply with any age restrictions

Certain jurisdictions may impose age restrictions for operating a golf cart. Ensure that you meet the minimum age requirement before driving to avoid legal consequences.

Ensure proper insurance coverage

Although not always required, obtaining proper insurance coverage for your golf cart is highly recommended. This protects you financially in case of accidents, theft, or damage to the cart.

Follow designated golf cart routes

When driving your golf cart on the golf course, it’s important to stay on designated paths and routes. Doing so not only protects the course from unnecessary damage but also ensures the safety of other golfers.

Common Issues and Solutions

Despite proper maintenance and care, occasional issues may arise with your golf cart. Here are some common problems and their respective solutions to help you address them quickly and effectively.

Cart not starting: check battery voltage

If your golf cart fails to start, the first thing to check is the battery voltage. Ensure it has enough charge to power the cart. If the battery is low, recharge it or consider replacing it if necessary.

Engine running rough: clean carburetor

If the engine is running rough or sputtering, the carburetor may be clogged with debris or varnish buildup. Clean the carburetor and its components to restore optimal fuel flow and combustion.

Charging problems: inspect charger connections

If you’re experiencing issues with charging the battery, inspect the charger connections. Ensure they are clean, secure, and properly connected to the battery and charging port.

Brakes not working: check brake fluid level

If your golf cart’s brakes are not working properly, check the brake fluid level. Low fluid levels can lead to decreased braking performance. Refill or change the brake fluid if necessary.

Strange noises: inspect belt and pulleys

Unusual noises coming from your golf cart may indicate belt or pulley issues. Inspect these components for wear, damage, or misalignment. Adjust or replace them as needed to eliminate the noise.

By following these steps and guidelines, you can confidently start your golf cart and enjoy a smooth and safe ride every time. Remember to prioritize safety, regularly maintain your cart, and comply with all applicable laws and regulations. With proper care and attention, your golf cart will provide you with countless hours of enjoyment on the course or around your community. Happy driving!

How to Clean Golf Balls

Learn how to clean golf balls and improve your game with these effective tips. From choosing the right cleaning method to tackling specific stains and marks, this article covers it all. Grab your golf clubs and get started!

Have you ever wondered how to keep your golf balls clean and in top-notch condition? Look no further! This article will provide you with simple yet effective tips on how to properly wash your golf balls. By following these easy steps, you will not only enhance the longevity of your golf balls, but also improve your overall game. So, grab your golf clubs and let’s get started!

How to Clean Golf Balls

Choosing the Right Cleaning Method

Maintaining clean golf balls is essential for optimal performance on the course. However, choosing the right cleaning method can be a daunting task. To make an informed decision, it is important to consider the golf ball material, the condition of the balls, and identifying any stains or accumulated debris.

Understanding the Golf Ball Material

Golf balls are made from various materials, including Surlyn, urethane, and balata. Each material has different characteristics and requires specific cleaning methods. Surlyn balls are durable and resistant to staining, making them easy to clean with most methods. On the other hand, urethane and balata balls are softer and more prone to damage, requiring gentler cleaning techniques.

Considering the Condition of the Golf Ball

Before deciding on a cleaning method, it is essential to assess the condition of your golf balls. If they are relatively clean and free of stains, a basic cleaning with soap and water may suffice. However, if the balls have deep stains or accumulated debris, you may need to explore more specialized cleaning methods.

Identifying Stains and Accumulated Debris

Inspect your golf balls for any visible stains or accumulated debris. Common stains include grass, dirt, mud, scuff marks, marker pen stains, tree sap, and rust. By identifying the specific stains and debris, it becomes easier to choose a suitable cleaning method that effectively removes them.

Basic Cleaning with Soap and Water

One of the simplest and most effective ways to clean golf balls is with soap and water. This method is suitable for most golf ball materials and conditions.

Preparing a Cleaning Solution

Start by preparing a cleaning solution using warm water and mild dish soap. Avoid using harsh chemicals or abrasive cleaners, as they can damage the golf ball surface. Mix a small amount of dish soap with warm water in a bucket or sink.

Soaking the Golf Balls

Once the cleaning solution is ready, place the golf balls in the bucket or sink, ensuring they are fully submerged. Allow the balls to soak for approximately 10-15 minutes. This soaking process helps loosen dirt, stains, and debris from the surface of the balls.

Scrubbing with a Soft Brush

After soaking, take a soft-bristled brush, such as a toothbrush or a brush specifically designed for golf ball cleaning, and gently scrub the surface of each golf ball. Focus on areas with visible stains or debris. Be careful not to apply excessive force, as it may damage the balls, especially if they are made of softer materials like urethane or balata.

Rinsing the Balls Thoroughly

After scrubbing, thoroughly rinse the golf balls with clean water to remove any leftover soap residue. Ensure that all soap is rinsed off, as any residue left on the balls can affect their performance on the course.

Drying the Golf Balls

Once the golf balls have been rinsed, pat them dry with a clean towel or let them air-dry. Avoid using heat sources like hairdryers or direct sunlight, as they can cause the balls to warp or lose their shape. Allow the golf balls to dry completely before returning them to your golf bag or storage.

Using a Golf Ball Washer

For golfers looking for a more efficient and convenient cleaning method, using a golf ball washer can be a game-changer. Golf ball washers come in various types, including manual and automatic, offering different features and benefits.

Understanding Golf Ball Washer Types

Manual golf ball washers are portable devices that require manual activation for cleaning. They typically consist of a container with cleaning bristles or an abrasive pad inside. Automatic golf ball washers, on the other hand, are often found at golf courses and use a pressurized water system to clean multiple balls simultaneously.

Operating a Manual Golf Ball Washer

To use a manual golf ball washer, simply fill the container with water and add a small amount of mild dish soap. Place a few golf balls inside the container, close the lid tightly, and vigorously shake or roll the container for a few minutes. The bristles or abrasive pad will scrub the balls, removing any dirt or stains.

Operating an Automatic Golf Ball Washer

Using an automatic golf ball washer is even simpler. Place the golf balls in the designated compartment or basket of the machine. Activate the washer, and it will use pressurized water jets to clean the balls thoroughly. Follow the instructions provided by the specific washer model for optimal results.

Rinsing and Drying the Golf Balls

After using a golf ball washer, rinse the balls with clean water to remove any soap residue. Make sure all soap is thoroughly rinsed off before drying the balls. Allow them to air-dry or pat them with a towel until they are completely dry. Avoid using heat sources that may damage the balls.

How to Clean Golf Balls

Using a Washing Machine

If you have a large number of golf balls to clean, using a washing machine can save time and effort. However, caution must be exercised to minimize potential damage.

Preparing the Golf Balls

Before placing the golf balls in the washing machine, remove any stickers or markings that could interfere with the washing process. Inspect the balls for any visible damage, cracks, or cuts, as these may be exacerbated by the washing machine’s vigorous agitation.

Placing the Golf Balls in a Mesh Bag

To protect the golf balls during the washing cycle, place them inside a mesh laundry bag. This will prevent them from banging against the walls of the washing machine, reducing the risk of damage. Make sure not to overcrowd the bag, as the balls need some room for proper cleaning.

Selecting the Right Washing Machine Cycle

Choose a delicate or gentle cycle on your washing machine to minimize the risk of damage to the golf balls. Avoid using hot water, as it can warp or deform the balls. Cold or warm water is typically sufficient for cleaning purposes.

Adding Laundry Detergent

Add a small amount of mild laundry detergent to the washing machine, ensuring that it is suitable for delicate fabrics. Avoid using bleach or any harsh chemicals that could damage the golf balls.

Running the Washing Machine

Start the washing cycle and allow it to complete its full duration. Do not interrupt the cycle, as this may affect the cleaning efficiency and damage the balls. Once the cycle is finished, promptly remove the golf balls from the washing machine.

Drying the Golf Balls

After washing, inspect the golf balls for any remaining stains or debris. If necessary, repeat the process or move on to a specialized cleaning method for specific stains. To dry the golf balls, place them on a towel or rack and allow them to air dry. Avoid exposing them to direct heat sources or sunlight.

Cleaning Specific Stains and Marks

In addition to basic cleaning methods, there are specialized techniques to tackle specific stains and marks commonly found on golf balls.

Removing Grass Stains

Grass stains can be quite stubborn. To remove them, create a paste using equal parts baking soda and water. Apply the paste to the stained areas and gently rub it in with a soft cloth or brush. Allow the paste to sit for a few minutes, then rinse thoroughly with clean water. Repeat if necessary.

Removing Dirt and Mud

For dirt and mud stains, start by rinsing the golf balls with warm water to remove any loose debris. Then, create a mixture of equal parts vinegar and water. Soak a cloth or sponge in the vinegar solution and gently scrub the stained areas. Rinse the balls thoroughly with clean water and dry them.

Treating Scuff Marks

Scuff marks can affect the ball’s aerodynamic properties. To remove scuff marks, apply a small amount of toothpaste or baking soda to a cloth or brush. Gently rub the scuffed areas in a circular motion. Rinse the balls thoroughly and dry them.

Dealing with Marker Pen Stains

If your golf balls have marker pen stains, it can be challenging to remove them completely. However, rubbing alcohol or nail polish remover can help. Apply a small amount of either substance to a cloth and gently rub the stained areas. Rinse the balls thoroughly with clean water and dry them.

Getting Rid of Tree Sap

Tree sap can be sticky and challenging to remove. Apply a small amount of rubbing alcohol or hand sanitizer to a cloth and gently rub the sap spots. Rinse the balls thoroughly with clean water and dry them. Repeat the process if necessary.

Removing Rust Stains

If your golf balls have rust stains, a mixture of vinegar and salt can work wonders. Make a paste using equal parts vinegar and salt. Apply the paste to the rust stains and let it sit for a few minutes. Rub the stains gently with a cloth or brush, then rinse the balls thoroughly with clean water. Dry them completely before returning them to your golf bag.

Using Special Sports Equipment Cleaners

For golfers who prefer specialized cleaning products, there are various golf ball cleaners available on the market.

Exploring Golf Ball Cleaner Options

Golf ball cleaners come in different forms, such as sprays, wipes, or cleaning solutions. Research and read product reviews to find the best cleaner for your needs. Look for cleaners specifically designed for golf balls to ensure they are safe and effective.

Following the Manufacturer’s Instructions

Before using a golf ball cleaner, carefully read and follow the manufacturer’s instructions. Each cleaner may have specific usage guidelines, including soaking time, application method, and rinsing instructions.

Applying the Cleaner and Letting it Sit

Once you have selected a suitable golf ball cleaner, follow the instructions to apply it to the balls. Depending on the cleaner, you may need to spray, wipe, or soak the balls. Allow the cleaner to sit for the recommended duration to break down stains and debris effectively.

Rinsing and Drying the Golf Balls

After the cleaner has had sufficient time to work, thoroughly rinse the golf balls with clean water to remove any residue. Dry the balls completely before storing or using them to ensure their performance is not affected.

Polishing Golf Balls

Polishing your golf balls can give them a shiny, like-new appearance and potentially improve their performance.

Understanding the Polishing Process

There are various methods you can use to polish golf balls, including toothpaste, baking soda, and commercial ball polish. Each method has its own advantages and considerations, so choose the one that suits your preferences and available resources.

Using Toothpaste for Polishing

To polish golf balls with toothpaste, apply a small amount of non-gel toothpaste to a cloth or brush. Gently rub the toothpaste onto the balls in circular motions. Rinse the balls with clean water and dry them thoroughly.

Using Baking Soda for Polishing

Similar to toothpaste, baking soda can be used as a polishing agent. Create a paste by mixing baking soda with water. Apply the paste to the golf balls and gently rub it in with a cloth or brush. Rinse the balls with clean water and dry them completely.

Using Commercial Ball Polish

If you prefer a specialized product, there are commercial ball polishes available. Follow the instructions provided by the manufacturer to apply the polish to the golf balls. Allow the polish to dry as directed, then buff the balls with a clean cloth to achieve a shiny finish.

Buffing and Shining the Golf Balls

After polishing, use a clean, dry cloth to buff and shine the golf balls. This step helps remove any excess polish, ensuring the balls are ready for use. Take your time and be gentle to avoid scratching the balls during the buffing process.

Cleaning Golf Balls on the Course

During a round of golf, the condition of your golf balls can deteriorate due to dirt, grass, and other factors. However, there are convenient methods to clean your golf balls directly on the course.

Using a Golf Ball Cleaning Towel

Carry a golf ball cleaning towel in your golf bag to clean your golf balls between shots. These towels are often made of microfiber materials specifically designed to remove dirt and debris from golf balls. Simply wet the towel with water or a cleaning solution and gently wipe the balls clean.

Using a Portable Golf Ball Washer

Some golfers prefer the convenience of portable golf ball washers. These compact devices often have a water reservoir and brushes attached, allowing you to clean your golf balls anytime, anywhere. Follow the manufacturer’s instructions for optimal use.

Cleaning Golf Balls between Holes

During a round of golf, take advantage of the time between holes to clean your golf balls. Use a golf ball cleaning towel or a portable washer to quickly remove any dirt or grass stains. This simple habit helps keep your golf balls clean and ready for optimal performance.

Storing Cleaned Golf Balls

Once your golf balls are cleaned and dried, proper storage is essential to maintain their condition.

Drying the Golf Balls Completely

Before storing your cleaned golf balls, ensure they are completely dry. Any residual moisture can lead to mold or damage over time. Give the balls ample time to air dry or use a clean towel to gently pat them dry if needed.

Organizing Golf Balls

Organizing your golf balls makes it easier to locate and identify them when you need them. Separate them by brand, type, or condition, according to your preference. This organization method can help you keep track of the balls’ performance and lifespan.

Using Golf Ball Cabinets

For avid golfers with a large collection of golf balls, investing in a golf ball cabinet can be an excellent storage solution. These cabinets often have designated compartments or racks to house your golf balls securely and neatly. They also provide protection against dust, moisture, and other elements that could affect the balls’ performance.

Maximizing Golf Ball Lifespan

To maximize the lifespan of your golf balls, store them in a cool, dry place away from direct sunlight or extreme temperatures. Excessive heat or cold can affect the ball’s elasticity and performance. Additionally, avoid storing your golf balls in areas with high humidity, as it can lead to mold or other damage.

Maintaining Clean Golf Balls

To ensure your golf balls stay clean and perform at their best, regular cleaning and proper maintenance are essential.

Cleaning Golf Balls Regularly

Regularly cleaning your golf balls is crucial to maintain their performance and appearance. Develop a cleaning routine that best fits your schedule and golfing habits. Whether you choose to clean your balls after each round or every few rounds, staying consistent will help prolong their lifespan.

Avoiding Unnecessary Damage

When using any cleaning method, exercise caution to avoid unnecessary damage to your golf balls. Use gentle brushing motions and avoid excessive force. Be mindful of the material your balls are made of and choose cleaning techniques that are suitable for that particular material.

Replacing Old or Damaged Golf Balls

No matter how well you maintain and clean your golf balls, they will eventually wear out or become damaged. As golf balls age, their performance and control may diminish. Inspect your golf balls regularly and replace any that are visibly damaged, cracked, or worn. Replacing old or damaged balls ensures you have consistent performance on the course.

In conclusion, cleaning golf balls is an important aspect of maintaining their performance and durability. By understanding the golf ball material, considering the condition of the balls, and identifying stains, you can choose the most suitable cleaning method. Whether opting for basic soap and water cleaning, utilizing a golf ball washer, using a washing machine, or employing specialized cleaning techniques, regularly cleaning your golf balls will help extend their lifespan and keep them in optimal condition. Proper storage and maintenance further contribute to their longevity. With clean golf balls, you can focus on your game and enjoy improved performance on the course.

How to Hit a Straight Golf Shot

Learn how to hit a straight golf shot with this comprehensive guide. From choosing the right equipment to maintaining proper body alignment, you’ll have all the tools you need to hit straight shots consistently. Improve your accuracy and eliminate hooks and slices with these simple yet effective tips and techniques. Master the art of hitting a straight golf shot and confidently send that ball soaring towards your target.

So you’ve found yourself on a golf course, ready to take a swing and send that little white ball flying straight down the fairway. But, unfortunately, hitting that elusive straight shot seems to be more of a challenge than you anticipated. Well, fear not, because this article is here to help you master the art of hitting a straight golf shot. Whether you’re a beginner looking to improve your accuracy or an experienced golfer aiming to eliminate those pesky hooks and slices, we’ve got you covered with some simple yet effective tips and techniques. By the end of this article, you’ll have all the tools you need to confidently step up to the tee and send that ball soaring straight towards your target.

How to Hit a Straight Golf Shot

Choosing the Right Equipment

Selecting the Right Golf Club

When it comes to hitting a straight golf shot, one of the most important factors to consider is selecting the right golf club for the job. Golf clubs come in different lengths, lofts, and designs, each catering to a specific purpose and skill level. As a beginner or intermediate player, it is essential to choose a club that offers forgiveness and a larger sweet spot. This will help you maintain better control over your shots and increase your chances of hitting straight. Additionally, consider the shaft flex and grip size that suits your swing speed and hand size, respectively.

Using the Correct Golf Ball

Another crucial aspect of achieving a straight shot is using the correct golf ball. Golf balls are manufactured with different constructions and compression ratings, which can significantly impact your shot’s direction and accuracy. For players aiming for a straight shot, it is recommended to choose a low spin ball. These balls reduce sidespin and minimize the chances of hooking or slicing, resulting in straighter shots. Additionally, softer golf balls can help with distance control and provide a more consistent feel.

Developing Proper Stance and Grip

Establishing the Correct Stance

To hit a straight golf shot consistently, it is vital to establish the correct stance. Start by positioning your feet shoulder-width apart, ensuring that they are parallel to the target line. While setting up, distribute your body weight evenly between both feet. This promotes stability and allows for a balanced swing. Furthermore, align your body with the target line, ensuring that your shoulders, hips, and feet are all parallel to the desired shot path. A proper stance sets the foundation for a solid swing and greatly enhances the chances of hitting straight shots.

Mastering the Grip

After establishing the correct stance, it is time to focus on your grip. The grip is a fundamental aspect of any golf swing and plays a crucial role in achieving consistent straight shots. It is recommended to use the “Vardon” grip, also known as the overlapping grip. Start by placing the club’s handle in your left hand (for right-handed players), allowing the club’s shaft to rest diagonally across the fingers. Next, position your right hand on the club, placing it beneath the left hand’s thumb. This grip promotes synchronization between your hands and arms, enabling better control over the clubface and resulting in straighter shots.

Understanding Ball Positioning

Positioning the Ball for Straight Shots

Proper ball positioning is key to hitting straight shots consistently. For irons and wedges, the ball should be positioned slightly ahead of the center of your stance. This allows for a more descending strike, promoting better contact and preventing the clubface from closing too soon. When it comes to drivers and fairway woods, the ball should be teed up further forward in your stance, just inside your lead heel. This promotes a sweeping motion and helps to launch the ball with the desired trajectory. By positioning the ball correctly for each club, you can maximize your chances of hitting straight and solid shots.

The Impact of Ball Position on Shot Accuracy

Ball position plays a crucial role in shot accuracy, especially when aiming for a straight shot. If the ball is positioned too far back in your stance, it can result in a low trajectory and a tendency to hit pulls or fades. On the other hand, if the ball is too far forward, it can lead to higher shots with a tendency to slice or push. By understanding and practicing proper ball positioning for each club, you can greatly improve your shot accuracy and increase the likelihood of hitting straight shots consistently.

How to Hit a Straight Golf Shot

Maintaining Proper Body Alignment

Aligning the Feet and Shoulders

Achieving and maintaining proper body alignment is essential for hitting straight golf shots. When setting up to the ball, it is crucial to ensure that your feet, shoulders, and hips are all aligned parallel to the target line. This alignment promotes a more accurate swing path and reduces the chances of hitting shots off target. To assist with alignment, you can utilize intermediate targets, such as a leaf or divot, to help guide your setup. Ensuring that your feet and shoulders are correctly aligned will greatly contribute to hitting straight shots consistently.

The Importance of Target Alignment

In addition to aligning your feet and shoulders, it is equally important to align the clubface with the target. Visualize an imaginary line extending from the ball to the desired target, commonly referred to as the target line. Upon addressing the ball, aim the clubface directly towards the target line. By doing so, you enhance your chances of swinging along the intended path and hitting straight shots. It is essential to double-check your target alignment before each shot to maintain consistency and accuracy.

Mastering the Backswing

Achieving a Full Shoulder Turn

To hit a straight golf shot, it is crucial to achieve a full shoulder turn during the backswing. As you start the backswing, focus on rotating your shoulders fully, allowing them to turn away from the target. This rotation helps create torque and stores potential energy, which can be unleashed during the downswing. A complete shoulder turn promotes better clubhead speed, enabling you to make solid contact with the ball and hit it straight. Practice drills and exercises that emphasize a full shoulder turn to improve your consistency and power in hitting straight shots.

Maintaining a Smooth and Controlled Backswing

While achieving a full shoulder turn is vital, it is equally important to maintain a smooth and controlled backswing. Avoid rushing or jerking your club during the backswing, as this can lead to inconsistencies and off-target shots. Instead, focus on maintaining a steady tempo and rhythm throughout your backswing. By doing so, you will have better control over the clubface and increase the likelihood of delivering a straight shot. Practice drills that emphasize a smooth backswing, paying attention to your timing and sequencing for optimal results.

Executing a Powerful Downswing

Initiating the Downswing with the Lower Body

Executing a powerful downswing is essential for hitting straight shots with distance. One way to accomplish this is by initiating the downswing with the lower body. Start by shifting your weight from your trail side (right side for right-handed players) to your lead side (left side for right-handed players). This weight transfer creates the necessary momentum for an explosive downward motion, generating power and speed. Additionally, focus on rotating your hips towards the target, allowing them to lead the downswing. By using your lower body effectively, you can increase clubhead speed and hit straight shots with added distance.

Swinging the Club Along the Correct Path

In addition to utilizing your lower body, it is crucial to swing the club along the correct path during the downswing. The ideal swing path for hitting straight shots is one that is slightly inside-out. This means that the clubhead should approach the ball from slightly inside the target line, then move towards the target after impact. To achieve this path, focus on initiating your downswing with a deliberate and unhurried motion. Maintain a connection between your arms and torso, allowing them to work together in sync. With a proper swing path, you can ensure that the clubhead makes solid contact with the ball and delivers a straight shot.

Generating Clubhead Speed

Developing Efficient Transfer of Energy

Generating clubhead speed is essential for hitting straight shots with distance. To accomplish this, focus on developing an efficient transfer of energy throughout your swing. Start by maintaining a stable and balanced stance, ensuring that your weight transfer is smooth and coordinated. As you transition from the backswing to the downswing, transfer your weight from your back foot to your front foot in a controlled and sequential manner. This transfer of energy will allow you to generate maximum clubhead speed at impact, resulting in powerful and straight shots.

Importance of a Relaxed Grip Pressure

To maximize clubhead speed and hit straight shots consistently, it is important to maintain a relaxed grip pressure. Gripping the club too tightly can restrict the natural movement of your wrists and arms, leading to tension and a loss of clubhead speed. Instead, focus on adopting a grip pressure that is firm enough to maintain control but relaxed enough to allow for fluid motion. By keeping a relaxed grip pressure, you enable the club to release freely through impact, promoting straight shots with increased clubhead speed.

Maintaining a Solid Impact Position

Positioning the Hands for Solid Impact

Maintaining a solid impact position is crucial for hitting straight shots with consistency and accuracy. One key element of this position is the positioning of your hands. As you approach impact, ensure that your hands are slightly ahead of the ball, leading the clubhead. This forward hand position promotes a descending strike and prevents the clubface from closing prematurely, resulting in straighter shots. Additionally, maintain a flat left wrist (for right-handed players) at impact, ensuring that the clubface remains square to the target. A solid impact position with proper hand positioning greatly enhances your chances of hitting straight shots.

Preventing Early Release of the Club

Another important aspect of maintaining a solid impact position is preventing the early release of the club. Early release refers to the moment when the clubhead releases too soon, leading to an open clubface at impact and a loss of power and accuracy. To avoid early release, focus on maintaining the angle between your left arm and the clubshaft as you approach impact. This allows for a powerful and controlled release of the club, delivering a straight shot with proper compression. Practice drills that emphasize maintaining this angle to improve your impact position and overall ball-striking consistency.

Achieving Proper Weight Shift

Initiating the Weight Transfer

Achieving a proper weight shift is essential for hitting straight shots with power and control. To initiate the weight transfer, start by keeping a balanced stance during your backswing. As you transition into the downswing, shift your weight from your trail side to your lead side. This weight transfer creates leverage and generates power as you move towards impact. By mastering the art of weight transfer, you can improve your distance, accuracy, and the ability to consistently hit straight shots.

Transferring the Weight to the Front Foot

As you execute your downswing, ensure that the majority of your weight transfers to your front foot at impact. This forward weight shift helps to deliver the clubhead on a proper path, leading to solid contact and straight shots. To practice this, focus on maintaining a stable lower body and rotating your hips towards the target. This motion not only promotes a proper weight shift but also allows for greater rotation and increased clubhead speed. By transferring your weight effectively to the front foot, you can optimize your chances of hitting straight shots consistently.

Importance of Mental Focus

Maintaining Calmness and Concentration

While the physical aspect of hitting a straight golf shot is crucial, it is equally important to maintain mental focus. Golf is a game that requires concentration and mental discipline. To hit straight shots consistently, it is vital to maintain calmness and composure throughout your swing. Avoid becoming overwhelmed by external factors and distractions on the course. Instead, focus on the task at hand and visualize a straight shot towards your target. By maintaining mental focus, you can enhance your chances of executing a successful and straight golf shot.

Visualizing the Straight Shot

Visualization is a powerful tool for improving your golf game, especially when it comes to hitting straight shots. Before each shot, take a moment to visualize the trajectory and path you desire for your shot. See the ball flying straight towards your intended target. Visualize the ball’s flight, the sound it makes upon impact, and the satisfying feeling of hitting a straight shot. By creating a mental image of success, you prime your mind and body to execute the desired shot, increasing the likelihood of hitting straight shots consistently.

In conclusion, hitting a straight golf shot requires a combination of physical technique and mental focus. By selecting the right equipment, developing a proper stance and grip, understanding ball positioning, maintaining body alignment, mastering the backswing and downswing, generating clubhead speed, maintaining a solid impact position, achieving proper weight shift, and maintaining mental focus, you can significantly increase your chances of hitting straight shots consistently. Practice these techniques regularly, seek guidance from a golf professional, and enjoy the process of improving your golf game. Happy golfing!

Mastering the Golf Downswing: A Step-by-Step Guide

Master your golf downswing with this step-by-step guide. Improve your technique, weight transfer, and sequencing for a more powerful game.

Are you tired of struggling with your golf downswing? Look no further! In this step-by-step guide, we will walk you through the process of mastering the golf downswing. From the importance of proper weight transfer to the correct sequencing of movements, we will provide you with all the necessary tips and techniques to improve your game. So grab your club and get ready to take your golf skills to the next level!

Mastering the Golf Downswing: A Step-by-Step Guide

Welcome to our comprehensive guide on mastering the golf downswing! Whether you’re a beginner looking to improve your skills or an experienced golfer aiming to take your game to the next level, understanding and perfecting the downswing is crucial for achieving consistent and powerful shots. In this article, we will take you through each step of the downswing process, providing detailed explanations and tips to help you unlock your full potential on the golf course.

Mastering the Golf Downswing: A Step-by-Step Guide

Understanding the Downswing

Before we dive into the specific techniques involved in the downswing, it’s essential to have a clear understanding of its significance in the golf swing. The downswing is the transition phase between the backswing and the impact, where the clubhead accelerates towards the ball, generating power and control. A well-executed downswing can lead to explosive shots, while a faulty one can result in inconsistency and undesirable ball flight. By grasping the mechanics and principles of the downswing, you’ll be better equipped to refine your technique and optimize your performance.

Establishing Proper Alignment

Proper alignment is a fundamental aspect of a successful downswing. It ensures that your body, club, and target are all in harmony, maximizing your chances of hitting accurate shots. To establish proper alignment, focus on three key elements: grip and hand placement, stance and foot position, and the alignment of the shoulders, hips, and feet. By paying attention to these details, you’ll create a solid foundation that sets you up for a smooth and efficient downswing.

Maintaining a Balanced Posture

Maintaining a balanced posture throughout the downswing is crucial for delivering consistent and powerful shots. Begin by finding the optimal spine angle, which allows for a natural rotation and weight transfer. Next, focus on distributing your weight evenly between both feet, ensuring stability and control. Finally, keep your head stable and neutral, avoiding any excessive movement that may affect your swing dynamics. By prioritizing a balanced posture, you’ll be able to execute the downswing with precision and confidence.

Starting the Downswing

The initiation of the downswing serves as a crucial moment in the golf swing. To start the downswing effectively, begin by relaxing your grip pressure. This helps to promote a fluid and unhindered motion of the clubhead. Additionally, utilize the ground for power by pushing off the ground with your lead foot, initiating the transfer of energy from the lower body to the upper body. By mastering the art of starting the downswing, you’ll be able to unleash the full potential of your swing sequence.

Mastering the Golf Downswing: A Step-by-Step Guide

Initiating the Lower Body Movement

The lower body plays a pivotal role in the downswing, providing the necessary power and stability for a successful shot. Start by shifting your weight from your trail side (right side for right-handed golfers) to your lead side (left side for right-handed golfers). This weight shift triggers the hip rotation, generating rotational power and creating separation between the upper and lower body. Engage your legs and hips throughout the downswing to maintain control and maximize energy transfer.

Hinging the Wrists

For optimal clubhead speed and control, mastering the proper wrist hinge is essential during the downswing. Maintain a controlled wrist position during the backswing and transition, avoiding any excessive wrist movement or breakdown. As you approach the downswing, focus on creating lag by maintaining a hinge in your wrists. This lag allows the clubhead to trail behind, storing energy that can be released at impact. Avoid casting or scooping the wrists, as this can lead to inconsistent ball contact and loss of power.

Maintaining Connection between Arms and Body

To achieve a powerful and efficient downswing, it’s crucial to maintain a connection between your arms and body. Keep your arms in front of your body during the downswing, avoiding any excessive separation or disconnection. Maintain the triangle formed by your arms and shoulders, ensuring that it stays intact throughout the swing. Avoid overextension or collapsing of the arms, as this can result in loss of control and compromised power.

Executing the Hip Rotation

Proper execution of hip rotation is key to achieving a consistent and powerful downswing. Initiate the hip rotation from your trail side (right side for right-handed golfers), allowing for a smooth and sequential transfer of energy. Ensure proper timing between the lower body and upper body rotation, allowing the hips to lead the swing and creating the necessary torque for optimal clubhead speed. Engage your core muscles to support and stabilize the movement, maximizing power generation.

Generating Lag and Power

Generating lag is a crucial component of a powerful downswing. Aim to maintain the lag between your clubshaft and wrists as you approach impact, storing and then releasing energy for maximum clubhead speed. Focus on a smooth transition from the backswing to the downswing, allowing for a gradual increase in acceleration. By mastering the art of generating lag, you’ll unlock the potential for long and explosive shots.

Maintaining a Smooth Transition

A smooth transition from the backswing to the downswing is vital for consistency and control in your golf swing. Avoid any abrupt or jerky movements that may disrupt the fluidity of your swing sequence. Aim for a seamless transfer of energy and momentum, maintaining a rhythmic and synchronized motion. Practice proper tempo and timing, emphasizing a gradual acceleration throughout the downswing. By prioritizing a smooth transition, you’ll enhance your ability to deliver consistent and accurate shots.

Perfecting the Impact and Follow-Through

The impact and follow-through stages of the downswing heavily influence the outcome of your shot. Focus on maintaining control of the clubface at impact, ensuring that it remains square to the target for maximum accuracy. Deliver a balanced follow-through by allowing your body to rotate fully after impact, maintaining stability and control. Analyze your technique and make necessary adjustments to refine your impact and follow-through, maximizing the effectiveness of your downswing.

With this comprehensive step-by-step guide to mastering the golf downswing, you now have the tools and knowledge to take your game to new heights. Remember to break down each aspect of the downswing, practicing and refining each step until it becomes second nature. With dedication and perseverance, you’ll be well on your way to achieving a consistent, powerful, and controlled downswing that will positively impact your golf game. Happy swinging!

Is Golf with Friends Cross Platform?

Is Golf with Friends Cross Platform? Find out how this popular multiplayer game brings players from Xbox and PC together for a round of virtual golf.

Did you know you can now tee off with your buddies, regardless of whether they prefer Xbox or PC gaming? That’s right – Golf with Friends is now available on both platforms, bringing together players from different gaming worlds to enjoy a round of virtual golf. So, gather your friends, grab your golf clubs, and get ready to swing into action. Whether you’re aiming for a hole-in-one or just looking for a fun and friendly competition, Golf with Friends has got you covered across platforms.

Is Golf with Friends Cross Platform?

What is Golf With Friends?

Overview of the game

Golf With Friends is a popular multiplayer mini-golf game that offers a fun and exciting experience for players of all ages. Developed by Blacklight Interactive, the game allows you to play with your friends or other players from around the world. The objective is to complete each golf course with the fewest strokes possible, competing against others or simply enjoying a relaxing round of golf.

Gameplay

The gameplay of Golf With Friends is straightforward and easy to understand. Each player takes turns aiming their ball and determining the power and direction of their shot. The physics-based mechanics of the game make it challenging yet enjoyable, as players navigate through various obstacles and tricky holes. With a wide selection of inventive and beautifully designed courses, you’ll never run out of challenges to conquer. Whether you’re a seasoned golf enthusiast or new to the game, Golf With Friends offers a great balance of skill and entertainment.

Platforms for Golf With Friends

Availability on Xbox

Golf With Friends is available to play on Xbox, expanding the game’s accessibility to console players. By launching on Xbox, Blacklight Interactive has provided another platform for enthusiasts to enjoy the game. Xbox users can now experience the thrill of multiplayer golfing with their friends, or even join in with players on other platforms. The availability on Xbox has contributed to the game’s growing popularity and has made it a staple in the console gaming community.

Availability on PC

Golf With Friends is also available to play on PC, making it accessible to a wide range of players. The PC version of the game offers the same engaging gameplay, stunning visuals, and multiplayer capabilities as its console counterpart. With its availability on PC, Golf With Friends has found a dedicated and passionate player base within the vast PC gaming community. The game can be easily downloaded and played on various operating systems, allowing players to enjoy the game on their preferred devices.

Availability on other platforms

Aside from Xbox and PC, Golf With Friends is also available on other platforms such as PlayStation, Nintendo Switch, and even mobile devices. This cross-platform availability ensures that players can enjoy the game regardless of the device they own. Whether you prefer to play on a console, PC, or even on the go, Golf With Friends has you covered. The developers have done an excellent job of catering to the gaming community by providing multiple platform options, allowing players to connect and enjoy the game together seamlessly.

Cross Platform Play

Explanation of cross-platform play

Cross-platform play refers to the ability to play a game with other players who are using different platforms. In the case of Golf With Friends, it means that players on Xbox, PC, and other platforms can all join the same game session and compete or cooperate with each other. This feature has gained significant popularity in recent years as it breaks down the barriers between different platforms and allows players to connect and play together regardless of their chosen device.

Importance of cross-platform play

Cross-platform play is important for several reasons. Firstly, it allows players to connect with their friends who may own different gaming devices. With cross-platform play, you no longer have to worry about missing out on gaming sessions with your buddies simply because you own a different console or play on a PC. The ability to play together despite platform differences fosters a sense of inclusivity, strengthens friendships, and enriches the overall gaming experience.

Secondly, cross-platform play expands the player base and encourages social engagement. With the ability to play with a larger pool of players, you can easily find and connect with others who share your gaming interests and skills. This not only enhances your chances of finding challenging opponents or cooperative teammates, but it also fosters a sense of community within the game. Cross-platform play promotes diversity, encourages healthy competition, and contributes to the longevity of the game by ensuring a vibrant and active player base.

Is Golf with Friends Cross Platform?

Cross Platform Play on Xbox and PC

Cross-platform support

Golf With Friends offers cross-platform support between Xbox and PC, allowing players on both platforms to connect and play together seamlessly. This means that if you own the game on Xbox, you can join a game session with your friends who are playing on PC, and vice versa. The game’s matchmaking system effortlessly brings players from both platforms together, creating a unified gaming experience.

Playing with friends on Xbox and PC

Playing with friends on Xbox and PC is a breeze with Golf With Friends’ cross-platform play feature. Whether you prefer to team up and conquer challenges together or compete against each other, the game allows you to create private game sessions and invite your friends from both Xbox and PC. With a simple invitation system, you can easily connect with your friends and enjoy the game as if you were all playing on the same platform. The seamless cross-platform compatibility further strengthens the bond between players, regardless of their chosen gaming device.

Cross Platform Play on Other Platforms

Cross-platform support on other platforms

Golf With Friends also offers cross-platform support on other platforms, such as PlayStation, Nintendo Switch, and mobile devices. This means that players on these platforms can also connect and play together, expanding the game’s multiplayer capabilities even further. Whether you’re playing on a console or on the go, Golf With Friends ensures that you can connect and compete with friends, regardless of the platform they choose.

Playing with friends on different platforms

If you have friends who play Golf With Friends on different platforms, fear not! The game’s cross-platform play feature allows you to play with friends on different platforms effortlessly. By creating private game sessions and inviting your friends, you can form a diverse group composed of players from Xbox, PC, PlayStation, Nintendo Switch, and mobile devices. The ability to connect and enjoy the game together, regardless of your chosen platform, ensures that no one is left out and that everyone can share in the excitement of multiplayer mini-golf.

Cross Platform Compatibility

Compatibility between Xbox and PC

Golf With Friends boasts excellent cross-platform compatibility between Xbox and PC. The game seamlessly supports multiplayer interactions between players on both platforms, ensuring that there are no barriers to connecting and playing together. The developers have put in the necessary effort to ensure that the game functions smoothly, regardless of the platform. This compatibility fosters a sense of inclusivity and ensures that players can fully enjoy the game without any limitations.

Compatibility with other platforms

In addition to Xbox and PC compatibility, Golf With Friends also demonstrates compatibility with other platforms such as PlayStation, Nintendo Switch, and mobile devices. This means that players on different consoles and even mobile devices can all connect and play the game together. The developers have worked tirelessly to ensure that the game runs smoothly across all platforms, providing a consistent and enjoyable experience for players, regardless of their chosen device. This compatibility further strengthens the game’s appeal and ensures that players can find opponents or teammates from a diverse pool of platforms.

Multiplayer Options

Options for multiplayer gameplay

Golf With Friends offers a range of multiplayer options to suit every player’s preference. Whether you enjoy teaming up with friends or competing against them, the game has got you covered. You can choose to create private game sessions, allowing you to invite specific friends and set custom game rules. Alternatively, you can join public game sessions, where you can connect with players from all over the world. The game’s versatility ensures that you can fully tailor your multiplayer experience to fit your desired playstyle and level of competition.

Connecting with friends on different platforms

The cross-platform play feature of Golf With Friends enables seamless connection and gameplay with friends on different platforms. By simply inviting your friends, regardless of the platform they are using, you can create a private game session and enjoy the game together. The process is hassle-free and allows you to instantly connect with your friends, irrespective of their preferred gaming device. Golf With Friends prioritizes inclusivity and ensures that you can enjoy the game’s multiplayer features without any restrictions.

Benefits of Cross Platform Play

Expanded player base

Cross-platform play significantly expands the player base of Golf With Friends. By allowing players from different platforms to connect and play together, the game fosters a diverse and active player community. This ensures that you can always find opponents or form teams, regardless of the time of day or the platform you are using. The expanded player base not only enhances the multiplayer experience but also contributes to the overall longevity of the game by ensuring a robust and consistently active player community.

Enhanced gaming experience

Cross-platform play enhances the overall gaming experience in Golf With Friends. The ability to connect and play with friends on different platforms fosters camaraderie, encourages social interactions, and strengthens friendships. Playing with a diverse group of players, each with their own unique playstyles and strategies, adds depth and excitement to the game. Additionally, cross-platform play promotes healthy competition, as players from different platforms can test their skills against each other, leading to more engaging and rewarding gameplay sessions.

Player flexibility

Cross-platform play offers players greater flexibility in terms of device choice. Whether you prefer the comfort of console gaming, the versatility of PC gaming, or the mobility of playing on the go, cross-platform play ensures that you can connect and enjoy Golf With Friends on your preferred gaming device. This flexibility allows players to seamlessly switch between devices without sacrificing their gaming experiences or disconnecting from their communities. Golf With Friends adapts to the player’s lifestyle, making it more convenient and accessible for everyone.

Limitations and Considerations

Technical limitations

While Golf With Friends provides seamless cross-platform play, there may be some occasional technical limitations depending on the specific platforms involved. These limitations could include discrepancies in performance, connection issues, or differences in user interfaces. However, the developers are continually working to address and resolve these technical challenges to provide the best possible cross-platform gaming experience for players.

Platform restrictions

Certain platform restrictions may impose limitations on cross-platform play. For example, some platforms may require a specific online subscription service to access multiplayer features. It’s important to be aware of these restrictions and ensure that all players have the necessary subscriptions or accounts to participate in cross-platform play. However, many platforms have embraced cross-platform play and collaborate with developers to provide a smooth and inclusive gaming experience for players.

Game version compatibility

To ensure successful cross-platform play, it’s crucial for players to have the same version of the game. If there are variations or updates across different platforms, compatibility issues may arise. Developers typically release updates simultaneously across all platforms to maintain version compatibility. Players should regularly check for game updates and ensure their game versions align with those of their friends to avoid any hiccups during cross-platform play sessions.

Future Developments

Potential for future cross-platform support

As the demand for cross-platform play continues to grow, there is a strong possibility for Golf With Friends to expand its cross-platform support to even more platforms in the future. With the success of the game and the increasing popularity of cross-platform play, the developers may consider integrating support for additional devices and consoles, ensuring that even more players can connect and enjoy Golf With Friends together.

Improvement in compatibility

To further enhance the cross-platform experience, developers are constantly working to improve compatibility between different platforms. This includes addressing any technical limitations, optimizing performance and connection stability, and ensuring a seamless and enjoyable gaming experience for players. With each update and improvement, Golf With Friends aims to provide the best possible cross-platform compatibility and solidify its position as a premier multiplayer golfing game.

In conclusion, Golf With Friends stands out as a prime example of the benefits and exciting possibilities of cross-platform play. With its availability on Xbox, PC, and other platforms, players can connect, compete, and forge friendships regardless of their chosen gaming device. The game’s cross-platform compatibility, multiplayer options, and enhanced gaming experience highlight the importance and positive impact of inclusivity in multiplayer gaming. With its expanding player base, flexible gameplay, and continuous improvements, Golf With Friends remains an engaging and enjoyable multiplayer golfing experience for players of all backgrounds and platforms.

The Ultimate Guide on Selling Used Golf Balls

Learn how to turn your used golf balls into cash with this ultimate guide. From understanding the market to finding buyers, we’ve got you covered. Start your profitable journey now!

Imagine making extra cash by selling used golf balls. Whether you’re an avid golfer or stumbled upon a treasure trove of golf balls, this ultimate guide will show you the ropes on how to turn those second-hand spheres into cold, hard cash. From understanding the different types of golf balls to finding potential buyers, we’ve got you covered. So, dust off those neglected balls, grab your notebook, and get ready for a fun and profitable journey into the world of selling used golf balls.

The Ultimate Guide on Selling Used Golf Balls

1. Understanding the Market for Used Golf Balls

What are used golf balls?

Used golf balls are golf balls that have been previously played with and are no longer considered new. These balls have typically been found on golf courses or purchased from individuals who no longer have a need for them. While they may have some signs of wear and tear, they are still fully functional and can be used for further play.

Why do people buy used golf balls?

There are several reasons why people choose to buy used golf balls instead of brand new ones. One of the main reasons is cost-effectiveness. Used golf balls are often significantly cheaper than new ones, allowing golfers to save money without compromising on performance. Additionally, some golfers prefer the feel and performance of used balls, as they may have softened and become easier to control with repeated use.

Determining the value of used golf balls

The value of used golf balls can vary depending on several factors. These factors include the brand, model, condition, and overall performance of the ball. High-end golf ball brands, such as Titleist or Callaway, may have higher resale value compared to lesser-known brands. Additionally, golf balls in excellent condition with minimal scuffs or marks will generally command a higher price. It’s important to research and compare prices in the market to accurately determine the value of your used golf balls.

Identifying different types of used golf balls

Used golf balls come in a variety of types, each with its own characteristics and performance attributes. Some popular types include distance balls, which are designed to provide maximum distance off the tee, and tour balls, which offer better control and feel for more experienced golfers. It’s important to know the different types of golf balls available in order to accurately describe and market your used balls to potential buyers.

2. Preparing Your Used Golf Balls for Sale

Cleaning and refurbishing used golf balls

Before selling your used golf balls, it’s essential to clean and refurbish them to enhance their overall appearance and performance. This can be done by soaking the balls in warm, soapy water and gently scrubbing them with a soft brush. Additionally, you can use specialized golf ball cleaners or cleaning machines to restore the balls’ original shine. By taking the time to clean and refurbish your used golf balls, you can significantly increase their appeal to potential buyers.

Sorting and grading used golf balls

To ensure that you provide accurate descriptions and prices for your used golf balls, it’s important to sort and grade them accordingly. This can be done by carefully inspecting each ball and categorizing them based on their condition. Common grading categories include mint, near mint, good, and practice, with mint being the highest quality and practice being the lowest. By accurately grading your golf balls, you can avoid misrepresentation and ensure customer satisfaction.

Storage and organization tips

Proper storage and organization of your used golf balls can help streamline the selling process and ensure their quality is maintained. Consider investing in golf ball storage containers or bags that keep the balls clean and protected from damage. It’s also a good idea to label or categorize the balls based on their grading, making it easier to locate specific types when creating listings. Keeping your inventory organized will save you time and effort in the long run.

3. Researching and Choosing the Right Selling Platforms

Online marketplaces for selling used golf balls

One of the most popular ways to sell used golf balls is through online marketplaces. Platforms such as eBay, Amazon, or Craigslist provide a wide reach and potential customer base. Research and compare these marketplaces to determine which one aligns best with your selling goals and target audience. Consider factors such as fees, listing options, and ease of use when choosing the right platform for your used golf ball business.

Specialized golf ball selling websites

In addition to general online marketplaces, there are specialized websites that cater specifically to the buying and selling of used golf balls. These websites often have features tailored to the golfing community and may attract more focused and interested buyers. Examples of such websites include LostGolfBalls.com or GolfBallsUnlimited.com. Explore these specialized platforms to see if they align with your selling objectives and customer preferences.

Local and community-based selling options

While online platforms offer convenience and a broader customer reach, don’t overlook local and community-based selling options. Consider setting up a booth at golf tournaments or local flea markets, as these venues attract golf enthusiasts who may be interested in purchasing used golf balls. Building relationships within your local golfing community can also lead to repeat customers and word-of-mouth referrals. Don’t underestimate the power of personal connections when selling your used golf balls.

The Ultimate Guide on Selling Used Golf Balls

4. Creating Effective Listings and Product Descriptions

Attractive photos and presentation

When creating listings for your used golf balls, it’s crucial to include high-quality and attractive photos that showcase the balls’ condition and appearance. Use proper lighting and angles to highlight any unique features or branding on the balls. Additionally, consider presenting the balls in an appealing way, such as grouping them by brand or categorizing them based on their grading. A visually appealing listing is more likely to attract potential buyers and generate interest.

Writing compelling product descriptions

Alongside your photos, well-written product descriptions are essential for effectively selling your used golf balls. Clearly describe the condition, brand, model, and any distinguishing features of the balls. Be honest and transparent about any wear or imperfections the balls may have. Highlight the benefits of buying used golf balls, such as cost savings or the opportunity to try different brands without the high price tag. Use descriptive language that engages your potential buyers and conveys the value of the balls.

Highlighting key selling points

To set your used golf balls apart from the competition, highlight their key selling points in your listings. This could include factors such as the brand’s reputation, the balls’ performance attributes, or any unique features they possess. For example, if you have a collection of limited-edition golf balls, make sure to mention their rarity and appeal to collectors. By emphasizing these key selling points, you can capture the attention of potential buyers and increase the perceived value of your used golf balls.

Pricing strategies and negotiations

Pricing your used golf balls appropriately is crucial for a successful sale. Research the market to get an idea of the going rates for similar balls in the same condition. Consider factors such as brand, model, grading, and demand when setting your prices. It’s also important to be open to negotiations and offers from potential buyers. Offering discounts for bulk purchases or running occasional promotions can attract more buyers and help move inventory quickly.

5. Marketing and Promoting Your Used Golf Balls

Utilizing social media platforms

Social media platforms can be powerful marketing tools for selling your used golf balls. Create business pages or profiles on platforms such as Facebook, Instagram, or Twitter to showcase your inventory and engage with potential customers. Post high-quality photos, informative content about golf balls, and any promotions or sales you may be running. Engage with the golfing community by responding to comments, sharing golf-related tips, and building relationships with potential buyers.

Building a customer base

Building a loyal customer base is key to long-term success in selling used golf balls. Encourage satisfied customers to leave reviews and testimonials, as positive feedback can attract new buyers. Consider implementing a customer loyalty program or offering special discounts for repeat customers. Engage with your customers after a sale by following up, asking for feedback, and providing exceptional customer service. Building strong relationships with your customers will not only generate repeat business but also increase the likelihood of referrals.

Advertising options and strategies

Explore different advertising options and strategies to reach a wider audience of potential buyers. Advertise your used golf balls in golfing magazines, local newspapers, or online forums dedicated to golf. Sponsor local golf events or tournaments to increase brand visibility and attract interested buyers. Collaborate with golf instructors or clubs to offer your used golf balls as part of their packages. Get creative with your marketing efforts to stand out in a competitive market.

6. Packaging and Shipping Your Used Golf Balls

Choosing suitable packaging materials

Proper packaging is crucial to ensure that your used golf balls arrive safely and in the stated condition to your buyers. Invest in sturdy packaging materials such as padded envelopes or boxes that provide adequate protection during transit. Consider using bubble wrap or foam padding to prevent the balls from moving or getting damaged during shipping. Ensure that your packaging materials are clean and presentable, as this contributes to a positive buying experience.

Shipping methods and costs

When it comes to shipping your used golf balls, there are several options to consider. The most common methods include shipping through postal services like USPS or using private shipping companies such as FedEx or UPS. Research the shipping rates, delivery times, and tracking options offered by different providers to choose the most suitable option for your business. Factor in the shipping costs when setting your prices to ensure that you cover the expenses without deterring potential buyers.

Ensuring secure and timely delivery

To ensure secure and timely delivery of your used golf balls, follow shipping best practices. Double-check the recipient’s address to avoid any delivery mishaps. Properly seal and label the packages to prevent damage or loss during transit. Consider adding insurance or tracking services to protect against any potential issues. Communication is key throughout the shipping process, so keep buyers informed about the shipment status and provide tracking numbers whenever possible. Providing excellent customer service during the shipping process will leave a positive impression on your buyers and encourage future business.

7. Customer Service and After-Sale Support

Maintaining positive communication

Creating positive and open lines of communication with your customers is crucial for building trust and ensuring satisfaction. Respond to inquiries, messages, or feedback promptly and professionally. Address any concerns or issues that arise during the buying process with empathy and a willingness to find a solution. Making your customers feel heard and valued will contribute to a positive buying experience and encourage future purchases.

Handling returns and refunds

Although you may strive to accurately describe and grade your used golf balls, there may be instances where a customer is dissatisfied with their purchase. Establish clear return and refund policies to address these situations. Consider offering partial refunds, exchanges, or store credit as options for resolving any disputes. Handling returns and refunds promptly and fairly will help maintain your reputation as a reliable seller in the used golf ball market.

Building customer loyalty

Building customer loyalty is essential for repeat business and the long-term success of your used golf ball business. Offer incentives such as discounts, exclusive promotions, or loyalty programs to reward and encourage repeat customers. Follow up with customers after their purchase to express appreciation and seek feedback on their experience. Consider sending personalized thank-you notes or small gifts as a gesture of gratitude. Going the extra mile to build relationships and maintain customer satisfaction will lead to a loyal customer base that supports your business.

8. Legal Considerations and Potential Risks

Understanding the laws and regulations

When selling used golf balls, it’s important to understand the laws and regulations that govern the sale of second-hand goods in your jurisdiction. Familiarize yourself with any specific regulations related to the sale of sporting equipment or used items. Ensure that you comply with any labeling, safety, or consumer protection requirements to avoid legal issues or penalties.

Protecting yourself from liabilities

While selling used golf balls generally carries minimal risk, it’s important to take steps to protect yourself from any potential liabilities. Clearly outline the condition and grading of the balls in your listings to manage customer expectations and avoid misrepresentation. Include disclaimers that state the balls are sold as-is and that the buyer assumes all risk associated with their use. Obtaining liability insurance can also provide added protection in case of any unforeseen incidents.

Insurance options for sellers

Consider obtaining insurance coverage for your used golf ball business to protect against loss, damage, or theft of inventory. Contact insurance providers that specialize in coverage for small businesses or e-commerce. Compare policies and ensure that the coverage offered aligns with the specific needs and risks of your business. Having proper insurance in place can provide peace of mind and safeguard your business from unexpected challenges.

9. Tips for Maximizing Profit and Success

Strategies for sourcing used golf balls

To maximize profit and success in selling used golf balls, explore various strategies for sourcing inventory. Reach out to golf courses or local clubs to inquire about purchasing their lost or abandoned balls. Establish relationships with individuals who regularly play golf and offer to collect their used balls. Attend golf equipment auctions or sales events to acquire larger quantities at competitive prices. Diversifying your sourcing methods will ensure a steady supply of used golf balls for your business.

Negotiating bulk deals and partnerships

Consider negotiating bulk deals or forming partnerships with other sellers or businesses in the golf industry. By purchasing larger quantities of used golf balls at discounted rates, you can increase your profit margins. Collaborate with golf instructors, trainers, or clubs to offer exclusive promotions or packages that include your used golf balls. Building mutually beneficial partnerships can expand your customer base and provide opportunities for growth.

Scaling your business and expanding

Once you have established a successful system for selling used golf balls, consider scaling your business and expanding into new markets or product categories. Explore opportunities to sell related golfing accessories, such as tees, ball markers, or golf gloves. Expand your online presence by creating a dedicated e-commerce website or exploring additional online marketplaces. Continuously monitor market trends and adapt your business model to stay ahead of competitors and attract new customers.

10. Customer Testimonials and Success Stories

Inspiring stories from successful sellers

Gather customer testimonials and success stories from satisfied buyers to showcase the positive experiences others have had with your used golf balls. Highlight the cost savings, improved performance, or unique finds that customers have enjoyed when purchasing from your business. These testimonials serve as social proof and can significantly influence potential buyers in their decision-making process.

Learning from customer feedback

Customer feedback is a valuable resource that can help you refine and improve your business. Pay attention to any feedback you receive, whether it’s positive or constructive criticism. Use customer feedback to enhance your product descriptions, grading accuracy, or overall customer service. Show appreciation for customer input by implementing changes based on their suggestions, thus building a reputation for continuous improvement.

Creating a positive reputation

A positive reputation is crucial in the used golf ball market. Strive to provide exceptional customer service, accurate product descriptions, and prompt shipping and delivery. Treat every customer as a valuable asset to your business, and aim to surpass their expectations in every interaction. Building a positive reputation will result in repeat customers and word-of-mouth referrals, contributing to the long-term success of your used golf ball business.

Golf Clubs: Understanding the Weight of a Set

Discover the impact of weight on golf clubs. Learn how it affects performance, shot distance, accuracy, and control. Find the right weight for your swing.

If you’ve ever wondered about the weight of a set of golf clubs, you’re not alone. The weight of golf clubs can vary depending on factors such as the materials used and the specific club types included in the set. From lightweight drivers to heavier irons and putters, each club serves a unique purpose on the golf course. Understanding the weight of a set of golf clubs can help you choose the right equipment for your game and optimize your performance on the green. Let’s explore the various factors that contribute to the weight of a golf club set and how it can impact your swing.

Golf Clubs: Understanding the Weight of a Set

Understanding the Importance of Golf Club Weight

Golf club weight is a crucial factor that can significantly impact your performance on the golf course. The weight of your clubs affects various aspects of your game, including shot distance, accuracy, swing speed, and control. By understanding the role of weight in golf clubs, you can make informed decisions about the type of clubs that best suit your swing and playing style.

How Golf Club Weight Affects Performance

The weight of a golf club plays a vital role in the overall performance of a player. It directly affects the distance and accuracy of your shots, as well as the control and consistency of your swing. Golf clubs with the proper weight distribution can help you generate greater clubhead speed, resulting in increased power and distance in your shots.

The Role of Weight in Shot Distance and Accuracy

The weight of a golf club influences shot distance and accuracy in several ways. Heavier clubs tend to generate more force and transfer more energy to the golf ball upon impact, resulting in longer shots. However, the increased weight may require more strength and control to achieve accurate shots. On the other hand, lighter clubs can offer increased swing speed but may sacrifice some power and control.

Finding the Right Weight for Your Swing

Finding the right weight for your golf clubs is crucial to optimize your performance. The ideal weight depends on various factors, including your swing speed, strength, and playing style. It is essential to mmatch club weight to your physical abilities and swing mechanics, as using clubs that are too heavy or too light can lead to swing errors and inconsistent performance.

The Impact of Clubhead Weight on Ball Flight

Clubhead weight is a critical component of golf club weight. The weight of the clubhead influences the trajectory and flight path of the golf ball. Clubs with heavier clubheads can promote a lower ball flight, which may be beneficial in windy conditions or when trying to achieve more roll on the fairway. Lighter clubheads, on the other hand, can help players generate more height and spin, which can be advantageous in certain situations.

Different Types Of Golf Clubs and Their Weight Ranges

Now that we understand the importance of golf club weight, let’s take a closer look at the weight ranges of different types of golf clubs.

Driver

The driver is typically the longest club in a golfer’s bag and is designed for distance off the tee. The weight of a driver can range from around 300 to 350 grams. Weight distribution is often concentrated towards the clubhead to maximize power and distance.

Fairway Woods

Fairway woods are versatile clubs used for shots from the fairway or rough. They are generally shorter than drivers but offer more control. The weight of fairway woods typically ranges from around 200 to 270 grams.

Hybrids

Hybrids are a blend of irons and fairway woods, designed to provide the forgiveness of a wood with the control of an iron. They have a weight range similar to fairway woods, around 200 to 270 grams.

Irons

Irons are the most commonly used clubs in a golfer’s bag and are available in numbered sets. The weight of irons varies depending on the club number, with longer irons being lighter and shorter irons being heavier. Typically, iron weights range from 250 to 320 grams.

Wedges

Wedges are specialized clubs used for shots around the green and in bunkers. They have higher lofts and shorter shafts than irons. Wedges typically range in weight from 260 to 330 grams.

Putter

The putter is used for the final strokes on the green and is designed to roll the ball into the hole. Putters vary significantly in weight, ranging from around 310 to 600 grams. Weight distribution in putters can vary, with some putters having balanced weight throughout and others having more weight in the clubhead for stability.

Factors That Influence Golf Club Weight

Several factors influence the weight of golf clubs. Understanding these factors can help you choose clubs that suit your playing style and preferences.

Clubhead Material

The material used in the clubhead construction can impact the weight of the club. Traditional clubheads were predominantly made of stainless steel, which offers durability and control. However, advancements in technology have led to the development of lighter materials, such as titanium and carbon composite, which can reduce clubhead weight while maintaining strength and performance.

Shaft Material

The material used in the shaft construction also plays a role in club weight. Steel shafts are generally heavier than graphite shafts, which are lighter and can help generate higher swing speeds. The choice of shaft material depends on personal preference and playing style.

Grip Weight

While the grip may not contribute significantly to overall club weight, it can influence the overall feel and balance of the club. Grips come in various sizes and materials, with heavier grips potentially affecting the swing weight and overall feel of the club.

Length of the Club

The length of a club can impact its weight. Longer clubs tend to be slightly heavier, while shorter clubs are generally lighter. The length of the club should be chosen based on your height, swing mechanics, and comfort.

Clubhead Design

The design and shape of the clubhead can also influence its weight. Certain clubhead designs may have more weight concentrated towards the clubface to maximize power and forgiveness, while others may distribute weight more evenly for better control and feel.

Golf Clubs: Understanding the Weight of a Set

Understanding Golf Club Weight Measurements

To better understand golf club weight, let’s explore the various measurements associated with it.

Standard Club Weight Measurements

Golf club weight is typically measured in grams (g) or ounces (oz). Manufacturers provide the weight specification for each club to assist golfers in making informed decisions based on their preferences and playing style.

Understanding Swing Weight

Swing weight, often denoted by a letter (e.g., D0, D2), is a measure of a club’s overall balance. It indicates how the weight is distributed throughout the club. A higher swing weight means that more weight is concentrated towards the clubhead, while a lower swing weight indicates more weight in the grip area.

Total Set Weight

Total set weight refers to the combined weight of all the clubs in your golf bag. It is essential to consider the total set weight to ensure consistency and balance throughout your entire set of clubs. A well-balanced set promotes better control and feel during your golf swing.

How Golf Club Weight Impacts Swing and Control

Understanding how golf club weight impacts your swing and control can help you make informed decisions when choosing the right clubs for your game.

The Relationship between Clubhead Weight and Swing Speed

The weight of the clubhead affects your swing speed, which plays a crucial role in shot distance and control. A heavier clubhead can require more strength and slower swing speed, but it may also generate more power. Conversely, a lighter clubhead can contribute to faster swing speed but may require more precise control to achieve consistency.

Balancing Weight for Control and Consistency

Balancing weight throughout your golf clubs is essential for control and consistency. Clubs that are too light can result in a lack of control and stability, while clubs that are too heavy can lead to fatigue and swing errors. By finding a balance in weight and swing weight, you can achieve optimal performance and consistency in your shots.

Overcoming Swing Errors with Club Weight Adjustment

Adjusting the weight of your clubs can help correct swing errors and improve performance. If you struggle with slicing the ball, a heavier clubhead may help promote a more in-to-out swing path. Conversely, if you tend to hook the ball, a lighter clubhead may help you correct your swing and achieve a more neutral ball flight.

Factors to Consider When Choosing the Right Golf Club Weight

When selecting the right golf club weight, consider the following factors:

Player Skill Level and Strength

Your skill level and physical strength play a significant role in determining the optimal weight for your golf clubs. Beginners or players with limited strength may find lighter clubs easier to swing and control, while more experienced players may benefit from the additional power and control that heavier clubs provide.

Swing Speed and Tempo

Your swing speed and tempo should also be considered when choosing golf club weight. Faster swing speeds may benefit from lighter clubs to maintain control, while slower swing speeds may require a slightly heavier club to generate more power.

Desired Shot Trajectory

Consider your desired shot trajectory when selecting golf club weight. Players looking to achieve a higher ball flight may opt for lighter clubs, while those seeking a lower, penetrating ball flight may prefer slightly heavier clubs.

Course Conditions

Course conditions can influence the optimal weight of your golf clubs. Windy conditions may require heavier clubs to combat the wind and maintain control, while calm conditions may allow for lighter clubs and increased swing speed.

The Importance of Custom Fitting for Golf Club Weight

Custom fitting is crucial when it comes to optimizing your golf club weight and overall performance. Custom fitting helps ensure that your clubs are tailored to your unique swing characteristics, physical attributes, and playing style.

Benefits of Customized Club Weight

Customized club weight offers numerous benefits, including enhanced control, improved consistency, and optimized distance. By fine-tuning the weight of your clubs, you can achieve a more comfortable and efficient swing, leading to better performance on the golf course.

Working with a Professional Club Fitter

Working with a professional club fitter is highly recommended when customizing the weight of your golf clubs. A club fitter will assess your swing mechanics, physical attributes, and playing goals to recommend the appropriate club weight and balance for your game. They will also consider other factors, such as shaft flex, grip size, and clubhead design, to optimize your overall club fitting experience.

Adjusting Club Weight for Individual Needs

Customizing club weight is a versatile process that can be tailored to your individual needs. A club fitter can help you explore different options, such as adding or removing weight from certain clubs or adjusting swing weight, to fine-tune your clubs and achieve optimal performance.

How to Modify Golf Club Weight to Suit Your Preferences

If you wish to modify the weight of your golf clubs to suit your preferences, there are various methods available.

Adding Weight to Clubs

Adding weight to clubs can be achieved by using lead tape or specialized clubweighting kits. This method allows you to increase the club’s overall weight or adjust the swing weight, depending on your specific requirements.

Reducing Weight of Clubs

Reducing the weight of clubs is typically a more challenging task but can be accomplished by replacing heavier components with lighter alternatives. For example, changing to lightweight grips or using graphite shafts can help reduce the overall weight of the clubs.

Using Adjustable Club Weight Systems

Some golf clubs offer adjustable weight systems, allowing you to fine-tune the weight and balance without making permanent modifications. These systems often involve interchangeable weights that can be added or removed from designated areas of the clubhead or shaft.

Using Technology to Optimize Golf Club Weight

Technology plays a significant role in optimizing golf club weight and improving overall performance.

High-Tech Solutions for Club Weight Analysis

Advancements in technology have enabled the development of sophisticated club weight analysis systems. These systems use sensors and data analysis to assess club weight, weight distribution, and swing weight, providing valuable insights to optimize club fitting and performance.

Optimizing Weight Distribution with Computer-Aided Design (CAD)

Computer-Aided Design (CAD) allows club designers to optimize weight distribution in clubhead designs. By strategically placing weight in specific areas, designers can influence the center of gravity, forgiveness, and overall performance of the club.

Computer Simulation and 3D Printing in Club Design

Computer simulation and 3D printing have revolutionized golf club design. These technologies allow designers to create and test various club designs with different weight distributions, ultimately leading to more advanced and optimized club options for golfers.

Conclusion

In conclusion, understanding the importance of golf club weight is essential for any golfer aiming to optimize their performance on the course. By considering factors such as clubhead weight, swing weight, and overall set weight, golfers can select clubs that suit their swing and playing style. Custom fitting and technology also play significant roles in fine-tuning club weight to meet individual preferences and maximize performance. Whether you are a beginner or an experienced golfer, paying attention to golf club weight can help you achieve greater distance, accuracy, and consistency in your shots.

Top Tips for Increasing the Speed of Your Golf Cart

Looking to increase the speed of your golf cart? Check out these top tips, from upgrading the motor to optimizing tire pressure, to make your golf cart faster.

If you’re looking to pick up the pace on the golf course, you’ve come to the right place. This article will provide you with some top tips for increasing the speed of your golf cart. Whether you’re a seasoned golfer looking to shave a few minutes off your round or simply want to add a bit of excitement to your golfing experience, these tips will have you zooming along in no time. From upgrading your battery to optimizing tire pressure, we’ve got you covered. So, fasten your seatbelt and get ready to discover how to make your golf cart faster.

Top Tips for Increasing the Speed of Your Golf Cart

If you’re looking to give your golf cart a little extra kick, there are plenty of options available to help increase its speed and performance. Whether you’re looking for a simple modification or a more comprehensive upgrade, we’ve got you covered. In this article, we’ll explore various ways to enhance your golf cart’s speed, from upgrading the motor to modifying the suspension system, and everything in between. So, buckle up, and let’s get started on maximizing the potential of your golf cart!

Top Tips for Increasing the Speed of Your Golf Cart

1. Upgrading the Motor

1.1 High-Speed Motor

One of the most effective ways to increase your golf cart’s speed is by upgrading to a high-speed motor. The motor is the heart of your golf cart, and a high-performance option can significantly improve its acceleration and overall top speed. By replacing the stock motor with a high-speed version, you can enjoy a thrilling ride on the golf course or any other terrain. Just be sure to choose a motor that is compatible with your cart’s make and model for the best results.

1.2 Performance Controller

In addition to upgrading the motor, installing a performance controller can further enhance your golf cart’s speed. A performance controller allows you to adjust the cart’s speed settings, giving you the ability to increase its maximum speed. This controller works in conjunction with the motor to optimize performance and ensure that you’re getting the most out of your golf cart. With the right combination of a high-speed motor and a performance controller, you’ll experience a whole new level of excitement on the greens.

2. Increasing Tire Size

2.1 Benefits of Larger Tires

Another effective way to improve the speed and performance of your golf cart is by increasing its tire size. Larger tires offer several benefits, including improved traction, enhanced stability, and increased ground clearance. These advantages translate into a smoother ride and better handling, especially on rough or uneven terrains. Additionally, larger tires cover more ground with each rotation, effectively increasing your golf cart’s speed. However, it’s essential to understand golf cart tire sizes and ensure that the new tires you choose are suitable for your cart’s specific make and model.

2.2 Understanding Golf Cart Tire Sizes

When considering tire size for your golf cart, it’s crucial to understand the numbers labeling them. For example, a typical golf cart tire size may be labeled as “205/50-10.” The first number indicates the tire’s width in millimeters, with larger numbers representing wider tires. The second number represents the tire’s aspect ratio, which is the ratio of its sidewall height to its width. Lastly, the last number denotes the wheel diameter in inches. By understanding these numbers, you can select the appropriate tire size that aligns with your desired speed and performance.

3. Improving Aerodynamics

3.1 Removing Unnecessary Accessories

One often overlooked aspect of increasing your golf cart’s speed is improving its aerodynamics. By removing unnecessary accessories from your cart, such as oversized coolers or bulky bags, you can reduce drag and improve its overall efficiency. Streamlining your golf cart by removing excess weight and unnecessary items not only makes it faster but also enhances its maneuverability. So, take a moment to evaluate your cart’s accessories and consider removing any that may be hindering its performance.

3.2 Adding a Golf Cart Windshield

On the flip side, adding a golf cart windshield can also aid in improving aerodynamics. A windshield reduces wind resistance and allows smoother airflow around the cart as you drive. This simple addition can help optimize your golf cart’s speed, especially when cruising at higher speeds. Moreover, a windshield also provides protection from debris, dust, and insects, ensuring a more comfortable and enjoyable ride.

Top Tips for Increasing the Speed of Your Golf Cart

4. Enhancing Battery Voltage

4.1 Upgrading to Lithium Batteries

If you’re serious about increasing your golf cart’s speed, upgrading to lithium batteries is a game-changer. Lithium batteries offer numerous advantages over traditional lead-acid batteries, including higher power density, longer lifespan, and faster charging times. These batteries provide a more consistent and reliable power supply to your cart’s motor, translating into improved acceleration and increased top speed. While lithium batteries may require a higher initial investment, their long-term benefits make them an excellent choice for those looking to maximize their golf cart’s performance.

4.2 Installing Multiple Batteries

Another option for enhancing your golf cart’s speed is by installing multiple batteries. By increasing the number of batteries in your cart, you’re effectively increasing its voltage, which directly impacts its performance. The higher voltage allows the motor to receive more power, resulting in improved speed. However, it’s essential to ensure that your cart’s electrical system can handle the increased load before installing additional batteries. Consulting with a professional or following the manufacturer’s guidelines is crucial to avoid damaging your cart’s electrical system.

5. Optimizing Gear Ratio

5.1 Understanding Gear Ratio

The gear ratio of your golf cart plays a significant role in determining its speed and acceleration. Gear ratio refers to the ratio between the number of teeth on the driven gear (typically the rear axle gear) compared to the number of teeth on the driving gear (usually the motor gear). A higher gear ratio means that the cart has more teeth on the driven gear, resulting in improved acceleration at the cost of top speed. Conversely, a lower gear ratio favors top speed but sacrifices acceleration. Understanding your cart’s gear ratio and finding the right balance for your needs can help optimize its overall performance.

5.2 Changing the Rear Axle Ratio

To modify the gear ratio of your golf cart, you can change the rear axle ratio. By swapping out the existing rear axle gears with higher or lower ratio gears, you can customize your cart’s performance to align with your preferences. For those seeking more speed, opting for a higher gear ratio will provide the desired effect, while a lower gear ratio is ideal for maximizing torque and acceleration. However, it’s essential to choose gears that are compatible with your cart’s make and model and consider seeking professional assistance for this modification.

6. Adding a Speed Chip

6.1 Benefits of a Speed Chip

A speed chip, also known as a performance chip, is a simple yet effective way to increase your golf cart’s speed. This electronic device plugs directly into your cart’s controller, overriding the manufacturer’s speed limitations. By altering the programming, a speed chip allows your cart to exceed its original speed settings, resulting in a faster and more exhilarating ride. Moreover, a speed chip improves throttle response, making your cart more responsive and enjoyable to drive.

6.2 Installing a Speed Chip

Installing a speed chip is generally straightforward and can be done by following the manufacturer’s instructions or with the assistance of a professional. The chip is usually inserted into the controller or wiring harness, depending on the specific cart model. However, it’s essential to ensure that you’re purchasing a speed chip that is compatible with your cart’s make and model to avoid compatibility issues or potential damage. Once installed, you’ll be able to experience the full potential of your golf cart’s speed capabilities.

7. Improving Weight Distribution

7.1 Rear Seat Removal

Improving the weight distribution of your golf cart can significantly impact its speed and handling. A simple but effective modification is removing the rear seat if it’s not necessary. Rear seats add considerable weight to the back of the cart, which can negatively affect acceleration and overall performance. By removing the rear seat, you’re redistributing the weight towards the front, increasing traction and enhancing maneuverability. However, it’s crucial to consider the intended use of your golf cart before removing the rear seat, as it may be needed for transporting passengers or equipment.

7.2 Moving Batteries or Bag Holders

Another way to optimize weight distribution is by moving batteries or bag holders. Golf carts typically have batteries located in the rear, contributing to a rear-heavy weight distribution. By repositioning the batteries towards the front of the cart, you’re shifting the weight balance and improving acceleration. Similarly, relocating bag holders or other heavy accessories towards the front can also help achieve a more balanced weight distribution. However, be cautious not to compromise the cart’s stability or handling when making these modifications, and consult with a professional if needed.

8. Regular Maintenance

8.1 Cleaning the Cart

To ensure optimal performance and speed, regular maintenance is key. One essential maintenance task is cleaning your golf cart regularly. Dust, debris, and other contaminants can accumulate on the exterior of your cart and even clog vital components. By keeping your cart clean, you’re ensuring proper airflow and reducing the risk of overheating, which can affect performance. Furthermore, a clean cart not only looks better but also feels better to drive, giving you a smoother and more enjoyable experience on the course.

8.2 Checking Tire Pressure

Another crucial maintenance aspect is regularly checking and maintaining proper tire pressure. Underinflated or overinflated tires can negatively impact the speed, handling, and overall performance of your golf cart. By ensuring that your tires are properly inflated, you’re optimizing traction and reducing the risk of tire damage. Use a tire pressure gauge to check the pressure regularly and adjust as needed according to the manufacturer’s specifications. This simple maintenance task goes a long way in maximizing your cart’s speed and performance.

9. Taking Advantage of Terrain

9.1 Utilizing Downhill Slopes

When it comes to increasing your golf cart’s speed, understanding and utilizing the terrain can make a significant difference. Taking advantage of downhill slopes allows your cart to pick up speed naturally without exerting additional effort. By coasting down slopes, you can enjoy faster speeds and give your cart’s motor a break. However, it’s crucial to stay in control and ensure the downhill terrain is safe and suitable for your cart’s speed capabilities.

9.2 Avoiding Steep Uphill Climbs

On the other hand, avoiding steep uphill climbs can help prevent strain on your golf cart’s motor and maximize its speed. Uphill climbs require more power and torque, and pushing your cart to its limits on steep inclines can result in overheating and reduced performance. If possible, choose alternate routes with less steep inclines or consider modifying your cart’s gear ratio or motor power to better handle uphill climbs. By avoiding strenuous uphill climbs, you can prolong the life of your cart’s components and enjoy a faster and more reliable ride.

10. Modifying Suspension System

10.1 Upgrading Shocks and Springs

Your golf cart’s suspension system plays a crucial role in its overall performance and speed. Upgrading the shocks and springs of your cart can greatly improve its handling, stability, and responsiveness. By opting for high-performance shocks and springs, you’ll experience reduced body roll, smoother rides, and better control over various terrains. These upgrades allow your cart to maintain higher speeds with enhanced stability, ensuring a more comfortable and enjoyable ride.

10.2 Adjusting Suspension Height

Another way to modify your golf cart’s suspension system is by adjusting its height. Lowering the suspension height can decrease wind resistance, making your cart more aerodynamic and improving speed. Conversely, raising the suspension height can provide more ground clearance, allowing you to tackle rough terrains while maintaining control at higher speeds. However, it’s essential to strike a balance and ensure that your cart’s suspension modifications align with its intended usage and manufacturer’s guidelines.

In conclusion, increasing the speed of your golf cart requires a thoughtful approach and a combination of various modifications. From upgrading the motor and enhancing battery voltage to optimizing gear ratio and adjusting suspension, there are countless ways to enhance your cart’s performance and make it faster. Additionally, regular maintenance and taking advantage of the terrain can also maximize speed while ensuring your cart stays in top condition. It’s essential to consider your cart’s make and model, consult with professionals when needed, and prioritize safety throughout the modification process. With these top tips at your disposal, you’ll be well on your way to enjoying a faster, more exhilarating ride on the golf course and beyond!

5 Tips to Increase the Speed of Your Electric Golf Cart

Increase the speed of your electric golf cart with these 5 tips! Upgrade the motor, batteries, and controller, optimize gear ratio, reduce weight, and enhance aerodynamics. Zip around the course in no time!

If you’re looking to make your electric golf cart go faster, you’re in luck! We’ve got 5 tried and tested tips that will help you increase its speed and enhance your golfing experience. From optimizing the battery power to upgrading the motor, we’ve got you covered. So strap in and get ready to zip around the course in no time!

Upgrade Your Electric Golf Cart for Speed!

Is your electric golf cart lacking the speed and performance you desire? Don’t worry! There are several ways you can upgrade your cart to make it go faster and enhance your overall golfing experience. In this comprehensive guide, we’ll walk you through ten key areas to focus on for maximum speed improvement. Let’s dive in!

5 Tips to Increase the Speed of Your Electric Golf Cart

1. Upgrade the Motor

1.1 Replace the stock motor

One of the easiest ways to boost your golf cart’s speed is by replacing the stock motor. Stock motors are typically designed for average performance, so upgrading to a more powerful motor can make a noticeable difference. Look for motors specifically made for golf carts to ensure a proper fit and optimal performance.

1.2 Install a high-performance motor

For even greater speed gains, consider installing a high-performance motor. These motors are typically designed for racing applications and can significantly increase your cart’s top speed. Keep in mind that high-performance motors may require additional modifications, so ensure compatibility with your cart before proceeding.

1.3 Consider a brushless motor

Brushless motors offer several advantages over traditional brushed motors, including increased efficiency and power output. Consider upgrading to a brushless motor to further enhance your golf cart’s speed and performance. However, it is essential to verify compatibility with your cart’s electrical system before making the switch.

1.4 Opt for a more powerful motor

If you’re looking to maximize your golf cart’s speed potential, opting for a more powerful motor is crucial. Look for motors with higher horsepower ratings and torque capabilities to achieve the speed boost you desire. Remember to consider the limitations of your cart’s electrical system to ensure safe and optimal performance.

1.5 Ensure compatibility with the cart’s voltage

Before selecting a new motor, ensure compatibility with your cart’s voltage. Electric golf carts typically operate on either 36 volts or 48 volts. Choosing a motor that matches your cart’s voltage ensures seamless integration and prevents any electrical issues that may arise from mismatched components.

2. Upgrade the Batteries

2.1 Upgrade to higher voltage batteries

Upgrading your golf cart’s batteries to higher voltage options can provide a substantial speed boost. Higher voltage batteries can deliver more power to the motor, allowing it to operate at higher speeds. However, ensure that your cart’s electrical system is compatible with the upgraded voltage before making any changes.

2.2 Install lithium-ion batteries

Another battery upgrade option is to replace your existing batteries with lithium-ion batteries. Lithium-ion batteries offer several advantages, including higher energy density, lighter weight, and longer lifespan. These batteries can deliver consistent power and enhance your cart’s speed and overall performance.

2.3 Optimize battery connections

To ensure maximum power delivery and prevent any voltage drops, it’s crucial to optimize the battery connections. Clean the battery terminals regularly and ensure a secure connection between the batteries and the cart’s electrical system. Loose or corroded connections can hinder performance and reduce speed.

2.4 Maintain proper battery charging and care

Proper battery charging and care are essential for optimal performance. Follow the manufacturer’s guidelines for charging your batteries and avoid overcharging or undercharging them. Additionally, keep your batteries clean and check for any signs of damage or wear regularly. Maintaining your batteries’ health will ensure consistent power delivery and keep your golf cart running at its best.

2.5 Consider a battery management system (BMS)

For advanced battery performance monitoring and protection, consider installing a battery management system (BMS). A BMS monitors individual battery cells, balances the charge distribution, and protects against overcharging and over-discharging. Integrating a BMS in your golf cart can optimize battery performance and enhance overall speed and efficiency.

3. Modify the Controller

3.1 Replace the stock controller

Upgrading the stock controller is another effective way to increase your golf cart’s speed. Stock controllers often have conservative settings to prioritize safety and battery life. By replacing the controller with a higher-performance option, you can unlock your cart’s speed potential and customize its performance to suit your preferences.

3.2 Install a programmable controller

For more control over your golf cart’s speed and acceleration, consider installing a programmable controller. Programmable controllers allow you to adjust settings such as acceleration rate, maximum speed, and torque output. With a programmable controller, you can fine-tune your cart’s performance to meet your specific needs and preferences.

3.3 Adjust controller settings

Once you’ve upgraded to a new controller, spend some time adjusting the settings to optimize your golf cart’s speed. Experiment with different acceleration rates and maximum speed limits to find the perfect balance between performance and safety. Keep in mind that pushing your cart to its maximum speed may reduce battery life and require more frequent charging.

3.4 Optimize throttle response

Fine-tuning the throttle response is essential for a smooth and responsive driving experience. Adjust the controller settings to achieve optimal throttle response, ensuring that your cart accelerates quickly and effortlessly. Finding the right balance can significantly enhance your cart’s speed and overall performance.

3.5 Ensure compatibility with other modifications

When upgrading the controller, it’s crucial to ensure compatibility with other modifications you’ve made or plan to make. Verify that the new controller can handle the increased power output from upgraded motors or batteries. Compatibility between components is essential for a reliable and efficient golf cart.

5 Tips to Increase the Speed of Your Electric Golf Cart

4. Upgrade the Gear Ratio

4.1 Install a higher gear ratio

Upgrading your golf cart’s gear ratio can have a significant impact on its speed. Installing a higher gear ratio, such as a higher number of teeth on the driven gear, allows the motor to rotate at a higher speed per revolution of the wheels. This modification effectively increases your cart’s top speed without the need for additional power upgrades.

4.2 Consider a differential upgrade

If you’re looking to maximize your cart’s speed potential, consider upgrading the differential. A performance differential with a limited-slip or locking mechanism can distribute power more efficiently between the wheels, improving acceleration and overall speed. Upgrading the differential is a more involved modification, so seek professional advice for proper installation and compatibility.

4.3 Optimize tire size

Choosing the right tire size is essential for speed optimization. Larger-diameter tires can increase your cart’s top speed by covering more ground with each revolution. However, keep in mind that larger tires may affect your cart’s torque and acceleration. Find the right balance between speed and performance to suit your specific needs.

4.4 Fine-tune gear adjustments

After upgrading the gear ratio or making changes to the differential, fine-tuning gear adjustments may be necessary. Proper gear alignment and adjustments ensure optimal power transfer from the motor to the wheels and prevent any unnecessary drag or friction. Seek professional assistance or refer to your cart’s manufacturer guidelines for proper gear adjustments.

4.5 Seek professional advice for specialized modifications

If you’re considering specialized modifications or advanced gear ratio changes, it’s best to consult with a professional golf cart specialist. They can provide expert guidance tailored to your specific needs and ensure that your modifications are compatible, safe, and compliant with regulations.

5. Reduce Weight and Increase Aerodynamics

5.1 Remove unnecessary accessories

An easy and effective way to increase your golf cart’s speed is by reducing unnecessary weight. Remove any accessories or items that you don’t need during your golf rounds. Extra weight puts a strain on your cart’s motor and batteries, reducing overall speed and performance. Travel light and only carry the essentials for a faster and smoother ride.

5.2 Use lightweight materials

Consider using lightweight materials when making any modifications or upgrades to your golf cart. Lighter components, such as aluminum frames or fiberglass bodies, can significantly reduce the overall weight of your cart without compromising structural integrity. This weight reduction translates into improved acceleration and higher top speed.

5.3 Optimize body and frame design

While changing the body and frame design may not be feasible for everyone, modifying or optimizing the existing design can improve aerodynamics. Smooth out any rough edges, streamline the body shape, and consider adding fairings or windshields designed to reduce drag. Optimizing the body and frame design can increase your cart’s top speed by minimizing air resistance.

5.4 Install aerodynamic elements

Another way to enhance your golf cart’s aerodynamics is by installing specific aerodynamic elements. Rear spoilers or airfoils can redirect airflow more efficiently, reducing drag and increasing stability at higher speeds. However, be mindful of any local regulations or course rules regarding modifications to your cart’s appearance.

5.5 Improve airflow and reduce drag

In addition to modifying the body and installing aerodynamic elements, ensure optimal airflow throughout your cart. Remove any obstructions that may disrupt the airflow, such as unnecessary covers or grilles. Creating smooth and uninterrupted airflow will reduce drag and contribute to increased speed and performance.

6. Enhance Airflow and Cooling

6.1 Install a cooling system for the motor

Heat can negatively affect your golf cart’s performance and lead to reduced speed and power output. Installing a cooling system specifically designed for the motor can ensure optimal temperature regulation and prevent overheating. Improved motor cooling will enable consistent performance, especially during prolonged use or in hot weather conditions.

6.2 Upgrade the cooling system for batteries

Battery temperature also plays a crucial role in maintaining consistent speed and performance. Consider upgrading the cooling system for your batteries to prevent overheating and extend their lifespan. Cooling fans or heat sinks can help dissipate heat and ensure that your batteries operate within the optimal temperature range.

6.3 Optimize air intake and exhaust

Ensuring a proper air intake and exhaust system is essential for efficient motor performance and cooling. Clear any debris or obstructions that may hinder airflow, such as dirt or leaves. Keep the air intakes and exhaust vents clean and ensure they are positioned for maximum airflow. Optimizing the air intake and exhaust will contribute to better motor performance and increased speed.

6.4 Add ventilation for controller and electrical components

Aside from motor and battery cooling, it’s crucial to provide sufficient ventilation for the controller and other electrical components. Overheating of these components can lead to reduced performance and even system failures. Install ventilation fans or openings to promote airflow and keep these components operating at optimal temperatures.

6.5 Regularly monitor and maintain cooling systems

Maintaining your cooling systems is essential for long-term speed and performance gains. Regularly monitor the cooling system components, clean or replace air filters, and ensure proper functioning of fans or other cooling mechanisms. Preventive maintenance and regular inspections will help identify any issues before they impact your golf cart’s speed and performance.

7. Perform Regular Maintenance

7.1 Check and replace worn-out parts

Regular maintenance is crucial for keeping your golf cart in top shape. Check all parts regularly, including belts, bearings, and other moving components. Replace any worn-out or damaged parts promptly to prevent further damage and maintain optimal performance.

7.2 Lubricate moving components

Proper lubrication is essential for reducing friction and ensuring smooth operation of moving components. Regularly lubricate the cart’s axles, suspension components, and other moving parts to minimize wear and extend their lifespan. Smoothly operating components will contribute to a smoother ride and maintained speed.

7.3 Keep the cart clean

A clean golf cart not only looks great but also performs better. Regularly clean your cart, removing any dirt, mud, or grass that may accumulate. Pay special attention to the undercarriage and wheel wells, as a buildup of debris in these areas can hinder performance and reduce speed.

7.4 Inspect and inflate tires

Properly inflated tires are crucial for optimal performance and speed. Regularly inspect your tires for signs of wear, cuts, or punctures. Ensure they are inflated to the manufacturer’s recommended pressure levels. Underinflated tires can result in increased rolling resistance and reduced speed, so keep them properly inflated for maximum performance.

7.5 Maintain proper alignment

Maintaining proper wheel alignment is essential for efficient and safe operation of your golf cart. Misaligned wheels can lead to increased tire wear, reduced speed, and poor handling. Regularly check and adjust the wheel alignment as needed to ensure optimal performance and extend the lifespan of your tires.

8. Consider Professional Tuning

8.1 Consult with a golf cart specialist

If you’re unsure how to proceed with your speed upgrades or feel overwhelmed by the options, it’s best to consult with a golf cart specialist. They can assess your cart’s current state, discuss your goals, and provide expert advice on the most effective modifications for your specific needs.

8.2 Get a performance assessment

Before making any upgrades, consider getting a performance assessment from a professional. They can evaluate your cart’s current speed, acceleration, and overall performance. This assessment will help you set realistic expectations and determine the areas that require the most attention to achieve your desired speed improvements.

8.3 Seek expert advice for modifications

Making modifications or upgrades to your golf cart can be a complex process, especially if you’re unfamiliar with the technical aspects. Seek expert advice for guidance on specific modifications and ensure that you’re following proper installation and safety procedures. Expert advice will save you time, money, and potential headaches down the road.

8.4 Professional tune-up and fine-tuning

Consider scheduling a professional tune-up for your golf cart, especially after major upgrades or modifications. A professional tune-up ensures that all components are functioning correctly, optimizes performance settings, and fine-tunes the cart for maximum speed and efficiency. Regular professional maintenance will help keep your cart operating at its best.

8.5 Ensure modifications comply with regulations

When making modifications to your golf cart, it’s essential to ensure compliance with local regulations and course rules. Some modifications, especially those affecting the appearance or safety features of the cart, may be restricted or require specific approvals. Research and confirm that your modifications are compliant before proceeding.

9. Upgrade the Suspension

9.1 Install heavy-duty shocks

Upgrading your golf cart’s shocks to heavy-duty options can significantly improve stability and handling, especially at higher speeds. Heavy-duty shocks offer increased dampening capabilities and minimize suspension movement, allowing for more confident and controlled driving experiences.

9.2 Opt for adjustable suspension components

Adjustable suspension components provide the flexibility to fine-tune your cart’s suspension settings to match your preferences and driving conditions. Consider upgrading to adjustable shocks, springs, or sway bars to optimize your cart’s performance at different speeds and terrains.

9.3 Improve stability and handling

Enhancing your cart’s stability and handling is crucial for safe and enjoyable rides. Consider adding braces or stabilizer bars to reduce body roll and improve overall stability. Upgrading your cart’s suspension components will contribute to better handling, allowing you to navigate corners and uneven terrains with ease.

9.4 Consider specialized suspension systems

For golfers who plan to drive their carts in challenging terrains or off-road conditions, specialized suspension systems may be worth considering. Off-road suspension kits or independent front suspensions are designed to handle rough terrains and provide greater stability and agility. Consult with a specialist to determine the best suspension options for your specific needs.

9.5 Seek professional assistance for complex upgrades

Upgrading your golf cart’s suspension system can be a complex task, especially for those without technical expertise. Seek professional assistance for complex suspension upgrades to ensure proper installation, compatibility, and compliance with regulations. Professionals can guide you on the best suspension options and modifications for your cart’s specific requirements.

10. Practice Safe Driving

10.1 Adhere to speed limits and regulations

While it’s exciting to have a faster golf cart, it’s crucial to prioritize safety. Adhere to speed limits and regulations set by your local authorities and golf courses. Excessive speed poses risks to yourself, other golfers, and course staff. Always drive responsibly and within designated speed limits to ensure a safe and enjoyable golfing experience.

10.2 Be mindful of other golfers on the course

Respect other golfers on the course and drive responsibly. Be mindful of your speed and avoid sudden maneuvers or excessive acceleration that may startle or distract other players. Maintain a safe distance from other golfers and prioritize their safety and enjoyment during your rounds.

10.3 Drive responsibly and be cautious

Even with modifications and upgrades, it’s essential to drive your golf cart responsibly. Be cautious of your surroundings and anticipate potential hazards or obstacles. Adjust your speed and driving style accordingly to maintain control and prevent accidents or damage to the cart.

10.4 Use appropriate safety equipment

Wearing appropriate safety equipment, such as helmets or seat belts, is important when operating a high-speed golf cart. While golf carts may not require the same safety measures as vehicles on public roads, taking precautions will reduce the risk of injury in the event of an accident or sudden stop.

10.5 Keep up with regular safety inspections

Regular safety inspections are essential for maintaining a safe golf cart. Ensure that all safety features, such as lights, brakes, and horn, are functioning correctly. Additionally, check your cart’s tires, suspension, and any other key components regularly to prevent any safety hazards or potential speed impediments.

By following these ten areas of focus and making the recommended upgrades and modifications, you’ll be well on your way to enjoying a faster and more exciting golf cart experience. Remember to prioritize safety, adhere to any local regulations, and seek the assistance of professionals when needed. Get ready to hit the golf course in style and speed!

Top Tips for Organizing Your 6-Way Golf Bag

Get top tips for organizing your 6-way golf bag! From sorting clubs to utilizing small pockets, learn how to keep your equipment tidy and easily accessible. Say goodbye to a cluttered bag and hello to an organized and enjoyable golfing experience!

Got a 6-way golf bag and feeling overwhelmed with how to keep it organized? Look no further! In this article, we’ve got you covered with some top tips to make sure your golf bag is in perfect order. From separating your clubs effectively to strategically arranging your accessories, we’ll help you take your golf game to the next level by keeping your equipment tidy and easily accessible. Say goodbye to searching through a cluttered bag and hello to a more organized and enjoyable golfing experience!

Top Tips for Organizing Your 6-Way Golf Bag

Top Tips for Organizing Your 6-Way Golf Bag

If you’re an avid golfer, you know how important it is to have an organized golf bag. Not only does it make it easier to find your clubs, but it also ensures that your equipment is protected and easily accessible. Here are ten top tips to help you organize your 6-way golf bag efficiently and effectively.

1. Sort Your Clubs

The first step in organizing your 6-way golf bag is to sort your clubs. Take all of your clubs out of the bag and group them together based on type. Separate your woods, irons, wedges, and putters. This will make it easier to find the club you need during your round and maintain a consistent organization system.

2. Use Divider Slots

Most 6-way golf bags come with individual divider slots for each club. Take advantage of these dividers to keep your clubs separated and protected. Place each club in its designated slot, ensuring that the grip end is securely placed in the divider. This will prevent your clubs from tangling together and potentially causing damage.

2.1 Choose the Right Divider Slots

When placing your clubs into the divider slots, consider the length and size of each club. Ensure that the longer clubs, such as your driver or woods, are placed in the appropriate slots that can accommodate their size. This will prevent any overcrowding or potential damage to your clubs.

3. Arrange Clubs by Type

Once your clubs are sorted and placed in the appropriate divider slots, organize them within each type. Start with your woods and arrange them from highest to lowest loft. Next, move on to your irons and wedges, arranging them from shortest to longest loft. Finish by placing your putter in the dedicated putter slot.

3.1 Color-Coded Clubs

If you’re looking to take your club organization to the next level, consider color-coding your clubs. Use colored clubhead covers or grips to differentiate between your woods, irons, and wedges. This visual cue will help you easily locate the specific type of club you need during your round.

Top Tips for Organizing Your 6-Way Golf Bag

4. Prioritize Easy Access

When organizing your 6-way golf bag, it’s essential to prioritize easy access. Place the clubs you use most frequently, such as your driver, putter, and high-lofted wedges, in the outer slots. This way, you can quickly grab them without having to dig through the other clubs in your bag.

4.1 Keep Frequently Used Clubs on Top

To further streamline your access to clubs, position your frequently used clubs on top of the others. This means having your driver, putter, and any other go-to clubs at the front and top of your bag. By doing so, you’ll minimize the time spent during your round searching for the right club, allowing you to focus on your game.

5. Utilize Small Pockets

Apart from the main club dividers, your 6-way golf bag likely has several smaller pockets. Don’t overlook these pockets as they can be incredibly useful for organizing your golf accessories and small items. Use them to store items such as tees, ball markers, extra golf balls, and golf gloves. Utilizing these small pockets will free up space in your main pockets for larger items and help keep your bag clutter-free.

5.1 Use Zipper Pouches

To further organize your small pockets, consider using zipper pouches or small bags. These can help keep similar items together and prevent them from getting lost within the pockets. For example, you can keep all of your golf tees in one pouch and your ball markers in another. This way, you won’t have to rummage through your pockets to find what you need.

6. Keep Essentials Handy

While it’s important to clear out clutter from your golf bag, make sure to have your essential items easily accessible. Keep your golf glove, rangefinder, scorecard, and pencil in designated pockets within easy reach. This way, you won’t waste time searching for these items when you need them the most on the course.

6.1 Designate a Pocket for Personal Items

In addition to your golf essentials, it’s handy to have a pocket dedicated to personal items such as your phone, wallet, keys, or sunscreen. By having a specific pocket for these non-golf-related items, you can easily find them without having to mix them with your golf accessories.

7. Place Extras in Larger Pockets

Larger pockets in your 6-way golf bag are perfect for storing extra items you may need during your round. These could include a towel, umbrella, rain gear, extra gloves, or additional balls. Utilize these larger pockets to keep these extras organized and easily accessible whenever you need them.

7.1 Use a Towel Hook or Carabiner

To keep your towel easily accessible and prevent it from getting misplaced, consider using a towel hook or carabiner. Attach it to the outside of your golf bag and hang your towel on it. This way, you can quickly grab it to clean your clubs or hands without having to fumble through your bag.

8. Consider Personal Preferences

Remember that organizing your golf bag is a personal process, and what works for one person may not work for another. Consider your personal preferences when arranging your clubs and organizing your bag. If there’s a specific order or arrangement that makes sense to you and enhances your game, go with it. Your organization system should be tailored to your needs and playing style, so don’t be afraid to experiment.

9. Maintain Cleanliness

A well-organized golf bag also means a clean one. Regularly clean out your bag and remove any debris, grass, or dirt that may have accumulated. Wipe down your clubheads and grips to keep them in optimal condition. By maintaining cleanliness, you not only prolong the life of your equipment but also ensure a clutter-free and enjoyable golfing experience.

9.1 Empty Pockets After Each Round

To stay on top of cleanliness, make it a habit to empty your bag’s pockets after each round. Remove any trash, empty water bottles, or forgotten items to keep your golf bag tidy. This simple step will save you time in the long run and ensure that your bag is always ready for your next game.

10. Experiment and Adjust

No two golfers are the same, and what works for one may not work for another. The key to finding the best organization system for your 6-way golf bag is to experiment and adjust as needed. Try different arrangements, test out new pocket configurations, and pay attention to what works best for you. Through trial and error, you’ll find the perfect organization system that suits your needs and helps improve your overall golfing experience.

In conclusion, organizing your 6-way golf bag is essential for a seamless and enjoyable golfing experience. By following these ten top tips, you’ll have a well-organized bag that ensures easy access to your clubs, protects your equipment, and keeps everything in its rightful place. Remember to sort your clubs, arrange them by type, prioritize easy access, utilize small pockets, keep essentials handy, and consider personal preferences. Maintain cleanliness, experiment, and adjust until you find the perfect organization system that suits your individual needs as a golfer. Now, get out on the course, confident that your well-organized golf bag will have you ready for every swing! Happy golfing!

Is Golf Losing its Popularity?

Is golf losing its popularity? Explore the declining participation, reasons behind it, impact of COVID-19, challenges faced, economic implications, image problem, and environmental concerns. Discover efforts to revive its popularity, attract younger players, improve accessibility, and promote golf as a recreational activity.

Golf, a sport that has captured the hearts of millions for generations, is now facing a question that lingers in the minds of enthusiasts and skeptics alike: is it losing its popularity? With the rise of other recreational activities and the changing interests of younger generations, doubts have arisen about the enduring appeal of this beloved pastime. However, beneath the surface, there is a fascinating exploration to be had, examining the factors that may contribute to its perceived decline and discovering if golf is truly at risk of becoming a dying sport.

Is Golf Losing its Popularity?

Golf’s Declining Participation

Golf, once considered a popular pastime for people of all ages and backgrounds, is currently facing a decline in participation. The statistics are clear and depict a worrying trend for the sport. According to recent studies, the number of people actively participating in golf has been steadily decreasing over the years. This decline raises concerns about the future of golf and the factors contributing to its decreasing popularity.

Statistics of declining golf participation

Various statistics highlight the decline in golf participation in recent years. For example, according to the National Golf Foundation, the number of golfers in the United States has dropped from 30 million in 2005 to around 24 million in recent years. This decline is not limited to a single country; it is a global phenomenon. In the United Kingdom, the number of registered golfers has fallen by nearly 20% since 2004.

Reasons for the decline

The decline in golf’s participation can be attributed to several factors. One of the primary factors is the impact of changing lifestyles and preferences. In today’s fast-paced world, people often find it difficult to dedicate the time required to play a full round of golf. Additionally, the perception of golf as a slow and time-consuming sport may deter potential players, especially among the younger generation.

Another significant factor is the cost associated with playing golf. Golf can be an expensive sport, with membership fees, equipment costs, and greens fees adding up. This financial barrier may discourage individuals from taking up the sport, especially in difficult economic times.

Impact of COVID-19 on golf’s popularity

The COVID-19 pandemic has had contrasting impacts on golf’s popularity. While many recreational activities were restricted due to social distancing measures, golf experienced a surge in interest. Golf provided a safe outdoor option for physical activity, leading to an increase in participation rates. However, this surge may be temporary, and the long-term impact of the pandemic on the sport remains uncertain.

Attempts to attract younger players

Recognizing the need to engage younger generations, various initiatives have been undertaken to make golf more appealing to them. One approach is to introduce innovative formats and shorter versions of the game, such as “golf in a day” programs or nine-hole rounds. These initiatives aim to offer a more time-friendly and less intimidating golf experience to attract younger players.

Furthermore, youth development programs and scholarships have been established to provide opportunities for aspiring young golfers. By offering support and resources, these programs aim to nurture talent and encourage the next generation of golfers.

Challenges Faced by Golf

While the decline in golf’s participation poses significant challenges, there are several factors contributing to this decline that need to be addressed.

Competition from other sports

One major challenge faced by golf is the competition from other sports. In recent years, various new sports and recreational activities have emerged, capturing the interest of younger individuals. Sports such as soccer, basketball, and skateboarding have gained popularity, drawing potential golfers away from the sport.

Perception of golf as an elitist sport

Golf has long been associated with elitism, which may contribute to its declining participation. The expensive equipment, exclusive clubs, and dress codes may create a perception of inaccessibility and exclusivity. This perceived exclusivity can deter potential players who feel intimidated or unwelcome in the golfing community.

To combat this notion, efforts are being made to break down barriers and make golf more inclusive. Initiatives promoting more relaxed dress codes and welcoming environments aim to create a more inviting atmosphere for individuals from diverse backgrounds.

Time and cost constraints

Golf requires a significant investment of both time and money. The commitment to a full round of golf can be demanding, especially for individuals with busy schedules. Additionally, the cost of equipment, membership fees, and greens fees can be prohibitively expensive.

To address these challenges, some golf courses have introduced flexible tee times and reduced rates to accommodate individuals with limited time and budget. By offering more affordable and flexible options, golf courses aim to attract a broader range of players.

Lack of diversity and inclusivity

Golf has historically struggled with diversity and inclusivity, with certain demographics being underrepresented within the sport. This lack of diversity can make the golfing community seem exclusive and unrepresentative of the broader population.

Efforts are being made to increase representation and create a more diverse and inclusive golfing environment. Programs that provide opportunities for individuals from all backgrounds, regardless of age, gender, or socioeconomic status, aim to promote inclusivity within the sport.

Economic Implications

The declining popularity of golf has not only affected player participation but also had significant economic implications across various sectors associated with the sport.

Financial struggles faced by golf courses

As participation in golf declines, golf courses face financial challenges. Decreased revenue from fewer players can lead to difficulties in maintaining and operating golf courses. Some courses have even been forced to close due to financial constraints. This has led to concerns about the long-term sustainability of golf courses and the impact on communities that rely on the revenue generated by these establishments.

Impact on golf equipment and apparel industry

The decline in golf participation and interest also affects the golf equipment and apparel industry. With fewer people playing golf, the demand for golf clubs, balls, and other equipment decreases. Similarly, the reduced interest in the sport impacts the sales of golf apparel and accessories.

To adapt to the changing market, companies in the golf industry are innovating and diversifying their product offerings. They are exploring new technologies, styles, and features to attract a wider audience beyond traditional golfers.

Effects on tourism and local economies

Golf has long been associated with tourism, attracting visitors from around the world to destinations renowned for their golf courses. The decline in golf’s popularity can have a significant impact on the tourism industry and local economies that depend on golf-related revenue.

Communities that rely heavily on golf tourism must adapt to the changing landscape. Diversifying tourism offerings and attracting visitors with other attractions or amenities can help mitigate the economic effects of golf’s declining popularity.

Is Golf Losing its Popularity?

Golf’s Image Problem

Apart from challenges related to participation and economic implications, golf also faces an image problem that affects its perception among the general public.

Negative portrayal in the media

Golf has often been portrayed negatively in the media, perpetuating stereotypes and misconceptions about the sport. Media coverage may focus on controversies, elitism, or the perceived lack of excitement in golf. These portrayals can shape public opinion and impact the sport’s appeal, particularly to non-golfers.

Efforts are being made to change the narrative and showcase the positive aspects of golf, including the skill, strategy, and camaraderie involved in the sport. Highlighting the positive impact that golf can have on physical and mental well-being can help challenge negative stereotypes.

Challenges of attracting non-golfers

Golf traditionally appeals to individuals who are already interested in the sport. However, attracting non-golfers can be a challenge. The perception of golf as a complex and difficult sport to learn may intimidate potential players.

By offering introductory programs, clinics, and beginner-friendly courses, golf can become more accessible to non-golfers. These initiatives aim to break down barriers and provide a more welcoming entry point for individuals interested in exploring the sport.

Public perception of golf’s slow pace

Another aspect contributing to golf’s image problem is the perception of the sport as slow-paced. In a world where everything moves at a rapid pace, the slow tempo of golf may deter individuals seeking immediate gratification or excitement.

Efforts are being made to address this perception by adopting faster-playing formats and promoting the benefits of a leisurely and mindful sport. By emphasizing the enjoyment of the game and the social aspects of playing golf, it is possible to shift public perception and attract a wider audience.

Environmental Concerns

As the world becomes increasingly aware of environmental issues, golf faces scrutiny regarding its impact on natural resources and ecosystems.

Water resource usage and environmental impact

Golf courses require vast amounts of water to maintain lush green fairways and greens. This heavy use of water raises concerns about the depletion of water resources, especially in areas prone to drought or water scarcity.

To mitigate the environmental impact, golf courses are implementing water management strategies such as efficient irrigation systems, drought-tolerant grass varieties, and water recycling programs. These measures aim to reduce water consumption and promote sustainability.

Resistance from environmental groups

Golf courses have faced criticism from environmental groups concerned about the environmental impact of maintaining expansive landscapes and chemical use. The use of pesticides, fertilizers, and other chemicals on golf courses can potentially contaminate water sources and harm local ecosystems.

To address these concerns, golf courses are transitioning towards more sustainable practices. Implementing organic or integrated pest management programs and minimizing chemical usage help reduce the environmental impact associated with golf course maintenance.

Transition towards more sustainable golf courses

Recognizing the need for sustainability, golf courses are increasingly adopting eco-friendly practices and pursuing environmental certifications. From embracing renewable energy sources to creating wildlife habitats on golf course properties, these initiatives aim to make golf courses more environmentally responsible.

Efforts are also being made to educate golfers and raise awareness about sustainable practices on the course. By fostering a sense of environmental responsibility among golfers, the sport can contribute positively to environmental conservation efforts.

Efforts to Revive Golf’s Popularity

In response to the decline in golf’s participation, numerous initiatives have been undertaken to revive its popularity and attract a wider audience.

Innovative formats and shorter versions of golf

To appeal to individuals with time constraints or those seeking a faster-paced experience, golf has embraced innovative formats and shorter versions of the game. These include options such as speed golf, footgolf, and urban golf, which offer alternative ways to experience the sport in a more time-friendly manner.

By diversifying the ways in which golf can be played, these alternative formats aim to attract new players who may not be inclined to commit to a full 18-hole round.

Youth development programs and scholarships

To cultivate future generations of golfers, youth development programs and scholarships have been established. These programs provide young individuals with access to golf instruction, equipment, and competitive opportunities. By nurturing young talent and providing support, these initiatives aim to ensure the future growth and sustainability of the sport.

Improving accessibility and affordability

Efforts are being made to make golf more accessible and affordable for a broader range of individuals. Introduction of lower-cost memberships, discounted greens fees, and beginner-friendly facilities make it easier for individuals to try golf without significant financial barriers.

Furthermore, collaborations between golf courses and community organizations aim to introduce golf to underserved populations, providing opportunities for individuals who otherwise may not have access to the sport.

Promotion of golf as a recreational activity

Highlighting the recreational aspects of golf and repositioning it as a leisure activity rather than a competitive sport can attract new players. By focusing on the leisurely nature of the game and the social opportunities it provides, golf can appeal to individuals seeking a relaxing and enjoyable outdoor activity.

Efforts to promote golf as a recreational pastime encompass marketing campaigns, community events, and partnerships with leisure and hospitality industries. By appealing to a wider audience beyond avid golfers, these initiatives aim to revitalize interest in the sport.

Digital Influence

The digital age has transformed numerous industries, including sports, and golf is no exception. Incorporating digital platforms and technology has the potential to enhance the golfing experience and engage new audiences.

Emergence of e-sports and online gaming

The rise of e-sports and online gaming has introduced a new way to experience sports virtually. Golf video games provide individuals with the opportunity to play and compete in virtual golf courses from the comfort of their own homes. This virtual experience can serve as an entry point to the sport and be instrumental in inspiring potential players to try their hand at golf in real life.

Platforms for virtual golf experiences

Virtual golf experiences have gained popularity, offering a way to play golf indoors using simulators. These simulators recreate the golfing experience with advanced technology, allowing players to practice their swings, play virtual courses, and compete against others without the need for a traditional golf course.

By offering a convenient and accessible alternative to traditional golf, these virtual platforms can generate interest among individuals who may not have access to golf courses or prefer the convenience of an indoor experience.

Utilizing technology to enhance the game

Technology continues to play a significant role in enhancing the golfing experience. From advanced golf clubs equipped with sensors to track and analyze swings, to GPS-enabled rangefinders and smartphone apps providing course information, technology helps golfers improve their performance and engage with the sport in innovative ways.

The integration of technology in golf not only enhances the playing experience but also attracts tech-savvy individuals who appreciate the combination of sport and innovation.

Golf’s Global Perspective

While golf may be facing challenges in some regions, it is important to consider the global perspective of the sport. Golf’s popularity varies across different countries and regions, with varying levels of participation and interest.

Growth of golf in emerging markets

In recent years, golf has experienced growth in emerging markets, such as China, India, and parts of Southeast Asia. These regions have seen the development of new golf courses and an increase in the number of players. The growth in these emerging markets presents opportunities for the sport to expand its global reach and diversify its player base.

Comparison of golf’s popularity in different regions

Golf’s popularity differs significantly across various regions. While the sport may face challenges in some countries, it remains highly popular in others. For example, golf has a strong following in countries like the United States, United Kingdom, and Australia.

Understanding the regional differences in golf’s popularity is crucial for developing targeted strategies to increase participation and attract new players.

International golf tournaments and players

International golf tournaments, such as the Masters, the British Open, and the Ryder Cup, showcase the global nature of the sport. These tournaments attract top players from around the world, fostering a sense of international camaraderie and competition.

The success and global recognition of international golf tournaments contribute to the overall growth and promotion of the sport on a global scale.

Future of Golf

While golf may face challenges in terms of declining participation and changing perceptions, the sport has the potential to adapt and thrive in the future.

Predictions and forecasts for golf’s future

Experts predict that golf will continue to evolve in response to changing trends and preferences. The sport may witness an increase in alternative formats, shorter versions, and more accessible facilities. Technology will likely play a larger role in enhancing the golfing experience, with innovations in equipment, digital platforms, and virtual reality. These developments aim to attract and engage a broader audience, ensuring the longevity of the sport.

Adaptation to changing trends and preferences

To remain relevant and attract new players, golf must adapt to changing trends and preferences. Embracing technology, promoting inclusivity, and offering flexible playing options are essential to meet the evolving needs of current and future generations.

By continuously innovating and staying attuned to the interests and desires of potential players, golf can enhance its appeal and regain popularity.

Collaborations with other sports and industries

Collaborations with other sports and industries can help golf tap into new audiences and create unique experiences. Partnerships with fitness and wellness organizations can highlight the health benefits of golf, attracting individuals seeking active and enjoyable ways to stay fit.

Additionally, collaborations with other sports, such as tennis or soccer, can introduce players from one sport to the other, promoting cross-participation and expanding the reach of both sports.

By embracing collaborations and synergies, golf has the potential to broaden its appeal and secure its future as a popular sport and recreational activity.

In conclusion, golf’s declining participation poses substantial challenges for the sport. Factors such as changing lifestyles, cost constraints, and negative perceptions contribute to the decline. However, efforts are being made to address these challenges and revive golf’s popularity. Initiatives to attract younger players, improve accessibility, and promote inclusivity are crucial in engaging new participants. The economic implications of declining golf participation require careful consideration, and sustainable practices are being adopted to address environmental concerns. The digital age offers opportunities to enhance the golfing experience, while a global perspective highlights the sport’s varying popularity across regions. With adaptation, collaboration, and innovation, golf can navigate these challenges and build a promising future.

How to Start a Golf Cart Without a Key

Learn how to start a golf cart without a key. From finding a spare key to using alternative methods, this article provides practical solutions to get you back on the green in no time.

So you find yourself in a predicament; you’re standing in front of a locked golf cart, but alas, you don’t have the key to start it. Fear not, my friend, for there are alternative methods to get that cart up and running. In this article, we will explore some ingenious ways to start a golf cart without a key. From bypassing the ignition system to using a screwdriver as a makeshift key, we’ll provide you with practical solutions to get you back on the green in no time.

How to Start a Golf Cart Without a Key

Checking for a Spare Key

Look for a hidden spare key

If you’ve misplaced your golf cart key, the first step is to check if there’s a hidden spare key somewhere. Golf cart manufacturers sometimes include a spare key in a discreet location, such as under the seat, inside the glove compartment, or even attached to the frame of the cart. Take a thorough look around these areas to see if you can find a spare key.

Ask the previous owner or rental agency for a spare key

If you purchased a used golf cart or you’re renting one, it’s worth reaching out to the previous owner or the rental agency to inquire about a spare key. They might have forgotten to mention it, or they may have an extra key that they can provide you with. It’s always worth asking, as it can save you from the hassle of trying other methods to start the golf cart without a key.

Visit the manufacturer or a reputable golf cart dealer for a spare key

If you’ve exhausted all other options and still can’t find a spare key, consider visiting the golf cart manufacturer or a reputable dealer. They may be able to provide you with a replacement key for your specific golf cart model. Bring your identification and proof of ownership to ensure a smooth process. While this method may involve some costs, it is a reliable and legal solution to starting your golf cart without a key.

Using a Golf Cart Ignition Bypass Tool

Understanding how a golf cart ignition bypass tool works

A golf cart ignition bypass tool is specifically designed to override the ignition system and start the golf cart without a key. These tools mimic the function of a key by bypassing the ignition switch and activating the starter motor directly. They are a popular option among golf cart owners who have misplaced their keys or need to start their cart in an emergency situation.

Identifying the correct bypass tool for your golf cart model

It’s crucial to ensure that you purchase the correct golf cart ignition bypass tool for your specific golf cart model. Different golf cart models may have different ignition systems, so it’s important to match the tool to your cart’s requirements. Check the manufacturer’s specifications or consult with a golf cart expert to find the right bypass tool for your golf cart.

Connecting and using the ignition bypass tool

To use the golf cart ignition bypass tool, follow the provided instructions carefully. Typically, you will need to locate the ignition wires in the golf cart’s wiring harness and connect the bypass tool accordingly. The tool will essentially bridge the necessary connections, allowing you to start the golf cart without a key. Remember to exercise caution and follow safety precautions while using the ignition bypass tool.

Ensuring safety precautions while using the tool

When using a golf cart ignition bypass tool, it’s important to prioritize safety. Ensure that the cart is on a flat surface and the parking brake is engaged. Disconnecting the battery is recommended before connecting the bypass tool to avoid any electrical mishaps. Additionally, familiarize yourself with the specific instructions and safety guidelines provided with the tool to minimize any potential risks.

Using a Screwdriver to Hotwire

Understanding the risks and legalities of hotwiring a golf cart

Hotwiring a golf cart involves bypassing the ignition system by connecting the necessary wires manually. However, it’s essential to be aware of the risks and legal implications associated with this method. Tampering with a golf cart’s ignition system without proper authorization may be illegal in many jurisdictions. It’s recommended to explore other alternatives or seek professional assistance before attempting to hotwire a golf cart.

Identifying the correct wires to connect

To hotwire a golf cart, you’ll need to identify the correct wires to connect. The specific wire colors may vary depending on the golf cart model, so consult the wiring diagram in the golf cart’s manual or seek expert advice. Generally, you’ll be looking for the wires connected to the ignition switch and the starter motor.

Using a screwdriver to bridge the wires

Once you’ve identified the correct wires, you can use a screwdriver or another appropriate tool to bridge the connections. Carefully touch the two designated wires together to complete the circuit. This should bypass the ignition system and activate the starter motor, allowing the golf cart to start. However, remember that hotwiring a golf cart may void any warranties or insurance coverage.

Starting the golf cart after hotwiring

After successfully bridging the wires, the golf cart should start as normal. If the connections were made correctly, the ignition system should be bypassed, and the cart should respond to the engaged accelerator pedal, just as it would with a key. Remember to exercise caution while driving, as bypassing the ignition system may affect other safety features programmed into the cart’s ignition system.

How to Start a Golf Cart Without a Key

Replacing Ignition Switch

Understanding the importance of replacing the ignition switch

If you find yourself frequently needing to start your golf cart without a key, it may be worth considering replacing the ignition switch altogether. This option provides a long-term solution that restores the proper functioning of the cart’s ignition system. A new ignition switch ensures secure and reliable starts, eliminating the need for alternative methods that may carry legal risks or safety concerns.

Gathering the necessary tools and replacement ignition switch

Before replacing the ignition switch, gather the necessary tools and a compatible replacement switch. Depending on the golf cart model, you may need a set of screwdrivers, pliers, and a wrench. Additionally, purchase an ignition switch that matches your golf cart’s specifications. Consult the golf cart’s manual or reach out to a golf cart dealer for guidance on purchasing the correct replacement part.

Disconnecting the battery and removing the existing ignition switch

Prior to removing the existing ignition switch, disconnect the battery to prevent any electrical accidents. Once the battery is disconnected, locate the ignition switch, which is usually housed on the cart’s steering column. Use the appropriate tools to remove any retaining clips or screws holding the switch in place. Carefully disconnect the wiring harness connected to the switch and remove it from the steering column.

Installing the new ignition switch and reconnecting the battery

With the old ignition switch removed, it’s time to install the new one. Align the replacement switch with the steering column and connect the wiring harness. Ensure that all connections are secure and the switch is properly seated. Reattach any retaining clips or screws to hold the switch in place. Once the new ignition switch is securely installed, reconnect the battery and verify that the golf cart starts smoothly using the key.

Contacting a Professional Locksmith

Considering professional assistance for starting a golf cart without a key

If you’re uncomfortable or unsuccessful with DIY methods, it’s advisable to contact a professional locksmith who specializes in golf cart locks and ignition systems. Locksmiths have the expertise and specialized tools necessary to handle various lockout situations, including starting a golf cart without a key. Hiring a locksmith ensures a safe and efficient solution, with minimal risk of damage to the golf cart.

Searching for a reliable and experienced locksmith

When searching for a locksmith, look for a professional who has experience working on golf carts or similar vehicles. Ask for recommendations from friends, family, or other golf cart owners to find a reputable locksmith in your area. Verify that the locksmith is licensed, insured, and bonded to protect against any potential liability. Taking the time to research and choose a reliable locksmith can greatly impact the quality of service you receive.

Explaining the situation and requesting their services

When contacting a locksmith, explain the situation and emphasize that you need assistance starting your golf cart without a key. Provide details about your golf cart’s make and model, as well as any relevant information regarding its ignition system. Clear communication will allow the locksmith to come prepared with the necessary tools and knowledge to resolve your issue efficiently.

Following any necessary legal procedures

It’s important to follow any necessary legal procedures when seeking professional assistance for starting your golf cart without a key. Some jurisdictions may require proof of ownership or written authorization before a locksmith can assist with ignition-related services. Be prepared to provide the required documentation to comply with local regulations and ensure a smooth and lawful process.

Using a Jumper Cable

Understanding the potential risks and limitations of using jumper cables

Using jumper cables to start a golf cart without a key can be a viable option in certain situations. However, it’s crucial to understand the potential risks and limitations associated with this method. Golf carts often have sensitive electrical systems, and connecting jumper cables incorrectly or using excessive voltage can cause damage. If you’re unsure about your capabilities or lack experience with jumper cables, it’s best to seek professional assistance.

Locating the battery terminals in the golf cart

To use jumper cables, you’ll need to locate the battery terminals in your golf cart. Most golf carts have a set of battery terminals near the front or under the seat. The terminals are typically labeled with a positive (+) and negative (-) sign. Identify these terminals before proceeding with the jumper cable connection.

Connecting the jumper cables correctly

Once you’ve identified the battery terminals, ensure that both the donor vehicle and the golf cart are turned off. Connect one end of the red (positive) jumper cable to the positive terminal of the donor vehicle’s battery. Then, connect the other end of the red jumper cable to the positive terminal of the golf cart’s battery. Next, attach one end of the black (negative) jumper cable to the negative terminal of the donor vehicle’s battery. Finally, firmly connect the other end of the black jumper cable to a metal part of the golf cart’s frame, away from the battery.

Starting the golf cart with the assistance of a functioning vehicle

With the jumper cables connected correctly, start the donor vehicle and let it run for a few minutes to charge the golf cart’s battery. After a few minutes, attempt to start the golf cart using its regular key or ignition switch. If all connections are secure and the batteries are in good condition, the additional power from the donor vehicle’s battery should provide enough energy to start the golf cart. Once the golf cart starts, carefully disconnect the jumper cables in reverse order, ensuring that they don’t come into contact with each other or any metal surfaces.

Utilizing a Slam-Lock System

Understanding the slam-lock system and its compatibility with your golf cart

A slam-lock system is an alternative method of starting a golf cart without a key. It involves installing a specialized lock mechanism that allows the golf cart to start when the accelerator pedal is slammed or pressed forcefully. Not all golf carts are compatible with this system, so consult with a golf cart dealer or locksmith to determine if your cart can be retrofitted with a slam-lock system.

Installing the appropriate slam-lock system

If your golf cart is compatible with a slam-lock system, the next step is to install the appropriate mechanism. Slam-lock systems are designed to fit specific golf cart models, so ensure that you select the correct system for your cart. Installation can typically be done by following the instructions provided with the slam-lock kit, or you may choose to have a professional locksmith install it for you.

Using the slam-lock system to start the golf cart

Once the slam-lock system is installed, it’s important to familiarize yourself with its operation. Before attempting to start the golf cart, ensure that the slam-lock is engaged, typically by pressing the accelerator pedal firmly. Once engaged, pressing the accelerator pedal forcefully should activate the slam-lock and start the golf cart. It may take some practice to get the hang of the timing and force needed to start the cart reliably using the slam-lock system.

Ensuring proper maintenance and security measures

With a slam-lock system installed, it’s essential to maintain it properly to ensure its continued functionality. Regularly inspect the system for any signs of wear or damage, and address any issues promptly. Additionally, consider implementing additional security measures, such as steering wheel locks or GPS tracking devices, to protect your golf cart from theft.

Considering a Keypad Entry System

Exploring the option of installing a keypad entry system

A keypad entry system is another alternative to starting a golf cart without a key. This system involves installing a keypad on the golf cart’s dashboard or other accessible location, allowing you to enter a unique code to start the cart. Keypad entry systems provide convenience and added security, as they eliminate the need for physical keys that can be lost or stolen.

Choosing a suitable keypad entry system for your golf cart

When selecting a keypad entry system, ensure that it is compatible with your specific golf cart model and ignition system. Consult with a golf cart dealer or locksmith to determine which keypad entry system will work best for your cart. Consider factors such as durability, ease of use, and any additional features that may be available.

Installing and programming the keypad entry system

Once you’ve chosen a suitable keypad entry system, follow the manufacturer’s instructions to install it on your golf cart. Typically, this involves mounting the keypad in a convenient location and connecting the necessary wiring. Once installed, you’ll need to program the keypad with a unique code. Consult the manufacturer’s instructions for the specific programming steps, which may involve a combination of button presses or other inputs.

Using the keypad entry system to start the golf cart

After the keypad entry system is installed and programmed, using it to start the golf cart is relatively straightforward. Simply enter your unique code on the keypad, and if the entered code matches the programmed code, the golf cart should start. Many keypad entry systems also include additional functionality, such as the ability to program multiple user codes or set specific access restrictions.

Consulting the Golf Cart Manual

Locating the golf cart manual

If you’re unable to start your golf cart without a key, consulting the golf cart’s manual is a valuable resource. The manual provides essential information specific to your golf cart model, including guidance on starting without a key and troubleshooting common issues. Locate the manual, either in physical or digital form, to access the manufacturer’s recommended steps and instructions.

Finding relevant information on starting without a key

Once you have the golf cart manual in hand, navigate to the section that covers ignition-related topics. Look for any information or instructions related to starting the golf cart without a key. The manual may provide insights into alternative methods or emergency procedures that can be used. Take note of any specific steps or guidelines provided to ensure a successful start without a key.

Following the provided instructions and guidelines

Carefully follow the instructions and guidelines provided in the manual for starting the golf cart without a key. Manufacturers have an in-depth understanding of their own products and can offer the most accurate and reliable advice. It’s important to adhere to any recommended steps or precautions outlined in the manual to prevent damage to the golf cart or compromise its safety features.

Contacting the manufacturer for further assistance

If you encounter any difficulties or have specific questions regarding starting your golf cart without a key, consider reaching out to the manufacturer for further assistance. Manufacturers often have customer support services available to help troubleshoot issues and provide additional guidance. Be prepared to provide relevant information, such as your golf cart’s make, model, and any serial or identification numbers, to help the manufacturer better assist you.

Investing in Keyless Ignition System

Understanding the advantages of a keyless ignition system

Investing in a keyless ignition system offers several advantages for golf cart owners. With a keyless system, you no longer need to worry about misplacing keys or dealing with mechanical issues related to traditional ignition systems. Keyless systems provide convenience, enhanced security, and can even offer additional features such as remote start capabilities or customizable access restrictions.

Researching and purchasing a suitable keyless ignition system

Before purchasing a keyless ignition system, conduct thorough research to determine the best option for your golf cart. Consider factors such as compatibility with your cart’s make and model, ease of installation, and available features. Read customer reviews and seek recommendations from experts or fellow golf cart owners to ensure that you select a reliable and reputable keyless ignition system.

Installing and programming the keyless ignition system

Once you have chosen a suitable keyless ignition system, carefully follow the manufacturer’s instructions for installation and programming. Keyless systems typically require connecting wiring, installing control modules, and programming unique codes or fobs. Pay close attention to the provided guidelines and ensure that all components are securely installed to guarantee proper functioning.

Enjoying the convenience and security of keyless starting

After the keyless ignition system is successfully installed and programmed, you can enjoy the convenience and security it offers. To start the golf cart, simply activate the keyless system using the designated method, such as pressing a button or entering a code. With the hassle of keys eliminated, you can focus on enjoying your golf cart experience and have peace of mind knowing that your cart is protected by a modern and reliable ignition system.

In conclusion, starting a golf cart without a key is possible with several methods and alternatives. From seeking a spare key to exploring advanced keyless ignition systems, there are options available to suit different circumstances and preferences. Prioritize safety and legality when choosing a method, and consider consulting professionals or referring to the golf cart manual for guidance. With the knowledge and understanding of these different approaches, you can confidently start your golf cart without a key when the need arises.

The Ultimate Guide: Properly Cleaning Your Golf Clubs

Learn how to properly clean your golf clubs with this ultimate guide. From step-by-step instructions to essential tools and helpful tips, keep your clubs in pristine condition and improve their performance. Grab your cleaning supplies and get ready to make your clubs shine!

Have you ever wondered how to give your golf clubs the TLC they deserve? Look no further! In this article, we will provide you with the ultimate guide on properly cleaning your golf clubs. From simple step-by-step instructions to helpful tips and tricks, you’ll be equipped with all the knowledge you need to keep your clubs in pristine condition. So grab your cleaning supplies and get ready to make your golf clubs shine like never before!

The Ultimate Guide: Properly Cleaning Your Golf Clubs

Why Cleaning Your Golf Clubs is Important

Cleaning your golf clubs is an essential part of maintaining their performance, extending their lifespan, and preserving their aesthetics. Regular cleaning not only improves the overall performance of your clubs but also ensures that they last for a long time. Additionally, keeping your clubs clean and well-maintained enhances their appearance, making you look more professional on the course. In this article, we will discuss the importance of cleaning your golf clubs and provide you with a comprehensive guide on how to properly clean them.

Essential Tools for Cleaning Golf Clubs

Before we dive into the cleaning process, let’s take a look at the essential tools you’ll need to properly clean your golf clubs. These tools will help you remove dirt, debris, and grime from your clubs without causing any damage.

  1. Soft-bristled Brush: A soft-bristled brush is the perfect tool for removing dirt and debris from your clubheads and grooves without scratching them.

  2. Towel or Microfiber Cloth: A towel or microfiber cloth is essential for wiping down your clubs and ensuring they are dry after cleaning.

  3. Warm Water: Warm water is the ideal medium for cleaning your golf clubs as it helps to loosen dirt and grime.

  4. Gentle Soap or Golf Club Cleaner: You can use a mild soap or a specifically formulated golf club cleaner to help remove stubborn stains and keep your clubs looking their best.

  5. Toothpicks or Pipe Cleaners: Toothpicks or pipe cleaners are handy tools for clearing out any dirt or grass that may be stuck in the clubhead grooves.

  6. Wire Brush: A wire brush can be used sparingly to remove any rust or corrosion from the clubhead, but caution must be taken to avoid damaging the club’s finish.

The Ultimate Guide: Properly Cleaning Your Golf Clubs

Regular Cleaning Routine

To ensure your golf clubs stay in the best possible condition, it is important to establish a regular cleaning routine. This routine should include pre-round maintenance, post-round cleaning, and monthly deep cleaning.

Pre-Round Maintenance

Before heading out to the golf course, it is a good idea to inspect and prepare your clubs for optimal performance. Here are the steps you can take for pre-round maintenance:

  1. Inspecting the Clubs: Take a close look at each club to ensure there are no visible signs of damage or wear. Check for any loose heads, cracked shafts, or worn grips.

  2. Removing Debris: Use a soft-bristled brush to gently remove any dirt, grass, or debris from the clubheads and grooves. Pay attention to the grooves as they play a crucial role in the club’s performance.

  3. Wiping Down Grips: Wipe down the grips of your clubs with a damp towel or microfiber cloth. This will remove any sweat, dirt, or oils that may have built up and ensure a firm grip during your round.

  4. Checking Shaft Flexibility: Take a moment to flex each club’s shaft gently. If you notice any stiffness or bending, it may be a sign of damage that needs to be addressed before playing.

  5. Ensuring Clubhead Alignment: Look at the clubheads and ensure they are properly aligned. If you notice any misalignment, it could affect your shots, and the club may need to be adjusted or repaired.

Post-Round Cleaning

Once you’ve finished your round, it’s time to give your clubs a thorough cleaning to remove any dirt, grass, or moisture that may have accumulated during play. Follow these steps for post-round cleaning:

  1. Cleaning Clubhead: Take a damp towel or cloth and gently wipe down the clubheads to remove any dirt or grass. Pay special attention to the grooves, as they can easily accumulate debris.

  2. Cleaning Grooves: Use a soft-bristled brush or a toothpick to clean out the grooves on the clubface. Clearing out any debris will ensure optimal ball contact and spin control during your next round.

  3. Drying the Clubs: After cleaning, use a dry towel or microfiber cloth to thoroughly dry your clubs. Moisture can lead to rust or corrosion, so it is crucial to remove any excess moisture.

  4. Polishing Metal Shafts: If your clubs have metal shafts, you can use a metal polish specifically made for golf clubs. Apply a small amount to a cloth and gently rub it onto the shafts to restore their shine.

  5. Conditioning Leather Grips: For golf clubs with leather grips, it is essential to regularly condition them to maintain their suppleness and prevent cracking. Apply a leather conditioner and wipe off any excess.

Monthly Deep Cleaning

In addition to regular pre-round and post-round cleaning, it is important to perform a monthly deep cleaning to keep your clubs in top condition. Here’s how to do it:

  1. Soaking the Clubs: Fill a bucket or sink with warm water and add a mild soap or golf club cleaner. Allow the clubs to soak for 15-20 minutes to loosen any built-up dirt or grime.

  2. Scrubbing Stubborn Dirt: Use a soft-bristled brush to scrub away any stubborn dirt or stains on the clubheads and grips. Be gentle to avoid damaging the club’s finish or grips.

  3. Cleaning the Grips Thoroughly: Submerge the grips in the soapy water and scrub them with a brush or cloth. Rinse them well and ensure they are free from any soap residue before drying.

  4. Removing Rust or Corrosion: If you notice any rust or corrosion on the clubheads, use a wire brush to gently remove it. Take care not to scratch the club’s finish and rinse off any debris thoroughly.

  5. Inspecting for Damage: Once the clubs are clean, take the time to inspect them for any signs of damage. Check the clubheads, shafts, and grips for cracks, dents, or other issues that may require attention.

Tips for Properly Cleaning Golf Clubs

While you now have a comprehensive understanding of the cleaning process, here are some additional tips to keep in mind to ensure you clean your golf clubs properly:

  1. Avoid Using Abrasive Cleaners: Harsh, abrasive cleaners can damage the finish of your clubs. Stick to mild soap or golf club cleaners to prevent any unwanted scratches or discoloration.

  2. Don’t Neglect the Clubheads: The clubheads are the most critical part of the club when it comes to performance. Clean the grooves thoroughly to maintain maximum ball control and spin.

  3. Pay Attention to Grooves: The grooves on the clubface are designed to create backspin and heighten control. Regularly cleaning the grooves will enhance your ability to generate spin and accuracy.

  4. Dry Clubs Thoroughly: Moisture can lead to rust or corrosion, so it is important to dry your clubs thoroughly after cleaning. Pay special attention to the grooves and the grips, ensuring they are completely dry.

  5. Store Clubs Properly: When not in use, keep your clubs in a clean and dry environment. Use a golf bag with individual club dividers to prevent them from banging against each other, causing damage.

Maintaining Long-term Durability

To ensure your golf clubs remain in optimal condition for the long run, here are a few additional tips to maintain their durability:

  1. Avoiding Extreme Temperatures: Avoid exposing your clubs to extreme temperatures, as this can cause materials such as graphite to expand or contract, potentially leading to damage.

  2. Regularly Inspect and Repair: Perform regular inspections of your clubs to catch any signs of damage early. Address any cracks, dents, or loose components promptly to prevent further deterioration.

  3. Replacing Grips When Necessary: Over time, golf club grips can wear out and lose their effectiveness. Replace them as needed to maintain a firm and comfortable grip during your swings.

  4. Periodically Regroove Clubfaces: The grooves on your club’s face can become worn down over time, affecting the spin and control you can generate. Consider regrooving your clubfaces to restore their performance.

Common Mistakes to Avoid

While cleaning your golf clubs, it’s important to avoid these common mistakes that can undermine your efforts to keep them in top condition:

  1. Using Harsh Cleaning Chemicals: Harsh chemicals can damage the finish of your clubs and corrode their components. Stick to mild soap or golf club cleaners to ensure safe and effective cleaning.

  2. Scrubbing Too Aggressively: Scrubbing your clubs too aggressively can lead to scratches, dents, or other forms of damage. Take a gentle approach to cleaning, especially when dealing with delicate club components.

  3. Overlooking Drying Process: Failing to dry your clubs thoroughly after cleaning can lead to rust, corrosion, or mold growth. Take the time to dry each club, paying attention to the grooves and grips.

  4. Not Consistently Maintaining Clubs: Regular maintenance is key to the longevity of your clubs. Neglecting to clean them on a regular basis can lead to a build-up of dirt and grime, affecting their performance.

  5. Storing Clubs in Damaging Conditions: Avoid storing your clubs in extreme conditions, such as a hot trunk or a damp basement. Proper storage in a clean and dry environment will prolong their lifespan.

Conclusion

Properly cleaning your golf clubs is crucial for maintaining their performance, extending their lifespan, and preserving their aesthetics. By following a regular cleaning routine, including pre-round maintenance, post-round cleaning, and monthly deep cleaning, you can ensure your clubs are always in top condition. Additionally, by utilizing the essential tools and tips mentioned in this guide, you’ll be able to clean your clubs effectively and keep them in peak performance for years to come. So, make it a priority to clean your golf clubs regularly, and enjoy the benefits of having clubs that look and perform their best every time you step onto the course.

5 Simple Ways to Make Your EZGO Golf Cart Faster

Unlock the full potential of your EZGO golf cart with these 5 simple tips. Upgrade the motor, improve aerodynamics, upgrade the battery, optimize tire and wheel selection, adjust the governor settings, upgrade the controller, check and tune the suspension, and reduce weight for a faster and more efficient ride.

Are you looking to add a little more speed to your EZGO golf cart? Well, look no further! In this article, we will share 5 simple and effective ways to make your EZGO golf cart faster. From upgrading the motor to adjusting the speed controller, these tips will have you zipping around the golf course in no time. So, if you’re ready to give your cart a boost, keep reading to discover how to unlock its full potential.

1. Upgrade the Motor

5 Simple Ways to Make Your EZGO Golf Cart Faster

1.1 Replace the stock motor with a high-performance one

If you want to make your EZGO golf cart faster, one of the most effective ways is to upgrade the motor. The stock motor that comes with most golf carts is designed for standard performance and may not provide the speed you desire. By replacing it with a high-performance motor, you can significantly improve the acceleration and top speed of your golf cart. High-performance motors are specifically designed to handle higher voltage and deliver more power to the wheels, resulting in increased speed and performance.

1.2 Consider upgrading to a more powerful electric motor

Another option to boost the speed of your golf cart is to consider upgrading to a more powerful electric motor. Electric motors are known for their quick acceleration and smooth operation, making them a popular choice among golf cart enthusiasts. With a more powerful electric motor, you can experience faster speeds and improved performance on various terrains. Make sure to choose a motor that is compatible with your golf cart model and battery system for optimal performance.

1.3 Install a larger gas engine for increased speed

If you own a gas-powered EZGO golf cart, upgrading to a larger gas engine can make a significant difference in the speed and overall performance of your cart. A larger gas engine provides more horsepower, allowing your golf cart to reach higher speeds with ease. Before making this modification, consult with a professional or refer to the manufacturer’s guidelines to ensure compatibility and proper installation.

2. Improve Aerodynamics

2.1 Add a windscreen to reduce drag

Reducing drag is crucial to improving the speed and efficiency of your golf cart. One easy and effective way to achieve this is by installing a windscreen. A windscreen helps redirect airflow away from the front of the golf cart, reducing drag and improving aerodynamics. Choose a windscreen that fits your golf cart model and properly mounts to ensure optimal performance.

2.2 Install a golf cart roof to streamline airflow

Another way to enhance the aerodynamics of your golf cart is by installing a roof. A well-designed and properly fitted golf cart roof can help streamline the airflow over the cart, minimizing turbulence and reducing drag. Consider investing in a lightweight roof made from durable materials that won’t compromise the overall performance of your cart.

2.3 Use aerodynamic accessories like side skirts and spoilers

To further optimize the aerodynamics of your golf cart, you can equip it with additional accessories like side skirts and spoilers. These items are designed to direct airflow efficiently around and over the cart, reducing turbulence and drag. Side skirts are installed along the sides of the golf cart, while spoilers are mounted at the rear. Together, they help create a smoother flow of air, enhancing the overall speed and performance.

3. Upgrade the Battery

3.1 Replace the stock battery with a higher voltage one

The battery plays a crucial role in powering your EZGO golf cart. Upgrading to a higher voltage battery can significantly improve the performance and speed of your cart. A higher voltage battery delivers more power to the motor, allowing for quicker acceleration and overall increased speed. However, it’s important to ensure that the upgraded battery is compatible with your golf cart’s electrical system and that all necessary modifications are made to accommodate the higher voltage.

3.2 Upgrade to lithium-ion batteries for increased power and lighter weight

Another battery upgrade option to consider is switching to lithium-ion batteries. Lithium-ion batteries offer several advantages over traditional lead-acid batteries, including increased power output, lighter weight, and longer lifespan. These batteries have higher energy density, allowing for better acceleration and sustained power throughout your golf cart’s operation. While they may require some modifications to the electrical system, the benefits they provide make it a worthwhile investment for improving the speed of your cart.

3.3 Opt for deep-cycle batteries for better performance

If you use your golf cart frequently or for extended periods, upgrading to deep-cycle batteries can provide noticeable improvements in performance. Deep-cycle batteries are specifically designed to handle repeated discharging and recharging cycles, making them ideal for golf carts. These batteries offer a more consistent power output and longer run times, ensuring that your golf cart maintains its speed and performance throughout your golfing or recreational activities.

4. Optimize Tire and Wheel Selection

4.1 Choose low-profile tires for reduced rolling resistance

The tires you choose can have a significant impact on the speed and performance of your golf cart. Opting for low-profile tires can reduce rolling resistance, allowing your cart to move more efficiently. Low-profile tires have a shorter sidewall height, which minimizes the flexing and deformation that can occur during acceleration and cornering. This, in turn, translates to improved speed and more responsive handling.

4.2 Select larger diameter wheels for increased speed

In addition to choosing low-profile tires, selecting larger diameter wheels can also contribute to increased speed. Larger wheels cover more ground per revolution, resulting in a higher top speed. However, it’s important to consider the clearance and suspension limitations of your golf cart to ensure that larger wheels can be safely installed without causing any interference or compromising the vehicle’s stability.

4.3 Consider using racing tires for better grip and acceleration

If you’re looking to take your golf cart’s performance to the next level, consider using racing tires. Racing tires are specifically designed to provide excellent grip and acceleration, allowing you to navigate corners and rough terrains with confidence. These tires typically have a softer compound and a more aggressive tread pattern, providing enhanced traction and stability. However, keep in mind that racing tires may have a shorter lifespan compared to standard golf cart tires and may require more frequent replacement.

5. Adjust the Governor Settings

5.1 Locate the governor on your EZGO golf cart

Most golf carts, including EZGO models, come equipped with a governor that limits the top speed for safety reasons. Adjusting the governor settings can unlock the full potential of your golf cart and allow it to reach higher speeds. Before making any changes to the governor settings, it’s important to locate it and understand how it operates. The governor is typically located near the engine or in the drivetrain system and can be adjusted or removed.

5.2 Remove or disable the governor for higher speed

One way to increase the speed of your golf cart is by removing or disabling the governor. This modification will allow the engine or electric motor to operate without any speed restrictions imposed by the governor. However, it’s essential to keep in mind that disabling the governor can be unsafe, as it removes the built-in safety feature designed to prevent excessive speeds. If you choose to remove or disable the governor, it is recommended to exercise caution and consider other safety measures, such as upgrading the braking system or installing safety belts.

5 Simple Ways to Make Your EZGO Golf Cart Faster

5.3 Consult the manufacturer’s instructions for governor adjustment

If you prefer to keep the governor installed for safety reasons but want to increase the speed within its limits, consult the manufacturer’s instructions for governor adjustment. Some golf carts have adjustable governors that can be modified to allow for slightly higher speeds while still maintaining the safety features. Adjusting the governor according to the manufacturer’s guidelines ensures that you are following the recommended procedures and maintaining the optimal performance and safety of your golf cart.

6. Upgrade the Controller

6.1 Replace the stock controller with a high-performance one

The controller is an essential component of your golf cart’s electrical system, responsible for regulating the power delivery to the motor. By replacing the stock controller with a high-performance one, you can increase the power output to the motor, resulting in improved speed and acceleration. High-performance controllers are designed to handle higher voltage inputs and deliver more precise control over the motor, enhancing the overall performance of your golf cart.

6.2 Upgrade to a programmable controller for customized settings

For those who want greater control over their golf cart’s speed and performance, upgrading to a programmable controller is a viable option. Programmable controllers allow you to customize various parameters, such as acceleration rates, top speed limits, and regenerative braking settings, according to your preferences. This level of customization ensures that your golf cart performs exactly as you desire, providing a tailored driving experience.

6.3 Opt for a controller with regenerative braking for improved speed control

Regenerative braking is a feature that allows the golf cart’s motor to act as a generator when the brakes are applied, converting some of the kinetic energy into electrical energy. By upgrading to a controller with regenerative braking, you can harness this energy and use it to recharge the battery, increasing your golf cart’s overall efficiency. In addition, regenerative braking also helps in speed control, allowing for smoother deceleration and reduced wear on the traditional braking system.

7. Check and Tune the Suspension

7.1 Inspect and replace worn-out suspension components

The suspension system of your golf cart is responsible for providing a smooth and comfortable ride, but it also plays a role in the overall performance and handling. Ensure that you regularly inspect the suspension components and replace any worn-out or damaged parts. Worn-out suspension components can negatively affect the weight distribution, stability, and handling of your golf cart, which can impact its speed and overall performance.

7.2 Adjust the suspension for optimal weight distribution

The weight distribution of your golf cart significantly influences its handling and speed. By adjusting the suspension settings to achieve optimal weight distribution, you can enhance the stability and overall performance. Proper weight distribution ensures that the weight is evenly distributed between the front and rear wheels, allowing for better traction and minimizing the potential for fishtailing or wheel spin during acceleration.

7.3 Install performance shocks for better handling

Performance shocks can make a noticeable difference in the handling and stability of your golf cart. Upgrading to high-quality performance shocks provides improved control, quicker response, and reduced body roll during cornering and uneven terrain. These shocks are designed to absorb bumps and vibrations more effectively, allowing your golf cart to maintain higher speeds while ensuring a smooth and comfortable ride.

8. Reduce Weight

8.1 Remove unnecessary accessories or cargo from the golf cart

Reducing the weight of your golf cart is an effective way to increase its speed and performance. Check for any unnecessary accessories or cargo that may be adding unnecessary weight and remove them. Every pound counts when it comes to speed, so ensure that your golf cart is free from any non-essential items that may be weighing it down.

8.2 Use lightweight materials for modifications

If you plan on making modifications to your golf cart, consider using lightweight materials. When upgrading components or adding accessories, opt for materials that offer the desired strength and functionality while also being lightweight. Lightweight modifications help reduce the overall weight of your golf cart, allowing it to accelerate faster and reach higher speeds.

8.3 Replace heavy components with lighter alternatives

In addition to using lightweight materials, you can also replace heavy components with lighter alternatives. For example, if your golf cart has a steel body, consider replacing it with a fiberglass or aluminum body, which can significantly reduce weight without compromising structural integrity. Likewise, if you have a cargo box or other accessories made of heavy materials, look for lighter options that can provide similar functionality while reducing the overall weight of the cart.

9. Install a Performance Exhaust

9.1 Upgrade to a high-flow exhaust system

An often overlooked but effective way to improve the speed and performance of your golf cart is by upgrading to a high-flow exhaust system. A high-flow exhaust system allows for better engine exhaust gas flow, reducing back pressure and improving overall engine efficiency. By upgrading to a high-flow exhaust, you can increase horsepower and torque, resulting in improved acceleration and top speed.

9.2 Opt for a tuned header for improved exhaust flow

Another option to consider when upgrading your golf cart’s exhaust system is installing a tuned header. A tuned header is designed to optimize exhaust gas flow by providing smoother airflow from the engine. This improvement in exhaust flow leads to increased engine power and responsiveness, translating into better speed and performance for your golf cart.

9.3 Consider installing a performance muffler for better engine efficiency

Adding a performance muffler to your golf cart can also enhance its speed and engine efficiency. Performance mufflers are specifically designed to reduce exhaust noise while optimizing exhaust gas flow. By replacing the stock muffler with a performance-oriented one, you can expect improved horsepower, torque, and overall engine performance. Additionally, performance mufflers can provide a deeper and more aggressive exhaust note, adding a sporty touch to your golf cart.

10. Perform Regular Maintenance

10.1 Keep the cart clean to avoid excess drag

Regular maintenance plays a crucial role in extending the life of your golf cart and ensuring optimal performance. One simple yet often overlooked aspect is keeping your cart clean. Dirt, mud, and other debris can accumulate on the body and undercarriage, creating excess drag and negatively affecting aerodynamics. By regularly cleaning your golf cart, you can minimize drag and maintain its speed and efficiency.

10.2 Check and adjust tire pressure regularly

Proper tire pressure is critical for optimal performance and safety. Monitor the tire pressure regularly and adjust it according to the manufacturer’s guidelines. Underinflated tires can increase rolling resistance, reducing your golf cart’s speed and efficiency. Overinflated tires, on the other hand, can affect traction and handling, compromising your cart’s performance. Maintaining the correct tire pressure ensures maximum grip, better fuel efficiency, and improved speed.

10.3 Keep the battery charged and in good condition

A well-maintained battery is essential for the performance of your golf cart. Keep the battery charged and ensure it is in good condition. Regularly check the battery terminals for any corrosion and clean them as needed. It is also advisable to periodically inspect the battery cables for tightness and replace any worn-out or damaged cables. A properly charged and well-maintained battery ensures that your golf cart’s electric motor operates at its full potential, enabling higher speeds and improved performance.

10.4 Lubricate moving parts to reduce friction

Reducing friction is crucial for the smooth operation and improved performance of your golf cart. Apply lubrication to the various moving parts such as hinges, suspension components, and wheel bearings. Lubricating these parts reduces friction, allowing them to move more freely and efficiently. This results in less resistance and improved speed. Use a lubricant suitable for the specific components, and follow the manufacturer’s recommendations for proper lubrication intervals.

By following these 10 comprehensive steps, you can easily make your EZGO golf cart faster and enhance its performance. From upgrading the motor and battery to optimizing aerodynamics and fine-tuning various components, these modifications and maintenance practices will help you achieve your desired speed and enjoy a thrilling and exhilarating ride on the golf course or any other terrain. Remember to always prioritize safety and consult professional guidance when necessary. So, get ready to experience a new level of speed and excitement with your upgraded EZGO golf cart!