A Step-by-Step Guide on Cleaning Golf Cart Batteries

Learn how to effectively clean your golf cart batteries with this step-by-step guide. From gathering materials to cleaning terminals, we’ve got you covered!

Hey there! If you’re a proud owner of a golf cart, you probably know that keeping the batteries clean is essential for optimal performance. In this article, we’ll take you through a step-by-step guide on how to effectively clean your golf cart batteries. From gathering the necessary materials to properly cleaning the battery terminals, we’ve got you covered. So grab your cleaning supplies and let’s get started on maintaining those batteries for a smooth ride on the green!

A Step-by-Step Guide on Cleaning Golf Cart Batteries

Preparation

Before you begin the process of cleaning your golf cart battery, it is important to gather all the necessary materials to ensure a smooth and efficient experience. You will need items such as safety goggles, gloves, a wire brush, a battery cleaning solution, distilled water, a battery brush, and a battery charger. It is also crucial to ensure safety precautions by wearing appropriate clothing and working in a well-ventilated area.

Disconnecting the Battery

To effectively clean your golf cart battery, you must first disconnect it from the power source. Begin by turning off the power of your golf cart to avoid any potential accidents. Next, carefully remove the battery cables from the battery terminals. Start with the negative cable, followed by the positive cable, and be cautious not to touch both terminals simultaneously to prevent any electric shocks.

Removing the Golf Cart Battery

With the battery cables disconnected, you can now proceed to remove the golf cart battery itself. Begin by removing the battery hold-down, which is usually a strap or bracket securing the battery in place. Carefully loosen and remove the hold-down, ensuring that it is completely detached before attempting to lift the battery out. Take extra care when lifting the battery, as they can be heavy and awkward to handle.

A Step-by-Step Guide on Cleaning Golf Cart Batteries

Cleaning the Battery Exterior

After removing the battery from your golf cart, it’s time to clean the exterior to remove any dirt, debris, or corrosion. Start by inspecting the battery case for any visible damage or signs of leakage. If you notice any cracks or leaks, it is advisable to replace the battery. To clean the battery terminals, use a wire brush or battery brush to remove any corrosion or buildup. Scrub the terminals gently but thoroughly, ensuring all grime is removed. Once the terminals are clean, rinse off the battery using distilled water to remove any remaining cleaning solution or residue.

Cleaning the Battery Interior

Once the battery exterior is clean, it’s important to also clean the interior to maintain its performance and longevity. Begin by inspecting the battery cells for any signs of damage or excessive corrosion. If you notice any issues, it is best to consult a professional for further guidance. To prepare a cleaning solution, mix baking soda with distilled water to create a paste-like consistency. Apply the cleaning solution to a battery brush and gently scrub all the battery cells. Be sure to remove any dirt, corrosion, or buildup that may have accumulated. After scrubbing, rinse the battery cells thoroughly with distilled water to remove any cleaning solution residue.

Drying and Reinstalling the Battery

Once the battery is cleaned both externally and internally, it is essential to ensure it is completely dry before reinstalling it. Use a clean, dry cloth to thoroughly dry the battery, paying close attention to the terminals and the surrounding areas. Inspect the battery terminals for any remaining moisture or residue. Only proceed with reinstalling the battery when you are certain it is completely dry and free from any cleaning solution or moisture.

Performing a Battery Maintenance Check

To ensure your golf cart battery is in optimal condition, it is advisable to perform a battery maintenance check after cleaning and reinstalling it. Start by checking the battery voltage using a voltmeter or multimeter. This will give you an indication of the battery’s charge level and overall condition. Additionally, inspect the battery connections for any looseness or signs of corrosion. If any issues are detected, address them promptly to avoid further damage or poor performance. Lastly, consider performing a capacity test to evaluate the battery’s ability to hold and deliver its charge effectively.

Charging the Golf Cart Battery

Once you have completed the maintenance check and determined that your golf cart battery requires charging, follow these steps to ensure a successful charging process. Begin by connecting the battery charger to the battery terminals, starting with the positive cable followed by the negative cable. Make sure the connections are secure and tight to prevent any accidental disconnection during the charging process. Set the charger parameters according to the manufacturer’s instructions for your specific battery type. It is crucial to monitor the charging process closely and follow the recommended charging time to avoid overcharging or undercharging the battery.

Testing and Reconnecting the Battery

After the battery has been successfully charged, it’s important to test its voltage to ensure it is within the desired range. Use a voltmeter or multimeter to measure the battery voltage and compare it to the manufacturer’s recommended specifications. If the voltage is too low, consider charging the battery further. Once the battery passes the voltage test, clean the battery cable terminals using a wire brush or battery brush to remove any residual corrosion or buildup. Ensure that the terminals are clean and dry before reconnecting the battery cables. Reconnect the battery cables in the reverse order of their removal, starting with the positive cable followed by the negative cable. Be sure to tighten the connections securely to ensure proper functioning.

Final Steps

Once the battery is successfully reconnected and the cleaning and maintenance process is complete, it is important to dispose of any waste properly. Battery cleaning solutions and any other materials used during the process should be handled and disposed of safely, following local regulations. It is also recommended to keep records of the maintenance performed on your golf cart battery. This will help you keep track of its condition, identify any recurring issues, and ensure regular maintenance is conducted as needed. By maintaining accurate records, you can prolong the life of your battery and ensure optimal performance.

In conclusion, cleaning your golf cart battery is a crucial part of its regular maintenance. By following these step-by-step instructions, you can effectively clean, maintain, and prolong the life of your battery. Remember to gather all the necessary materials and follow safety precautions before beginning the process. By regularly cleaning and maintaining your golf cart battery, you can ensure reliable performance and extend its overall lifespan. Happy golf carting!

The Perfect Ceiling Height for a Golf Simulator

Learn about the perfect ceiling height for a golf simulator. Discover factors to consider, recommended heights, and how it affects your gameplay.

Imagine being able to practice your swing and perfect your golf game without ever stepping foot on a golf course. With the growing popularity of golf simulators, more and more golf enthusiasts are transforming their homes into virtual fairways. However, to ensure an optimal gaming experience, one crucial factor to consider is the ceiling height. In this article, we will explore the ideal ceiling height for a golf simulator, providing you with the knowledge you need to create your own golf oasis at home. So, grab your clubs and get ready to tee off in the comfort of your own living room!

The Perfect Ceiling Height for a Golf Simulator

Factors to Consider

Space Constraints

When setting up a golf simulator, one of the first factors to consider is the available space. The size of the room or area in which you plan to install the simulator will directly impact the ceiling height required. It is important to measure the dimensions of the space accurately to determine if it can accommodate the simulator and allow for comfortable movement during swings. Additionally, consider the leeway required for swinging the club without hitting any walls or obstructions. This will ensure a safe and enjoyable experience.

Type of Simulator

Another crucial factor to consider is the type of simulator you are using. Different simulators have varying specifications and may require specific ceiling heights. There are three main types to choose from: fixed simulators, portable simulators, and projection-based simulators. Each has its advantages and requirements. Fixed simulators are permanently installed systems that typically require more headroom due to their overall structure. Portable simulators, on the other hand, are more flexible in terms of space requirements but may still need sufficient room for clearance. Projection-based simulators utilize projectors to display the virtual golf course, and these also have specific height recommendations that should be considered.

Golfer’s Height

The height of the golfer is an important consideration when determining the appropriate ceiling height for a golf simulator. Taller golfers will naturally require more room to comfortably swing the club without feeling restricted. On the other hand, shorter golfers may be able to manage with a lower ceiling height. It is essential to take accurate measurements of the golfer’s height to ensure a suitable ceiling clearance that allows for unrestricted swings.

Swing Height

The swing height refers to the highest point a golfer’s club reaches during a swing. It is crucial to measure this height accurately, taking into account the golfer’s height and swing technique. The swing plane also plays a role in determining the necessary ceiling height, as a more upright swing will require more space overhead. Careful measurement and consideration of the swing height will help determine the minimum clearance required for a safe and effective golf simulator setup.

Club Length

The length of the clubs used by the golfer must also be taken into account when calculating the ceiling height required for a simulator. Longer clubs, such as drivers or fairway woods, will require more space overhead due to their extended length. It is essential to measure the length of the longest club that will be used and ensure that there is sufficient clearance during the swing. This consideration becomes even more important for golfers with longer-than-average clubs or those who use specialty clubs that require additional space.

Recommended Ceiling Heights

Minimum Height

The minimum ceiling height recommended for a golf simulator depends on various factors, including the type of simulator, golfer’s height, swing height, and club length. However, as a general guideline, a minimum height of 8 to 9 feet (2.4 to 2.7 meters) is often recommended to allow for basic swings with most simulators. This height provides enough clearance to avoid collisions with the ceiling or light fixtures. However, it is essential to keep in mind that taller golfers or those with longer clubs may require more ceiling clearance to swing comfortably.

Ideal Height

For an optimal golf simulator experience, an ideal ceiling height of around 10 to 12 feet (3 to 3.6 meters) is recommended. This height allows for unrestricted swings for the majority of golfers, regardless of their height or club length. With this height, golfers can confidently swing without worrying about hitting the ceiling or feeling cramped during their follow-through. Additionally, the increased vertical space enables a more immersive experience and reduces the risk of visual distractions from the projected image.

Maximum Height

While there is no strict maximum ceiling height for a golf simulator, extremely high ceilings may impact the overall realism and immersion during gameplay. Excessive vertical space can result in diminished ball flight feedback, as the projection distance may become too long, affecting accuracy. However, if the golf simulator uses high-quality projection technology and has adjustable settings, it is still possible to achieve an immersive experience in rooms with very high ceilings. The key is to strike a balance between ceiling height and maintaining a realistic and enjoyable golfing experience.

Space Constraints

Measurement of Available Space

To determine the adequate ceiling height for a golf simulator, it is crucial to measure the available space accurately. Take measurements of the room’s width, length, and height to have a clear understanding of the dimensions. This will help in selecting the right simulator that fits within the available space and ensure there is sufficient clearance for swinging without any obstructions.

Leeway for Swinging

When measuring the available space, it is important to consider the leeway required for swinging the club comfortably. Ensure that there is ample room for the golfer to execute a full swing without hitting any walls, furniture, or other objects. Having additional space along the sides and behind the golfer’s stance will allow for a more relaxed swing, enhancing the overall experience and reducing the risk of accidents or damage to the surroundings.

Installation Area

Consideration should also be given to the installation area itself. The surrounding walls and proximity to other objects, such as windows, doors, or cabinets, can affect the overall usability of the simulator. Ideally, choose an area with minimal obstructions that allows for unrestricted movement while swinging. This will enhance the accuracy of the simulator’s tracking system and prevent any potential damage to the surroundings.

The Perfect Ceiling Height for a Golf Simulator

Type of Simulator

Fixed Simulator

A fixed simulator is a permanent installation, typically featuring a dedicated room or enclosure. These simulators often have a more substantial structure and require a higher ceiling height due to overhead framework, swing nets, and other equipment. The recommended ceiling height for a fixed simulator ranges from 10 to 12 feet (3 to 3.6 meters). The advantage of a fixed simulator lies in its stability and the ability to create a dedicated golfing environment with customized lighting, flooring, and sound systems.

Portable Simulator

Portable simulators offer more flexibility in terms of space requirements. These systems can be set up in various locations, making them suitable for locations with lower ceiling heights. However, it is still essential to ensure that there is sufficient clearance for swinging comfortably. The recommended ceiling height for a portable simulator is similar to that of a fixed simulator, around 10 to 12 feet (3 to 3.6 meters), to accommodate golfers of different heights and swing techniques.

Projection-based Simulator

Projection-based simulators rely on projecting a virtual golf course onto a screen or impact canvas. These systems often have specific height recommendations due to the projection distance required to create an immersive experience. For projection-based simulators, a ceiling height of 10 to 12 feet (3 to 3.6 meters) is recommended to avoid any distortions in the projected image and provide enough overhead clearance for comfortable swings.

Golfer’s Height

Measurements

To determine the suitable ceiling height for a golfer, it is important to measure their height accurately. Stand the golfer upright and measure from the top of their head to the ground. This measurement will provide a baseline for determining the minimum clearance required for their swings. Taking precise golfer measurements will ensure a safe and enjoyable experience without any risk of collisions with the ceiling or light fixtures.

Consideration for Tall Golfers

Tall golfers often require more ceiling clearance to accommodate their height during swings. If you are taller than average, it is advisable to add a few inches to the minimum ceiling height recommendation to ensure unrestricted swings. This will allow you to perform your swings comfortably without feeling cramped or worrying about unintentional collisions. Consider your swing height and reach when determining the appropriate ceiling clearance for your simulator setup.

Consideration for Short Golfers

Short golfers may have the advantage of requiring slightly less ceiling clearance due to their height. While the minimum ceiling height recommendations should still be followed, shorter golfers may find that a lower height range works well for them. However, it is important not to compromise on safety and comfort. Measure your swing height carefully to determine the appropriate ceiling clearance and ensure unimpeded swings.

Swing Height

Measurement of Swing Height

Determining the swing height is crucial to accurately calculate the needed ceiling clearance. To measure the swing height, take into account the golfer’s height, swing technique, and any potential extension of the arms during the swing. By analyzing the trajectory of the swing, you can identify the highest point reached by the club and ensure that the ceiling height allows for unrestricted movement throughout the entire swing process.

Swing Plane

The swing plane plays a role in determining the ceiling height required for a golf simulator. Different swing planes, such as upright or flatter swings, will impact the amount of vertical space needed. An upright swing plane, which reaches higher during the swing, will require more overhead clearance compared to a flatter swing plane. Consider the golfer’s swing style when calculating the ceiling height to ensure there is sufficient space overhead, irrespective of the swing plane.

Club Length

Measurement of Club Length

To accurately calculate the required ceiling height for a golf simulator, it is necessary to measure the length of the clubs that will be used. The longest club, typically the driver, should be measured from the grip to the front face of the clubhead. This measurement will help determine the additional clearance needed to accommodate the extended length of the clubs during swings. Consider both the standard club length and any additional specialty clubs used.

Consideration for Longer Clubs

Golfers using clubs longer than average will require more ceiling clearance. Drivers, fairway woods, and specialty clubs often have longer shafts, increasing the potential risk of hitting the ceiling during the swing. To ensure unrestricted swings, additional vertical space should be factored into the overall ceiling height calculations. By considering the length of the clubs used, you can create a safe and comfortable environment that allows for proper swing execution.

Effects of Ceiling Height

Visual Distractions

The ceiling height directly affects the overall experience and immersion in a golf simulator. A ceiling that is too low or too close to the golfer can become a visual distraction, especially when projecting the virtual golf course. A minimum ceiling height recommendation of 8 to 9 feet (2.4 to 2.7 meters) helps reduce the risk of distractions caused by the projection system or light fixtures. Opting for the ideal ceiling height of 10 to 12 feet (3 to 3.6 meters) enhances the realism and ensures a clear view of the virtual golf course, enhancing the overall enjoyment of the simulation.

Ball Flight Interference

Insufficient ceiling clearance can result in interference with the ball’s flight path during a swing. If the golfer’s club hits the ceiling or comes close to doing so, it can affect the natural trajectory of the ball. Higher ceilings provide more vertical space for unimpeded swings, reducing the chances of interference or disruption to the flight of the ball. This is especially important when using the simulator for practice or honing skills, as accurate ball flight feedback is essential for improvement.

Comfort and Confidence

Having ample ceiling clearance creates a comfortable and confident environment for golfers. With sufficient space overhead, golfers can focus on their swing technique without worrying about hitting the ceiling or feeling restricted. This freedom of movement allows for a more natural swing motion, leading to increased comfort and improved performance. A golf simulator setup with the right ceiling height cultivates an environment that fosters both physical and mental well-being during gameplay.

Installation and Setup

Ceiling Materials

When setting up a golf simulator, consider the type of materials used for the ceiling. Softer materials, such as acoustic ceiling tiles, may provide some level of protection if the golfer’s club accidentally comes into contact with the ceiling. However, it is always best to maintain proper clearance to avoid any damage to the ceiling or surrounding structures. Ensure that the chosen ceiling materials are durable and can withstand the potential impact of club strikes.

Support Structures

The ceiling and support structures play a crucial role in the stability and safety of the golf simulator setup. Proper support must be in place to bear the weight of the simulator components, such as screens, projectors, nets, and lighting fixtures. Consult with professionals to ensure that the ceiling and support structures meet necessary safety standards. Reinforcements or additional bracing may be required to handle the setup’s weight and minimize any potential risks.

Safety Precautions

Safety should always be a top priority when setting up a golf simulator. Regularly inspect the ceiling, support structures, and overall installation to identify any potential hazards. Ensure that the simulator is securely anchored and that all components are properly mounted. Familiarize yourself with safety guidelines provided by the simulator manufacturer and take appropriate precautions, such as using safety nets or impact-proofing measures, to protect the surroundings and prevent accidents.

Additional Considerations

Lighting

Proper lighting is essential for a golf simulator setup. Ensure that the lighting is evenly distributed throughout the space, minimizing glare and shadows on the screen or projected image. Consider installing dimmable lights to create the appropriate ambiance for a realistic golfing experience. Additionally, position the lighting fixtures in a way that avoids direct contact with the golfer’s swing path to prevent any potential disruptions or distractions during gameplay.

Ventilation

Installing a golf simulator can create heat and humidity within the enclosed space, which may impact comfort and performance. Adequate ventilation should be considered to maintain a pleasant environment. This can be achieved through the use of fans, air conditioning, or ensuring that windows or doors can be opened to allow for natural airflow. Proper ventilation enhances the overall experience and prevents discomfort or fatigue during extended gameplay.

Ground Surface

The ground surface beneath the golfer’s feet is another important consideration. It is recommended to have a stable and level surface to prevent any tripping hazards or compromised balance during the swings. Ensure that the surface provides good traction to avoid slipping or sliding, as this can negatively impact the golfer’s performance and safety. Consider using materials such as rubber mats, synthetic turf, or carpeting designed for indoor golfing setups to provide a suitable and safe surface for the golfer.

In conclusion, determining the appropriate ceiling height for a golf simulator depends on several factors such as space constraints, type of simulator, golfer’s height, swing height, and club length. By carefully considering these factors and taking accurate measurements, you can create a safe and enjoyable environment for practicing your golf game. Remember to prioritize safety, comfort, and realism when setting up your golf simulator, and consult professionals if needed to ensure a proper installation. Happy golfing!

The Process of Golf Ball Manufacturing

Discover the intricate world of golf ball manufacturing in this informative post. From materials used to quality control measures, uncover the secrets behind this essential equipment.

Have you ever wondered how a golf ball is made? In this article, we will take you through the fascinating process of golf ball manufacturing. From the initial design to the final packaging, each step is meticulously crafted to ensure the highest quality and performance. Join us as we explore the intricate world of golf ball production, unveiling the secrets behind the creation of this essential piece of equipment for the avid golfer.

The Process of Golf Ball Manufacturing

Materials Used in Golf Ball Manufacturing

Golf balls are made using a variety of materials that contribute to their performance and durability. The main materials used in golf ball manufacturing include:

Rubber Core

The rubber core is the innermost component of a golf ball and is responsible for providing its initial bounce and compression. It is typically made from a blend of natural and synthetic rubber. The rubber core is molded to achieve the desired size and density, allowing it to provide consistent performance on the golf course.

Cover Materials

The cover of a golf ball is crucial for its feel, spin control, and durability. There are two main types of cover materials: ionomer resin and urethane. Ionomer resin covers are more commonly used in lower-priced golf balls as they provide good distance and durability. Urethane covers, on the other hand, are preferred by more advanced golfers as they offer enhanced feel, spin, and control around the greens.

Dimples

The dimples on a golf ball play a significant role in its aerodynamic performance. They help reduce drag and create lift, allowing the ball to achieve maximum distance and stability in flight. The pattern and arrangement of the dimples are carefully designed to optimize these aerodynamic properties. Manufacturers employ advanced machinery to create precise and consistent dimple patterns on each golf ball.

Adhesive

Adhesive is used in the construction of golf balls to secure the layers and components together. It ensures that the rubber core is firmly attached to the cover, preventing any separation during play. The adhesive used in golf ball manufacturing is specifically formulated to withstand the high impact forces experienced during a golf swing and the rigors of the game.

Construction of the Rubber Core

The construction of the rubber core begins with molding the core into the desired shape and size. The rubber is heated and injected into a mold, allowing it to take the form of a spherical core. This process ensures consistency and accuracy in the core’s dimensions.

To enhance certain performance characteristics, fillers are added to the rubber core during its formation. These fillers can include various materials, such as metal powders or lightweight microspheres. The addition of fillers modifies the core’s density and compression, influencing its feel and performance.

Compression and temperature control are integral steps in the construction of the rubber core. The molded cores undergo compression molding, wherein they are subjected to high pressure and elevated temperatures. This process helps achieve the desired hardness and compression rating for the golf balls.

Formation of the Cover

The cover of a golf ball is manufactured separately from the rubber core and is then added during the assembly process. The selection of the cover material depends on the desired characteristics of the golf ball. The chosen material is cut into segments to match the core’s dimensions, ensuring a precise fit.

Next, the dimple pattern is created on the cover material. Specialized machines are used to create consistent and accurate dimples of various sizes and patterns. The dimple pattern significantly influences the ball’s flight characteristics and stability, so it is carefully designed to optimize performance.

Once the dimples are formed, graphics such as brand logos and alignment aids are added to the cover. This step adds visual appeal to the golf ball and allows manufacturers to incorporate their branding elements.

The Process of Golf Ball Manufacturing

Layering the Golf Ball

To complete the construction of a golf ball, the rubber core is attached to the cover using an adhesive. The adhesive is applied to both the core and cover, ensuring a strong and permanent bond between the two components.

For certain high-end golf balls, multiple layers are used to enhance performance. These additional layers can be made of various materials and have different properties. The multiple-layer construction allows for greater control, increased spin, and optimized distance, catering to the preferences of advanced players.

Compression and Vulcanization

Compression molding is a critical process in golf ball manufacturing. The assembled golf balls are placed in compression molding presses, where they are subjected to high pressure and heat. This step ensures that the golf ball achieves its final shape and compression rating.

After compression molding, the golf balls undergo vulcanization. This process involves exposing the balls to high temperatures in specially designed chambers. Vulcanization enhances the durability and performance characteristics of the golf balls, making them more resilient to impact and prolonged use.

Quality Control Measures

To ensure the consistency and quality of golf balls, rigorous quality control measures are implemented throughout the manufacturing process. These measures include:

Weight and Diameter Check

Each golf ball is examined to ensure that it meets the specified weight and diameter requirements. Any deviations from the standard can affect the ball’s performance and compliance with regulations.

Compression Test

Compression testing is conducted to measure the firmness and compression rating of the golf balls. This test ensures that the golf balls provide consistent performance across the entire product range.

Durability Testing

Golf balls are subjected to various durability tests to assess their resistance to impact, cutting, and scuffing. These tests simulate the conditions encountered during play and ensure that the balls maintain their shape and performance over time.

Aerodynamic Performance Assessment

The aerodynamic properties of golf balls are assessed through wind tunnel testing. This helps manufacturers analyze the flight characteristics, spin rates, and stability of the balls, ensuring their optimal performance in different playing conditions.

Finishing Processes

Once the golf balls have undergone quality control checks, they proceed to the finishing processes. These processes include:

Trimming Excess Material

Any excess material from the manufacturing process is meticulously trimmed, ensuring that the golf balls meet the desired specifications and aesthetic standards.

Painting and Coating

Golf balls are painted and coated to provide an attractive appearance and offer enhanced durability. The paint and coating also help protect the ball’s surface and maintain its performance characteristics during play.

Stamping and Printing

Brand logos, model names, and identification marks are stamped or printed onto the golf balls. These marks serve to identify the brand and model and also add aesthetic value to the balls.

Packaging

Once the finishing processes are complete, the golf balls are carefully packaged in sleeves or boxes. The packaging ensures that the balls remain in pristine condition until they are purchased by golfers.

Manufacturing Equipment and Machinery

Golf ball manufacturing involves the use of specialized equipment and machinery, which includes:

Rubber Mixing and Processing Machines

These machines are used to mix and process the rubber compounds used in the formation of the golf ball core. They ensure precise control over the composition and consistency of the rubber.

Molding Equipment

Molding equipment is essential for shaping the rubber cores. It allows for accurate and efficient production of consistent cores with the desired dimensions.

Cutting and Dimple Pattern Machines

Specialized machines are employed to cut the cover materials into precise segments and create the dimple patterns. These machines ensure consistency in the manufacturing process and produce reliable results.

Adhesive Application Machines

Adhesive application machines are used to apply the adhesive to the rubber core and cover materials. They enable precise and uniform distribution of the adhesive, ensuring a strong bond between the components.

Compression Molding Presses

Compression molding presses exert high pressure and heat to shape and compress the assembled golf balls. They play a crucial role in achieving the final form and performance characteristics of the balls.

Vulcanization Chambers

Vulcanization chambers provide the controlled heat necessary for the vulcanization process. These chambers ensure that the golf balls attain the desired durability and performance properties.

Testing and Inspection Devices

Various testing and inspection devices are utilized to evaluate the quality and performance of the golf balls. These devices include weight scales, compression testers, impact testers, and wind tunnels.

Environmental Impact and Sustainability

Golf ball manufacturers are increasingly adopting measures to minimize their environmental impact and promote sustainability. These measures include:

Recycling Programs

Manufacturers have implemented recycling programs to recycle used and discarded golf balls. This reduces waste and allows for the reuse of materials, minimizing the environmental footprint of golf ball production.

Reducing Material Waste

Efforts are made to reduce material waste during the manufacturing process. Advanced production techniques and careful material management help optimize material usage, reducing waste generation.

Alternative Cover Materials

Research is being conducted to explore alternative cover materials that are more environmentally friendly. These alternatives aim to provide comparable performance while being more sustainable in their production and disposal.

Energy Efficiency Measures

Manufacturers are implementing energy-efficient practices and technologies in their facilities. These measures help reduce energy consumption and carbon emissions associated with golf ball production.

Ongoing Research and Innovations

The golf ball industry continues to invest in research and development to drive innovation and improve performance. Some of the areas of ongoing research include:

Advanced Core Designs

Scientists and engineers are developing advanced core designs to enhance the performance characteristics of golf balls. These designs focus on optimizing initial ball speed, spin rates, and feel to benefit golfers of all skill levels.

Enhanced Cover Materials

Researchers are constantly exploring new cover materials that offer improved feel, spin control, and durability. Innovations in cover materials aim to cater to the preferences and demands of golfers seeking enhanced performance on the course.

Dimple Pattern Optimization

Ongoing research is focused on exploring optimal dimple patterns for various playing conditions. By fine-tuning the dimple design, manufacturers aim to maximize distance, accuracy, and stability of the golf balls in different wind and weather conditions.

Smart Golf Balls

Innovations in technology are paving the way for the development of smart golf balls. These balls incorporate sensors and tracking systems to provide golfers with real-time data on swing analysis, trajectory, and distance, allowing for a more interactive and analytical experience on the course.

In conclusion, the manufacturing process of a golf ball involves the careful selection and utilization of various materials, precise construction techniques, and stringent quality control measures. Manufacturers constantly strive to improve performance, durability, and sustainability through ongoing research and innovation. With the use of advanced machinery and dedication to environmental responsibility, the golf ball industry continues to produce high-quality products that cater to the diverse needs and preferences of golfers worldwide.

What Are Golfers Hats Called

Discover what golfers hats are called in this informative post. Learn about the different types, their significance in the sport, and popular styles.

You love watching golf tournaments and have noticed that many players wear those stylish hats. But have you ever wondered what those hats are actually called? Well, wonder no more! In this article, we will unveil the name of the iconic headgear that adorns the heads of golfers worldwide. Whether you’re an avid golfer yourself or simply curious about the sport, read on to discover the answer to the age-old question: What are golfers hats called?

What Are Golfers Hats Called

Golfer Hats: An Introduction

When you picture a golfer, one of the first things that comes to mind is the iconic hat they often wear. Golf hats not only serve as a stylish accessory but also play a significant role in the comfort and performance of a golfer. In this comprehensive guide, we will explore the various types of golf hats, popular brands, and their significance in the world of golf.

The significance of golf hats

Golf hats have been a staple in the sport for many years, serving both practical and fashionable purposes. They provide protection from the sun, shielding the golfer’s face and eyes from harmful UV rays. On hot summer days, they also keep the head cool by providing shade and ventilation. Moreover, golf hats are an essential part of a golfer’s outfit, adding a touch of elegance and professionalism to their appearance.

The various types of golf hats

When it comes to golf hats, there is a wide variety to choose from. Each type has its own unique style, features, and benefits. Let’s explore some of the most popular types of golf hats.

Traditional Golf Hats

The origins of traditional golf hats

Traditional golf hats have deep roots in the history of the sport. Dating back to the early days of golf, these hats were typically made of tweed or wool and featured a round shape with a small brim. They were often worn by golfers as a symbol of tradition and as a mark of belonging to the golfing community.

Features of traditional golf hats

Traditional golf hats typically have a structured crown and a short, curved brim. They are commonly made from high-quality materials such as wool or cotton to ensure durability and comfort. These hats often come in neutral colors like navy, black, or beige, making them versatile and suitable for a wide range of golf outfits.

Popular styles of traditional golf hats

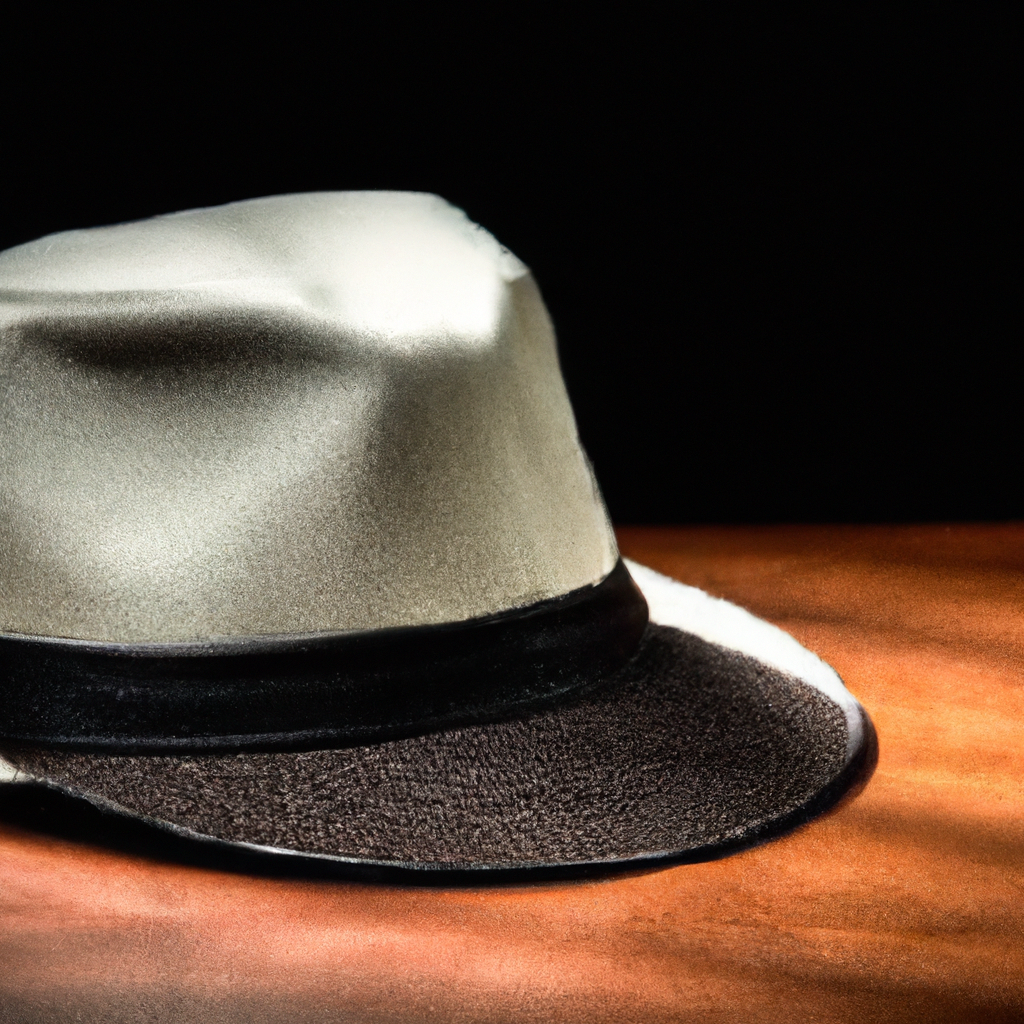
Some of the most popular styles of traditional golf hats include the classic flat cap, the timeless fedora, and the sophisticated homburg hat. Each style offers its own unique charm and can be paired with different golfing ensembles to elevate the golfer’s look on the course.

What Are Golfers Hats Called

Newsboy Caps

History and evolution of newsboy caps

Newsboy caps, also known as baker boy caps or eight-panel caps, have a long-standing connection with the world of golf. Originating from the working-class attire of early 20th-century newspaper vendors, these hats gained popularity among golfers due to their stylish yet casual appearance. Over the years, newsboy caps have undergone several design evolutions to match the changing fashion trends.

Distinct features of newsboy caps

Newsboy caps are characterized by their round, full crown and a small brim. They are usually made from tweed or other lightweight materials, making them suitable for variable weather conditions. The distinctive eight-panel construction of these caps gives them a unique and fashionable look, perfectly complementing a golfer’s attire.

Newsboy caps as a popular choice among golfers

Newsboy caps have become a favorite choice among golfers who want to add a touch of vintage flair to their outfits. With their classic yet trendy appeal, newsboy caps allow golfers to showcase their individual style on the course. These caps can be worn with both casual and formal golf attires, making them a versatile option for any golfer.

Flat Caps

The origin and name of flat caps

Flat caps, also known as ivy caps or driving caps, have a long history and are closely associated with English golf culture. These caps derived their name from their characteristic flat crown, distinguishing them from other hat styles. Flat caps were initially worn by the working class in the 19th century but later gained popularity among golfers for their comfort and style.

Characteristics of flat caps

Flat caps are known for their low-profile design with a short brim. They are typically made from materials like tweed, herringbone, or wool, giving them a classic and sophisticated look. The snug fit of flat caps ensures that they stay securely on the golfer’s head even during a swing, providing both comfort and convenience on the course.

Different materials used in manufacturing flat caps

Flat caps are available in a variety of materials, allowing golfers to choose the one that best suits their preferences and playing conditions. Wool flat caps provide warmth and insulation during colder months, while cotton or linen caps offer lightweight breathability for hotter climates. Additionally, some flat caps feature water-repellent finishes, making them suitable for rainy golf rounds.

Bucket Hats

Bucket hats: A practical choice for golfers

Bucket hats have gained significant popularity among golfers in recent years due to their practical features. These hats feature a wide, downward-sloping brim that provides excellent sun protection for the face, neck, and ears. The comfortable fit and lightweight construction make bucket hats ideal for long hours spent on the golf course.

Advantages and disadvantages of bucket hats

Bucket hats offer several advantages for golfers. Besides protecting from the sun, they also help to keep the head cool by providing shade and allowing air circulation. Additionally, bucket hats are often made from quick-drying materials, making them suitable for use in wet and humid conditions. However, one drawback of bucket hats is that they may obstruct peripheral vision if the brim is excessively wide.

Trends in bucket hat designs

In recent years, bucket hats have experienced a renaissance in fashion trends, and the golfing world has embraced this resurgence. Golf-specific designs often feature additional features such as moisture-wicking technology, adjustable chin straps, and even built-in sweatbands. Golfers can now choose from a wide range of colors, patterns, and materials to find the perfect bucket hat that matches their personal style.

Visors

Visors vs. hats: A comparison

Visors and hats are both popular choices for golfers, but they differ in their design and functionality. While hats provide complete coverage and sun protection for the entire head, visors offer shade only for the eyes and face, leaving the top of the head exposed. Visors are designed to allow maximum ventilation and reduce heat buildup during play.

Benefits of wearing visors during golf

Visors offer several advantages that make them a preferred choice for many golfers. Their open-top design allows for better heat dissipation, making them cooler to wear than hats. Visors also provide unrestricted visibility, allowing golfers to maintain a clear line of sight while addressing the ball and tracking its trajectory. Moreover, visors offer a sporty and sleek look that complements many golf outfits.

Different types of visors

Visors come in various styles and designs to suit different preferences and needs. Classic visors feature a wide brim and an adjustable strap or elastic band for a secure fit. Some modern visors incorporate additional features like moisture-wicking fabric and UV protection to enhance comfort and performance on the golf course. Golfers can choose from a range of colors and materials to find the visor that best matches their style.

Beanie Hats

The increasing popularity of beanie hats in golf

Beanie hats, traditionally associated with colder climates, have gained popularity among golfers in recent years. These snug-fitting hats provide warmth and insulation during colder seasons, making them an excellent choice for golfers who brave the elements on the course. Beanie hats have also become a stylish accessory, with golfers incorporating them into their outfits to add a touch of sophistication.

Materials and designs of beanie hats

Beanie hats are typically made from knitted materials such as wool or acrylic. These materials offer insulation and excellent moisture-wicking properties, keeping golfers comfortable and dry during their rounds. Beanie hats come in various designs, including solid colors, patterns, and even embroidered logos or golf-related motifs.

Pros and cons of wearing beanie hats

Wearing a beanie hat on the golf course has its advantages and disadvantages. On the positive side, beanie hats provide warmth and protection from cold winds, enabling golfers to extend their playing season. They also offer a snug fit that stays in place even during vigorous swings. However, beanie hats may become too hot and uncomfortable in warmer weather, so they are best suited for colder climates or early morning tee times.

Sun Hats

Protecting against sun exposure on the golf course

Sun hats play a vital role in safeguarding golfers from harmful UV rays and sun-related risks. Prolonged sun exposure can lead to skin damage, eye strain, and even heatstroke. Sun hats provide a practical solution by shielding the face, neck, and ears from direct sunlight, reducing the risk of sunburn and sun-related illnesses.

Features of sun hats specifically designed for golfers

Sun hats designed for golfers often incorporate features tailored to their needs. These hats are typically made from lightweight and breathable materials that offer excellent UV protection. They may also feature moisture-wicking technology to keep the head cool and dry in hot weather. Additionally, some sun hats have a wide brim that can be shaped to provide optimal shade and can be easily adjusted to one’s preferences.

Choosing the right sun hat based on materials and design

When selecting a sun hat for golf, it is essential to consider the materials and design that best suit your needs. Look for hats made from UPF-rated fabrics that provide reliable protection against harmful UV rays. Additionally, choose a hat with a brim wide enough to cover your face, neck, and ears, but not so wide that it obstructs your field of vision. Opt for breathable materials like nylon or polyester to ensure comfort and ventilation.

Baseball Caps

The prevalence of baseball caps in golf

Baseball caps are perhaps one of the most common and versatile options when it comes to golf headwear. These caps are characterized by their rounded crown and a stiff, curved brim. Due to their casual yet sporty design, baseball caps have found a permanent place in the world of golf, being worn by both professionals and amateurs alike.

Advantages and disadvantages of baseball caps

Baseball caps offer several advantages that make them a popular choice among golfers. They provide adequate sun protection for the face and eyes while allowing ventilation and airflow. The curved brim helps to shield the eyes from direct sunlight, making it easier to focus on the game. However, one drawback of baseball caps is that they do not offer the same level of neck and ear protection as other hat styles.

Customization options for golf-related baseball caps

Baseball caps can be easily customized with logos, team emblems, or golf-related designs, allowing golfers to showcase their affiliations or personal interests. Many golfers choose to wear baseball caps featuring the logos of their favorite golf courses, brand endorsements, or even their own monograms. This customization adds a touch of personality and uniqueness to their golfing attire.

Bucket Visors

A combination of bucket hats and visors

Bucket visors, also known as brim visors, offer a hybrid design that combines the features of bucket hats and visors into a single headwear option. These unique hats feature a wide brim, similar to a bucket hat, while leaving the top of the head exposed like a visor. This combination provides golfers with the advantages of both hat styles.

The unique features of bucket visors

Bucket visors offer excellent sun protection for the face, neck, and ears due to their wide brim. The open-top design of visors allows for enhanced ventilation and temperature regulation, ideal for warm weather. By combining these features into one hat, bucket visors offer golfers a versatile and multifunctional option that can adapt to various playing conditions.

How bucket visors differ from traditional bucket hats

While both bucket visors and traditional bucket hats share a similar wide-brimmed design, the primary difference lies in the coverage they provide. Bucket visors leave the top of the head exposed, allowing for increased airflow and minimizing heat buildup. On the other hand, traditional bucket hats provide full coverage and offer more protection against the elements.

In conclusion, golf hats are not only a fashion statement but also offer practical benefits for golfers. Whether you prefer the traditional elegance of a flat cap, the vintage charm of a newsboy cap, the versatility of a bucket hat, or the sporty appeal of a baseball cap or visor, there is a golf hat for every golfer’s style and needs. So next time you hit the golf course, don’t forget to top off your outfit with a stylish and functional hat – it will not only enhance your look but also protect you from the sun and help you stay focused on your game. Happy golfing!