A Step-by-Step Guide on Cleaning Golf Cart Batteries

Learn how to effectively clean your golf cart batteries with this step-by-step guide. From gathering materials to cleaning terminals, we’ve got you covered!

Hey there! If you’re a proud owner of a golf cart, you probably know that keeping the batteries clean is essential for optimal performance. In this article, we’ll take you through a step-by-step guide on how to effectively clean your golf cart batteries. From gathering the necessary materials to properly cleaning the battery terminals, we’ve got you covered. So grab your cleaning supplies and let’s get started on maintaining those batteries for a smooth ride on the green!

A Step-by-Step Guide on Cleaning Golf Cart Batteries

Preparation

Before you begin the process of cleaning your golf cart battery, it is important to gather all the necessary materials to ensure a smooth and efficient experience. You will need items such as safety goggles, gloves, a wire brush, a battery cleaning solution, distilled water, a battery brush, and a battery charger. It is also crucial to ensure safety precautions by wearing appropriate clothing and working in a well-ventilated area.

Disconnecting the Battery

To effectively clean your golf cart battery, you must first disconnect it from the power source. Begin by turning off the power of your golf cart to avoid any potential accidents. Next, carefully remove the battery cables from the battery terminals. Start with the negative cable, followed by the positive cable, and be cautious not to touch both terminals simultaneously to prevent any electric shocks.

Removing the Golf Cart Battery

With the battery cables disconnected, you can now proceed to remove the golf cart battery itself. Begin by removing the battery hold-down, which is usually a strap or bracket securing the battery in place. Carefully loosen and remove the hold-down, ensuring that it is completely detached before attempting to lift the battery out. Take extra care when lifting the battery, as they can be heavy and awkward to handle.

A Step-by-Step Guide on Cleaning Golf Cart Batteries

Cleaning the Battery Exterior

After removing the battery from your golf cart, it’s time to clean the exterior to remove any dirt, debris, or corrosion. Start by inspecting the battery case for any visible damage or signs of leakage. If you notice any cracks or leaks, it is advisable to replace the battery. To clean the battery terminals, use a wire brush or battery brush to remove any corrosion or buildup. Scrub the terminals gently but thoroughly, ensuring all grime is removed. Once the terminals are clean, rinse off the battery using distilled water to remove any remaining cleaning solution or residue.

Cleaning the Battery Interior

Once the battery exterior is clean, it’s important to also clean the interior to maintain its performance and longevity. Begin by inspecting the battery cells for any signs of damage or excessive corrosion. If you notice any issues, it is best to consult a professional for further guidance. To prepare a cleaning solution, mix baking soda with distilled water to create a paste-like consistency. Apply the cleaning solution to a battery brush and gently scrub all the battery cells. Be sure to remove any dirt, corrosion, or buildup that may have accumulated. After scrubbing, rinse the battery cells thoroughly with distilled water to remove any cleaning solution residue.

Drying and Reinstalling the Battery

Once the battery is cleaned both externally and internally, it is essential to ensure it is completely dry before reinstalling it. Use a clean, dry cloth to thoroughly dry the battery, paying close attention to the terminals and the surrounding areas. Inspect the battery terminals for any remaining moisture or residue. Only proceed with reinstalling the battery when you are certain it is completely dry and free from any cleaning solution or moisture.

Performing a Battery Maintenance Check

To ensure your golf cart battery is in optimal condition, it is advisable to perform a battery maintenance check after cleaning and reinstalling it. Start by checking the battery voltage using a voltmeter or multimeter. This will give you an indication of the battery’s charge level and overall condition. Additionally, inspect the battery connections for any looseness or signs of corrosion. If any issues are detected, address them promptly to avoid further damage or poor performance. Lastly, consider performing a capacity test to evaluate the battery’s ability to hold and deliver its charge effectively.

Charging the Golf Cart Battery

Once you have completed the maintenance check and determined that your golf cart battery requires charging, follow these steps to ensure a successful charging process. Begin by connecting the battery charger to the battery terminals, starting with the positive cable followed by the negative cable. Make sure the connections are secure and tight to prevent any accidental disconnection during the charging process. Set the charger parameters according to the manufacturer’s instructions for your specific battery type. It is crucial to monitor the charging process closely and follow the recommended charging time to avoid overcharging or undercharging the battery.

Testing and Reconnecting the Battery

After the battery has been successfully charged, it’s important to test its voltage to ensure it is within the desired range. Use a voltmeter or multimeter to measure the battery voltage and compare it to the manufacturer’s recommended specifications. If the voltage is too low, consider charging the battery further. Once the battery passes the voltage test, clean the battery cable terminals using a wire brush or battery brush to remove any residual corrosion or buildup. Ensure that the terminals are clean and dry before reconnecting the battery cables. Reconnect the battery cables in the reverse order of their removal, starting with the positive cable followed by the negative cable. Be sure to tighten the connections securely to ensure proper functioning.

Final Steps

Once the battery is successfully reconnected and the cleaning and maintenance process is complete, it is important to dispose of any waste properly. Battery cleaning solutions and any other materials used during the process should be handled and disposed of safely, following local regulations. It is also recommended to keep records of the maintenance performed on your golf cart battery. This will help you keep track of its condition, identify any recurring issues, and ensure regular maintenance is conducted as needed. By maintaining accurate records, you can prolong the life of your battery and ensure optimal performance.

In conclusion, cleaning your golf cart battery is a crucial part of its regular maintenance. By following these step-by-step instructions, you can effectively clean, maintain, and prolong the life of your battery. Remember to gather all the necessary materials and follow safety precautions before beginning the process. By regularly cleaning and maintaining your golf cart battery, you can ensure reliable performance and extend its overall lifespan. Happy golf carting!

The Perfect Ceiling Height for a Golf Simulator

Learn about the perfect ceiling height for a golf simulator. Discover factors to consider, recommended heights, and how it affects your gameplay.

Imagine being able to practice your swing and perfect your golf game without ever stepping foot on a golf course. With the growing popularity of golf simulators, more and more golf enthusiasts are transforming their homes into virtual fairways. However, to ensure an optimal gaming experience, one crucial factor to consider is the ceiling height. In this article, we will explore the ideal ceiling height for a golf simulator, providing you with the knowledge you need to create your own golf oasis at home. So, grab your clubs and get ready to tee off in the comfort of your own living room!

The Perfect Ceiling Height for a Golf Simulator

Factors to Consider

Space Constraints

When setting up a golf simulator, one of the first factors to consider is the available space. The size of the room or area in which you plan to install the simulator will directly impact the ceiling height required. It is important to measure the dimensions of the space accurately to determine if it can accommodate the simulator and allow for comfortable movement during swings. Additionally, consider the leeway required for swinging the club without hitting any walls or obstructions. This will ensure a safe and enjoyable experience.

Type of Simulator

Another crucial factor to consider is the type of simulator you are using. Different simulators have varying specifications and may require specific ceiling heights. There are three main types to choose from: fixed simulators, portable simulators, and projection-based simulators. Each has its advantages and requirements. Fixed simulators are permanently installed systems that typically require more headroom due to their overall structure. Portable simulators, on the other hand, are more flexible in terms of space requirements but may still need sufficient room for clearance. Projection-based simulators utilize projectors to display the virtual golf course, and these also have specific height recommendations that should be considered.

Golfer’s Height

The height of the golfer is an important consideration when determining the appropriate ceiling height for a golf simulator. Taller golfers will naturally require more room to comfortably swing the club without feeling restricted. On the other hand, shorter golfers may be able to manage with a lower ceiling height. It is essential to take accurate measurements of the golfer’s height to ensure a suitable ceiling clearance that allows for unrestricted swings.

Swing Height

The swing height refers to the highest point a golfer’s club reaches during a swing. It is crucial to measure this height accurately, taking into account the golfer’s height and swing technique. The swing plane also plays a role in determining the necessary ceiling height, as a more upright swing will require more space overhead. Careful measurement and consideration of the swing height will help determine the minimum clearance required for a safe and effective golf simulator setup.

Club Length

The length of the clubs used by the golfer must also be taken into account when calculating the ceiling height required for a simulator. Longer clubs, such as drivers or fairway woods, will require more space overhead due to their extended length. It is essential to measure the length of the longest club that will be used and ensure that there is sufficient clearance during the swing. This consideration becomes even more important for golfers with longer-than-average clubs or those who use specialty clubs that require additional space.

Recommended Ceiling Heights

Minimum Height

The minimum ceiling height recommended for a golf simulator depends on various factors, including the type of simulator, golfer’s height, swing height, and club length. However, as a general guideline, a minimum height of 8 to 9 feet (2.4 to 2.7 meters) is often recommended to allow for basic swings with most simulators. This height provides enough clearance to avoid collisions with the ceiling or light fixtures. However, it is essential to keep in mind that taller golfers or those with longer clubs may require more ceiling clearance to swing comfortably.

Ideal Height

For an optimal golf simulator experience, an ideal ceiling height of around 10 to 12 feet (3 to 3.6 meters) is recommended. This height allows for unrestricted swings for the majority of golfers, regardless of their height or club length. With this height, golfers can confidently swing without worrying about hitting the ceiling or feeling cramped during their follow-through. Additionally, the increased vertical space enables a more immersive experience and reduces the risk of visual distractions from the projected image.

Maximum Height

While there is no strict maximum ceiling height for a golf simulator, extremely high ceilings may impact the overall realism and immersion during gameplay. Excessive vertical space can result in diminished ball flight feedback, as the projection distance may become too long, affecting accuracy. However, if the golf simulator uses high-quality projection technology and has adjustable settings, it is still possible to achieve an immersive experience in rooms with very high ceilings. The key is to strike a balance between ceiling height and maintaining a realistic and enjoyable golfing experience.

Space Constraints

Measurement of Available Space

To determine the adequate ceiling height for a golf simulator, it is crucial to measure the available space accurately. Take measurements of the room’s width, length, and height to have a clear understanding of the dimensions. This will help in selecting the right simulator that fits within the available space and ensure there is sufficient clearance for swinging without any obstructions.

Leeway for Swinging

When measuring the available space, it is important to consider the leeway required for swinging the club comfortably. Ensure that there is ample room for the golfer to execute a full swing without hitting any walls, furniture, or other objects. Having additional space along the sides and behind the golfer’s stance will allow for a more relaxed swing, enhancing the overall experience and reducing the risk of accidents or damage to the surroundings.

Installation Area

Consideration should also be given to the installation area itself. The surrounding walls and proximity to other objects, such as windows, doors, or cabinets, can affect the overall usability of the simulator. Ideally, choose an area with minimal obstructions that allows for unrestricted movement while swinging. This will enhance the accuracy of the simulator’s tracking system and prevent any potential damage to the surroundings.

The Perfect Ceiling Height for a Golf Simulator

Type of Simulator

Fixed Simulator

A fixed simulator is a permanent installation, typically featuring a dedicated room or enclosure. These simulators often have a more substantial structure and require a higher ceiling height due to overhead framework, swing nets, and other equipment. The recommended ceiling height for a fixed simulator ranges from 10 to 12 feet (3 to 3.6 meters). The advantage of a fixed simulator lies in its stability and the ability to create a dedicated golfing environment with customized lighting, flooring, and sound systems.

Portable Simulator

Portable simulators offer more flexibility in terms of space requirements. These systems can be set up in various locations, making them suitable for locations with lower ceiling heights. However, it is still essential to ensure that there is sufficient clearance for swinging comfortably. The recommended ceiling height for a portable simulator is similar to that of a fixed simulator, around 10 to 12 feet (3 to 3.6 meters), to accommodate golfers of different heights and swing techniques.

Projection-based Simulator

Projection-based simulators rely on projecting a virtual golf course onto a screen or impact canvas. These systems often have specific height recommendations due to the projection distance required to create an immersive experience. For projection-based simulators, a ceiling height of 10 to 12 feet (3 to 3.6 meters) is recommended to avoid any distortions in the projected image and provide enough overhead clearance for comfortable swings.

Golfer’s Height

Measurements

To determine the suitable ceiling height for a golfer, it is important to measure their height accurately. Stand the golfer upright and measure from the top of their head to the ground. This measurement will provide a baseline for determining the minimum clearance required for their swings. Taking precise golfer measurements will ensure a safe and enjoyable experience without any risk of collisions with the ceiling or light fixtures.

Consideration for Tall Golfers

Tall golfers often require more ceiling clearance to accommodate their height during swings. If you are taller than average, it is advisable to add a few inches to the minimum ceiling height recommendation to ensure unrestricted swings. This will allow you to perform your swings comfortably without feeling cramped or worrying about unintentional collisions. Consider your swing height and reach when determining the appropriate ceiling clearance for your simulator setup.

Consideration for Short Golfers

Short golfers may have the advantage of requiring slightly less ceiling clearance due to their height. While the minimum ceiling height recommendations should still be followed, shorter golfers may find that a lower height range works well for them. However, it is important not to compromise on safety and comfort. Measure your swing height carefully to determine the appropriate ceiling clearance and ensure unimpeded swings.

Swing Height

Measurement of Swing Height

Determining the swing height is crucial to accurately calculate the needed ceiling clearance. To measure the swing height, take into account the golfer’s height, swing technique, and any potential extension of the arms during the swing. By analyzing the trajectory of the swing, you can identify the highest point reached by the club and ensure that the ceiling height allows for unrestricted movement throughout the entire swing process.

Swing Plane

The swing plane plays a role in determining the ceiling height required for a golf simulator. Different swing planes, such as upright or flatter swings, will impact the amount of vertical space needed. An upright swing plane, which reaches higher during the swing, will require more overhead clearance compared to a flatter swing plane. Consider the golfer’s swing style when calculating the ceiling height to ensure there is sufficient space overhead, irrespective of the swing plane.

Club Length

Measurement of Club Length

To accurately calculate the required ceiling height for a golf simulator, it is necessary to measure the length of the clubs that will be used. The longest club, typically the driver, should be measured from the grip to the front face of the clubhead. This measurement will help determine the additional clearance needed to accommodate the extended length of the clubs during swings. Consider both the standard club length and any additional specialty clubs used.

Consideration for Longer Clubs

Golfers using clubs longer than average will require more ceiling clearance. Drivers, fairway woods, and specialty clubs often have longer shafts, increasing the potential risk of hitting the ceiling during the swing. To ensure unrestricted swings, additional vertical space should be factored into the overall ceiling height calculations. By considering the length of the clubs used, you can create a safe and comfortable environment that allows for proper swing execution.

Effects of Ceiling Height

Visual Distractions

The ceiling height directly affects the overall experience and immersion in a golf simulator. A ceiling that is too low or too close to the golfer can become a visual distraction, especially when projecting the virtual golf course. A minimum ceiling height recommendation of 8 to 9 feet (2.4 to 2.7 meters) helps reduce the risk of distractions caused by the projection system or light fixtures. Opting for the ideal ceiling height of 10 to 12 feet (3 to 3.6 meters) enhances the realism and ensures a clear view of the virtual golf course, enhancing the overall enjoyment of the simulation.

Ball Flight Interference

Insufficient ceiling clearance can result in interference with the ball’s flight path during a swing. If the golfer’s club hits the ceiling or comes close to doing so, it can affect the natural trajectory of the ball. Higher ceilings provide more vertical space for unimpeded swings, reducing the chances of interference or disruption to the flight of the ball. This is especially important when using the simulator for practice or honing skills, as accurate ball flight feedback is essential for improvement.

Comfort and Confidence

Having ample ceiling clearance creates a comfortable and confident environment for golfers. With sufficient space overhead, golfers can focus on their swing technique without worrying about hitting the ceiling or feeling restricted. This freedom of movement allows for a more natural swing motion, leading to increased comfort and improved performance. A golf simulator setup with the right ceiling height cultivates an environment that fosters both physical and mental well-being during gameplay.

Installation and Setup

Ceiling Materials

When setting up a golf simulator, consider the type of materials used for the ceiling. Softer materials, such as acoustic ceiling tiles, may provide some level of protection if the golfer’s club accidentally comes into contact with the ceiling. However, it is always best to maintain proper clearance to avoid any damage to the ceiling or surrounding structures. Ensure that the chosen ceiling materials are durable and can withstand the potential impact of club strikes.

Support Structures

The ceiling and support structures play a crucial role in the stability and safety of the golf simulator setup. Proper support must be in place to bear the weight of the simulator components, such as screens, projectors, nets, and lighting fixtures. Consult with professionals to ensure that the ceiling and support structures meet necessary safety standards. Reinforcements or additional bracing may be required to handle the setup’s weight and minimize any potential risks.

Safety Precautions

Safety should always be a top priority when setting up a golf simulator. Regularly inspect the ceiling, support structures, and overall installation to identify any potential hazards. Ensure that the simulator is securely anchored and that all components are properly mounted. Familiarize yourself with safety guidelines provided by the simulator manufacturer and take appropriate precautions, such as using safety nets or impact-proofing measures, to protect the surroundings and prevent accidents.

Additional Considerations

Lighting

Proper lighting is essential for a golf simulator setup. Ensure that the lighting is evenly distributed throughout the space, minimizing glare and shadows on the screen or projected image. Consider installing dimmable lights to create the appropriate ambiance for a realistic golfing experience. Additionally, position the lighting fixtures in a way that avoids direct contact with the golfer’s swing path to prevent any potential disruptions or distractions during gameplay.

Ventilation

Installing a golf simulator can create heat and humidity within the enclosed space, which may impact comfort and performance. Adequate ventilation should be considered to maintain a pleasant environment. This can be achieved through the use of fans, air conditioning, or ensuring that windows or doors can be opened to allow for natural airflow. Proper ventilation enhances the overall experience and prevents discomfort or fatigue during extended gameplay.

Ground Surface

The ground surface beneath the golfer’s feet is another important consideration. It is recommended to have a stable and level surface to prevent any tripping hazards or compromised balance during the swings. Ensure that the surface provides good traction to avoid slipping or sliding, as this can negatively impact the golfer’s performance and safety. Consider using materials such as rubber mats, synthetic turf, or carpeting designed for indoor golfing setups to provide a suitable and safe surface for the golfer.

In conclusion, determining the appropriate ceiling height for a golf simulator depends on several factors such as space constraints, type of simulator, golfer’s height, swing height, and club length. By carefully considering these factors and taking accurate measurements, you can create a safe and enjoyable environment for practicing your golf game. Remember to prioritize safety, comfort, and realism when setting up your golf simulator, and consult professionals if needed to ensure a proper installation. Happy golfing!

The Process of Golf Ball Manufacturing

Discover the intricate world of golf ball manufacturing in this informative post. From materials used to quality control measures, uncover the secrets behind this essential equipment.

Have you ever wondered how a golf ball is made? In this article, we will take you through the fascinating process of golf ball manufacturing. From the initial design to the final packaging, each step is meticulously crafted to ensure the highest quality and performance. Join us as we explore the intricate world of golf ball production, unveiling the secrets behind the creation of this essential piece of equipment for the avid golfer.

The Process of Golf Ball Manufacturing

Materials Used in Golf Ball Manufacturing

Golf balls are made using a variety of materials that contribute to their performance and durability. The main materials used in golf ball manufacturing include:

Rubber Core

The rubber core is the innermost component of a golf ball and is responsible for providing its initial bounce and compression. It is typically made from a blend of natural and synthetic rubber. The rubber core is molded to achieve the desired size and density, allowing it to provide consistent performance on the golf course.

Cover Materials

The cover of a golf ball is crucial for its feel, spin control, and durability. There are two main types of cover materials: ionomer resin and urethane. Ionomer resin covers are more commonly used in lower-priced golf balls as they provide good distance and durability. Urethane covers, on the other hand, are preferred by more advanced golfers as they offer enhanced feel, spin, and control around the greens.

Dimples

The dimples on a golf ball play a significant role in its aerodynamic performance. They help reduce drag and create lift, allowing the ball to achieve maximum distance and stability in flight. The pattern and arrangement of the dimples are carefully designed to optimize these aerodynamic properties. Manufacturers employ advanced machinery to create precise and consistent dimple patterns on each golf ball.

Adhesive

Adhesive is used in the construction of golf balls to secure the layers and components together. It ensures that the rubber core is firmly attached to the cover, preventing any separation during play. The adhesive used in golf ball manufacturing is specifically formulated to withstand the high impact forces experienced during a golf swing and the rigors of the game.

Construction of the Rubber Core

The construction of the rubber core begins with molding the core into the desired shape and size. The rubber is heated and injected into a mold, allowing it to take the form of a spherical core. This process ensures consistency and accuracy in the core’s dimensions.

To enhance certain performance characteristics, fillers are added to the rubber core during its formation. These fillers can include various materials, such as metal powders or lightweight microspheres. The addition of fillers modifies the core’s density and compression, influencing its feel and performance.

Compression and temperature control are integral steps in the construction of the rubber core. The molded cores undergo compression molding, wherein they are subjected to high pressure and elevated temperatures. This process helps achieve the desired hardness and compression rating for the golf balls.

Formation of the Cover

The cover of a golf ball is manufactured separately from the rubber core and is then added during the assembly process. The selection of the cover material depends on the desired characteristics of the golf ball. The chosen material is cut into segments to match the core’s dimensions, ensuring a precise fit.

Next, the dimple pattern is created on the cover material. Specialized machines are used to create consistent and accurate dimples of various sizes and patterns. The dimple pattern significantly influences the ball’s flight characteristics and stability, so it is carefully designed to optimize performance.

Once the dimples are formed, graphics such as brand logos and alignment aids are added to the cover. This step adds visual appeal to the golf ball and allows manufacturers to incorporate their branding elements.

The Process of Golf Ball Manufacturing

Layering the Golf Ball

To complete the construction of a golf ball, the rubber core is attached to the cover using an adhesive. The adhesive is applied to both the core and cover, ensuring a strong and permanent bond between the two components.

For certain high-end golf balls, multiple layers are used to enhance performance. These additional layers can be made of various materials and have different properties. The multiple-layer construction allows for greater control, increased spin, and optimized distance, catering to the preferences of advanced players.

Compression and Vulcanization

Compression molding is a critical process in golf ball manufacturing. The assembled golf balls are placed in compression molding presses, where they are subjected to high pressure and heat. This step ensures that the golf ball achieves its final shape and compression rating.

After compression molding, the golf balls undergo vulcanization. This process involves exposing the balls to high temperatures in specially designed chambers. Vulcanization enhances the durability and performance characteristics of the golf balls, making them more resilient to impact and prolonged use.

Quality Control Measures

To ensure the consistency and quality of golf balls, rigorous quality control measures are implemented throughout the manufacturing process. These measures include:

Weight and Diameter Check

Each golf ball is examined to ensure that it meets the specified weight and diameter requirements. Any deviations from the standard can affect the ball’s performance and compliance with regulations.

Compression Test

Compression testing is conducted to measure the firmness and compression rating of the golf balls. This test ensures that the golf balls provide consistent performance across the entire product range.

Durability Testing

Golf balls are subjected to various durability tests to assess their resistance to impact, cutting, and scuffing. These tests simulate the conditions encountered during play and ensure that the balls maintain their shape and performance over time.

Aerodynamic Performance Assessment

The aerodynamic properties of golf balls are assessed through wind tunnel testing. This helps manufacturers analyze the flight characteristics, spin rates, and stability of the balls, ensuring their optimal performance in different playing conditions.

Finishing Processes

Once the golf balls have undergone quality control checks, they proceed to the finishing processes. These processes include:

Trimming Excess Material

Any excess material from the manufacturing process is meticulously trimmed, ensuring that the golf balls meet the desired specifications and aesthetic standards.

Painting and Coating

Golf balls are painted and coated to provide an attractive appearance and offer enhanced durability. The paint and coating also help protect the ball’s surface and maintain its performance characteristics during play.

Stamping and Printing

Brand logos, model names, and identification marks are stamped or printed onto the golf balls. These marks serve to identify the brand and model and also add aesthetic value to the balls.

Packaging

Once the finishing processes are complete, the golf balls are carefully packaged in sleeves or boxes. The packaging ensures that the balls remain in pristine condition until they are purchased by golfers.

Manufacturing Equipment and Machinery

Golf ball manufacturing involves the use of specialized equipment and machinery, which includes:

Rubber Mixing and Processing Machines

These machines are used to mix and process the rubber compounds used in the formation of the golf ball core. They ensure precise control over the composition and consistency of the rubber.

Molding Equipment

Molding equipment is essential for shaping the rubber cores. It allows for accurate and efficient production of consistent cores with the desired dimensions.

Cutting and Dimple Pattern Machines

Specialized machines are employed to cut the cover materials into precise segments and create the dimple patterns. These machines ensure consistency in the manufacturing process and produce reliable results.

Adhesive Application Machines

Adhesive application machines are used to apply the adhesive to the rubber core and cover materials. They enable precise and uniform distribution of the adhesive, ensuring a strong bond between the components.

Compression Molding Presses

Compression molding presses exert high pressure and heat to shape and compress the assembled golf balls. They play a crucial role in achieving the final form and performance characteristics of the balls.

Vulcanization Chambers

Vulcanization chambers provide the controlled heat necessary for the vulcanization process. These chambers ensure that the golf balls attain the desired durability and performance properties.

Testing and Inspection Devices

Various testing and inspection devices are utilized to evaluate the quality and performance of the golf balls. These devices include weight scales, compression testers, impact testers, and wind tunnels.

Environmental Impact and Sustainability

Golf ball manufacturers are increasingly adopting measures to minimize their environmental impact and promote sustainability. These measures include:

Recycling Programs

Manufacturers have implemented recycling programs to recycle used and discarded golf balls. This reduces waste and allows for the reuse of materials, minimizing the environmental footprint of golf ball production.

Reducing Material Waste

Efforts are made to reduce material waste during the manufacturing process. Advanced production techniques and careful material management help optimize material usage, reducing waste generation.

Alternative Cover Materials

Research is being conducted to explore alternative cover materials that are more environmentally friendly. These alternatives aim to provide comparable performance while being more sustainable in their production and disposal.

Energy Efficiency Measures

Manufacturers are implementing energy-efficient practices and technologies in their facilities. These measures help reduce energy consumption and carbon emissions associated with golf ball production.

Ongoing Research and Innovations

The golf ball industry continues to invest in research and development to drive innovation and improve performance. Some of the areas of ongoing research include:

Advanced Core Designs

Scientists and engineers are developing advanced core designs to enhance the performance characteristics of golf balls. These designs focus on optimizing initial ball speed, spin rates, and feel to benefit golfers of all skill levels.

Enhanced Cover Materials

Researchers are constantly exploring new cover materials that offer improved feel, spin control, and durability. Innovations in cover materials aim to cater to the preferences and demands of golfers seeking enhanced performance on the course.

Dimple Pattern Optimization

Ongoing research is focused on exploring optimal dimple patterns for various playing conditions. By fine-tuning the dimple design, manufacturers aim to maximize distance, accuracy, and stability of the golf balls in different wind and weather conditions.

Smart Golf Balls

Innovations in technology are paving the way for the development of smart golf balls. These balls incorporate sensors and tracking systems to provide golfers with real-time data on swing analysis, trajectory, and distance, allowing for a more interactive and analytical experience on the course.

In conclusion, the manufacturing process of a golf ball involves the careful selection and utilization of various materials, precise construction techniques, and stringent quality control measures. Manufacturers constantly strive to improve performance, durability, and sustainability through ongoing research and innovation. With the use of advanced machinery and dedication to environmental responsibility, the golf ball industry continues to produce high-quality products that cater to the diverse needs and preferences of golfers worldwide.

What Are Golfers Hats Called

Discover what golfers hats are called in this informative post. Learn about the different types, their significance in the sport, and popular styles.

You love watching golf tournaments and have noticed that many players wear those stylish hats. But have you ever wondered what those hats are actually called? Well, wonder no more! In this article, we will unveil the name of the iconic headgear that adorns the heads of golfers worldwide. Whether you’re an avid golfer yourself or simply curious about the sport, read on to discover the answer to the age-old question: What are golfers hats called?

What Are Golfers Hats Called

Golfer Hats: An Introduction

When you picture a golfer, one of the first things that comes to mind is the iconic hat they often wear. Golf hats not only serve as a stylish accessory but also play a significant role in the comfort and performance of a golfer. In this comprehensive guide, we will explore the various types of golf hats, popular brands, and their significance in the world of golf.

The significance of golf hats

Golf hats have been a staple in the sport for many years, serving both practical and fashionable purposes. They provide protection from the sun, shielding the golfer’s face and eyes from harmful UV rays. On hot summer days, they also keep the head cool by providing shade and ventilation. Moreover, golf hats are an essential part of a golfer’s outfit, adding a touch of elegance and professionalism to their appearance.

The various types of golf hats

When it comes to golf hats, there is a wide variety to choose from. Each type has its own unique style, features, and benefits. Let’s explore some of the most popular types of golf hats.

Traditional Golf Hats

The origins of traditional golf hats

Traditional golf hats have deep roots in the history of the sport. Dating back to the early days of golf, these hats were typically made of tweed or wool and featured a round shape with a small brim. They were often worn by golfers as a symbol of tradition and as a mark of belonging to the golfing community.

Features of traditional golf hats

Traditional golf hats typically have a structured crown and a short, curved brim. They are commonly made from high-quality materials such as wool or cotton to ensure durability and comfort. These hats often come in neutral colors like navy, black, or beige, making them versatile and suitable for a wide range of golf outfits.

Popular styles of traditional golf hats

Some of the most popular styles of traditional golf hats include the classic flat cap, the timeless fedora, and the sophisticated homburg hat. Each style offers its own unique charm and can be paired with different golfing ensembles to elevate the golfer’s look on the course.

What Are Golfers Hats Called

Newsboy Caps

History and evolution of newsboy caps

Newsboy caps, also known as baker boy caps or eight-panel caps, have a long-standing connection with the world of golf. Originating from the working-class attire of early 20th-century newspaper vendors, these hats gained popularity among golfers due to their stylish yet casual appearance. Over the years, newsboy caps have undergone several design evolutions to match the changing fashion trends.

Distinct features of newsboy caps

Newsboy caps are characterized by their round, full crown and a small brim. They are usually made from tweed or other lightweight materials, making them suitable for variable weather conditions. The distinctive eight-panel construction of these caps gives them a unique and fashionable look, perfectly complementing a golfer’s attire.

Newsboy caps as a popular choice among golfers

Newsboy caps have become a favorite choice among golfers who want to add a touch of vintage flair to their outfits. With their classic yet trendy appeal, newsboy caps allow golfers to showcase their individual style on the course. These caps can be worn with both casual and formal golf attires, making them a versatile option for any golfer.

Flat Caps

The origin and name of flat caps

Flat caps, also known as ivy caps or driving caps, have a long history and are closely associated with English golf culture. These caps derived their name from their characteristic flat crown, distinguishing them from other hat styles. Flat caps were initially worn by the working class in the 19th century but later gained popularity among golfers for their comfort and style.

Characteristics of flat caps

Flat caps are known for their low-profile design with a short brim. They are typically made from materials like tweed, herringbone, or wool, giving them a classic and sophisticated look. The snug fit of flat caps ensures that they stay securely on the golfer’s head even during a swing, providing both comfort and convenience on the course.

Different materials used in manufacturing flat caps

Flat caps are available in a variety of materials, allowing golfers to choose the one that best suits their preferences and playing conditions. Wool flat caps provide warmth and insulation during colder months, while cotton or linen caps offer lightweight breathability for hotter climates. Additionally, some flat caps feature water-repellent finishes, making them suitable for rainy golf rounds.

Bucket Hats

Bucket hats: A practical choice for golfers

Bucket hats have gained significant popularity among golfers in recent years due to their practical features. These hats feature a wide, downward-sloping brim that provides excellent sun protection for the face, neck, and ears. The comfortable fit and lightweight construction make bucket hats ideal for long hours spent on the golf course.

Advantages and disadvantages of bucket hats

Bucket hats offer several advantages for golfers. Besides protecting from the sun, they also help to keep the head cool by providing shade and allowing air circulation. Additionally, bucket hats are often made from quick-drying materials, making them suitable for use in wet and humid conditions. However, one drawback of bucket hats is that they may obstruct peripheral vision if the brim is excessively wide.

Trends in bucket hat designs

In recent years, bucket hats have experienced a renaissance in fashion trends, and the golfing world has embraced this resurgence. Golf-specific designs often feature additional features such as moisture-wicking technology, adjustable chin straps, and even built-in sweatbands. Golfers can now choose from a wide range of colors, patterns, and materials to find the perfect bucket hat that matches their personal style.

Visors

Visors vs. hats: A comparison

Visors and hats are both popular choices for golfers, but they differ in their design and functionality. While hats provide complete coverage and sun protection for the entire head, visors offer shade only for the eyes and face, leaving the top of the head exposed. Visors are designed to allow maximum ventilation and reduce heat buildup during play.

Benefits of wearing visors during golf

Visors offer several advantages that make them a preferred choice for many golfers. Their open-top design allows for better heat dissipation, making them cooler to wear than hats. Visors also provide unrestricted visibility, allowing golfers to maintain a clear line of sight while addressing the ball and tracking its trajectory. Moreover, visors offer a sporty and sleek look that complements many golf outfits.

Different types of visors

Visors come in various styles and designs to suit different preferences and needs. Classic visors feature a wide brim and an adjustable strap or elastic band for a secure fit. Some modern visors incorporate additional features like moisture-wicking fabric and UV protection to enhance comfort and performance on the golf course. Golfers can choose from a range of colors and materials to find the visor that best matches their style.

Beanie Hats

The increasing popularity of beanie hats in golf

Beanie hats, traditionally associated with colder climates, have gained popularity among golfers in recent years. These snug-fitting hats provide warmth and insulation during colder seasons, making them an excellent choice for golfers who brave the elements on the course. Beanie hats have also become a stylish accessory, with golfers incorporating them into their outfits to add a touch of sophistication.

Materials and designs of beanie hats

Beanie hats are typically made from knitted materials such as wool or acrylic. These materials offer insulation and excellent moisture-wicking properties, keeping golfers comfortable and dry during their rounds. Beanie hats come in various designs, including solid colors, patterns, and even embroidered logos or golf-related motifs.

Pros and cons of wearing beanie hats

Wearing a beanie hat on the golf course has its advantages and disadvantages. On the positive side, beanie hats provide warmth and protection from cold winds, enabling golfers to extend their playing season. They also offer a snug fit that stays in place even during vigorous swings. However, beanie hats may become too hot and uncomfortable in warmer weather, so they are best suited for colder climates or early morning tee times.

Sun Hats

Protecting against sun exposure on the golf course

Sun hats play a vital role in safeguarding golfers from harmful UV rays and sun-related risks. Prolonged sun exposure can lead to skin damage, eye strain, and even heatstroke. Sun hats provide a practical solution by shielding the face, neck, and ears from direct sunlight, reducing the risk of sunburn and sun-related illnesses.

Features of sun hats specifically designed for golfers

Sun hats designed for golfers often incorporate features tailored to their needs. These hats are typically made from lightweight and breathable materials that offer excellent UV protection. They may also feature moisture-wicking technology to keep the head cool and dry in hot weather. Additionally, some sun hats have a wide brim that can be shaped to provide optimal shade and can be easily adjusted to one’s preferences.

Choosing the right sun hat based on materials and design

When selecting a sun hat for golf, it is essential to consider the materials and design that best suit your needs. Look for hats made from UPF-rated fabrics that provide reliable protection against harmful UV rays. Additionally, choose a hat with a brim wide enough to cover your face, neck, and ears, but not so wide that it obstructs your field of vision. Opt for breathable materials like nylon or polyester to ensure comfort and ventilation.

Baseball Caps

The prevalence of baseball caps in golf

Baseball caps are perhaps one of the most common and versatile options when it comes to golf headwear. These caps are characterized by their rounded crown and a stiff, curved brim. Due to their casual yet sporty design, baseball caps have found a permanent place in the world of golf, being worn by both professionals and amateurs alike.

Advantages and disadvantages of baseball caps

Baseball caps offer several advantages that make them a popular choice among golfers. They provide adequate sun protection for the face and eyes while allowing ventilation and airflow. The curved brim helps to shield the eyes from direct sunlight, making it easier to focus on the game. However, one drawback of baseball caps is that they do not offer the same level of neck and ear protection as other hat styles.

Customization options for golf-related baseball caps

Baseball caps can be easily customized with logos, team emblems, or golf-related designs, allowing golfers to showcase their affiliations or personal interests. Many golfers choose to wear baseball caps featuring the logos of their favorite golf courses, brand endorsements, or even their own monograms. This customization adds a touch of personality and uniqueness to their golfing attire.

Bucket Visors

A combination of bucket hats and visors

Bucket visors, also known as brim visors, offer a hybrid design that combines the features of bucket hats and visors into a single headwear option. These unique hats feature a wide brim, similar to a bucket hat, while leaving the top of the head exposed like a visor. This combination provides golfers with the advantages of both hat styles.

The unique features of bucket visors

Bucket visors offer excellent sun protection for the face, neck, and ears due to their wide brim. The open-top design of visors allows for enhanced ventilation and temperature regulation, ideal for warm weather. By combining these features into one hat, bucket visors offer golfers a versatile and multifunctional option that can adapt to various playing conditions.

How bucket visors differ from traditional bucket hats

While both bucket visors and traditional bucket hats share a similar wide-brimmed design, the primary difference lies in the coverage they provide. Bucket visors leave the top of the head exposed, allowing for increased airflow and minimizing heat buildup. On the other hand, traditional bucket hats provide full coverage and offer more protection against the elements.

In conclusion, golf hats are not only a fashion statement but also offer practical benefits for golfers. Whether you prefer the traditional elegance of a flat cap, the vintage charm of a newsboy cap, the versatility of a bucket hat, or the sporty appeal of a baseball cap or visor, there is a golf hat for every golfer’s style and needs. So next time you hit the golf course, don’t forget to top off your outfit with a stylish and functional hat – it will not only enhance your look but also protect you from the sun and help you stay focused on your game. Happy golfing!

How to Correctly Strike the Golf Ball

Learn the correct technique to strike the golf ball with accuracy and distance. Improve your grip, stance, and swing for better shots on the course.

Are you tired of consistently pushing the golf ball instead of hitting it straight? Frustrated with your shots veering off course and ruining your game? In this article, you will learn the correct technique to strike the golf ball, ensuring that it goes exactly where you want it to. By following a few simple tips and adjusting your stance, grip, and swing, you can say goodbye to those errant shots and hello to improved accuracy and distance on the golf course.

How to Correctly Strike the Golf Ball

Correct Grip

The Importance of a Proper Grip

One of the most crucial aspects of a successful golf swing is having a proper grip on the club. A correct grip sets the foundation for a solid swing and allows you to have control over the clubface throughout the swing. Without a proper grip, you may struggle with accuracy, distance, and consistency. It is essential to understand the significance of a proper grip and how it can impact your overall game.

How to Position Your Hands on the Club

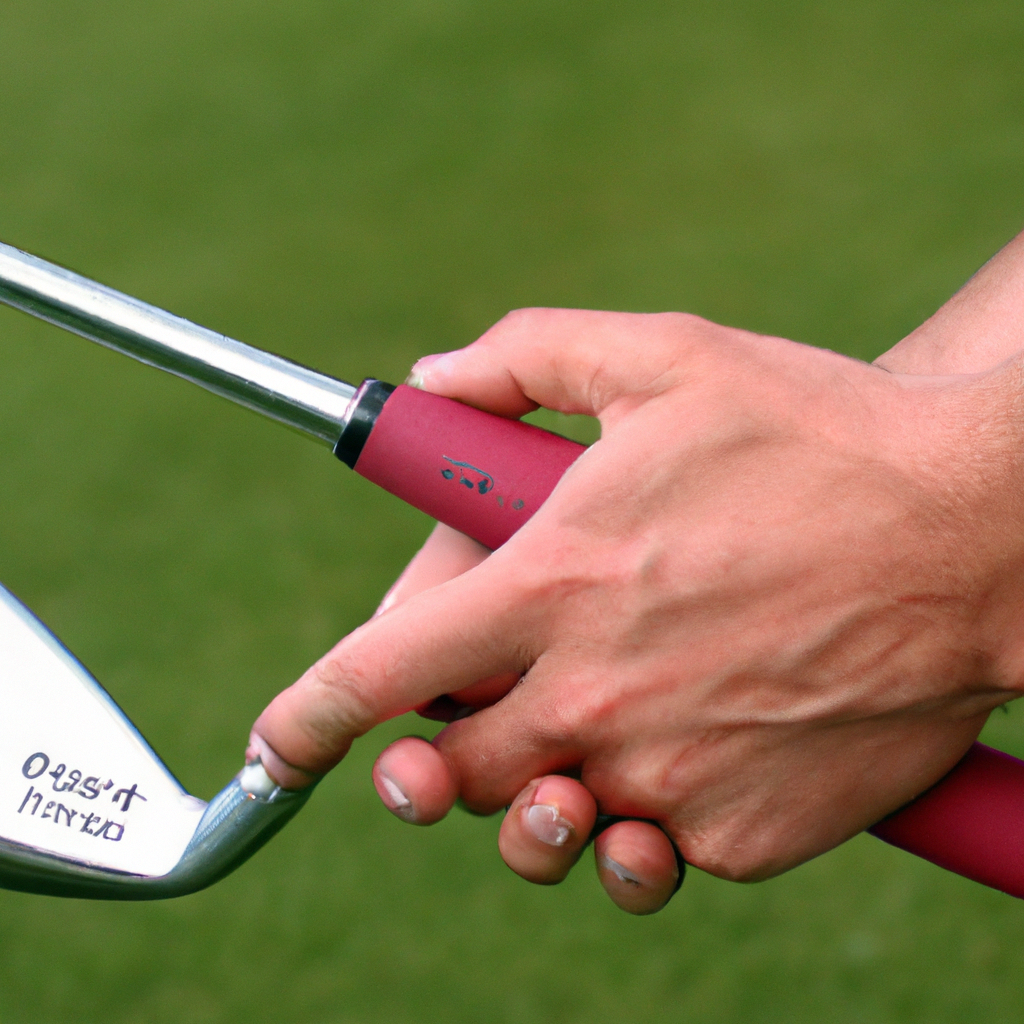
To achieve a proper grip, start by placing the club in your left hand (for right-handed golfers) with the clubface square to the target. Wrap your left hand around the grip, making sure the club runs diagonally across the base of your palm. Your left thumb should be placed slightly to the right of the centerline of the grip.

Next, place your right hand below your left hand on the club, making sure the left thumb fits snugly into the lifeline of your right hand. The right thumb should be placed on the left side of the grip, mirroring the left thumb. The lifeline of your right hand should point towards your right shoulder.

It is crucial to have a firm grip without tensing your hands too much. The pressure should be consistent throughout the swing, neither too tight nor too loose. Finding a grip that feels comfortable and allows for control is essential to ensure a successful swing.

Common Grip Mistakes

Even the most experienced golfers can sometimes make grip mistakes that can negatively impact their game. One common mistake is gripping the club too tightly, which can restrict the free movement of the hands and wrists during the swing. Another mistake is having a grip that is too weak or too strong, affecting the clubface alignment at impact. Lastly, not positioning the hands correctly on the grip can lead to inconsistent and inaccurate shots. It is essential to be aware of these grip mistakes and make the necessary adjustments for a more effective swing.

Stance and Alignment

Finding the Right Stance

Your stance provides the foundation for a successful golf swing. It is crucial to find the right stance that allows for balance, stability, and proper weight distribution. Begin by standing with your feet shoulder-width apart and slightly wider than the width of your shoulders. Keep your knees slightly flexed and your weight evenly distributed between your feet.

Experiment with different foot positions to find what feels most comfortable and allows you to maintain balance throughout your swing. Some golfers prefer a slightly open or closed stance, while others opt for a square stance where both feet are parallel to the target line. Remember, a proper stance aids in generating power and maintaining stability during the swing.

Aligning Your Body to the Target

In addition to finding the right stance, aligning your body to the target is crucial for accurate shots. Imagine a straight line extending from your target and adjust your feet, hips, and shoulders to align parallel to this line. This alignment ensures that your swing path is on target.

To achieve proper alignment, step behind the ball and pick a spot in front of the ball, a few feet away, that aligns with your target. Use this spot as a reference when aligning your feet, hips, and shoulders. Taking the time to align your body before each shot will help you consistently hit the ball in the desired direction.

Positioning the Ball in Your Stance

The position of the golf ball in your stance can greatly impact your swing and ball flight. For most full shots with a mid-iron, the proper ball position is in line with the logo on your shirt or slightly ahead of it. As the clubs get shorter or longer, you will need to adjust the ball position slightly. For shorter irons, move the ball slightly back in your stance, and for longer clubs, move the ball slightly forward.

By positioning the ball correctly, you can ensure that your clubface strikes the ball at the proper angle and promotes a desired ball flight. Experiment with different ball positions during practice to find what works best for your swing and produces consistent results.

Body Position

Maintaining a Balanced Body

Balancing your body throughout the golf swing is vital for consistent and accurate shots. At address, make sure your weight is evenly distributed between both feet for maximum stability. Throughout your swing, focus on maintaining this balance and avoid shifting too much weight towards your toes or heels.

A balanced body position allows for a more controlled and consistent swing. Practice drills that improve your balance, such as standing on one foot while swinging a club, can be beneficial in developing a strong foundation.

The Role of Your Shoulders and Hips

Proper shoulder and hip rotation are key elements of a successful golf swing. As you take the club back during your backswing, allow your shoulders to rotate while keeping your hips relatively stable. This separation between the shoulders and hips creates torque and stores potential energy, ready to be released during the downswing.

During the downswing, focus on rotating your hips first while allowing your shoulders to follow. This sequence of movement generates power and helps ensure that your clubface remains square at impact. Practice drills that emphasize proper shoulder and hip rotation, such as the “X-Factor” drill, can improve your swing mechanics and add distance to your shots.

Proper Spine Angle

Maintaining the correct spine angle is crucial for consistency and power in your golf swing. At address, tilt your spine slightly towards the target, creating a straight line from the top of your head to your tailbone. This spine angle allows for a proper weight shift during the swing and promotes a shallow and sweeping path for the club.

Throughout your swing, focus on maintaining this spine angle and avoid excessive tilting or straightening of the spine. An incorrect spine angle can lead to inconsistent swings and a loss of power. Practice drills that reinforce a proper spine angle, such as the “Swing Plane” drill, can improve your swing mechanics and overall performance.

How to Correctly Strike the Golf Ball

Backswing Fundamentals

Importance of a Full Backswing

The backswing sets the foundation for a powerful and consistent golf swing. It is essential to complete a full backswing to maximize the potential energy of the swing and generate power. A full backswing allows for a wide swing arc and helps create a smooth tempo and rhythm.

During the backswing, focus on turning your shoulders away from the target while maintaining a stable lower body. Keep your arms extended and your wrists hinged to maintain leverage and create a wide swing radius. A full backswing not only generates power but also promotes proper sequencing and timing for the downswing.

Maintaining a Relaxed Grip Pressure

While it is crucial to have a firm grip on the club, it is equally important to maintain a relaxed grip pressure throughout the swing. Gripping the club too tightly can restrict the natural motion of the hands and wrists, leading to a loss of power and control.

During the backswing, consciously relax your grip, ensuring that your hands remain supple and responsive. This allows for a fluid and natural swing motion while retaining the necessary control over the club. Practice drills that focus on grip pressure awareness, such as the “Soft Hands” drill, can help you develop a relaxed grip throughout the swing.

Rotating the Shoulders and Hips

Proper shoulder and hip rotation during the backswing is essential for generating power and maintaining proper swing mechanics. As you take the club back, focus on turning your shoulders away from the target, creating a coil-like effect with your torso. This rotation stores potential energy that can be unleashed during the downswing.

In addition to shoulder rotation, it is important to allow your hips to rotate naturally during the backswing. The hips should turn while maintaining stability, providing a solid foundation for the upper body rotation. This separation of movement between the shoulders and hips creates torque and promotes an efficient transfer of energy during the swing.

Downswing and Impact

Transitioning Smoothly from Backswing to Downswing

The transition from backswing to downswing is a critical moment in the golf swing. A smooth transition ensures proper sequencing and allows for an efficient transfer of energy from the backswing to the downswing.

To achieve a smooth transition, focus on initiating the downswing with the lower body. Begin by shifting your weight towards your front foot while allowing your hips to rotate towards the target. This transfer of weight and rotation creates a powerful driving force that propels the club forward.

Avoid any jerky or rushed movements during this transition. Instead, aim for a controlled and fluid motion that allows for proper timing and synchronization between the lower body, upper body, and the club.

Generating Power from the Lower Body

Generating power in your golf swing begins with the lower body. By utilizing the muscles in your legs and hips, you can generate tremendous power and add distance to your shots.

During the downswing, focus on shifting your weight towards your front foot while maintaining a stable lower body. As your hips rotate towards the target, allow the energy from the weight shift and rotation to transfer through your legs and into the club. This transfer of power creates lag and whip-like action, resulting in increased clubhead speed and momentum.

By harnessing the power of your lower body, you can achieve greater distance and consistency in your golf swing.

Contacting the Ball at the Correct Spot

Contacting the ball at the correct spot on the clubface is essential for optimal ball flight and distance. Striking the ball off-center can lead to mishits, loss of distance, and a lack of control.

During impact, aim to make solid contact with the ball with the center of the clubface. This ensures maximum transfer of energy from the clubhead to the ball, resulting in a more powerful and accurate shot. Focus on maintaining a balanced swing and a relaxed grip to promote a consistent and centered strike.

Practice drills that enhance your ability to contact the ball correctly, such as the “Impact Bag” drill or the “Tee Drill,” can help you develop better ball-striking skills and improve your overall performance.

Keeping Your Head Down

Understanding the Importance of Head Position

Keeping your head down during the golf swing is a fundamental aspect of a consistent and accurate swing. By maintaining a stable head position, you can improve your ability to see the ball clearly at impact, maintain proper balance, and execute a more controlled swing.

During the swing, focus on keeping your eyes fixed on the back of the ball until after impact. This allows for better ball contact and helps prevent topping or skulling the ball. It also promotes overall stability and balance throughout the swing.

The Role of the Eyes During the Swing

Your eyes play a crucial role in the golf swing, providing visual feedback and aiding in alignment and focus. By using your eyes effectively, you can enhance your swing mechanics and improve your overall performance.

During the swing, it is important to keep your eyes focused on the ball while maintaining a soft gaze. Avoid lifting your head prematurely or trying to track the flight of the ball before completing your swing. By keeping your eyes on the ball, you can maintain proper sequencing, rhythm, and timing, leading to more consistent and accurate shots.

Drills to Improve Head Stability

To improve head stability throughout your swing, there are several drills you can incorporate into your practice routine. The “Head Still Drill” involves taking practice swings while focusing on keeping your head perfectly still throughout the swing. By exaggerating this motion, you can train your body to maintain stability and reduce any unnecessary movement.

Another helpful drill is the “Headcover Drill,” where you place a headcover or other object under your chin and swing while keeping the headcover in place. This drill helps ensure that you maintain a steady head position and avoid lifting your head prematurely.

By incorporating these drills into your practice sessions, you can develop better head stability and improve your overall swing mechanics.

Swing Tempo and Rhythm

Achieving a Consistent Tempo

The tempo of your swing plays a significant role in the timing, sequencing, and overall effectiveness of your golf swing. A consistent tempo promotes fluidity, rhythm, and synchronization, leading to more accurate and powerful shots.

To achieve a consistent tempo, focus on maintaining a steady and even-paced swing throughout the entire motion. Avoid rushing your backswing or downswing and strive for a smooth transition between these phases. By finding a comfortable and repeatable tempo, you can improve your timing and striking consistency.

It can be helpful to practice with a metronome or count out a specific rhythm in your head during your swing. This can help you establish the ideal tempo and reinforce muscle memory.

Maintaining a Smooth and Balanced Swing

A smooth and balanced swing is essential for consistent and accurate shots. By focusing on a smooth transition from the backswing to the downswing and maintaining balance throughout the swing, you can increase the likelihood of solid ball contact and desired ball flight.

During the swing, it is important to avoid any jerky or forceful movements that can disrupt your tempo and balance. Instead, strive for a flowing and connected swing motion that maintains a consistent rhythm from start to finish. This will enable you to generate power and accuracy while maintaining control over the clubface.

Avoiding Rushing or Jerky Movements

Rushing or jerky movements can greatly impact your swing mechanics and overall performance. These movements often stem from a lack of relaxation, tension, or an attempt to overpower the shot.

To avoid rushing or jerky movements, focus on maintaining a relaxed grip pressure and a smooth transition from backswing to downswing. Practice drills that promote a fluid and controlled swing, such as the “Pump Drill” or the “Slow-Motion Swing,” can help you develop better swing tempo and eliminate any unnecessary hastiness.

By eliminating rushing or jerky movements, you can enhance your swing mechanics, increase consistency, and achieve better results on the course.

Weight Transfer

Shifting Your Weight for Proper Transfer

Proper weight transfer is a critical component of a well-executed golf swing. By shifting your weight effectively, you can generate power, maintain balance, and ensure proper sequencing of the swing.

During the backswing, your weight should predominantly shift onto your trail leg (right leg for right-handed golfers). As you initiate the downswing, focus on transferring your weight smoothly onto your lead leg (left leg for right-handed golfers). This transfer of weight creates a powerful rotation and generates momentum for a powerful strike.

Be mindful of initiating and completing your weight transfer fluidly and avoid any abrupt weight shifts that can disrupt your balance and swing mechanics.

Role of Lower Body in Weight Transfer

The lower body plays a crucial role in weight transfer during the golf swing. By utilizing your leg and hip muscles effectively, you can generate power and maintain stability throughout the swing.

During the backswing, focus on maintaining a stable lower body while allowing your upper body to rotate and coil. As you initiate the downswing, begin transferring your weight onto your lead leg by rotating your hips towards the target. This weight transfer creates a powerful driving force that propels the club forward and generates clubhead speed.

To improve your lower body’s role in weight transfer, practice drills that enhance hip rotation and lower body stability, such as the “Hip Rotation Drill” or the “Lower Body Stability Drill.” These exercises can help you develop a more efficient weight transfer and improve your overall swing mechanics.

Exercises to Improve Weight Distribution

Proper weight distribution is vital for a balanced and powerful golf swing. By strengthening the muscles that control weight transfer, you can enhance your stability, generate more power, and improve your overall performance.

Exercises such as squats, lunges, and deadlifts can help improve lower body strength and stability. Additionally, incorporating exercises that focus on core strength, such as planks and Russian twists, can aid in maintaining balance and promoting a stable swing.

By consistently incorporating these exercises into your fitness routine, you can develop better weight distribution skills and enhance your overall golf swing.

The Role of the Wrists

Maintaining Solid Wrists throughout the Swing

The wrists play a crucial role in controlling the clubface and generating power during the golf swing. By maintaining solid and firm wrists throughout the swing, you can achieve better clubface control, resulting in more accurate and consistent shots.

During the swing, focus on maintaining a “flat” left wrist (for right-handed golfers) at impact and throughout the follow-through. This ensures that the clubface remains square, promoting a desired ball flight. Avoid any excessive wrist hinging or casting, as this can lead to inconsistent strikes and loss of power.

Practice drills that emphasize wrist stability and control, such as the “Two-Tee Drill” or the “Wrist Release Drill,” can help you develop better wrist mechanics and improve the overall consistency of your swing.

Using the Wrists to Control Clubface Alignment

The movement of the wrists during the swing directly affects the clubface alignment and, consequently, the direction of your shots. By understanding how to control the movement of your wrists, you can enhance your ability to maintain proper clubface alignment and hit more accurate shots.

During the backswing, focus on maintaining a firm left wrist (for right-handed golfers) and limiting any excessive cupping or hinging. This stability in the left wrist sets the foundation for proper clubface control. As you transition into the downswing and reach impact, keep your wrists firm and avoid any flipping or rolling of the wrists.

By consciously controlling your wrist movement and maintaining stability, you can improve your ability to align the clubface and achieve more consistent and accurate shots.

Exercises to Develop Wrist Strength

Developing wrist strength is crucial for maintaining a solid, firm grip throughout the swing and controlling the clubface. Strong wrists enable you to resist any unwanted clubface rotation, leading to greater accuracy and control.

Exercises such as wrist curls and reverse wrist curls using dumbbells or resistance bands can help strengthen your wrist muscles. Additionally, incorporating exercises that focus on forearm strength, such as wrist rotations with a weighted club or barbell, can further enhance your wrist strength.

By regularly incorporating these exercises into your fitness routine, you can develop stronger wrists, improve grip stability, and enhance your overall swing mechanics.

Practice Drills

Putting Alignment Drill

Improving your putting alignment is crucial for sinking more putts and lowering your scores on the greens. The putting alignment drill can help you develop better alignment skills and improve your overall putting performance.

To practice this drill, set up a putting station with two alignment sticks or clubs on either side of your intended putting line. The sticks should be placed parallel to each other and pointing towards your target. Take your normal putting stance and make several practice strokes, ensuring that your putter aligns parallel to the alignment sticks throughout your stroke. This drill helps train your eyes and body to align properly, promoting more accurate putting.

Incorporate the putting alignment drill into your practice routine to develop better alignment habits, improve your confidence on the greens, and sink more putts.

Mirror Drill for Swing Mechanics

The mirror drill is a helpful tool for improving swing mechanics and developing a more consistent and efficient golf swing. By utilizing a mirror or reflective surface, you can observe your body positions, alignments, and movements throughout the swing.

Set up in front of a mirror or reflective surface with your golf club. Take your address position and make practice swings while observing your body positions and swing mechanics. Pay attention to your grip, alignment, posture, and swing plane. Use the mirror to ensure that you are maintaining the correct positions and alignments throughout the swing.

The mirror drill allows for instant visual feedback, enabling you to make adjustments and fine-tune your swing mechanics. Incorporate this drill into your practice routine to develop better swing awareness and improve your overall swing mechanics.

Impact Bag Drill for Proper Ball Striking

Proper ball striking is essential for consistent and accurate shots. The impact bag drill is a valuable training tool for improving your ball striking skills and developing a more solid and centered strike.

To perform this drill, set up an impact bag or a large, soft target in place of a golf ball. Take your normal address position and make swings, focusing on striking the impact bag with your clubhead. Pay attention to the feeling of the strike, ensuring that you are hitting the bag at the correct spot (slightly ahead of the ball for irons). This drill helps train your body to maintain a solid and centered strike, promoting better ball contact.

Incorporate the impact bag drill into your practice routine to refine your ball striking skills, enhance your swing mechanics, and achieve more consistent and accurate shots.

By following these comprehensive guidelines and practicing the recommended drills, you can improve your grip, stance, alignment, body position, swing mechanics, and overall golf performance. Remember to stay patient, stay positive, and have fun while working on these fundamental aspects of your golf swing. With dedication and practice, you’ll be well on your way to striking the golf ball more effectively and enjoying the game to its fullest.

How to Make Your Golf Cart Street Legal in Florida

Learn how to make your golf cart street legal in Florida. This article provides step-by-step guidance on the necessary modifications, permits, and safety features required to cruise the Florida roads in style. Get ready to hit the streets with your fully equipped, street legal golf cart!

So, you’ve got yourself a golf cart, and you’d like to take it for a spin on the streets of Florida. Well, good news! With a few simple steps and a little bit of paperwork, you can make your golf cart street legal in the Sunshine State. From adding essential safety features to getting the necessary permits, this article will guide you through the process, making sure you’re properly equipped to cruise along the Florida roads in no time. So, buckle up and get ready to hit the streets in style with your newly street legal golf cart!

How to Make Your Golf Cart Street Legal in Florida

Determine Eligibility for Street Legal Conversion

Before you begin the process of converting your golf cart into a street legal vehicle, it is essential to determine the eligibility of your golf cart for this conversion. To do so, you must first check the local laws and regulations in your area and understand how golf carts are classified.

Check Local Laws and Regulations

Street legal requirements for golf carts can vary from state to state and even within different local municipalities. Therefore, it is crucial to familiarize yourself with the specific laws and regulations in your area. Check with your local department of motor vehicles or the transportation authority to obtain accurate information about the requirements for street legal golf carts.

Understand Golf Cart Classification

Golf carts are typically classified into two categories: Low-Speed Vehicles (LSV) and Neighborhood Electric Vehicles (NEV). LSVs are allowed to operate on roads with posted speeds of up to 35 mph, while NEVs can travel on roads with posted speeds of up to 25 mph. Understanding the classification of your golf cart will help you determine which modifications are necessary to make it street legal.

Vehicle Modifications

Once you have determined the eligibility of your golf cart, the next step is to make the necessary vehicle modifications to meet the street legal requirements. Here are some key modifications that you should consider:

Install Proper Safety Equipment

To ensure the safety of yourself and others on the road, it is essential to install the necessary safety equipment on your golf cart. This may include seat belts, headlights, taillights, brake lights, reflectors, a horn, and windshield wipers. Installing these safety features will enhance visibility and make your golf cart more noticeable to other drivers on the road.

Upgrade Lighting and Reflectors

Proper lighting is crucial for a street legal golf cart, especially during nighttime operations. Upgrading your golf cart’s lighting system to include headlights, taillights, and turn signals is essential to comply with the street legal requirements. Additionally, adding reflective tape or reflectors on the sides and rear of your golf cart will further enhance its visibility.

Install Turn Signals and Mirrors

Turn signals and mirrors are essential for indicating your intentions on the road and keeping track of your surroundings. Install turn signals that can be easily operated from the driver’s seat and ensure that they are visible to other road users. Additionally, consider installing side-view mirrors and a rearview mirror to provide you with better visibility and enhance your situational awareness.

Obtain Insurance and Registration

After making the necessary modifications to your golf cart, you’ll need to obtain insurance and registration to legally operate it on public roads. Here’s what you need to do:

Research Insurance Options

Contact your insurance provider or explore different insurance options to find a policy that meets the requirements for street legal golf cart insurance. Compare coverage options and premiums to ensure you are adequately protected. Be sure to inquire about liability insurance, which is typically required for street legal golf carts.

Choose Appropriate Coverage

Once you have researched insurance options, choose the coverage that meets your needs and complies with the local laws. In addition to liability insurance, you may also want to consider comprehensive coverage, which will protect your golf cart against theft, vandalism, and other risks.

Register Your Golf Cart

The next step is to register your golf cart with the appropriate authorities. Contact your local department of motor vehicles or transportation authority to find out the specific registration requirements for street legal golf carts in your area. Prepare the necessary documentation, such as proof of ownership, proof of insurance, and any required forms, and follow the registration process to obtain your golf cart’s registration certificate and license plates.

How to Make Your Golf Cart Street Legal in Florida

Meet Safety Requirements

To ensure that your street legal golf cart is safe to operate on public roads, you must meet specific safety requirements. Here are some key areas to focus on:

Ensure Adequate Braking System

Having a reliable braking system is crucial to ensure the safety of yourself and others on the road. Inspect your golf cart’s brakes and ensure that they are in good working condition. If necessary, have them serviced or replaced by a professional to meet the safety requirements for street legal golf carts.

Check Tire Specifications

Proper tires are essential for safe road travel. Check the tire specifications required for street legal golf carts in your area. Ensure that your golf cart’s tires meet the necessary size, tread, and pressure requirements. Regularly inspect the tires for wear and tear, and replace them as needed to maintain road safety.

Adjust Maximum Speed

Most street legal golf carts have a speed limit imposed to ensure their safe operation. Check the maximum speed limit allowed for your golf cart and adjust it accordingly. This can typically be done through a governor adjustment or programming. Adhering to the designated speed limit is essential for maintaining safety on the roads.

Valid Driver’s License and Age Requirements

Operating a street legal golf cart requires a valid driver’s license and compliance with age restrictions. Here’s what you need to know:

Check Minimum Age Restrictions

Different areas may have varying age restrictions for operating a street legal golf cart. Review the local laws and regulations to find out the minimum age requirement for driving a golf cart on public roads. Ensure that you or the intended driver meets the minimum age criteria before operating the street legal golf cart.

Possess a Valid Driver’s License

In addition to meeting the age requirements, it is essential to possess a valid driver’s license to operate a street legal golf cart. Verify that your driver’s license is current and valid. If the intended driver does not have a driver’s license, they will not be legally allowed to operate the golf cart on public roads.

Understanding Road Use Limitations

While your golf cart may be street legal, it is essential to understand the road use limitations that apply to these vehicles. Here are some key considerations:

Know Where You Can and Cannot Drive

Familiarize yourself with the roads and areas where you are permitted to drive your street legal golf cart. Some roads may have restrictions or prohibitions for golf carts, such as highways or major thoroughfares. Respect these rules and stick to designated roads and areas where golf carts are allowed.

Follow Speed Limits and Traffic Laws

Adhering to speed limits and traffic laws is crucial for the safe operation of your golf cart on public roads. Observe and abide by speed limits, traffic signals, and other applicable regulations. Remember that your golf cart is sharing the road with other vehicles, so it is essential to drive responsibly and in accordance with traffic laws.

Adhere to Daytime Driving Restrictions

Certain areas may have restrictions on driving a street legal golf cart during nighttime or specific times of the day. Be aware of any such limitations and avoid operating your golf cart during prohibited hours. It is important to prioritize safety and comply with all applicable regulations to prevent accidents and ensure a positive experience on the road.

Consider Environmental Impact

As you convert your golf cart into a street legal vehicle, it is also essential to consider its environmental impact. Here are some ways you can make your street legal golf cart more environmentally friendly:

Opt for Electric Golf Carts

Electric golf carts are more environmentally friendly compared to gas-powered ones. They produce zero emissions and help reduce air pollution. If you have the flexibility to choose, consider opting for an electric golf cart to minimize your carbon footprint.

Use Energy-Efficient Models

If you already have a golf cart and are not looking to replace it, you can still contribute to a more sustainable future by using energy-efficient models. Ensure that your golf cart’s batteries are well-maintained and charged efficiently. Avoid excessive idling or unnecessary energy consumption to maximize the energy efficiency of your golf cart.

Participate in Green Initiatives

Take part in green initiatives and organizations that promote sustainable practices for golf carts and other eco-friendly vehicles. Stay informed about the latest developments and technologies in electric transportation. By actively participating in these initiatives, you can contribute to the overall mission of creating a greener and more sustainable future.

Maintain Your Street Legal Golf Cart

To keep your street legal golf cart running smoothly and safely, it is crucial to stay on top of regular maintenance. Here are some maintenance tips to keep in mind:

Regularly Inspect and Maintain Vehicle

Perform regular inspections of your golf cart to identify any issues or areas that require maintenance. Check for loose connections, damaged wiring, or any signs of wear and tear. It is essential to address these issues promptly to prevent further damage and ensure the ongoing safety of your street legal golf cart.

Ensure All Safety Features are Functional

Regularly check that all safety features, such as lights, turn signals, mirrors, and brakes, are fully functional. If you notice any malfunctioning or damaged components, have them repaired or replaced immediately. Safety should always be a top priority, and ensuring that your golf cart’s safety features are in good working condition is key to maintaining a street legal vehicle.

Keep Up with Scheduled Servicing

Follow the manufacturer’s recommended maintenance schedule for your golf cart. This includes regular servicing, battery maintenance, and other routine checks. Adhering to the scheduled maintenance will help extend the lifespan of your golf cart and reduce the likelihood of unexpected breakdowns or issues.

Stay Informed about Updates in Regulations

Street legal requirements for golf carts may evolve over time, so it is essential to stay informed. Here’s how you can keep up with the latest updates:

Check for Changes in Local Laws

Regularly check for changes in local laws and regulations regarding street legal golf carts. Stay updated with any amendments or additions to the existing requirements. Websites of local transportation authorities or department of motor vehicles are good sources of current information.

Stay Updated with Safety Standards

Stay informed about the latest safety standards and recommendations for street legal golf carts. Follow news and updates from relevant organizations and institutions related to golf cart safety. Being aware of current safety standards will ensure that your street legal golf cart remains compliant and safe to operate.

Participate in Golf Cart Communities

Join golf cart communities or clubs to stay connected with other golf cart enthusiasts. These communities often provide valuable information, updates, and resources related to street legal golf carts. By engaging with fellow golf cart owners, you can stay informed about any changes or developments in regulations and share experiences and tips for maintaining and operating your street legal golf cart.

Conclusion

Converting your golf cart into a street legal vehicle requires careful consideration and adherence to the specific laws and regulations in your area. By checking the local laws, understanding the necessary modifications, obtaining insurance and registration, meeting safety requirements, complying with driver’s license and age restrictions, understanding road use limitations, considering environmental impact, maintaining your golf cart, and staying informed about updates in regulations, you can ensure a smooth and legal transition to street legal golf cart ownership. Enjoy the freedom and convenience of driving your golf cart on public roads while prioritizing safety, environmental responsibility, and compliance with local regulations.

How to properly charge a golf cart

Learn how to properly charge a golf cart for optimal performance and longevity. Get step-by-step instructions, safety tips, and troubleshooting advice.

Are you a golf enthusiast looking to keep your golf cart in top condition? One crucial aspect of maintaining a golf cart is knowing how to properly charge it. In this article, we will provide you with valuable information and step-by-step instructions on how to charge a golf cart correctly. From understanding the charging process to ensuring you use the right equipment, we’ve got you covered. So, let’s get started and ensure your golf cart stays powered up for all your future rounds of golf!

How to Properly Charge a Golf Cart

Welcome to this comprehensive guide on how to properly charge a golf cart! Whether you’re a seasoned golfer or a first-time owner, understanding the ins and outs of charging your golf cart is crucial for optimal performance and longevity. In this article, we will cover everything you need to know about charging your golf cart, from choosing the right charger to troubleshooting common issues. So let’s dive in and ensure you have the knowledge to keep your golf cart running smoothly!

How to properly charge a golf cart

Choosing the Right Charger

The first step in properly charging your golf cart is selecting the right charger. There are various types of chargers available in the market, so it’s important to choose the one that best suits your specific golf cart model and battery type. The voltage and amperage requirements of your golf cart will determine the charger you need. Consult your golf cart’s manual or contact the manufacturer for guidance on selecting the appropriate charger. It’s also advisable to invest in a charger with safety features such as overcharge protection and automatic shut-off.

Understanding Battery Types

Before diving into the charging process, it’s essential to understand the different types of batteries commonly used in golf carts. The two main types are lead-acid batteries and lithium-ion batteries. Lead-acid batteries are the traditional choice, affordable but requiring regular maintenance. On the other hand, lithium-ion batteries are more expensive upfront but provide longer lifespan and require little maintenance. Familiarize yourself with the specific requirements and recommendations for your battery type to ensure proper charging.

Preparing for Charging

To ensure a smooth charging process, it’s important to prepare your golf cart adequately. First, make sure the cart is parked in a well-ventilated area away from flammable materials. Ensure the battery terminals are clean and free from corrosion, as this can affect the charging efficiency. Inspect the battery cables for any signs of damage and replace them if necessary. Additionally, ensure that all accessories and lights are turned off before connecting the charger.

How to properly charge a golf cart

Connecting the Charger

Once you’ve prepared your golf cart, it’s time to connect the charger. Start by locating the charger port on your cart; it is usually located near the battery compartment. Ensure the charger is unplugged before connecting the charging cable to the cart’s charger port. It’s crucial to make a secure and proper connection to avoid any electrical accidents. Once connected, plug the charger into a grounded electrical outlet. Double-check that all connections are secure and that the charger is displaying the appropriate charging status.

Monitoring the Charging Process

While your golf cart is charging, it’s important to monitor the process to ensure everything goes smoothly. Most chargers have an indicator light that shows the charging status. A solid green light usually indicates that the battery is fully charged, while a flashing light indicates that the battery is still charging. Avoid overcharging the battery, as this can lead to damage and reduce its lifespan. Keep an eye on the charging progress and disconnect the charger once the battery is fully charged.

Charging Safety Measures

Safety should always be a top priority when dealing with any electrical equipment. When charging your golf cart, follow these important safety measures. Avoid charging the battery in extreme temperatures, as this can affect the charging efficiency and potentially damage the battery. Never attempt to charge a damaged or leaking battery, as this can be dangerous. It’s also advisable to keep a fire extinguisher nearby and never leave the charging process unattended.

Maintaining Battery Health

Proper maintenance is crucial for the health and longevity of your golf cart battery. Regularly check the water level in lead-acid batteries and replenish it as needed with distilled water. Keep the batteries clean and free from dirt and debris, as this can hinder their performance. Additionally, avoid deep discharges and recharge the batteries after each use. Following these maintenance practices will help extend the lifespan of your golf cart battery and ensure optimum performance.

Troubleshooting Common Charging Issues

Sometimes, issues may arise during the charging process. One common problem is a charger that fails to start or does not charge the battery properly. In such cases, ensure that all connections are secure and that the charger is receiving power from the electrical outlet. If the charger still does not work, it may be faulty and require professional assistance. Additionally, if the battery does not hold a charge or drains quickly, it may indicate a battery issue that needs to be addressed promptly.

Extending Battery Life

To maximize the lifespan of your golf cart battery, there are a few simple practices to follow. Avoid storing your golf cart with a fully discharged battery, as this can lead to irreversible damage. If you plan to store your golf cart for an extended period, ensure the battery is properly charged before doing so. Regularly check the battery voltage and recharge it whenever it drops below the recommended level. Following these practices will help extend your battery’s life and save you from unnecessary replacement costs.

Using Solar Power for Charging

In recent years, the use of solar power for charging golf cart batteries has gained popularity. Solar chargers harness the sun’s energy to charge your battery and provide an eco-friendly and cost-effective charging solution. If you have access to ample sunlight or are looking to reduce your carbon footprint, investing in a solar charger can be a great option. However, keep in mind that solar charging may take longer than traditional methods, especially on cloudy days. Before purchasing a solar charger, ensure it is compatible with your golf cart and battery type.

In conclusion, properly charging your golf cart is essential for its performance and longevity. By following the steps outlined in this article, from choosing the right charger to understanding battery types, connecting the charger, monitoring the process, and following safety measures, you can ensure that your golf cart battery stays in optimal condition. Regular maintenance, troubleshooting common issues, and considering alternative charging methods like solar power will all contribute to an extended battery life, saving you time, money, and potential headaches in the long run. So go ahead, charge your golf cart with confidence, and enjoy many rounds of golf or leisurely rides!

5 Tips to Prevent Early Extension in Golf Swing

Struggling with early extension in your golf swing? Check out our article for five valuable tips to prevent early extension and improve your game. Perfect your technique and achieve a more consistent and powerful swing. Beginners and experienced players alike can benefit from these expert tips. Read now!

Are you struggling with early extension in your golf swing? Don’t worry, we’ve got you covered! In this article, we will share five invaluable tips to help you prevent early extension and improve your golf game. Whether you’re a beginner or an experienced player, these tips will provide you with the necessary guidance to achieve a more consistent and powerful swing. So, grab your clubs and get ready to perfect your technique – let’s dive right in!

5 Tips to Prevent Early Extension in Golf Swing

Proper Setup and Alignment

Align Your Feet and Shoulders

When setting up for a golf swing, it is important to ensure that your feet and shoulders are properly aligned. Aligning your feet parallel to the target line helps establish a solid foundation and promotes a more accurate swing. Your shoulders should also be aligned parallel to the target line, as this promotes proper body rotation throughout the swing. Making sure your feet and shoulders are aligned sets the stage for a successful swing and can help prevent early extension.

Position Your Hands and Grip

The position of your hands and the way you grip the club can greatly affect your swing. When gripping the club, make sure your hands are placed in a neutral position. Your top hand (left hand for right-handed golfers) should be placed comfortably on top of the grip with the thumb resting on the top of the club. Your bottom hand (right hand for right-handed golfers) should be positioned with the palm facing the target. An incorrect hand position or grip can lead to inconsistencies in your swing and increase the likelihood of early extension.

Maintain Proper Posture

Maintaining a proper posture during your golf swing is crucial for both power and accuracy. Start by bending from your hips instead of your waist, keeping your back straight. Your knees should be slightly flexed, allowing for optimal movement and stability. It is important to avoid slouching or excessively arching your back, as this can lead to poor ball contact and early extension. By maintaining proper posture, you create a strong foundation for a more efficient and consistent golf swing.

Strengthen Core Muscles

Engage in Core-Strengthening Exercises

A strong core is essential for a stable and powerful golf swing. Engaging in regular core-strengthening exercises can help improve your overall swing mechanics and prevent early extension. Some effective exercises for strengthening the core include planks, Russian twists, and medicine ball rotations. By strengthening your core muscles, you increase your ability to maintain proper posture and generate rotational power, resulting in a more controlled and accurate swing.

Focus on Rotational Movements

The golf swing is a rotational movement, and it is important to incorporate exercises that specifically target rotational muscles. Exercises such as seated trunk rotations, wood chops, and cable rotations can help improve the range of motion and strength of your rotational muscles, reducing the likelihood of early extension. By focusing on rotational movements in your fitness routine, you can develop a more fluid and efficient golf swing.

Improve Flexibility and Mobility

Stretch Regularly

Maintaining good flexibility and mobility is essential for a fluid and unrestricted golf swing. Incorporating regular stretching exercises into your routine can help improve your range of motion and prevent early extension. Pay attention to stretching your hamstrings, hips, shoulders, and thoracic spine, as these areas are crucial for a smooth swing. Dynamic stretches, such as leg swings and arm circles, are particularly beneficial for golfers as they mimic the movement patterns of the swing. By prioritizing flexibility and mobility, you can enhance your overall swing mechanics and reduce the risk of early extension.

Work on Hip Mobility

The hips play a critical role in the golf swing, and limited hip mobility can lead to compensations, including early extension. Performing exercises that target the hip flexors, hip rotators, and glute muscles can help improve your hip mobility and prevent early extension. Lunges, hip rotations, and hip bridges are effective exercises to incorporate into your routine. By increasing hip mobility, you can maintain proper posture, generate more power from the ground, and minimize the tendency to early extend.

Enhance Shoulder Range of Motion

Having adequate shoulder range of motion is important for a fluid and powerful golf swing. Limited shoulder mobility can restrict your backswing and lead to compensations, including early extension. Stretching and mobility exercises that target the shoulders, such as shoulder circles, arm crossovers, and shoulder dislocations, can help improve your range of motion and prevent early extension. By enhancing shoulder mobility, you can achieve a more efficient swing plane and maintain proper posture throughout the swing.

5 Tips to Prevent Early Extension in Golf Swing

Balance and Weight Transfer

Maintain a Balanced Stance

Balance is crucial in golf, and maintaining a balanced stance is essential for a consistent and controlled swing. When setting up to address the ball, make sure your weight is evenly distributed between both feet, with a slight bias towards the balls of your feet. This balanced stance allows for optimal weight transfer and helps prevent early extension. Being aware of your balance throughout the swing and ensuring it remains stable can greatly improve your ball-striking ability and reduce the risk of early extension.

Practice Weight Transfer Drills

Proper weight transfer is a key component of a powerful and well-executed golf swing. Engaging in weight transfer drills can help train your body to shift weight effectively and prevent early extension. One effective drill is the “step-through” drill, where you practice shifting your weight from your back foot to your front foot during the downswing. Another helpful drill is hitting balls with your feet close together, forcing you to focus on proper weight transfer and balance. By practicing weight transfer drills, you can develop a more fluid and connected swing, minimizing the chances of early extension.

Maintain a Smooth Tempo

Avoid Rushing the Downswing

Maintaining a smooth and controlled tempo throughout the golf swing is essential for both accuracy and preventing early extension. Many golfers make the mistake of rushing their downswing, resulting in a loss of balance and an increased likelihood of early extension. Focus on maintaining a consistent and deliberate pace throughout your swing, with a smooth transition from backswing to downswing. By avoiding the urge to rush, you can maintain proper sequencing and avoid early extension, leading to improved swing mechanics and more consistent ball striking.

Focus on Smooth Transitions

Smooth transitions between the different phases of the golf swing are important for maintaining rhythm and preventing early extension. Pay attention to the transition from the backswing to the downswing, ensuring it is fluid and controlled. A jerky or abrupt transition can disrupt the sequencing of your swing and contribute to early extension. Practice drills such as pausing at the top of your backswing before initiating the downswing to promote a smoother transition. By focusing on smooth transitions, you can maintain a consistent swing plane and reduce the likelihood of early extension.

Use the Right Clubs

Ensure Proper Club Length and Lie Angle

Using clubs that are properly fitted to your body and swing characteristics is crucial for preventing early extension. Clubs that are too long or have incorrect lie angles can lead to compensations in your swing mechanics and increase the chances of early extension. Visit a professional club fitter to ensure that your clubs are the correct length and lie angle for your height, arm length, and swing style. By using properly fitted clubs, you can optimize your swing mechanics and reduce the risk of early extension.

Get Custom-Fitted Clubs

For even more precise and tailored equipment, consider investing in custom-fitted clubs. Working with a professional club fitter who can analyze your swing and make adjustments to the club specifications can greatly enhance your ability to prevent early extension. Custom-fitted clubs take into account factors such as grip size, shaft flex, and clubhead design, ensuring that you have the best possible equipment to support your swing mechanics. By using custom-fitted clubs, you can optimize your performance and reduce the likelihood of early extension.

Develop a Solid Impact Position

Focus on the Correct Ball Position

The position of the golf ball in relation to your stance can greatly impact your ability to prevent early extension. Placing the ball too far back in your stance can encourage a steep swing plane and result in early extension. Conversely, placing the ball too far forward in your stance can lead to a shallow swing plane and loss of balance. Aim to position the ball slightly forward of center in your stance to promote optimal ball contact and prevent early extension. By focusing on the correct ball position, you can maintain a more stable swing and improve your ball-striking consistency.

Strike the Ball with a Forward Shaft Lean

During impact, it is important to maintain a forward shaft lean, with your hands leading the clubhead. This forward shaft lean helps ensure a downward strike on the ball and prevents the club from flipping or scooping at impact, which can lead to early extension. Focus on keeping your hands slightly ahead of the ball through impact, allowing for a crisp and solid strike. By developing a solid impact position and maintaining a forward shaft lean, you can minimize the risk of early extension and achieve improved ball flight and control.

Fix Swing Faults

Identify Swing Faults Leading to Early Extension

Early extension can be caused by various swing faults that disrupt the proper sequencing and mechanics of the swing. Common swing faults that contribute to early extension include an overactive lower body, a loss of posture, and an improper weight transfer. Pay attention to any tendencies or compensations you may have in your swing and identify specific faults that contribute to early extension. By recognizing and addressing these swing faults, you can make the necessary corrections to prevent early extension and improve your overall swing mechanics.

Work with a Golf Instructor to Correct Faults

Working with a knowledgeable golf instructor can greatly assist in identifying and correcting swing faults that lead to early extension. A qualified instructor can analyze your swing, pinpoint specific faults, and provide guidance on how to correct them. They may recommend specific drills, exercises, or swing modifications to address your swing faults and prevent early extension. By seeking professional instruction, you can receive personalized guidance and develop a plan to eliminate early extension from your swing, leading to improved consistency and performance on the golf course.

Practice with Alignment Aids

Utilize Alignment Sticks or Training Aids

Alignment aids, such as alignment sticks or training aids, can be valuable tools in preventing early extension. These aids help you establish proper alignment and promote a more efficient swing path. Placing alignment sticks on the ground can provide visual references for correct foot and shoulder alignment, helping you maintain a more stable and connected swing. Training aids designed specifically for early extension can provide additional feedback and help you develop the muscle memory needed to prevent this swing fault. By incorporating alignment aids into your practice routine, you can reinforce proper mechanics and reduce the chances of early extension.

Practice with a Mirror or Video Recording

Using a mirror or video recording during practice sessions can provide valuable feedback on your swing mechanics and help prevent early extension. Position yourself in front of a mirror or set up a camera to record your swing from different angles. Pay attention to your body movements and sequencing, specifically focusing on whether you maintain proper posture and avoid early extension. Analyzing your swing in a mirror or through video playback allows you to identify any faults or tendencies and make the necessary adjustments to prevent early extension. By regularly reviewing your swing, you can refine your mechanics and develop a more efficient and consistent golf swing.

Mental Approach and Visualization

Visualize a Controlled Swing

The mental aspect of golf is just as important as the physical. When it comes to preventing early extension, visualization can be a powerful tool. Before every shot, take a moment to visualize yourself swinging the club with a controlled and fluid motion. See yourself maintaining proper posture, shifting your weight smoothly, and avoiding any early extension. By visualizing a controlled swing, you can create a mental image of the desired outcome and reinforce the correct movements in your muscle memory. This positive visualization can help calm your mind, increase confidence, and reduce the likelihood of early extension.

Focus on Finishing the Swing in Balance

Maintaining balance throughout the swing is essential for preventing early extension. As you swing through the ball, make it a point to focus on finishing in a balanced position. Avoid any excessive weight shifts or body movements that can disrupt your balance and lead to early extension. Finish with your weight on your front foot, your hips facing the target, and your body in a stable and upright position. By consciously focusing on finishing the swing in balance, you can reinforce proper mechanics and significantly reduce the chances of early extension.

How to Determine the Year of Your Club Car Golf Cart

Learn how to determine the year of your Club Car golf cart with our simple guide. Locate the serial number, decode it, identify the model, examine the body style, analyze the engine, research historical changes, and consult experts. Double-check with multiple sources for accuracy.

Have you ever found yourself wondering about the year of your Club Car golf cart? Well, fret no more! In this article, we will guide you through a simple and easy process to determine the year of your beloved golf cart. Whether you’ve lost your documentation or just bought a pre-owned cart, we’ve got you covered. By following a few straightforward steps, you’ll soon have the answer to that burning question: “What year is my Club Car golf cart?”. So grab your golf cart keys and let’s get started!

How to Determine the Year of Your Club Car Golf Cart

1. Checking the Serial Number

1.1. Locating the Serial Number

When trying to determine the year of your Club Car golf cart, the first step is to locate the serial number. The Club Car serial number can typically be found in one of three main locations: under the passenger side glove box, on the steering column under the dashboard, or on the passenger side frame inside the engine compartment. Once you have located the serial number, you are ready to begin decoding it to determine the year of your golf cart.

1.2. Decoding the Serial Number

Decoding the serial number of your Club Car golf cart is the next step in identifying its year. The serial number is a combination of letters and numbers that provide important information about the cart. To decode the serial number, you will need to identify the first two letters, as they indicate the production year. For example, if the first two letters are “PG,” it indicates that the cart was manufactured in the year 2004. It’s essential to refer to a Club Car serial number guide or contact the manufacturer to ensure accuracy in decoding the serial number.

2. Identifying the Model

2.1. Locating the Model Number

Once you have determined the year of your Club Car golf cart using the serial number, the next step is to identify the model. The model number is crucial in understanding the specific features and characteristics of your golf cart. The model number can usually be found on a metal or plastic plate located either on the dash panel, on the passenger side glove box, or under the passenger side seat.

2.2. Understanding Model Number Codes

Club Car model number codes provide valuable information about the golf cart’s specifications. These codes consist of a combination of letters and numbers that represent various features, such as the type of body style, seating capacity, and electrical system. While the codes can vary depending on the specific model and year, referring to a Club Car model number guide or contacting the manufacturer will help you decode the model number and gain a better understanding of your golf cart.

3. Examining the Body Style

3.1. Differentiating Between Body Styles

To accurately determine the year of your Club Car golf cart, it’s important to examine the body style. Club Car offers various body styles for their golf carts, including DS, Precedent, and Tempo models, among others. Each body style has distinct design elements and characteristics that can help in identifying the year of manufacture. Pay attention to details such as headlights, taillights, and overall body shape to differentiate between different body styles.

3.2. Comparing Body Features

In addition to identifying the body style, comparing specific body features can also help in narrowing down the year of your Club Car golf cart. Look for any unique design elements or modifications that were introduced in particular years. For example, changes in the grille design, body molding, or windshield shape can often be indicators of a specific model year. By examining and comparing these body features, you can gather further clues to determine the year of your golf cart.

How to Determine the Year of Your Club Car Golf Cart

4. Analyzing the Engine

4.1. Determining the Engine Type

Another important aspect to consider when determining the year of your Club Car golf cart is the engine type. Different engine types were used in Club Car golf carts throughout the years, and identifying the engine type can help narrow down the manufacturing year. Locate the engine, typically located under the seat or in the front of the cart, and note any specific markings or labels. Compare these markings with the manufacturer’s records or consult a Club Car engine guide to determine the engine type and its corresponding years of use.

4.2. Matching Engine Specifications

Along with determining the engine type, matching the engine specifications can provide further insights into the year of your Club Car golf cart. Note any unique features, such as horsepower, fuel type, or additional components, that may vary between different models and manufacturing years. By studying the engine specifications and comparing them with the available records, you can gather additional information to help confirm the year of your golf cart.

5. Researching Club Car Golf Cart History

5.1. Identifying Historical Changes

To gain a deeper understanding of your Club Car golf cart’s year, it is essential to research the historical changes implemented by the manufacturer. Club Car has made various updates and enhancements to their golf carts over the years, including improvements to performance, design, and technology. By identifying these historical changes and their corresponding years, you can compare them to your cart and make an informed determination of its manufacturing year.

5.2. Consulting Manufacturer Resources

Club Car provides valuable resources for researching the history of their golf carts. Visit the official Club Car website and explore their archives, manuals, and documentation sections. These resources may contain information about specific models and their manufacturing years, making it easier to verify the year of your golf cart. Additionally, Club Car customer support can provide assistance and guidance in determining the year based on the cart’s features and specifications.

5.3. Seeking Assistance from Club Car

If you are still unsure about the year of your Club Car golf cart, don’t hesitate to seek assistance from Club Car directly. Contact their customer support or reach out to a local Club Car authorized dealer. They have access to comprehensive databases and historical records that can accurately determine the year of your cart. Provide them with the necessary information, such as the serial number, model number, and any other identifying features, to aid in their analysis and verification process.

6. Reviewing Purchase Documents

6.1. Checking Owner’s Manual or Documentation

If you have the original owner’s manual or any other documentation related to your Club Car golf cart, review these materials for any indications of the manufacturing year. The owner’s manual often contains details about specific models and may include a section dedicated to identifying the year of manufacture. Pay attention to any dates mentioned or model-specific details that can help you determine the year with more certainty.

6.2. Contacting Previous Owners or Dealerships

If you purchased a used Club Car golf cart and have contact information for previous owners or dealerships, consider reaching out to them for additional information. They may possess knowledge about the cart’s history, including its manufacturing year. Previous owners may have documentation or recall specific details that can assist in verifying the year. Likewise, dealerships may have access to sales records or be familiar with the product line to provide additional insights.

7. Utilizing Online Resources

7.1. Exploring Club Car Communities and Forums

Online communities and forums dedicated to Club Car golf carts can be a valuable resource in determining the year of your cart. Join these communities and engage with fellow Club Car owners who may have experience in identifying specific models and their manufacturing years. Share pictures and details of your golf cart to seek input and assistance from knowledgeable enthusiasts who can provide insights based on their firsthand experiences.

7.2. Visiting Club Car’s Official Website

In addition to consulting Club Car’s historical resources, visiting their official website can provide further information on specific models and years. Manufacturer websites often have comprehensive product archives that include details about past models, years of production, and any notable updates or changes. Utilize the search function on the website to find information related to your specific model and narrow down the list of possible manufacturing years.

8. Consulting Golf Cart Experts

8.1. Seeking Help from Golf Cart Mechanics

Golf cart mechanics and technicians who specialize in Club Car vehicles can offer valuable insights into determining the year of your golf cart. These experts have in-depth knowledge about the different models, their manufacturing years, and the specific features that differentiate them. Schedule a visit to a reputable golf cart repair shop or reach out to a knowledgeable mechanic to discuss your golf cart and gather their professional opinion on its manufacturing year.

8.2. Contacting Club Car Authorized Dealers

Club Car authorized dealerships have extensive knowledge of Club Car golf carts and can provide accurate information about their various models and manufacturing years. Contact one of these dealerships and provide them with the necessary details, such as the serial number, model number, and any other identifying features. They can access manufacturer databases and historical records to pinpoint the year of your golf cart and provide you with the most reliable information.

9. Considering Additional Indicators

9.1. Examining Serial Number Stickers

In some cases, Club Car golf carts may have additional serial number stickers or tags that can provide clues about the manufacturing year. These stickers may be located in unexpected places, such as under the seat, inside the battery compartment, or on the frame. Take a thorough look at your golf cart, paying close attention to areas where stickers or tags may be attached. Note any numbers, codes, or dates mentioned on these stickers, and cross-reference them with manufacturer resources or consult an expert for further analysis.

9.2. Assessing Technology and Features

Technological advancements and updated features can also be indicators of the manufacturing year of your Club Car golf cart. Consider the presence of features such as regenerative braking, programmable speed settings, or advanced GPS systems, as these are typically introduced in more recent models. Compare the technology and features on your golf cart with the historical timeline of Club Car’s innovations to gain insights into the approximate manufacturing year.

10. Recapping and Verifying Year

10.1. Summarizing the Findings

After conducting a comprehensive analysis using various methods and resources, it’s time to summarize the findings. Compile the information gathered from checking the serial number, identifying the model, examining the body style, analyzing the engine, researching historical changes, reviewing purchase documents, utilizing online resources, consulting experts, and considering additional indicators. Take note of the most significant clues and evidence that point to a specific manufacturing year for your Club Car golf cart.

10.2. Double-Checking with Multiple Sources

To ensure the accuracy of your determination, double-check it with multiple sources. Compare the findings from your research with information obtained from the manufacturer, authorized dealerships, and reputable experts. Verify the serial number decoding, model number identification, body style assessment, engine analysis, and any other information you have gathered. By cross-referencing the findings, you can confidently validate the manufacturing year of your Club Car golf cart.

Understanding the Concept of a Barranca in Golf

Discover the meaning and significance of barrancas in golf. Learn how they impact strategy, shot selection, and overall gameplay for a challenging experience.

Have you ever wondered what a barranca in golf is? Whether you’re a novice or an experienced golfer, understanding the concept of a barranca is crucial to navigating the course successfully. Essentially, a barranca is a natural or man-made trench or ravine that runs alongside a fairway, posing a challenge for golfers. It can significantly impact your strategy and shot selection, forcing you to carefully consider your approach to each hole. By familiarizing yourself with the concept of a barranca, you can better navigate the course and enhance your overall golfing experience.

Understanding the Concept of a Barranca in Golf

Understanding the Concept of a Barranca in Golf

Golf courses are known for their unique features, and one such feature that adds both beauty and challenge to the game is a barranca. Whether you’re an avid golfer or just starting to explore the world of golf, understanding the concept of a barranca is key to appreciating its role in golf course design and gameplay. In this article, we will delve into the definition of a barranca, its origin, types found on golf courses, its role in golf course design, the challenges it presents, strategies for playing shots from a barranca, common mistakes to avoid, famous golf courses with barrancas, and the environmental and conservation considerations associated with barrancas in golf.

Definition of a Barranca

What is a Barranca?

A barranca refers to a deep and steep-sided gully or ravine that is commonly found on golf courses. Also known as a dry creek bed or arroyo, a barranca is often formed by erosion, creating a picturesque landscape feature. It serves as a natural hazard that golfers must navigate around or over in order to reach the green.

Physical Characteristics of a Barranca

Barrancas vary in size and shape, but they commonly have steep sides and rugged terrain. They can be wide or narrow, shallow or deep, and may meander throughout the golf course, creating unique challenges for players. Grass, rocks, and other vegetation may line the edges of a barranca, adding to its visual appeal.

Different Names for Similar Features in Golf

While barranca is a commonly used term, similar features on golf courses may have different names in different regions. In some places, golf courses may refer to these features as creeks or ravines. The terminology may vary, but the concept remains the same: a natural or man-made hazard that poses a challenge to golfers.

Barranca vs. Creek vs. Ravine

Although barranca, creek, and ravine are terms that are sometimes used interchangeably, there are subtle distinctions between them. A barranca is typically a dry watercourse, while a creek refers to a flowing body of water. On the other hand, a ravine is a deep, narrow valley with steeper sides than a barranca. While the exact terminology used may differ from course to course, the presence of any of these features can make a significant impact on a golfer’s game.

Origin of the Term ‘Barranca’

Etymology of the Word

The term “barranca” originates from Spanish, where it refers to a deep gorge or ravine. The word has its roots in the Latin word “barranca,” which means “precipice” or “steep slope.” The Spanish influence on golf course design and architecture, particularly in regions where the terrain is rugged, has led to the adoption of the term to describe these distinctive features.

Historical Usage of the Term

The term barranca has its origins in Spanish-speaking regions where golf became popular. The word has been used for centuries to describe steep-sided landforms, particularly in regions with arid or mountainous landscapes. As golf spread to different parts of the world, the term was adopted to describe similar features found on golf courses, paying homage to the shared heritage and history of the sport.

Geographic Origins of Barrancas in Golf

The geographic origins of barrancas in golf can be traced back to courses located in regions where the terrain naturally features steep gullies or ravines. Courses in countries such as Spain, Mexico, and the southwestern United States, where barrancas are common geological formations, often incorporate these features into their designs. As golf’s popularity grew, the term barranca became more widely recognized globally in association with these distinctive landscape features.

Understanding the Concept of a Barranca in Golf

Types of Barrancas on Golf Courses

Natural Barrancas

Natural barrancas are those that are formed over time due to natural processes such as erosion and the movement of water. These barrancas are often found in regions with rugged landscapes, where the natural topography features deep gullies or ravines. Natural barrancas can add a sense of authenticity and challenge to a golf course, as they integrate seamlessly with the surrounding environment.

Man-Made or Artificial Barrancas

On some golf courses, man-made or artificial barrancas are created to enhance the design and challenge of the course. These barrancas are typically excavated or constructed to mimic the appearance and function of natural barrancas. While they may lack the same geological origins as natural barrancas, they can still pose significant challenges to golfers, requiring careful shot selection and strategic play.

Different Shapes and Sizes of Barrancas

Barrancas come in various shapes and sizes, which adds to the diversity and complexity of golf course design. Some barrancas may be long and winding, stretching across multiple holes, while others may be short and concentrated in a particular area of the course. They can also vary in width and depth, with some barrancas being wide enough to pose challenges to shots from multiple directions, while others may be narrow and require precise shot placement.

Barrancas as Hazardous Areas

Barrancas are considered hazardous areas on a golf course due to their steep sides and rugged features. Golfers must navigate these hazards carefully to avoid losing their ball or incurring penalty strokes. The presence of a barranca near a fairway or green can greatly influence a player’s strategy, requiring them to make accurate shot choices to successfully negotiate the hazard and continue play.

Role of a Barranca in Golf Course Design

Strategic Placement of Barrancas

Barrancas play a strategic role in golf course design by influencing shot placement and decision-making. They are often strategically placed near fairways, greens, or at strategic distances from tee boxes to add challenge and variety to the course. The proper placement of barrancas can force golfers to carefully consider their shot selection and technique, adding an element of risk-reward to each hole.

Aesthetic Considerations of Barrancas

In addition to their strategic importance, barrancas also contribute to the visual appeal of a golf course. The rugged and natural beauty of a barranca can enhance the overall aesthetic of the course, providing a unique and picturesque backdrop. Golfers are not only treated to a challenging playing experience but also have the opportunity to enjoy the natural beauty of their surroundings.

Impact on Golf Course Difficulty

Barrancas have a significant impact on the difficulty of a golf course. They require golfers to adapt their gameplay strategies and execute precise shots to avoid them or recover from errant shots that end up in the barranca. Their presence can increase the course’s overall difficulty, making it an exciting challenge for golfers of all skill levels.

Integration of Barrancas with Other Course Features

Barrancas are often integrated with other course features, such as bunkers, water hazards, and trees, to create a diverse and strategic playing experience. The combination of these features can test a golfer’s skills across multiple dimensions, requiring them to use a variety of shots and strategies to navigate each hole successfully. The integration of barrancas with other features adds further complexity and excitement to the game.

Challenges Presented by Barrancas

Effect on Shots and Ball Flight

Barrancas can have a significant impact on the flight and trajectory of a golf ball. Shots played over or near a barranca require precise distance control and shot shaping to avoid landing in the hazard. The steep sides and rugged terrain of a barranca can make recovery shots challenging, necessitating golfers to execute complex shots to escape from their perilous position.

Recovery Options from a Barranca

When a golfer finds themselves in a barranca, their recovery options are limited. Depending on the nature and depth of the barranca, attempting to play the ball directly out of the hazard may be impossible or result in further trouble. Golfers may need to consider different recovery options, such as taking an unplayable lie, pitching out to a safe area, or even taking a penalty stroke and repositioning themselves back in play.

Risk-Reward Decision-Making

Barrancas pose a risk-reward decision-making challenge for golfers. Whether to play safe and avoid the barranca altogether or take a more aggressive line to gain a potentially advantageous position is a constant dilemma. These decisions often depend on a golfer’s skill level, confidence, and the specific circumstances of the shot and hole. The presence of a barranca can add a strategic element to the game, forcing golfers to evaluate their options carefully and make bold choices.

Psychological Impact of Barrancas on Players

Barrancas have a psychological impact on players, primarily due to the potential consequences they present. The fear of landing in a barranca can lead to increased pressure and anxiety, affecting a golfer’s focus and decision-making abilities. Successful navigation of barrancas requires mental strength and confidence, as players must trust their abilities and commit fully to their shots.

Strategies for Playing Shots from a Barranca

Assessing the Situation

When faced with a shot from a barranca, it is crucial to assess the situation thoroughly. Evaluate the depth, width, and slope of the barranca, as well as the lie and position of the ball. Consider the available recovery options and potential risks associated with each. By carefully analyzing the situation, you can make an informed decision regarding the best course of action.

Club Selection Considerations

Club selection is critical when playing shots from a barranca. Consider the distance to the target, the severity of the barranca, and any slope or elevation changes. Depending on the situation, you may opt for a lower lofted club to minimize the risk of the ball catching the lip of the barranca or a higher lofted club to clear a significant obstacle. Choose a club that will allow you to execute the desired shot with confidence.

Shotmaking Techniques

Different shotmaking techniques can be employed when attempting to play a shot from a barranca. Consider factors such as the lie, slope, and distance to determine the most suitable shot type. A punch shot, for example, may be necessary to control the trajectory and keep the ball low if there are overhanging branches or a steep rise out of the barranca. Practice a variety of shotmaking techniques to develop a versatile skillset for navigating barrancas.

Optimal Shot Trajectories

The trajectory of a shot from a barranca plays a crucial role in its success. When attempting to clear a barranca, aim for a slightly higher trajectory to ensure ample clearance. Avoid hitting the ball too low, as it may not clear the hazard, or too high, as it may reduce distance and potentially result in a mishit. Practice controlling the trajectory of your shots to increase your chances of a successful outcome.

Common Mistakes to Avoid when Dealing with a Barranca

Misjudging Distance and Elevation

One common mistake when dealing with a barranca is misjudging the distance and elevation required to clear the hazard. Overestimating or underestimating the distance can result in the ball falling short or overshooting the intended target. Similarly, misjudging the elevation of the barranca can lead to ineffective shot selection and execution. Take the time to assess these factors accurately to avoid costly errors.

Choosing the Wrong Shot Option

Another mistake golfers often make is choosing the wrong shot option when faced with a barranca. It is essential to evaluate the available recovery options and the potential risks associated with each. Opting for a high-risk shot when a safer alternative is available can lead to further trouble. Be rational and select the shot that offers the best chance of advancing the ball and minimizing potential penalties.

Neglecting the Course Conditions

Neglecting the course conditions, particularly those around the barranca, can lead to undesirable outcomes. Take into account factors such as wind direction, slope steepness, and the firmness of the ground. Wind direction and slope can influence the flight and trajectory of the ball, affecting the outcome of your shot. Firmness of the ground can impact bounce and rollout and may require adjustments to your shot strategy.

Ignoring Escape Routes

Failing to consider available escape routes from a barranca can limit your recovery options. Take note of any openings, low points, or areas with less severe slopes that may allow you to navigate the hazard more easily. By identifying potential escape routes, you can increase your chances of executing a successful recovery shot and minimizing the overall impact of the barranca on your score.

Famous Golf Courses with Barrancas

Augusta National Golf Club’s Barranca on Hole 10

Augusta National Golf Club in Augusta, Georgia, is renowned for its stunning barranca on Hole 10, commonly known as “Camellia.” The barranca guards the left side of the fairway and creates a strategic challenge for players off the tee. Golfers must carefully navigate their drives to avoid landing in the barranca, as it can significantly impact their chances of reaching the green in regulation.

Pebble Beach Golf Links’ Barranca on Hole 18

Pebble Beach Golf Links, located along the scenic California coastline, features a memorable barranca on Hole 18. Golfers face the challenge of carrying the barranca with their tee shot to set up an approach to the iconic 18th green. With the breathtaking Pacific Ocean as the backdrop, the barranca adds to the drama and difficulty of the closing hole.

St. Andrews Links’ Barrancas on Holes 1 and 17

St. Andrews Links, often referred to as the “Home of Golf,” showcases barrancas on several of its renowned holes. The most notable barrancas can be found on Holes 1 and 17, famous for their historical and strategic significance. Golfers must navigate the barrancas to position themselves for optimal approach shots, showcasing the design ingenuity and challenge that St. Andrews is known for.

Cypress Point Club’s Barrancas on Multiple Holes

Cypress Point Club, located in Pebble Beach, California, is lauded for its captivating barrancas that are intricately woven throughout the course. The barrancas on Holes 6, 11, 14, and 15 add a unique character to the layout and test players’ abilities to handle the challenges presented by these deep ravines. Cypress Point’s barrancas offer breathtaking views and thrilling shot opportunities.

Environmental and Conservation Considerations of Barrancas in Golf

Preservation of Natural Barrancas

Preserving natural barrancas on golf courses is essential to maintain the ecological balance and integrity of these unique landforms. Golf course architects and environmentalists work together to ensure that the construction and maintenance of the course do not harm or disturb the natural barrancas. This includes implementing measures to prevent erosion and sedimentation, as well as preserving the native vegetation surrounding the barrancas.

Ecological Impact of Man-Made Barrancas

While man-made or artificial barrancas can add interest and challenge to a golf course, it is crucial to consider their ecological impact. Construction activities associated with man-made barrancas must be conducted with sensitivity to the environment, minimizing disturbances to the natural habitat and vegetation. Proper landscaping and water management practices around man-made barrancas can help mitigate potential adverse effects on local ecosystems.

Mitigation Strategies for Minimizing Environmental Damage

Golf course designers and managers employ various mitigation strategies to minimize the environmental damage caused by barrancas. These strategies may include implementing erosion control measures, reestablishing native vegetation, and utilizing sustainable water management practices near barrancas. By prioritizing environmental conservation and sustainability, golf courses can ensure that barrancas continue to exist harmoniously within the natural landscape.

Promotion of Sustainability in Golf Course Design

As awareness of environmental issues continues to grow, golf course design and management are increasingly emphasizing sustainability. This includes thoughtful consideration of features such as barrancas to ensure that they are incorporated in a manner that aligns with ecological principles. By actively promoting sustainability in golf course design, the golf industry can contribute to the preservation and restoration of natural landscapes, including barrancas.

In conclusion, understanding the concept of a barranca in golf is vital for golfers and enthusiasts alike. From its definition to its origin, types, role in golf course design, challenges it presents, strategies for playing shots from a barranca, common mistakes to avoid, and famous golf courses with barrancas, this article has provided a comprehensive overview of this intriguing golf course feature. Additionally, the environmental and conservation considerations associated with barrancas highlight the need to balance golf course development with ecological preservation. So next time you find yourself on a golf course with a barranca, you’ll have a deeper appreciation for the unique challenges and beauty it brings to the game.

Understanding the Charging Time for Golf Carts

Learn about the factors that affect the charging time for golf carts. Understand battery types, capacity, state of charge, and charger types. Optimize your charging routine for faster and efficient charging.

Imagine you’re out on the golf course, enjoying a day of leisurely rounds with friends. Suddenly, your trusty golf cart starts to slow down, its battery drained. You’re faced with the dilemma of waiting for it to charge, but how long will that take? In this article, we will delve into the world of golf cart charging time, exploring the factors that affect it, and providing you with the knowledge you need to make informed decisions about getting back on the green. So, let’s take a closer look at understanding the charging time for golf carts.

Understanding the Charging Time for Golf Carts

Factors Affecting Charging Time

When it comes to charging your golf cart, several factors can affect the charging time. Understanding these factors can help you plan your charging routine more effectively and optimize the charging process for your cart. The key factors that influence the charging time include the battery type, battery capacity, state of charge, and charger type. Let’s dive deeper into each of these factors to gain a better understanding.

Battery Type

The type of battery used in your golf cart can significantly impact the charging time. There are primarily two types of batteries commonly used in golf carts: lead-acid batteries and lithium-ion batteries.

Lead-Acid Batteries

Lead-acid batteries have been the industry standard for golf carts for many years. These batteries are known for their durability and affordability. However, they tend to have longer charging times compared to other battery types. Charging a lead-acid battery typically takes anywhere from 8 to 12 hours.

Lithium-Ion Batteries

On the other hand, lithium-ion batteries are gaining popularity in the golf cart industry due to their fast-charging capabilities. These batteries offer a significant reduction in charging time compared to lead-acid batteries. With the right charger, you can charge a lithium-ion battery in as little as 2 to 4 hours.

Battery Capacity

The capacity of your golf cart battery also plays a crucial role in determining the charging time. Battery capacity is typically measured in voltage and amp-hour (Ah) rating.

Voltage

The voltage of the battery indicates its power capacity. Golf carts usually operate on a 36-volt or 48-volt system. Higher voltage batteries tend to charge faster due to their increased power output.

Amp-Hour (Ah) Rating

The amp-hour rating of a battery indicates how much charge it can hold. A higher Ah rating means a larger capacity battery, which may require additional time to fully charge.

Understanding the Charging Time for Golf Carts

State of Charge

The state of charge refers to the amount of charge remaining in your golf cart battery. Two factors affecting the state of charge are the initial charge and the depth of discharge.

Initial Charge

When you initially install a new battery or fully charge a discharged battery, it usually takes longer to complete the charging process. This is because the battery needs to reach its maximum capacity, which can take several hours.

Depth of Discharge

The more deeply discharged your battery is, the longer it will take to recharge. If you frequently run your golf cart until the battery is almost fully depleted, it may take longer to charge back to its full capacity.

Charger Type

The type of charger you use for your golf cart also affects the charging time. There are two main types of chargers: onboard chargers and portable chargers.

Onboard Chargers

Onboard chargers are built into the golf cart and are typically designed to match the battery’s specifications. These chargers are convenient as they are always present and ready to use. However, they may have limitations in terms of charging speed compared to portable chargers.

Portable Chargers

Portable chargers, also known as external or aftermarket chargers, can be connected to your golf cart when needed. These chargers provide more flexibility in terms of charging speed and can often charge the batteries faster than onboard chargers.

Charging Methods

Golf carts can be charged using two main methods: standard charging and fast charging. Each method has its own set of considerations and implications on the charging time.

Standard Charging

Standard charging is the conventional method used for charging golf cart batteries. It involves connecting the charger to the battery and allowing it to charge gradually over a specified period. The charging time for standard charging depends on various factors, including battery type, capacity, and charger specifications.

Fast Charging

Fast charging, as the name suggests, allows for a quicker recharge of your golf cart battery. This method utilizes specialized chargers that deliver a higher current to the battery, allowing it to charge at a faster rate. While fast charging can significantly reduce the charging time, it may have an impact on the long-term health and lifespan of the battery.

Standard Charging

Standard charging is the most commonly used method for charging golf cart batteries. It offers a safe and reliable way to charge your battery without putting excessive stress on its components. The following considerations are important when using standard charging:

Charging Time

The charging time for standard charging can vary depending on the battery type, capacity, and charger specifications. On average, standard charging can take anywhere from 8 to 12 hours for lead-acid batteries, while lithium-ion batteries may require 2 to 4 hours.

Charger Specifications

Using the right charger with the correct voltage and charging capacity is essential for standard charging. Consult your golf cart’s manufacturer guidelines to ensure you are using a charger compatible with your battery’s specifications.

Maintenance and Safety Considerations

During standard charging, it is important to monitor the charging process and ensure proper ventilation. Regular maintenance of the battery, including checking for any signs of damage or corrosion, is crucial for optimal performance and safety.

Fast Charging

If you are looking to reduce your charging time significantly, fast charging may be an option worth considering. However, it is important to understand the implications before using this method.

Charging Time

Fast charging can complete the charging process in a fraction of the time required for standard charging. With the right equipment and charger, you can charge your lead-acid battery in 4 to 6 hours, while lithium-ion batteries may reach full charge in just 1 to 2 hours.

Charger Specifications

Fast charging requires specialized chargers capable of delivering higher current levels. Using a charger with the wrong specifications can damage the battery or pose safety risks. Make sure to use a fast charger recommended by your golf cart manufacturer.

Impact on Battery Life

Although fast charging offers shorter charging times, it may have an impact on the overall lifespan and health of the battery. Fast charging generates more heat and can cause accelerated wear on the battery’s components. It is important to weigh the benefits of reduced charging time against the potential long-term effects on your battery.

Tips to Reduce Charging Time

If you are looking for ways to further reduce your golf cart charging time, consider the following tips:

Optimizing Battery Usage

Efficiently using your golf cart’s battery can help extend its charge and reduce the frequency of charging. Avoiding unnecessary stops and optimizing your driving habits can help maximize your battery’s capacity, resulting in longer durations between charges.

Using Higher Capacity Chargers

Using a charger with a higher charging capacity can significantly reduce the charging time. However, it is important to ensure that the charger is compatible with your battery’s specifications and won’t cause any damage.

Avoiding Overcharging

Overcharging your golf cart battery can lead to decreased performance and increased wear. Avoid leaving your battery on charge for extended periods once it reaches full capacity. Disconnecting the charger once the battery is charged will help maintain its health and prolong its lifespan.

Conclusion

Understanding the factors affecting the charging time of your golf cart battery is crucial for efficient and effective charging. Factors such as battery type, capacity, state of charge, and charger type all play a role in determining the duration of the charging process. By considering these factors and following the tips provided, you can optimize your charging routine, reduce charging time, and ensure optimal performance from your golf cart battery.

Is Sam Ryder a Married Golfer?

Curious about Sam Ryder’s marital status? This article reveals whether the skilled golfer is married or not. Find out now!

Curious to know if Sam Ryder, the skilled golfer, has tied the knot? Wonder no more! This article uncovers whether or not Sam Ryder is a married man.

Is Sam Ryder a Married Golfer?

Background

Sam Ryder, the talented golfer, has had a remarkable journey that shaped him into the champion he is today. Born and raised in a small town, he discovered his passion for golf at an early age and dedicated himself to honing his skills. With unwavering determination and countless hours of practice, Sam set forth on a path that would lead him to great accomplishments in the world of golf.

Early Life

Growing up in a golf-centric family, Sam Ryder was exposed to the sport from a young age. His parents, avid golfers themselves, recognized his natural talent and nurtured his passion. They provided him with ample opportunities to play and compete, allowing him to develop his skills and foster his love for the game. Sam’s early life revolved around golf, laying the foundation for his future success.

Golf Career

Sam Ryder’s golf career is nothing short of extraordinary. With an unwavering dedication to his craft, he has risen through the ranks and established himself as a force to be reckoned with in the golfing world. His promising talent propelled him to various tournaments and championships, where he showcased his skills and impressed both fans and fellow golfers. Sam’s professional career has been marked by consistent improvement, displaying his unwavering commitment to the sport he loves.

Achievements

Throughout his golfing journey, Sam Ryder has racked up an impressive list of achievements. He has clinched multiple tournament victories, each one a testament to his skill and determination on the fairway. Sam’s unwavering focus, coupled with his natural talent, has earned him the respect and admiration of both fans and peers alike. These accomplishments serve as a testament to Sam’s immense talent and set him apart as a golfer to watch in the years to come.

Personal Life

Beyond his successful golfing career, Sam Ryder’s personal life is a subject of intrigue and curiosity for fans and the media alike. While he is widely recognized for his skills on the course, his personal life often garners attention and speculation.

Marital Status

One question that frequently arises when discussing Sam Ryder is his marital status. As a private individual, Sam has chosen to keep his personal life out of the spotlight, and his marital status remains undisclosed. While fans are naturally curious about this aspect of his life, it is essential to respect his boundaries and understand that his personal choices are not obligated to be public knowledge.

Rumors and Speculations

As with any public figure, rumors and speculations concerning Sam Ryder’s personal life have arisen over the years. These rumors, often spread by gossip columns or online forums, should be taken with a grain of salt. It is crucial to remember that rumors are not necessarily reflective of the truth, and should not be regarded as such. Speculations about Sam’s marital status or personal relationships should be approached with caution and a healthy dose of skepticism.

Relationship Status

Although Sam Ryder’s personal life is predominantly private, his fans cannot help but wonder about his relationship status, fueling their curiosity and desire to know more about his romantic life.

Current Relationship

As an individual who values his privacy, details about Sam Ryder’s current relationship, if indeed he is in one, remain undisclosed. Sam has chosen to keep his personal life separate from his professional endeavors, allowing him to focus on his golfing career without unnecessary distractions. It is important to respect and appreciate his desire for privacy, as this is indicative of his commitment to the sport that has brought him immense success.

Past Relationships

In the realm of past relationships, Sam Ryder remains private and rarely discusses his romantic history. While fans may be curious about his past partners, it is important to recognize that his personal life is entirely his own. Speculating or prying into his past relationships is an invasion of privacy and detracts from the primary focus – his remarkable golfing career.

Family

Behind every successful individual is a supportive and loving family, and Sam Ryder is no exception. His family has played a vital role in his journey, offering unconditional support and encouragement throughout his rise to prominence in the golfing world.

Spouse

As mentioned earlier, information concerning Sam Ryder’s marital status is not readily available. Therefore, his spouse, if he is indeed married, remains discreetly out of the public eye. It is admirable that Sam has managed to maintain his personal life separate from his professional endeavors, ensuring that his golfing career takes center stage.

Children

Similarly, discussions regarding Sam Ryder’s children, if any, remain off-limits to the public. The privacy he maintains surrounding his personal life demonstrates his commitment to keeping his family out of the media spotlight, shielding them from unnecessary attention.

Is Sam Ryder a Married Golfer?

Parents

Sam Ryder’s unwavering passion for golf was fostered by his supportive and golf-loving parents. Their belief in his abilities and their dedication to nurturing his talent paved the way for his successful career. While specific details about Sam’s parents are limited, it is evident that their unwavering support has been instrumental in shaping him into the accomplished golfer he is today.

Siblings

Information regarding Sam Ryder’s siblings, if he has any, is scarce. Like his parents and other aspects of his personal life, Sam has chosen to keep his relationship with his siblings private. This decision allows him to maintain a sense of normalcy and separation between his professional and personal spheres.

Public Appearances

As a prominent figure in the golfing world, Sam Ryder is no stranger to public appearances. From red carpet events to charity functions, he understands the significance of giving back and engaging with his fans outside of the golf course.

Red Carpet Events

Occasionally, Sam Ryder finds himself in the spotlight at red carpet events. These glamorous occasions provide an opportunity for him to showcase his suave style and charm. While attending such events, Sam remains affable and approachable, engaging with fans and fellow attendees alike. His presence on the red carpet exudes a sense of confidence and self-assuredness, befitting of a prominent figure in the golfing industry.

Charity Functions

In addition to red carpet events, Sam Ryder actively participates in various charity functions. Giving back to the community has always been close to his heart, and he utilizes his platform to raise awareness and funds for causes that are important to him. Sam’s involvement in charitable endeavors demonstrates his genuine care and concern for others, and his dedication to making a positive impact beyond the golf course.

Social Media Presence

While Sam Ryder values his privacy, he understands the importance of connecting with fans and engaging with them on social media platforms. He maintains a limited yet interactive presence on popular platforms such as Instagram, Twitter, and Facebook.

Instagram

Sam Ryder’s Instagram account offers fans a glimpse into his golfing journey and highlights various aspects of his life. From breathtaking golf courses to behind-the-scenes snapshots, his Instagram feed provides an intimate look into his world. Sam frequently shares his thoughts, milestones, and occasionally interacts with fans through comments and direct messages, fostering a sense of connection with his dedicated followers.

Twitter

Sam Ryder’s Twitter presence is marked by his witty banter and occasional reflections on his golfing career. On this platform, he shares his thoughts and engages in light-hearted discussions with fans, further establishing his relatability. While he maintains a measured approach to social media, Sam understands the importance of keeping fans informed and entertained through his Twitter feed.

Facebook

Sam Ryder’s Facebook page serves as a hub for his fans to gather and stay updated on his latest achievements and endeavors. While not as interactive as his other social media platforms, his Facebook page provides regular updates, showcasing his dedication to the sport and his appreciation for the support he receives from his fans.

Fan Reactions

As an accomplished golfer, Sam Ryder enjoys a dedicated fan base that never fails to show their support and admiration. These fan reactions range from enthusiastic encouragement to intense speculation about every aspect of his life, further solidifying his status as a beloved figure in the golfing community.

Support and Encouragement

Sam Ryder’s fans are unwavering in their support, offering him encouragement and cheering him on throughout his golfing journey. They celebrate his victories and motivate him during challenging times, showcasing their loyalty and belief in his abilities. This outpouring of support serves as a reminder to Sam that he is not alone and that his fans are behind him every step of the way.

Speculations and Curiosity

With fame comes curiosity, and Sam Ryder’s fans and the public at large are not immune to this. Speculations concerning his personal life, including his relationship status, often circulate. However, it is crucial to remember that personal matters should be respected, and speculation should not overshadow the incredible talent and achievements that define Sam’s golfing career.

Privacy and Media Coverage

For Sam Ryder, striking a balance between his public profile and personal life is essential. He takes great care to maintain his privacy, ensuring that his personal choices and relationships remain out of the media’s reach. However, navigating the realm of public figures often invites unwarranted attention and controversial media coverage.

Maintaining Privacy

Despite the invasive nature of public life, Sam Ryder manages to maintain his privacy with grace and determination. By setting clear boundaries and limiting the divulgence of personal information, he protects his personal life while nurturing his golfing career. This approach allows him to focus on his passion and maintain a sense of normalcy despite the public’s curiosity.

Controversial Coverage

Unfortunately, the media’s hunger for sensational stories occasionally leads to controversial coverage of public figures like Sam Ryder. In such instances, it is important for both fans and the media to exercise caution and empathy, recognizing that behind the public persona lies a private individual deserving of respect. Focusing on Sam’s achievements and contributions to the golfing world instead of scandalous rumors preserves the integrity of his career and emphasizes his impact on the sport.

Conclusion

As fans of Sam Ryder, it is natural to be curious about his personal life, including his marital status. However, it is vital to respect his privacy and understand that he has chosen to keep these aspects of his life separate from his professional endeavors. Instead, let us focus on celebrating his remarkable golfing career, applauding his achievements, and looking forward to his continued success on the fairway. Sam Ryder’s talent and dedication to the sport are what truly define him, making him a golfing icon worth admiring.

The Role of Golf in Marriage: Finding the Balance

Discover the delicate balance between golf and marriage. Learn how to strengthen your bond through shared interests and find harmony in your relationship.

Picture this: you and your spouse, both avid golfers, standing side by side on a picturesque golf course, enjoying a beautiful morning game together. The sun shines warmly, the birds chirp in the background, and the soft breeze whispers through the trees. It seems like the perfect way to spend quality time together, strengthening your bond through a shared love for the sport. But where do you draw the line between a healthy passion for golf and an obsession that might strain your marriage? In this article, we will explore the delicate balance between golf and marriage, and how finding the sweet spot can contribute to a thriving relationship.

The Role of Golf in Marriage: Finding the Balance

Introduction

Marriage is a beautiful journey filled with love, companionship, and shared interests. While every couple’s dynamic is unique, finding common hobbies and activities that both partners enjoy can strengthen the bond and create lasting memories. One such activity that has gained significant popularity among couples is golf. In this article, we will explore the significance of golf in a marriage, the benefits it can bring to couples, potential challenges that may arise, and strategies to find a balance between golf and marriage.

Understanding the Significance of Golf in a Marriage

The popularity of golf as a recreational activity

Golf is a sport that has attracted millions of enthusiasts around the world. Its appeal lies in the combination of physical and mental challenges, as well as the opportunity to spend time outdoors. In recent years, golf has not only become a favorite pastime for individuals but has also captured the attention of couples looking for a recreational activity they can enjoy together.

The impact of hobbies on relationships

Shared hobbies are known to enhance relationships by providing a common ground and fostering a sense of togetherness. Engaging in activities that both partners enjoy can create opportunities for meaningful interactions and create a deeper understanding and connection with each other. With its wide range of benefits, golf has emerged as a hobby that appeals to couples, offering an avenue for quality time and shared experiences.

Golf as a shared interest in a marriage

Having a shared interest, such as golf, in a marriage can have a significant positive impact. It not only provides an opportunity for couples to spend time together but also presents a chance to strengthen the emotional bond. The shared passion for golf can promote a sense of camaraderie and teamwork, creating a unique foundation for a thriving marriage.

The Benefits of Golf for Couples

Improving communication and bonding

Golf offers an excellent platform for couples to improve communication and foster a stronger bond. As partners navigate the course together, they must communicate effectively, assess the situation, and strategize their shots. This constant communication can enhance teamwork and problem-solving skills while also promoting trust and understanding between partners.

Promoting physical health and well-being

Engaging in physical activities is not only enjoyable but also plays a crucial role in maintaining good health. Golf, with its combination of walking, swinging, and carrying clubs, can provide a moderate workout for couples. Regular golf sessions can help improve cardiovascular health, increase flexibility, and enhance muscle strength. By pursuing this activity together, couples can motivate each other to prioritize physical well-being.

Reducing stress and enhancing relaxation

In today’s fast-paced world, stress has become a prevalent issue in many relationships. Golf provides a calm and serene environment, allowing couples to escape the demands of everyday life and focus on the game. The peaceful surroundings, coupled with the gentle exercise and concentration required, create a relaxing atmosphere that promotes stress relief and mental rejuvenation.

The Role of Golf in Marriage: Finding the Balance

Potential Challenges When Golf Plays a Major Role

Neglecting other aspects of the relationship

While golf can be a wonderful shared interest, it is essential to maintain a balance and ensure that it does not consume all aspects of the relationship. One potential challenge is the risk of neglecting other important areas, such as emotional intimacy or quality time spent outside of the golf course. It is crucial for couples to be mindful of maintaining a well-rounded connection beyond their shared interest in golf.

Financial implications and time commitments

Golf can become an expensive hobby, especially when considering club memberships, equipment, and greens fees. This financial aspect can put strain on a couple’s budget, potentially leading to conflicts or resentment if not managed effectively. Additionally, golf often requires a significant time commitment, which can create challenges if one partner feels neglected or desires more time spent on other activities or responsibilities.

Conflicting interests and priorities

While golf can be a shared passion, it is not uncommon for couples to have different preferences or priorities when it comes to recreational activities. This divergence in interests may lead to challenges in finding a balance between pursuing golf together and accommodating individual desires. It is important for couples to navigate these differences with open communication and mutual understanding.

Finding Balance in Golf and Marriage

Open and honest communication

Communication is the foundation of a healthy marriage. When golf plays a major role, it becomes even more crucial to openly discuss expectations, concerns, and desires regarding the involvement in the sport. Regular conversations about boundaries, time commitments, and the impact on other aspects of the relationship can help establish a balanced and harmonious approach to golf within the marriage.

Establishing boundaries and expectations

Establishing clear boundaries and expectations is vital to maintain balance in a marriage where golf is a significant component. Both partners should openly express their needs, concerns, and limitations regarding the time and resources dedicated to golf. By setting realistic boundaries, couples can ensure that their relationship remains a priority while still enjoying their shared interest.

Scheduling quality time and date nights

To maintain a healthy balance, it is essential for couples to schedule dedicated quality time and date nights that do not revolve around golf. This intentional effort ensures that both partners feel valued and allows for opportunities to nurture emotional intimacy outside the realm of golf. By prioritizing these moments, couples can strike a balance between their shared interest and the various other facets of their relationship.

Strategies for Couples to Enjoy Golf Together

Taking golf lessons together

Embarking on a shared journey of learning by taking golf lessons together can be a fantastic bonding experience for couples. Whether they are beginners or seasoned players, the process of acquiring new skills and improving together can create a sense of shared accomplishment. It also allows for regular time spent together while pursuing a common goal, further deepening the connection within the marriage.

Planning golf trips and vacations

Golf trips and vacations offer couples a chance to combine their love for each other and the sport. Exploring new golf courses, enjoying beautiful surroundings, and experiencing the excitement of playing on different terrains can create unforgettable memories. By incorporating golf into their travel plans, couples can experience adventure, relaxation, and quality time all at once.

Participating in couples or mixed-gender golf events

Many golf clubs and organizations organize couples or mixed-gender golf events that foster a sense of community and camaraderie. Participating in these events can provide couples with opportunities to meet other like-minded individuals, share experiences, and further enhance their passion for golf. Such events also offer the chance to strengthen the bond between partners through friendly competition and shared achievements.

Tips for Managing Golf-Related Conflicts

Compromising and finding middle ground

Conflicts are inevitable in any relationship, but handling them constructively is crucial. When conflicts arise regarding golf-related matters, it is important for couples to seek compromise and find middle ground. This may involve adjusting schedules, prioritizing different aspects of the shared interest, or exploring alternative activities that accommodate both partners’ needs.

Supporting each other’s golf goals

In a supportive marriage, both partners strive to help each other achieve their personal goals. This concept applies to golf as well. Supporting each other’s golf goals, whether it is improving skills, participating in tournaments, or simply enjoying the game, strengthens the bond between partners. By demonstrating encouragement and celebration of each other’s successes, couples can reinforce their commitment and love.

Finding alternative hobbies and interests

While golf can be a significant aspect of a marriage, it is important to have other hobbies and interests as well. Individual pursuits outside of golf allow each partner to maintain their sense of identity and personal fulfillment. By finding alternative hobbies or activities that align with their individual passions, couples can strike a healthy balance between their shared interest in golf and their individual desires.

Seeking Professional Help When Needed

Counseling or therapy for relationship issues

If conflicts related to golf or other aspects of the relationship become persistent and challenging to address on your own, seeking professional help can be invaluable. Marriage counseling or therapy offers a safe and supportive space for couples to work through their issues, enhance communication skills, and deepen their understanding of each other. A trained professional can provide guidance and tools to help couples find the balance they seek.

Financial planning and budgeting assistance

If the financial implications of golf become a source of stress or conflict within a marriage, enlisting the help of a financial planner or budgeting expert can offer a path towards resolution. These professionals can provide guidance on managing expenses, setting realistic financial goals, and finding ways to accommodate the couple’s shared interest while maintaining overall financial stability.

Real-Life Examples of Couples Balancing Golf and Marriage

Testimonials from couples with successful marriages and shared love for golf

Real-life examples of couples who have successfully navigated the balance between golf and marriage serve as inspiration for others. These couples have discovered the secrets to maintaining a healthy and fulfilling relationship while pursuing their love for golf. Their testimonials provide insights, tips, and encouragement for couples striving to strike a similar balance.

Conclusion

Golf can undoubtedly play a significant role in a marriage, providing couples with shared experiences, improved communication, physical well-being, and relaxation. However, it is essential to approach this shared interest mindfully and find a balance that nurtures the relationship alongside the love for golf. By openly communicating, setting boundaries, and prioritizing quality time, couples can enjoy the benefits of golf while maintaining a loving and thriving marriage. So, grab your clubs, find that balance, and embark on a lifelong journey of love, friendship, and golfing adventures!

A Step-by-Step Guide on Testing a Golf Cart Motor

A step-by-step guide on testing a golf cart motor. Learn how to assess motor performance and troubleshoot common issues for a smooth ride.

So you’ve got yourself a golf cart and you want to make sure the motor is in tip-top shape before hitting the green? Well, you’ve come to the right place! This article will provide you with a simple and easy-to-follow step-by-step guide on testing your golf cart motor. Whether you’re a seasoned golfer or just a casual player, knowing how to test your motor will ensure that you have a smooth and enjoyable ride every time you hit the turf. Let’s get started on this exciting journey of motor testing!

A Step-by-Step Guide on Testing a Golf Cart Motor

Preparing for the Test

Before you can begin testing a golf cart motor, it is important to gather the necessary tools and equipment. You will need a multimeter, a set of screwdrivers, a wrench set, and safety goggles. These tools will help you safely and accurately assess the motor’s performance. Additionally, make sure you have access to the golf cart’s owner’s manual or wiring diagram for reference.

Next, ensure that you take the proper safety precautions. Disconnect the battery cables and remove the key from the ignition to prevent any accidental engagement of the motor during the testing process. Put on your safety goggles to protect your eyes from any potential debris or sparks that may occur while working on the motor.

Lastly, inspect the golf cart motor to ensure there are no visible signs of damage or worn-out components. Look for any loose connections, frayed wires, or corroded terminals. If you notice any issues, address them before proceeding with the testing process. Taking these steps will help ensure a smooth and safe testing experience.

Testing the Golf Cart Motor

Now that you are fully prepared, it’s time to move on to testing the golf cart motor. This step-by-step process will help you accurately assess its performance and identify any underlying issues or faults.

Start by testing the battery. Using a multimeter set to DC voltage, test the battery’s voltage. A fully charged battery should read around 12.6 volts. If the voltage is significantly lower, the battery may need to be charged or replaced.

Next, inspect the wiring connections. Check all of the connections, including the ones on the battery, motor, and controller. Ensure that all connections are secure, free of corrosion, and properly insulated.

Continue by checking the power switch. Turn the switch on and off, making sure it engages and disengages properly. If there are any issues with the switch, it may need to be replaced.

Next, test the solenoid. With the key in the off position, use a multimeter to check the resistance of the solenoid. It should read approximately zero ohms. If the reading is significantly higher, the solenoid may be faulty and in need of replacement.

After that, examine the controller. Look for any signs of damage or burnt components on the controller board. Ensure that all connections are secure and that there are no loose wires or frayed cables.

Moving on, test the motor brushes. Carefully remove the motor brushes using a screwdriver and inspect them for wear or damage. If the brushes are worn down, replace them to ensure proper motor performance.

Now, it’s time to check the motor armature. Using a multimeter set to resistance, measure the resistance between the armature segments. A good armature should have consistent resistance readings. If there are any significant variations or no readings at all, the armature may need to be repaired or replaced.

Next, test the motor coil. Using a multimeter set to resistance, measure the resistance between each coil’s terminal. The readings should be consistent and within the manufacturer’s specified range. Any abnormal readings may indicate a faulty coil and necessitate further inspection or replacement.

Continue by inspecting the drive train. Look for any signs of wear or damage on the gears, axles, and belts. Ensure that all components are properly aligned and lubricated. Any abnormalities should be addressed to prevent further damage or motor performance issues.

Lastly, examine the charging system. Check the charger for any visible damage or loose connections. Ensure that the charging cables are securely connected to the battery and charging port. If there are any issues, they should be promptly addressed to maintain proper charging functionality.

A Step-by-Step Guide on Testing a Golf Cart Motor

Interpreting the Test Results

Once you have completed the testing process, it is important to interpret the results accurately. This will help you identify any issues and determine the appropriate course of action. Here are some key areas to consider when analyzing the test results:

Analyzing Battery Performance

The battery is a crucial component of the golf cart motor. If your battery is not adequately charged, it may result in weak motor performance or even motor failure. Evaluate the battery voltage readings and determine if it needs charging or replacement.

Identifying Wiring Connection Issues

Loose or corroded wiring connections can cause disruptions in the motor’s performance. Carefully inspect all connections and ensure that they are secure, properly insulated, and free from corrosion or damage.

Diagnosing Power Switch Problems

If there are issues with the power switch, it may result in the motor not engaging correctly or not turning on at all. Evaluate the switch’s functionality and consider replacing it if necessary.

Evaluating Solenoid Functionality

The solenoid plays a crucial role in engaging the motor. If the solenoid has high resistance or inconsistent readings, it may need to be replaced to ensure proper functioning of the motor.

Assessing Controller Performance

The controller regulates the power flow to the motor. Any damage or loose connections on the controller can result in motor performance issues. Evaluate the controller’s condition and connections to determine if any repairs or replacements are necessary.

Determining Motor Brush Condition

Worn-out motor brushes can lead to poor motor performance and reduced power output. If the brushes are significantly worn down, replace them to maintain optimal motor functionality.

Analyzing Motor Armature

The motor armature is responsible for converting electrical energy into mechanical energy. Irregular resistance readings or no readings at all may indicate a faulty armature that requires repair or replacement.

Evaluating Motor Coil

The motor coil is an essential component for generating the magnetic field required for motor operation. Abnormal resistance readings may suggest issues with the coil’s functionality, necessitating further inspection or replacement.

Identifying Drive Train Problems

Issues with the drive train, such as worn gears or misaligned components, can result in motor inefficiency or failure. Carefully examine the drive train for any signs of wear, damage, or misalignment and address these issues promptly.

Examining Charging System Function

The charging system ensures that the battery remains charged and ready for use. Any damage or loose connections within the charging system can hinder battery charging. Thoroughly inspect the charger, cables, and connections to maintain proper charging functionality.

Troubleshooting Common Motor Issues

While testing the golf cart motor, you may come across some common issues that require troubleshooting. Here are a few common motor problems and their potential solutions:

Motor not Running

If the motor is not running at all, check the battery for sufficient charge and ensure all connections are secure. Additionally, inspect the power switch and solenoid for any issues that may prevent the motor from engaging.

Weak Motor Performance

Weak motor performance is often indicative of a low battery charge, worn-out motor brushes, or a faulty solenoid. Evaluate and address these components accordingly to restore optimal motor performance.

Intermittent Motor Functionality

Intermittent motor functionality could be caused by loose wiring connections or a faulty power switch. Check all wiring connections and examine the power switch for any defects or inconsistencies.

Abnormal Motor Noises

Unusual noises coming from the motor may suggest loose components, damaged gears, or misalignment within the drive train. Conduct a thorough inspection of the drive train and make any necessary adjustments or repairs.

Motor Overheating

Motor overheating can be caused by issues such as low battery voltage, excessive motor load, or inadequate ventilation. Address these issues to prevent further motor damage and ensure safe operation.

Inconsistent Battery Charging

If the battery is not charging consistently, check the charging system for loose connections or damaged components. Additionally, inspect the battery for any signs of damage or deterioration that may hinder charging.

Motor Stalling or Cutting Off

Motor stalling or sudden shutdowns may indicate a faulty solenoid, controller, or wiring connection. Thoroughly inspect these components and address any issues to restore proper motor operation.

Uneven Wheel Movement

Uneven wheel movement can be attributed to issues with the drive train, such as misaligned belts or worn gears. Carefully inspect the drive train and make any necessary adjustments or replacements.

Poor Battery Life

If the battery life seems significantly shorter than expected, check for any excessive power drain from the motor or controller. Address any issues that may be causing increased power consumption to extend battery life.

Lack of Speed Control

A lack of speed control can be caused by a faulty controller or wiring connection. Inspect the controller for any damage or loose connections and address these issues promptly.

Basic Golf Cart Motor Maintenance

To keep your golf cart motor running smoothly, it is important to perform regular maintenance. Here are some basic maintenance tasks that will help extend the life of your motor:

Regular Cleaning and Inspection

Regularly clean the motor and surrounding components to remove dirt, dust, and debris. Inspect for any signs of wear, damage, or loose connections during the cleaning process.

Lubricating Moving Parts

Proper lubrication of the motor’s moving parts, such as gears and bearings, reduces friction and minimizes wear. Refer to the owner’s manual for the manufacturer’s recommended lubrication schedule and use the appropriate lubricant.

Removing Debris

Ensure that the motor and its surrounding components are free from any debris or obstructions. Clear out any leaves, grass, or other items that may accumulate and affect the motor’s performance.

Checking Battery Water Levels

If your golf cart has a lead-acid battery, regularly check the water levels and top up with distilled water as necessary. Maintaining proper water levels helps optimize battery performance and lifespan.

Inspecting Wiring Connections

Regularly inspect all wiring connections for tightness and signs of corrosion or damage. Loose or corroded connections can lead to motor performance issues and should be promptly addressed.

Maintaining a Proper Charging Routine

Follow the manufacturer’s guidelines for charging your golf cart battery. Overcharging or undercharging can negatively impact battery performance and overall motor function.

Replacing Worn Out Motor Brushes

Monitor the condition of the motor brushes and replace them if they become excessively worn down. Worn brushes can hinder motor performance and may lead to further damage if not addressed.

Cleaning and Testing the Solenoid

Periodically clean the solenoid to remove any dirt or debris that may affect its performance. Test the solenoid’s resistance regularly to ensure optimal functionality.

Inspecting and Cleaning the Controller

Inspect the controller for any signs of damage, loose connections, or burnt components. Clean the controller and its surrounding area to remove any dirt or debris that may impede its performance.

Lubricating the Drive Train Components

Regularly lubricate the drive train components, such as gears, axles, and belts, to reduce friction and prevent excessive wear. Follow the manufacturer’s recommendations for the type and frequency of lubrication.

Importance of Professional Assistance

While performing routine maintenance and troubleshooting can often address common motor issues, some situations may require the expertise of a professional. Here are a few reasons why professional assistance is crucial:

Complex Motor Repairs

If you encounter complex motor issues that require in-depth repairs or component replacements, a professional can ensure the job is done correctly and safely.

Advanced Electrical Troubleshooting

Addressing intricate electrical problems within the motor or controller may necessitate specialized knowledge and equipment. Professionals have the expertise to accurately diagnose and rectify these issues.

Motor Controller Programming

Programming or reprogramming the motor controller may be necessary in certain situations. Professionals have the knowledge and tools to program the controller correctly to ensure optimal motor performance.

Specialized Tools and Expertise

Professionals possess the specialized tools and expertise required to accurately assess and repair golf cart motors. They can troubleshoot and diagnose issues more efficiently, saving you time and effort.

Manufacturer Support and Warranty

Seeking professional assistance ensures that any repairs or replacements adhere to the manufacturer’s guidelines and specifications. Additionally, professional services may be covered under the manufacturer’s warranty.

Ensuring Safety and Proper Functionality

Working with high-voltage electrical components can be hazardous. Professionals are trained to follow safety protocols and ensure that repairs are carried out safely and effectively.

Conclusion

Testing a golf cart motor is a crucial step in maintaining its performance and identifying any underlying issues that may affect its functionality. By following a step-by-step process and interpreting the test results accurately, you can troubleshoot common motor issues and perform basic maintenance tasks. However, for complex repairs, advanced troubleshooting, or to ensure safety and optimal functionality, seeking professional assistance is highly recommended. By taking the time to properly test and maintain your golf cart motor, you can prolong its lifespan and enjoy reliable performance on the green.

The Role of Golf Caddies in the Game

Discover the vital role of golf caddies in the game. From strategic advice to equipment management, explore how they enhance golfers’ performance.

So, you’ve probably seen them walking along the pristine fairways, carrying those heavy golf bags and chatting away with the players. But have you ever wondered what exactly golf caddies do? Well, these unsung heroes play a crucial role in the game, providing invaluable assistance and support to golfers as they navigate the course. From offering strategic advice to keeping a player’s equipment in order, caddies are the ultimate behind-the-scenes champions, ensuring that every golfer’s experience on the course is nothing short of extraordinary.

The Role of Golf Caddies in the Game

Golf caddies play a vital role in the game of golf, providing invaluable support and assistance to golfers on the course. They are not mere bag carriers; they are strategic partners who can greatly enhance a golfer’s overall performance. In this article, we will delve into the various facets of the golf caddy’s role, discussing their qualities, skills, responsibilities, and the importance they hold in the game.

The Role of Golf Caddies in the Game

Overview of Golf Caddies

Golf caddies are individuals who accompany golfers during their rounds, carrying their bags and providing guidance and advice on various aspects of the game. They are typically knowledgeable about the course layout, intricacies of each hole, and possess an understanding of the game’s nuances. Golf caddies often maintain a strong rapport with their players, offering both emotional support and tactical insights to help them navigate the course successfully.

Qualities and Skills of a Golf Caddy

To be an effective golf caddy, several qualities and skills are required. Firstly, a deep understanding and knowledge of the game of golf is essential. This encompasses a thorough understanding of the rules, strategies, and techniques employed by golfers. Additionally, excellent communication and interpersonal skills enable caddies to effectively convey information and offer guidance to their players during crucial moments in the game.

Furthermore, physical fitness is crucial for caddies, as they are expected to carry the golfer’s bag, which can often be heavy, throughout the entirety of the round. Stamina and endurance play a pivotal role in ensuring that the caddy can keep up with the golfer’s pace and maintain their performance throughout the round.

Responsibilities and Duties of a Golf Caddy

The responsibilities and duties of a golf caddy extend far beyond merely carrying the golfer’s bag. Caddies are responsible for providing golfers with crucial information and assistance throughout the course of their round. They act as a reliable source of information regarding course navigation, club selection, providing accurate yardage, reading the green, and even maintaining equipment.

The Role of Golf Caddies in the Game

The Importance of a Golf Caddy

The importance of a golf caddy cannot be overstated. They provide golfers with insightful advice and assistance, optimizing their performance and enabling them to make informed decisions on the course. The golf caddy serves as a strategic partner, helping golfers navigate the course effectively and adapt their strategies according to various factors such as weather conditions, hazards, and overall course layout.

Advantages of Having a Golf Caddy

Having a golf caddy offers numerous advantages to golfers. Firstly, the caddy’s intimate knowledge of the course allows them to provide essential guidance for navigating each hole. They can point out hazards, suggest optimal landing areas, and provide insights on the course’s layout that might be unfamiliar or challenging to the golfer.

Secondly, golf caddies play a key role in club selection. With their expertise, they can recommend the ideal club for each shot, taking into consideration factors such as distance, wind direction, and elevation changes. This guidance ensures that the golfer is consistently using the most appropriate club, greatly improving their chances of success.

Golf Caddies and Course Navigation

One of the primary roles of a golf caddy is to assist golfers in successfully navigating the course. They possess intricate knowledge about each hole, such as the placement of bunkers, water hazards, and out-of-bounds areas. This information allows caddies to strategize with the golfer, suggesting the best route to take and identifying potential risks to avoid. By working together as a team, golfer and caddy can devise a game plan that maximizes the golfer’s chances of success on each hole.

Golf Caddies and Club Selection

Club selection is vital in golf, and having a knowledgeable caddy by your side can significantly impact your game. Caddies have an extensive understanding of different clubs and their characteristics, including distance, loft, and forgiveness. Their expertise enables them to advise golfers on which club to use based on various factors such as distance to the pin, wind speed and direction, and any obstacles in the way. This guidance greatly enhances the golfer’s ability to choose the optimal club for each shot, leading to more accurate and consistent results.

Golf Caddies and Providing Yardage

Accurate yardage calculations are crucial for successful shots in golf, and caddies excel in this aspect. With their knowledge of each hole’s layout and the use of advanced measuring devices such as laser rangefinders or GPS systems, caddies can precisely determine the distance to the target. This information allows golfers to select the appropriate club and adjust their swing accordingly, optimizing their chances of hitting accurate shots and reaching their intended target.

Golf Caddies and Reading the Green

Reading the green is an art form in golf, and caddies are skilled at interpreting the subtle nuances of the putting surface. They can identify the slope, undulations, and subtle breaks that may not be evident to the golfer’s eye. By providing guidance on how the ball is likely to roll on the green, caddies assist golfers in making the necessary adjustments in their putting technique. This expertise proves invaluable in helping golfers sink those crucial putts and lower their scores.

Golf Caddies and Maintaining Equipment

In addition to their advisory roles, golf caddies also take on the responsibility of maintaining the golfer’s equipment. This includes cleaning clubs, replacing worn-out grips, ensuring that golf balls are in optimal condition, and carrying out minor repairs when necessary. By keeping the golfer’s equipment in top shape, caddies help ensure that the golfer’s performance is not hindered by subpar equipment, allowing them to focus solely on their game.

In conclusion, golf caddies play an indispensable role in the game of golf. From providing guidance on course navigation and club selection to offering accurate yardage and reading the green, their expertise and support significantly contribute to a golfer’s performance. Whether you are a professional golfer or an amateur enthusiast, having a reliable and knowledgeable golf caddy by your side can elevate your game and enhance your overall enjoyment of the sport. So, the next time you step onto the golf course, consider enlisting the services of a golf caddy and experience the countless benefits they bring to your game.

How to Re-grip Golf Clubs: A Step-by-Step Guide

Learn how to re-grip your golf clubs in this step-by-step guide. Save money, enhance performance, and maintain your equipment with ease.

If you’re a golf enthusiast looking to improve your game, one essential aspect to consider is the condition of your golf clubs. Over time, the grips on your clubs can wear out and lose their effectiveness, resulting in compromised control and reduced performance. In this article, you will find a comprehensive step-by-step guide on how to re-grip your golf clubs, allowing you to save money and ensure optimal performance on the course. Whether you’re a seasoned golfer or a beginner, this guide will equip you with the knowledge and skills needed to maintain the quality of your golf clubs and enhance your overall golfing experience. So, let’s dive in and discover the art of re-gripping golf clubs.

How to Re-grip Golf Clubs: A Step-by-Step Guide

If you’ve noticed that the grips on your golf clubs are worn out or not providing you with the necessary grip, it may be time to re-grip them. Re-gripping your golf clubs is an important part of maintaining your equipment and ensuring optimal performance on the course. In this comprehensive guide, we will walk you through the step-by-step process of re-gripping your golf clubs. So let’s get started!

How to Re-grip Golf Clubs: A Step-by-Step Guide

Preparation

Before you begin the re-gripping process, it’s essential to gather the necessary materials. You will need the following items:

Gather necessary materials

  • New golf grips
  • Grip tape
  • Grip solvent
  • Razor blade or grip removal tool
  • Adhesive remover
  • Clean cloth or paper towels
  • Grip clamp or air compressor
  • Finishing tape or grip cap (optional)
  • Golf club vise or sturdy workbench

Once you have gathered all the materials, it’s time to set up your workspace.

Set up your workspace

Find a well-lit and spacious area where you can comfortably work on re-gripping your golf clubs. Make sure you have a sturdy workbench or a golf club vise to secure the club firmly during the process. Having a clean and organized workspace will help you complete the task efficiently.

Removing the Old Grip

To remove the old grip from your golf club, follow these steps:

Secure the club

Place your golf club securely in the vise or workbench, ensuring that it is stable before proceeding with the grip removal.

Cut the old grip

Using a razor blade or a grip removal tool, cut the old grip lengthwise from the top to the bottom. Be cautious not to damage the shaft while cutting the grip.

Remove any tape or adhesive residue

After removing the grip, you may find leftover tape or adhesive residue on the shaft. Gently peel off any old grip tape and use an adhesive remover to clean the shaft surface completely. Wipe off any residue with a clean cloth or paper towel to ensure a smooth grip installation.

Cleaning the Club Shaft

Before installing the new grip, it’s important to clean the club shaft thoroughly. This ensures a clean surface for proper grip adhesion. Follow these steps to clean the club shaft:

Inspect the shaft

Take a closer look at the club shaft and check for any dings, nicks, or rust. If you notice any significant damage, it may be necessary to repair or replace the club before re-gripping.

Clean the shaft surface

Use a clean cloth or paper towel dampened with a mild soap and water solution to wipe down the club shaft. Ensure that all dirt, grime, and oils are removed. Rinse the shaft with clean water and dry it thoroughly before moving on to the next step.
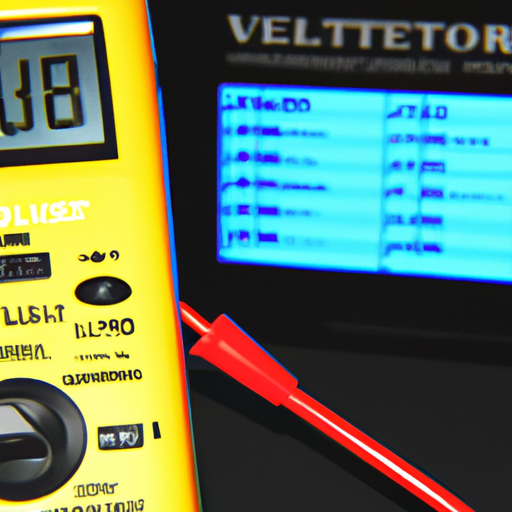
Preparing the Club Grip

Now that the club shaft is clean and ready, it’s time to prepare the new grip. Consider the following factors when preparing your club grip:

Choose the right grip size

Golf grips come in various sizes, so it’s crucial to select one that suits your hand size and grip preference. Grip size affects your swing mechanics and can greatly impact your performance on the course. If you are unsure about the right grip size, consult with a professional club fitter or golf instructor for guidance.

Select the desired grip type

Golf grips come in different materials, textures, and designs. Consider factors such as weather conditions, personal preferences, and playing style when choosing the grip type. Popular grip materials include rubber, corded, and hybrid variations. Experiment with different grip types to find the one that feels comfortable and enhances your performance.

Apply grip tape

Before installing the new grip, apply grip tape to the club shaft. Grip tape helps create a secure bond between the grip and the club. It also helps to layer the grip tape in a way that feels comfortable in your hands. Start from the bottom of the club and wrap the grip tape upwards, overlapping each layer slightly. Cut off any excess tape at the top so that the grip can easily slide over it.

How to Re-grip Golf Clubs: A Step-by-Step Guide

Applying Grip Solvent

Once the grip tape is in place, it’s time to apply grip solvent. Grip solvent acts as a lubricant, allowing you to position and adjust the grip before it dries. Here’s how you can apply grip solvent:

Apply grip solvent to the tape

Pour a small amount of grip solvent onto the exposed grip tape. The solvent should be evenly distributed and cover the entire length of the tape. Be careful not to oversaturate the tape, as excessive solvent can affect the grip’s performance.

Spread the solvent evenly

Using your fingers or a grip brush, spread the grip solvent evenly over the grip tape. This helps to activate the adhesive properties of the tape and makes it easier to slide the grip onto the shaft. Ensure that the solvent is evenly distributed without any excess pooling at the top or bottom of the grip.

Installing the New Grip

With the grip tape and solvent in place, it’s time to install the new grip onto the golf club. Follow these steps for a successful grip installation:

Align the grip

Before sliding the grip onto the shaft, check for any alignment markings on both the grip and the shaft. Align these markings to ensure that the grip is oriented correctly. This step is crucial to maintain proper club face alignment during your swing.

Slide the grip onto the shaft

Place one hand inside the open end of the grip and position your other hand on the top of the grip. Using a steady twisting motion, slide the grip onto the shaft. Be sure to move the grip all the way down until it reaches the end of the shaft.

Position the grip correctly

Once the grip is fully on the shaft, double-check its positioning. Ensure that the grip’s end aligns with the bottom of the shaft or any alignment markings. Make any necessary adjustments by twisting or sliding the grip until it is in the desired position.

Securing the Grip

To ensure that the grip is securely in place, follow these steps:

Remove excess solvent

Use a clean cloth or paper towel to remove any excess grip solvent that may have seeped out of the grip during installation. This allows the grip to dry properly without any slippery residue.

Use grip clamp or air compressor

To facilitate the drying process and create a tight bond between the grip and the tape, you can use a grip clamp or an air compressor. If using a grip clamp, position it at the top of the grip and tighten it gently. Alternatively, you can use an air compressor to blow compressed air into the open end of the grip. This helps to expand the grip, creating a snug fit and accelerating the drying time.

Allow the grip to dry and set

After securing the grip, let it dry and set for a minimum of 24 hours. This allows the adhesive properties of the grip tape to fully bond with the grip and the club shaft. Avoid using the club during this drying period to ensure a strong and long-lasting grip.

Checking and Adjusting

Once the grip is completely dry, it’s important to check for proper alignment and feel. Follow these steps to assess the grip’s performance:

Check for proper alignment and feel

Hold the golf club as you would during a swing and evaluate the grip’s alignment. Ensure that the grip’s alignment markings match your desired hand positioning. Additionally, take note of the grip’s feel in your hands. It should provide a secure and comfortable grip, allowing you to have proper control over the club during your swing.

Make any necessary adjustments

If you find that the grip’s alignment or feel is not optimal, you may need to make some adjustments. Remove the grip by repeating the steps for grip removal, clean the shaft, and start the re-gripping process again. It may take some trial and error to find the perfect grip for your game, so be patient and willing to make adjustments as needed.

Finishing Touches

To complete the re-gripping process, attend to the finishing touches. Follow these steps:

Remove any leftover adhesive residue

After removing the old grip and adhesive residue, there may still be some sticky residue on the shaft. Use an adhesive remover and a clean cloth or paper towel to remove any remaining residue. This ensures a clean and professional appearance.

Clean the grip surface

With a clean cloth or paper towel, wipe down the grip surface to remove any dirt, debris, or excess grip solvent. This final cleaning step ensures that your new grip is ready to perform flawlessly on the golf course.

Add finishing tape or grip cap if desired

If you want to add extra cushioning or customization to your grip, consider adding finishing tape or a grip cap. Finishing tape can be wrapped around the top of the grip to provide additional comfort and support. Alternatively, a grip cap can be added to the end of the grip for a polished look. These finishing touches are optional but can enhance your grip experience.

Troubleshooting

During the re-gripping process, you may encounter some common issues. Here are a few troubleshooting tips and solutions:

Common issues and solutions

  • Issue: Difficulty sliding the grip onto the shaft. Solution: Ensure that you have applied enough grip solvent and that the grip tape is properly layered. You can also use a grip alignment tool to assist with grip installation.

  • Issue: Grip feels loose or spins when swinging. Solution: This may indicate insufficient grip tape layers or improper installation. Recheck the grip tape layers, apply more adhesive if necessary, and ensure a secure fit when sliding the grip onto the shaft.

  • Issue: Excessive grip solvent seeping out during installation. Solution: Be mindful of the grip solvent amount applied. Excess solvent can affect the grip’s adhesion. Use a clean cloth or paper towel to remove any excess solvent before securing the grip.

  • Issue: Adhesive residue remains on the shaft after old grip removal. Solution: Adhesive remover and a clean cloth or paper towel can effectively remove leftover residue. Take care not to damage the shaft surface when cleaning.

  • Issue: Discomfort or blisters while using the new grip. Solution: The grip size or type may not be suitable for your hands and playing style. Consider re-gripping with a different grip size or material that provides a more comfortable feel.

Congratulations! You have successfully re-gripped your golf club. This process is a crucial aspect of maintaining your golf equipment and ensuring peak performance on the golf course. Remember, practicing good equipment maintenance leads to a better golfing experience and improved playability.

Conclusion

Re-gripping your golf clubs may seem like a daunting task, but with the right materials and a step-by-step approach, you can easily accomplish it. By following the comprehensive guide we’ve provided, you are now equipped with the knowledge to successfully re-grip your golf clubs, ensuring comfort, control, and optimal performance during your rounds. So go ahead and give your golf clubs the makeover they deserve – your game will thank you!

Note: The cost of re-gripping golf clubs can vary depending on factors such as the grip type, quality, and additional services offered by professional club fitters. It’s advisable to research local golf stores or consult with professionals to get an accurate estimate of the cost involved.

How to Measure the Distance to the Top Golf Net

Learn how to accurately measure the distance to the top golf net. Improve your swing and enhance your game with a simple and effective method.

Whether you’re a seasoned golfer or just getting started with the sport, knowing the distance to the top golf net is an essential piece of information. After all, accuracy is key when it comes to improving your swing and hitting the ball right where you want it to go. In this article, you’ll discover a simple and effective method for measuring the distance to the top golf net, allowing you to fine-tune your skills and take your game to new heights. So, grab your clubs and let’s get started on this distance-measuring adventure!

How to Measure the Distance to the Top Golf Net

Overview of Distance Measurement

When it comes to playing golf, accurately measuring distance is crucial for making informed decisions and achieving optimal results. Knowing the distance to the top golf net, or any other target on the course, can greatly improve your game and help you choose the right club for each shot. In this article, we will explore various methods of distance measurement in golf, including rangefinders, GPS devices, visual markers and yardage signs, mobile apps, Bushnell Golf Watches, laser technologies, and even golf ball launchers. Each method has its own advantages and limitations, and we will provide step-by-step guides, tips, and considerations for using each one effectively.

Using a Rangefinder

Understanding Rangefinder Technology

Rangefinders are handheld devices that utilize laser or GPS technology to accurately measure the distance between you and a target point, such as the top golf net. Laser rangefinders work by emitting a laser beam that bounces off the target and returns to the device, calculating the time it took for the beam to travel and providing an accurate distance reading. GPS rangefinders, on the other hand, rely on satellite signals to determine your exact location and the distance to desired targets.

Step-by-Step Guide to Measuring Distance with a Rangefinder

  1. Ensure your rangefinder is properly calibrated and has a clear line of sight to the top golf net.
  2. Activate the device and select the appropriate mode for distance measurement.
  3. Aim the rangefinder at the top golf net and press the designated button to initiate the distance measurement.
  4. Wait for the device to calculate and display the accurate distance to the target.
  5. Take note of the measurement and use it to inform your club selection and shot strategy.

Tips for Accurate Distance Measurement

  • Hold the rangefinder steady and keep a steady hand to avoid any movement that could affect the accuracy of the measurement.
  • Take multiple readings from different angles to ensure consistency and accuracy.
  • Familiarize yourself with the features and settings of your rangefinder to optimize its performance.
  • Practice using the rangefinder on the driving range or during practice rounds to build confidence in its accuracy.

Using a GPS Device

Introduction to GPS Distance Measurement

GPS devices have revolutionized distance measurement in golf by providing precise location data and accurate distance calculations. These handheld devices use satellite signals to accurately determine your position on the golf course and provide real-time distance information to various targets, including the top golf net.

Step-by-Step Guide to Measuring Distance with a GPS Device

  1. Turn on the GPS device and wait for it to establish a connection with the satellites for accurate positioning.
  2. Select the golf course and hole you are playing from the device’s preloaded database.
  3. Once your position is determined, navigate to the distance measurement function or target list.
  4. Locate the top golf net in the list of targets and select it to display the calculated distance.
  5. Pay close attention to the displayed distance and use it to inform your club selection and shot strategy.

Considerations for GPS Distance Measurement

  • GPS devices may require a clear view of the sky to establish accurate satellite connections, so tall trees or buildings may affect their performance.
  • Some GPS devices may offer additional features such as hazard mapping and green contouring, which can be valuable for more precise shot planning.
  • Battery life may vary among GPS devices, so ensure your device is adequately charged or carry a backup power source for longer rounds.

Benefits and Limitations of GPS Devices

GPS devices offer the advantage of providing accurate distance information without the need for manual targeting or line of sight. They can also provide additional course information, such as hazards and green layouts, to enhance your overall game strategy. However, they may be less precise than rangefinders when it comes to measuring distances to specific targets and may require regular updates or course downloads for optimal performance.

How to Measure the Distance to the Top Golf Net

Using Markers and Yardage Signs

Utilizing Visual Markers on the Golf Course

One of the oldest and most traditional methods of distance measurement in golf is using visual markers and yardage signs strategically placed throughout the course. These markers can be found on fairways, in the form of colored stakes or discs, and on tees, greens, and hazards, indicating specific distances to various targets.

Interpreting Yardage Signs

Yardage signs are typically placed near tees and fairways, providing golfers with valuable information on the distances to certain landmarks or hazards. These signs often contain various markings indicating the yardage to reach these points, allowing golfers to make more informed decisions in their club and shot selection.

Challenges and Limitations of Marker-Based Distance Measurement

While marker-based distance measurement can be a reliable and convenient method, it does come with its limitations. Weather conditions, such as wind or rain, can physically alter the layout and visibility of markers, rendering them less accurate. In addition, yardage signs may not always be present or visible on all courses, limiting their availability as a consistent distance measurement tool.

Using Mobile Apps

Overview of Golf Distance Measuring Apps

With the rise of smartphones and their array of capabilities, there are now numerous golf distance measuring apps available for download. These apps utilize a combination of GPS technology and course mapping to provide accurate distance readings directly on your mobile device.

Popular Golf Distance Measurement Apps

Several popular golf distance measurement apps include “Golf GPS & Scorecard,” “Golfshot: Golf GPS + Caddy,” and “Hole19: Golf GPS App.” These apps offer a user-friendly interface, accurate distance measurements, and additional features such as score tracking, shot tracking, and even virtual caddies for shot recommendations.

Step-by-Step Guide to Measuring Distance with a Mobile App

  1. Download and install a golf distance measurement app from your device’s app store.
  2. Open the app and allow it permission to access your location.
  3. Select the golf course you are playing from the app’s database or manually search for the course if it is not preloaded.
  4. Once the course is selected, choose the hole you are on to display the accurate distances to various targets, including the top golf net.
  5. Utilize the distance displayed on the app to inform your club selection and shot strategy.

Advantages and Disadvantages of Mobile Apps

One of the main advantages of using golf distance measurement apps is the convenience of having all the necessary information on your mobile device. These apps often provide comprehensive course maps, hole layouts, and accurate distance readings. However, they do rely on the availability of cellular data or a stable internet connection, which may not always be reliable on certain courses or in remote areas. Additionally, using a mobile device during a round may be distracting or batter-consuming.

Measuring Distance with a Bushnell Golf Watch

Introduction to Bushnell Golf Watches

Bushnell is a trusted name in golf distance measurement, and their golf watches offer a convenient and wearable solution for obtaining accurate distance readings. These watches are equipped with GPS technology, allowing golfers to easily access distance information without the need for additional devices or handheld rangefinders.

Step-by-Step Guide to Distance Measurement using a Bushnell Golf Watch

  1. Put on your Bushnell Golf Watch and ensure it is properly charged.
  2. Select the golf course you are playing from the preloaded database or manually search for the course.
  3. Activate the GPS function on the watch and wait for it to establish a connection with the satellites.
  4. Once your position is determined, navigate to the distance measurement function or target list.
  5. Locate the top golf net or desired target in the list and view the calculated distance on the watch’s display.

Features and Benefits of Bushnell Golf Watches

Bushnell Golf Watches offer several features and benefits that make them an attractive choice for distance measurement on the golf course. These watches typically provide accurate yardage readings to various targets, as well as hazards and layup distances. They often come preloaded with a large database of golf courses, allowing for seamless usage worldwide.

Factors to Consider Before Purchasing a Golf Watch

Before investing in a Bushnell Golf Watch or any other brand of golf watch, there are a few key factors to consider. These include battery life, comfort and fit, ease of use, durability, and additional features such as score tracking or shot tracking. It’s important to select a golf watch that suits your specific needs and preferences to ensure a positive experience on the course.

Using Laser Technologies

Laser Technology for Distance Measurement

Laser technologies have become increasingly popular for accurate distance measurement in golf. These devices utilize laser beams to target an object or point, in this case, the top golf net, and calculate the time it takes for the beam to travel and return, providing an instant and precise distance reading.

Different Types of Golf Laser Devices

There are various types of golf laser devices available on the market, each with its own set of features and capabilities. Some laser rangefinders offer additional functions such as slope adjustment, which accounts for the angle of the terrain and provides a more accurate measurement. Others may have multiple target modes or advanced targeting systems for enhanced accuracy and performance.

Procedure for Accurate Distance Measurement with Laser Devices

  1. Ensure your laser device is turned on and properly calibrated.
  2. Aim the device at the top golf net, making sure it has a clear line of sight to the target.
  3. Activate the laser by pressing the designated button or trigger.
  4. Keep the device steady and allow it to emit the laser beam and capture the return signal.
  5. Receive the instant distance reading displayed on the device and use it to inform your club selection and shot strategy.

Pros and Cons of Laser Technologies

Laser technologies offer the advantage of instant and highly accurate distance readings, often with impressive precision. These devices are compact, portable, and easy to use. However, laser rangefinders may require steady hands and clear visibility to the target, as they rely on direct line-of-sight measurements. They may also be affected by atmospheric conditions, such as fog or rain, which can disrupt laser beams and result in less accurate measurements.

Considerations for Wind and Slope

Effects of Wind on Distance Measurement

Wind has a significant impact on the flight of a golf ball, and as a result, it can affect distance measurement. Strong headwinds can reduce the distance the ball travels, while tailwinds can increase it. When measuring distance to a target like the top golf net, it can be helpful to consider the current wind conditions and make appropriate adjustments to your club selection and shot strategy.

Accounting for Slope in Distance Calculation

The slope of the terrain can also influence distance measurement in golf. Uphill shots will generally require more power and a longer club selection, while downhill shots may require less force and a shorter club. Some rangefinders and GPS devices offer slope adjustment features, which take into account the angle of the slope and provide adjusted distance readings to account for these variations in elevation.

Advanced Features for Wind and Slope Compensation

Certain distance measurement devices, such as high-end rangefinders or GPS watches, may have advanced features for wind and slope compensation. These features utilize integrated algorithms and real-time data to provide precise distance adjustments based on wind speed, direction, and slope angle. However, it’s important to note that these advanced features may not be permitted in tournament play, so be sure to check the rules and regulations of the specific event or course you are playing on.

Importance of Adjustments for Accurate Distance Measurement

To ensure accurate distance measurement and make confident club selections, taking into account wind and slope is crucial. By making the necessary adjustments, you will be able to adapt your shot strategy and better predict the ball’s trajectory and flight distance. Regular practice and familiarity with your distance measurement device will also improve your ability to make accurate adjustments on the course.

Using a Golf Ball Launcher

Understanding Golf Ball Launchers

Golf ball launchers, also known as swing analyzers or launch monitors, are advanced devices that measure various aspects of your swing and provide valuable data for distance calculation. These devices can capture swing speed, launch angle, ball speed, and other parameters, helping you accurately gauge the distance your ball will travel towards the top golf net.

Step-by-Step Guide to Distance Measurement with a Golf Ball Launcher

  1. Set up the golf ball launcher according to the manufacturer’s instructions, ensuring it is positioned correctly.
  2. Take a golf ball and place it into the launcher’s designated slot or mechanism.
  3. Prepare for your swing and take your normal address position.
  4. Initiate the swing while ensuring the launcher captures all necessary swing data.
  5. Review the launched ball’s data and distance on the device’s display or connected app.

Safety Precautions and Best Practices

When using a golf ball launcher, safety should always be a priority. Ensure that the device is securely set up and that it is safe to swing without any risk of injury to yourself or others. It’s also important to follow the manufacturer’s guidelines and recommendations for using the ball launcher to achieve accurate distance measurements and reliable swing data.

Limitations and Alternatives

While golf ball launchers can provide valuable swing data and estimations of distance, it’s important to note that they may not be as accurate as distance-specific devices such as rangefinders or GPS devices. Additionally, golf ball launchers are not typically portable or suitable for on-course use. However, they can be useful tools for practice sessions, swing analysis, and improving swing consistency.

Practical Tips for Distance Measurement

Practice and Familiarize with Measurement Device

Whichever distance measurement method you choose, it’s essential to practice using the device and become familiar with its features and operation. Regular practice will increase your confidence in obtaining accurate distance readings and improve your overall accuracy on the course. Take advantage of practice rounds, driving range sessions, or even simulated golf environments to hone your skills using the chosen distance measurement tool.

Factors Affecting Accuracy

While modern distance measurement devices are highly accurate, it’s important to understand that certain factors can affect their precision. These factors include environmental conditions such as fog, rain, or extreme heat, which can interfere with laser beams, GPS signals, or physical markers. Additionally, user error, device calibration, or battery life can also impact accuracy. By being aware of these factors, you can take appropriate measures to compensate or minimize their effects on distance measurement.

Consider Environmental Conditions

Environmental conditions play a significant role in distance measurement accuracy. Wind speed and direction can affect the ball’s flight, altering its distance. Similarly, extreme temperatures and humidity levels can impact the ball’s performance. When using a distance measurement device, be mindful of these external factors and make necessary adjustments to ensure accurate distance calculations.

Regular Calibration and Maintenance

To maintain optimum accuracy and performance of your distance measurement device, regular calibration and maintenance are crucial. Follow the manufacturer’s guidelines for calibration and ensure the device is properly functioning before each round. Keep the device clean and protected from moisture or physical damage, and replace batteries or charge the device as needed to avoid any interruptions in distance measurement.

Combining Multiple Measurement Methods

To enhance accuracy and gain a more comprehensive understanding of course distances, consider combining multiple distance measurement methods. For example, use a rangefinder for precise measurements to specific targets, complemented by visual markers and yardage signs for a broader sense of the course layout. By utilizing multiple methods, you can cross-reference measurements and increase the confidence in your club selection and shot strategy.

In conclusion, accurately measuring the distance to the top golf net or any target on the course is essential for improving your golf game. With various distance measurement methods available, including rangefinders, GPS devices, visual markers, mobile apps, Bushnell Golf Watches, laser technologies, and even golf ball launchers, there is a method to suit every golfer’s needs and preferences. By understanding the technology, following step-by-step guides, and considering the tips and considerations provided, you can confidently measure and utilize distances to enhance your performance on the course. So grab your preferred distance measurement device, head out to the course, and start elevating your golf game today!

Exploring Golf Courses with High Membership Fees

Discover the world of golf courses with high membership fees, offering exclusive access to luxurious facilities and breathtaking landscapes. Explore prestigious clubs and the factors that influence their fees. Join for a superior playing experience and networking opportunities. Find out about top courses like Augusta National and Pine Valley. Consider the financial commitment and waiting lists before joining.

If you’re a golf enthusiast who dreams of getting exclusive access to world-class facilities, breathtaking landscapes, and impeccable service, then it’s time for you to delve into the fascinating world of golf courses with high membership fees. Picture yourself surrounded by meticulously manicured fairways, challenging greens, and top-notch amenities that cater to your every need. Today, we will explore some of the most prestigious golf courses around the globe, where the membership fees soar as high as the eagles that grace their skies. So, grab your packed clubs and get ready for an unforgettable journey into the world of opulence and luxury in golf.

Exploring Golf Courses with High Membership Fees

Factors influencing high membership fees

Location

The location of a golf course plays a significant role in determining the membership fees associated with it. Golf clubs situated in prime, highly desirable areas often have higher fees due to the increased demand for membership in those locations. Access to prestigious golf courses in renowned regions can be a major draw for avid golfers, leading to higher membership costs.

Club amenities

The amenities offered by a golf club also contribute to the determination of membership fees. Exclusive facilities such as world-class practice areas, state-of-the-art fitness centers, luxurious locker rooms, and fine dining options all add to the allure and value of a golf club. Clubs with extensive amenities tend to have higher fees as they provide a more comprehensive and enjoyable experience for their members.

Course condition

The condition of the golf course plays a crucial role in attracting golfers and justifying higher membership fees. Well-maintained fairways, immaculate greens, pristine bunkers, and overall exceptional course upkeep is often a key factor for golf enthusiasts willing to pay a premium price for a membership. The investment required to achieve and maintain such high course standards can greatly influence the membership fees.

Course design

The design and layout of a golf course are important considerations for golfers when choosing a club. Courses that are skillfully designed, offering a challenging yet enjoyable playing experience, can command higher membership fees. Unique features like strategically placed hazards, picturesque landscapes, and thoughtful design elements contribute to the overall appeal of a golf course and can increase its perceived value.

Club exclusivity

The exclusivity and reputation of a golf club can significantly impact its membership fees. Golf clubs that have a prestigious reputation, a long-standing history, or a limited number of memberships available tend to have higher fees. The exclusivity of these clubs creates an aura of privilege and prestige, attracting golfers who are willing to pay a premium to be part of an elite community and golfing experience.

Benefits of joining golf courses with high membership fees

Superior playing experience

Golf courses with high membership fees often offer superior playing experiences. These clubs invest heavily in course maintenance, ensuring impeccable conditions for golfers. From well-manicured fairways to lightning-fast greens, every aspect of the course is carefully attended to in order to provide members with a remarkable and enjoyable game.

Access to exclusive events

One of the major benefits of joining a golf course with a high membership fee is gaining access to exclusive events. These clubs often organize special tournaments, member-only competitions, and social gatherings that offer a unique and enriching experience. Members have the opportunity to be part of these prestigious events, forging connections with fellow golf enthusiasts and creating lasting memories.

Networking opportunities

Joining a golf course with high membership fees can provide exceptional networking opportunities. Many clubs have a membership base that includes influential individuals from various industries. Playing rounds with like-minded professionals can foster valuable connections that may extend beyond the golf course. These networking opportunities can lead to business partnerships, collaborations, and personal growth.

High-quality facilities

Golf courses with high membership fees typically offer top-notch facilities to their members. From luxurious clubhouse amenities to world-class practice areas, these clubs strive to provide the ultimate golfing experience. State-of-the-art fitness centers, spa facilities, and gourmet dining options are often available, ensuring that members have access to unparalleled services and comfort.

Top golf courses with high membership fees

Augusta National Golf Club

Augusta National Golf Club, located in Augusta, Georgia, is one of the most prestigious golf courses in the world. Known for hosting the annual Masters Tournament, Augusta National has a rich history and tradition that attracts golfers from around the globe. The membership details of Augusta National Golf Club are highly exclusive and secretive, with membership invitations extended to a select few individuals.

Pine Valley Golf Club

Pine Valley Golf Club, situated in Pine Valley, New Jersey, is renowned for its challenging and picturesque course. The club has consistently been ranked as one of the top golf courses in the United States. Pine Valley Golf Club has limited membership availability, and the club maintains its exclusivity by keeping the membership details private.

Cypress Point Club

Cypress Point Club, located on the Monterey Peninsula in California, is known for its breathtaking coastal views and strategic course design. The club’s membership is considered one of the most sought-after in the golfing world. Details regarding Cypress Point Club’s membership process and fees are not publicly disclosed, adding to its air of exclusivity.

Shinnecock Hills Golf Club

Shinnecock Hills Golf Club, located in Southampton, New York, is recognized as one of the oldest and most prestigious golf clubs in the United States. The club has a long championship history, having hosted multiple U.S. Open Championships. Membership details for Shinnecock Hills Golf Club are highly selective, with a focus on maintaining a distinguished and passionate member community.

Exploring Golf Courses with High Membership Fees

Augusta National Golf Club

Overview

Augusta National Golf Club is an iconic golf course that has become synonymous with the Masters Tournament. The course features immaculate fairways, undulating greens, and strategically placed hazards, providing a challenging and exciting golfing experience. Augusta National is known for its picturesque beauty, highlighted by iconic landmarks such as Magnolia Lane and Amen Corner.

Membership details

The membership details of Augusta National Golf Club are highly private and exclusive. Membership is by invitation only, with invitations extended to a select few individuals deemed worthy of joining this esteemed golfing community. The club does not publicly disclose its membership fees, adding to the allure and mystique surrounding Augusta National.

Features and amenities

Augusta National Golf Club offers an array of luxurious features and amenities to enhance the member experience. The clubhouse exudes elegance and provides a welcoming atmosphere for members and guests. The golf practice facilities are world-class, allowing members to hone their skills. Additionally, the club offers exceptional dining options, from casual meals to fine culinary experiences.

History and tradition

Augusta National Golf Club has a rich history and tradition that adds to its legendary status. Founded in 1933 by Bobby Jones and Clifford Roberts, the club has hosted the Masters Tournament since 1934. The pristine condition of the course, the green jacket awarded to the tournament champion, and the annual traditions, such as the Par 3 Contest and the Champions Dinner, all contribute to the allure and mystique of Augusta National Golf Club.

Pine Valley Golf Club

Overview

Pine Valley Golf Club is widely regarded as one of the most challenging and visually stunning golf courses in the world. The course features rolling fairways, strategically placed bunkers, and breathtaking natural landscapes. Pine Valley offers a unique blend of difficulty and beauty that captivates golfers of all skill levels.

Membership details

Membership at Pine Valley Golf Club is highly exclusive and limited. The club does not disclose its membership details publicly, as it maintains a sense of privacy and exclusivity. Prospective members are typically nominated by current members and must undergo a rigorous selection process.

Features and amenities

Pine Valley Golf Club provides an exceptional golfing experience with its top-tier facilities and amenities. The clubhouse offers a relaxed and comfortable environment for members to socialize and enjoy the club’s services. The practice areas are meticulously maintained, providing members with optimal conditions for refining their skills. Additionally, Pine Valley offers fine dining options and a pro shop stocked with premium golf merchandise.

Course highlights

The course at Pine Valley Golf Club presents golfers with a challenging yet rewarding experience. Notable course highlights include strategically placed bunkers, undulating greens, and stunning vistas. The 5th hole, known as “Devil’s Asshole,” is particularly renowned for its difficulty and requires precise shot execution. Pine Valley’s renowned reputation is further solidified by its ranking as one of the top golf courses in the world year after year.

Cypress Point Club

Overview

Cypress Point Club is a golf course located on the scenic Monterey Peninsula in California. The course boasts magnificent coastal views, showcasing the natural beauty of the area. Cypress Point is renowned for its challenging layout, with meticulously placed hazards that test the skills of even the most experienced golfers.

Membership details

Cypress Point Club maintains a high level of exclusivity with limited membership availability. The club does not publicly disclose its membership details, adding to its elite reputation. Prospective members often need to be recommended by current members and undergo a rigorous vetting process.

Features and amenities

Cypress Point Club offers a range of features and amenities designed to enhance the member experience. The clubhouse provides a warm and inviting atmosphere, while the practice facilities allow members to sharpen their skills. Fine dining options are available, allowing members to indulge in culinary delights while enjoying panoramic views of the course and ocean.

Signature holes

Cypress Point Club is famous for its signature holes that offer breathtaking views and challenging shot selections. The 16th hole, known as “The Lone Cypress,” features a stunning seaside backdrop and requires precision and accuracy to navigate the small green. The 17th hole, “The Whale,” presents golfers with a challenging tee shot over a rocky inlet, testing their skills and nerve.

Shinnecock Hills Golf Club

Overview

Shinnecock Hills Golf Club holds a special place in the history of golf. Founded in 1891, it is one of the oldest golf clubs in the United States. The course features undulating fairways, challenging greens, and a traditional links-style design. Shinnecock Hills is known for its classic and timeless beauty, offering a memorable golfing experience.

Membership details

Membership at Shinnecock Hills Golf Club is highly selective, reflecting the club’s commitment to maintaining a distinguished member community. The club does not publicly disclose its membership details, and prospective members often need to be nominated by existing members. The exclusivity of the membership adds to the allure and appeal of Shinnecock Hills.

Course information

The course at Shinnecock Hills Golf Club is meticulously maintained and reflects the rich history of the club. With its challenging fairways and meticulously designed greens, the course tests the skills of even the most accomplished golfers. Shinnecock Hills has hosted numerous U.S. Open Championships, further establishing its reputation as a world-class golfing destination.

Championship history

Shinnecock Hills Golf Club has a storied past as a host of major championships. It has hosted the U.S. Open four times, with the most recent being in 2018. The club’s championship heritage, alongside its scenic beauty and exceptional course conditions, reinforces its reputation as one of the premier golf courses in the United States.

Considerations for joining golf courses with high membership fees

Financial commitment

Joining a golf course with a high membership fee requires a significant financial commitment. Golfers should carefully consider their budget and determine if they are willing and able to allocate a substantial portion of their income to membership fees, as well as associated expenses such as annual dues and additional charges for services and amenities.

Long waiting lists

Golf courses with high membership fees often have long waiting lists for prospective members. It is essential to be aware of the potential waiting times and consider whether the benefits of joining the particular club outweigh the wait. Patience and a willingness to wait for an available membership spot may be necessary.

Social expectations

Joining a golf course with high membership fees often comes with certain social expectations. Golfers should be prepared to actively participate in club events, maintain a certain level of decorum, and adhere to the club’s rules and regulations. Understanding and embracing the club’s culture and expectations are crucial for a harmonious membership experience.

Assessing personal priorities

Before committing to a golf course with high membership fees, golfers should carefully evaluate their priorities and objectives. Considerations such as proximity to home, desired course difficulty, available amenities, and opportunities for networking and socializing should all be taken into account. Understanding personal preferences and aligning them with the offerings of the chosen golf club is essential for a fulfilling membership.

Alternative options for golfers on a budget

Public golf courses

For golfers seeking more affordable options, public golf courses provide a viable alternative. Public courses often offer reasonable green fees, allowing golfers to enjoy their favorite sport without the financial burden of high membership fees. While public courses may not provide the exclusivity and amenities of private clubs, they can still offer enjoyable golf experiences in a more accessible manner.

Semi-private clubs

Semi-private clubs offer a middle ground between public courses and fully private clubs. These clubs typically provide a combination of membership and public play options. Golfers can join as members and enjoy various benefits such as access to reserved tee times, exclusive events, and potentially reduced green fees. Semi-private clubs offer a balance between affordability and some level of exclusivity.

Discounted tee times

Golfers on a budget can take advantage of discounted tee times offered by various platforms and websites. These services allow golfers to book tee times at private and public courses for a reduced price. By being flexible with tee time selection and taking advantage of off-peak hours, golfers can enjoy playing at renowned courses without the need for a full membership.

Golfing societies

Golfing societies or associations provide an alternative option for avid golfers seeking a sense of community and access to various courses. Membership in these societies typically grants golfers the opportunity to play at a variety of courses through organized events and outings. While not exclusive to one specific club, golfing societies offer a way to connect with fellow enthusiasts and enjoy different golfing experiences.

Conclusion

Joining a golf course with high membership fees offers a range of benefits, including superior playing experiences, exclusive events, networking opportunities, and high-quality facilities. The top golf courses with high membership fees, such as Augusta National, Pine Valley, Cypress Point, and Shinnecock Hills, are renowned for their exceptional golfing experiences and rich histories. However, joining such clubs requires careful consideration of factors like financial commitment, waiting lists, social expectations, and personal priorities. For golfers on a budget, alternative options such as public courses, semi-private clubs, discounted tee times, and golfing societies provide opportunities to enjoy the game without the high costs associated with exclusive golf clubs. Ultimately, the decision to join a golf course with a high membership fee should align with individual preferences and priorities, ensuring a fulfilling and rewarding golfing experience.

Understanding Golf Scoring

Unlock the mysteries of golf scoring with this comprehensive guide. Learn the basics, scoring terms, formats, and how handicaps affect your score.

If you’ve ever wondered how golf scoring works, you’re not alone. Whether you’re new to the game or just curious about its intricacies, understanding golf scoring can enhance your overall experience on the course. From birdies to bogeys, this article will break down the fundamental concepts of golf scoring, providing you with a clearer understanding of how each stroke affects your final score. So, grab your clubs and get ready to embark on a journey of unraveling the mysteries behind the numbers on the scorecard.

Understanding Golf Scoring

Basics of Golf Scoring

Golf scoring is a fascinating aspect of the sport that adds a level of competition and strategy to the game. Understanding golf scoring is essential for players who want to track their progress and compare their performance to others. In this article, we will delve into the basics of golf scoring, the different scoring terms and definitions, the calculation of net and gross scores, and various scoring formats. Whether you’re a beginner or an experienced golfer, this comprehensive guide will help you navigate the world of golf scoring with ease.

Par

Par is a crucial concept in golf scoring. It represents the number of strokes a skilled golfer is expected to take to complete a specific hole or course. Par values commonly range from three to six strokes per hole, depending on the design and difficulty of the course. When you score par on a hole, it means you completed the hole in the number of strokes it was expected to take. Scoring below par is considered exceptional, while scoring above par is an opportunity for improvement.

Stroke Play

Stroke play is the most common scoring format in golf. In this format, your total score for a round is calculated by adding up the number of strokes you took for each hole. The player with the lowest total score at the end of the round is the winner. Stroke play provides a comprehensive measure of a golfer’s overall performance and consistency.

Match Play

Match play is a scoring format where players compete head-to-head on each hole. The objective is to win the most holes rather than having the lowest overall score. In match play, you earn either a win, loss, or tie on each hole. The player who wins more holes than their opponent by the end of the round is declared the winner. Match play is a more interactive scoring format that adds an element of strategy and psychological warfare to the game.

Scoring Terms and Definitions

To fully understand golf scoring, it’s important to familiarize yourself with various scoring terms and definitions. Here are some commonly used terms:

Birdie

A birdie is a score of one stroke below par on a hole. For example, scoring a three on a par four hole is considered a birdie. Aim for birdies, as they indicate exceptional performance and good opportunities to gain an advantage.

Eagle

An eagle is a score of two strokes below par on a hole. It is a remarkable achievement and shows great skill and precision. Scoring an eagle usually requires a combination of long drives and accurate shots.

Bogey

A bogey refers to scoring one stroke above par on a hole. It is a common score for average golfers and shows room for improvement. While bogeys are not ideal, they are a part of the learning process.

Double Bogey

A double bogey is scoring two strokes over par on a hole. It indicates struggling on a particular hole or making a couple of mistakes. Double bogeys should be avoided as they can significantly affect your overall score.

Triple Bogey

A triple bogey is scoring three strokes over par on a hole. It is a challenging score to recover from and can negatively impact your confidence. Minimizing triple bogeys is crucial for maintaining a consistent score.

Handicap

A handicap is a numerical measure of a golfer’s ability. It allows players of different skill levels to compete fairly. Handicap values can be used to adjust a player’s score and calculate net scores, which we will discuss later in this article.

Net Score

The net score is the player’s gross score minus their handicap. It provides a more accurate representation of a golfer’s performance, as it takes into account their ability level. Net scores are commonly used in tournaments and competitions when players have varying handicaps.

Gross Score

The gross score is the total number of strokes a player takes to complete a round of golf without any adjustments. It reflects the raw performance of the golfer and provides a baseline for comparison.

Stableford Points

The Stableford scoring system awards points based on the number of strokes taken on each hole, relative to par. A score below par earns points, while a score above par results in no points or a negative score. The higher the number of Stableford points, the better your performance.

Understanding Golf Scoring

Par and Stroke Index

Understanding the concepts of par and stroke index is essential for navigating a golf course and developing a scoring strategy.

Understanding Par

Par is determined by the course designer and represents the number of strokes a skilled golfer is expected to take to complete a hole or course. Shorter holes typically have lower par values, while longer and more challenging holes have higher par values. By understanding the par values of each hole, you can plan your shots and manage your expectations accordingly.

Determining Stroke Index

Stroke index refers to the order in which the holes on a course are ranked by difficulty. The stroke index is usually indicated on the scorecard, with the lowest number indicating the most challenging hole. Understanding the stroke index helps golfers strategize their gameplay, as they can allocate strokes according to the difficulty of each hole.

Counting Strokes

Counting strokes accurately is essential for keeping an accurate score and understanding how you performed on each hole. Here are some guidelines for counting strokes effectively:

To the Hole

Counting strokes “to the hole” means counting every stroke you take until the ball is in the hole. This includes putts, chips, and any penalties incurred during the hole. It is important to be diligent in counting each stroke, as missing a stroke can result in an inaccurate score.

To the Green

Counting strokes “to the green” means counting every stroke you take until the ball reaches the putting green. This excludes any putts you make on the green. Counting strokes to the green provides insight into your ball-striking and approach play, while excluding the putting aspect.

Off the Tee

Counting strokes “off the tee” involves counting only the strokes you take from the designated tee box to the first point of the hole. This method allows you to track your driving accuracy and distance.

Penalty Strokes

Penalty strokes are additional strokes added to your score as a result of rules violations. Common penalty strokes include hitting the ball out of bounds, hitting into a water hazard, or taking relief from certain situations. It is important to understand the rules and penalties associated with each situation to accurately count your strokes.

Lost Ball or Out of Bounds

If you lose your ball or hit it out of bounds, you must count a penalty stroke and replay your shot from the original position. It is essential to accurately determine if your ball is lost or out of bounds to ensure you count the appropriate penalty strokes and maintain the integrity of your score.

Calculating Net and Gross Scores

Golfers often calculate both net and gross scores to better evaluate their performance. Here’s how to calculate each type of score:

Handicap Calculation

Before calculating net scores, determine your handicap. Handicap values are determined based on your average performance over a set number of rounds. Most golf clubs or associations provide a handicap calculation system to determine your official handicap index. Using this index, you can then calculate your handicap for a specific round or course.

Net Score

To calculate your net score, subtract your handicap from your gross score. The resulting score represents your performance adjusted to account for your playing ability. Net scores are commonly used to compare players of different skill levels in tournaments or casual rounds.

Gross Score

Your gross score is simply the total number of strokes you took during a round of golf, without any adjustments or subtractions. It reflects the raw performance and can be used as a baseline for tracking your progress and improvement.

Different Scoring Formats

Golf offers various scoring formats to add excitement and variety to the game. Familiarize yourself with the different scoring formats to enhance your golfing experience. Here are some popular formats:

Stroke Play

Stroke play is the most common scoring format, as mentioned earlier. Players total their strokes for the round, and the lowest score wins.

Match Play

In match play, players compete head-to-head on each hole. The objective is to win more holes than your opponent, rather than achieving the lowest overall score. Match play adds a competitive and strategic element to the game.

Scramble

Scramble is a team format where all players hit a shot, and the team chooses the best shot to continue from. This process continues until the ball is holed. Scramble is a fun format that encourages teamwork and provides an opportunity for players of different skill levels to compete together.

Four-Ball

Four-Ball is a team format where each player plays their own ball throughout the round. The team’s score is determined by the lowest score of the two players on each hole. Four-Ball allows for individual play while contributing to the team’s overall score.

Bogey

Bogey is a simplified scoring format where players aim to score one stroke below par on each hole. If a player matches the predetermined par, it is considered a tie or “halve” for that hole.

Stableford

Stableford scoring rewards players based on the number of points earned for each hole. Points are allocated based on how the player’s score compares to par. Scoring below par earns points, while scoring above par results in no points or a negative score. The player with the most points at the end of the round wins.

Understanding Stableford Scoring

Stableford is a scoring system that provides a fair and inclusive way to measure a golfer’s performance. Here’s how it works:

Scoring Points

In Stableford scoring, you earn points based on the relative difficulty of the hole. Common point allocations are as follows:

  • Double eagles (three strokes under par) usually earn 5 points
  • Eagles (two strokes under par) earn 4 points
  • Birdies (one stroke under par) earn 3 points
  • Pars (matching par) earn 2 points
  • Bogeys (one stroke over par) earn 1 point
  • Double bogeys (two strokes over par) or worse earn 0 points

Strokes and Scoring Chart

To determine your Stableford score for each hole, refer to the scoring chart provided by the golf course or tournament organizers. The chart matches your handicap with the par and stroke index of the hole to determine how many strokes you receive on that hole. With your allocated strokes, play the hole as you usually would and tally your Stableford points at the end of the round.

Scoring Disqualification

In golf, accuracy and integrity are paramount. Failure to adhere to rules and regulations can lead to disqualification from a round or tournament. Here are some scenarios that may result in disqualification:

Signing an Incorrect Scorecard

Signing an incorrect scorecard, intentionally or inadvertently, can result in disqualification. It is essential to double-check your scorecard for accuracy before signing and verifying your score.

Disqualification Penalties

Other situations that may lead to disqualification include cheating, intentionally altering scorecards, or failing to adhere to specific rules and regulations set by the governing body. Always prioritize fair play and sportsmanship to avoid the consequences of disqualification.

How Handicaps Affect Scoring

Handicaps play a significant role in golf scoring, particularly in match play and net score calculations. Here’s how handicaps affect scoring:

Calculating Handicap

Handicaps are calculated based on a golfer’s average performance over a set number of rounds. Using a handicap index, which represents a player’s potential playing ability, handicaps are calculated for specific courses or sets of tees. These handicaps reflect a player’s ability relative to the difficulty of a particular course.

Applying Handicap to Net Score

When playing in a tournament or competition with players of varying skill levels, applying a handicap to your gross score can even the playing field. Subtracting your handicap from your gross score results in a net score, which provides a fair measure of your performance compared to other players. Net scores allow golfers to compete on an equal basis, regardless of their handicap.

Match Play Scoring Methods

Match play utilizes different scoring methods compared to stroke play. Understanding these methods is crucial for effectively navigating match play:

Hole-by-Hole Scoring

In match play, players compete hole-by-hole rather than calculating their overall score at the end of the round. The player who wins a hole receives one point, the player with the lowest score (or best net score) wins the hole. The player with the most points at the end of the round wins the match.

Dormie Holes

A “dormie” situation occurs when a player leads by the number of holes remaining. For example, if a player leads by two holes with only two holes left to play, they are considered to be “dormie” in the match. If the player with the advantage wins one of the remaining holes, they win the match. If the other player wins the hole, the match continues to a sudden-death playoff.

Match Halved

When both players or teams score the same on a hole, the hole is considered “halved.” No points are awarded, and the match continues to the next hole. If the match ends with all holes halved, it is officially declared a tie.

Conceded Strokes

During match play, it is common for players to concede strokes to their opponents. This often occurs when a player’s score is too high, or when they no longer have a chance to win the hole. Conceded strokes simplify the process and keep the match moving smoothly.

Conclusion

Golf scoring is a fascinating aspect of the sport that adds a layer of competition and strategy to the game. Understanding the basics of golf scoring, the different scoring terms and definitions, and the calculation of net and gross scores is essential for all golfers. Moreover, being familiar with various scoring formats enhances your golfing experience by introducing diverse challenges and opportunities for improvement. So, next time you step onto the course, armed with this knowledge, enjoy the game and aim for your best score!

The Cost of Wrapping a Golf Cart

Thinking of wrapping your golf cart? Learn about the factors influencing the cost, from size and design complexity to wrap material and labor. Find out more here!

Have you ever wondered how much it would cost to give your golf cart a whole new look? Well, the answer lies in the art of wrapping. Whether you want to add a personal touch or promote your business, wrapping your golf cart can be a fun and eye-catching way to stand out on the green. However, the cost may vary depending on various factors such as the size of the cart, the design complexity, and the type of material used. In this article, we will explore the factors that influence the cost of wrapping a golf cart, so you’ll have a better idea of what to expect before embarking on this exciting endeavor.

The Cost of Wrapping a Golf Cart

Factors Affecting the Cost of Wrapping a Golf Cart

When it comes to wrapping a golf cart, there are several factors that can affect the overall cost. Understanding these factors can help you make an informed decision and budget accordingly. Here, we will take a closer look at the main factors that play a role in determining the cost of wrapping a golf cart.

Size of the Golf Cart

The size of the golf cart is one of the primary factors to consider when determining the cost of wrapping. Golf carts come in different sizes, including standard, extended, and custom-built options. Standard golf carts are the most common and typically cost less to wrap compared to extended or custom-built carts. The larger the cart, the more material will be required, which can increase the overall cost.

Standard Golf Cart

Standard golf carts, also known as 2-seaters, are the most popular option. They are generally smaller and require less material to wrap, resulting in a lower cost. Standard golf cart wraps can range from simple solid colors to more intricate designs.

Extended Golf Cart

Extended golf carts, also known as 4-seaters, are larger in size and can accommodate more passengers. Wrapping an extended golf cart requires more material, which can lead to a higher cost compared to wrapping a standard cart. However, the overall cost will still depend on the complexity of the design and the type of wrap material chosen.

Custom-Built Golf Cart

Custom-built golf carts offer the most flexibility in terms of design and size. These carts are often built to individual specifications, allowing for unique and personalized wrap designs. Wrapping a custom-built golf cart can be more expensive due to the increased size and complexity of the design.

Type of Wrap Material

The type of wrap material chosen for your golf cart is another key factor that affects the cost. There are several options available, including vinyl, decals, and custom paint. Each material has its own characteristics and price range.

Vinyl

Vinyl wraps are the most commonly used material for golf cart wraps. They are durable, easy to install, and offer a wide range of colors and finishes. Vinyl wraps come in different qualities, with higher-quality vinyl generally being more expensive. The cost of vinyl wraps can vary depending on factors such as thickness, brand, and special finishes.

Decals

Decals are another popular option for golf cart wraps. They are pre-cut adhesive stickers that are applied to the cart’s surface. Decals come in various designs and patterns, making them a cost-effective choice for those looking to customize their golf cart. The cost of decals is generally lower compared to full wraps, as less material is required.

Custom Paint

For a truly unique and high-end look, some golf cart owners opt for custom paint jobs. Custom paint allows for intricate details and personalized designs that cannot be achieved with wraps or decals. However, custom paint can be quite expensive due to the labor-intensive process involved, making it a more premium choice.

The Cost of Wrapping a Golf Cart

Complexity of the Design

The complexity of the design you choose for your golf cart wrap will also impact the cost. Designs can range from simple graphics to detailed graphics with special effects. The more complex the design, the more time and effort it takes to accurately apply the wrap, which can increase the overall cost.

Simple Graphics

Simple graphics include basic shapes, lines, and solid colors. These designs are relatively easy to create and apply, making them a more budget-friendly option. Simple graphics can still be visually appealing and add a touch of personalization to your golf cart.

Detailed Graphics

Detailed graphics involve more intricate patterns, images, or logos. These designs require greater precision during installation to ensure the desired visual impact is achieved. Due to the additional time and effort involved, wraps with detailed graphics tend to be more expensive compared to simpler designs.

Special Effects

Special effects, such as metallic finishes, color-changing wraps, or textured surfaces, can add an extra wow factor to your golf cart. These effects require specific materials and installation techniques, which can drive up the cost of the wrap. If you are looking for a truly eye-catching design, be prepared for a higher price tag.

Additional Customizations

In addition to the main wrap, there are additional customizations that can further enhance the look of your golf cart. These include options such as full wrap versus partial wrap, as well as the inclusion of extra accessories.

Full Wrap

A full wrap covers the entire surface of the golf cart, including the body, roof, and any other visible areas. Full wraps provide a seamless and cohesive look, but they generally cost more compared to partial wraps due to the additional material required.

Partial Wrap

A partial wrap covers only certain areas of the golf cart, leaving some portions exposed. This option offers more flexibility in terms of design and cost. Partial wraps can be a more budget-friendly choice if you want to focus the design on specific areas of the cart.

Extra Accessories

Some golf cart owners choose to add extra accessories to their wraps, such as custom trim, seat covers, or upgraded wheels. While these additional customizations may not directly impact the cost of the wrap itself, they are worth considering when budgeting for your overall golf cart customization project.

Labor Costs

The cost of labor is an important consideration when estimating the total cost of wrapping a golf cart. The complexity of the design and the type of wrap material chosen can influence the amount of time and effort required for installation.

Professional Installation

Hiring a professional to install your golf cart wrap ensures a high-quality and precise result. Professionals have the expertise and tools needed to properly apply the wrap and ensure it adheres correctly. However, professional installation usually comes at a higher cost compared to DIY options.

DIY Wrapping

For those who are more adventurous and budget-conscious, DIY wrapping is a viable option. It allows you to save on labor costs but requires time, patience, and attention to detail. DIY wrapping can be a rewarding experience, but it is important to carefully follow instructions and take necessary precautions to achieve a satisfactory result.

Local Market Pricing

It is worth noting that the cost of wrapping a golf cart can vary depending on your location. Market pricing is influenced by factors such as the availability of wrap providers, competition, and the local cost of living. This means that the same golf cart wrap may cost differently in different locations.

Different Locations, Different Costs

If you are considering getting your golf cart wrapped, it is advisable to research and compare pricing in your local area. This will give you a better understanding of the average cost and help you make an informed decision. When comparing prices, be sure to take into account factors such as reputation, experience, and the quality of previous work.

Comparing Quotes from Different Providers

To obtain the best value for your money and ensure a satisfactory outcome, it is recommended to request multiple quotes from different wrap providers. Comparing quotes can help you identify any significant price differences and evaluate the services and materials included in each offer.

Requesting Multiple Quotes

Reach out to several reputable wrap providers in your area and provide them with the details of your golf cart and desired design. This will allow them to provide accurate quotes tailored to your specific needs. Be sure to ask for a breakdown of the costs, including materials, labor, and any additional services offered.

Evaluating Pricing and Services

When comparing quotes, look beyond the price alone and evaluate the services and materials included. Consider factors such as the quality of the wrap material, the reputation and experience of the provider, and any warranties or guarantees offered. A slightly higher price from a trusted provider may be worth the investment for a superior result.

Considering Reputation and Experience

Choosing a wrap provider with a solid reputation and extensive experience is key to ensuring a successful golf cart wrap. Take the time to read reviews, view their portfolio of previous work, and ask for references if necessary. A provider with a proven track record is more likely to deliver exceptional results and provide a positive overall experience.

Budget-Friendly Alternatives

If the cost of a full golf cart wrap is beyond your budget, there are alternative options that can still give your cart a fresh new look. Consider these budget-friendly alternatives:

Temporary Decals or Magnets

If you want to add a touch of customization without committing to a full wrap, temporary decals or magnets might be the solution. These options allow you to easily remove and change the design as desired, without the same level of investment as a permanent wrap.

Painting

While custom paint jobs can be expensive, exploring traditional painting options may be a more cost-effective alternative. Repainting your golf cart can still provide a refreshed appearance and allow for some personalization. However, it is important to consult a professional to ensure proper preparation and application techniques are used.

DIY Wrapping Techniques

For those with a creative spirit and a willingness to learn, DIY wrapping techniques can be an affordable way to customize your golf cart. There are numerous online resources, tutorials, and instructional videos available to guide you through the process. However, keep in mind that DIY wrapping requires time, patience, and attention to detail to achieve a satisfactory result.

Conclusion

Wrapping a golf cart is an excellent way to add personality and style to your vehicle. As you consider the cost of wrapping, take into account factors such as the size of the cart, the type of wrap material, the complexity of the design, additional customizations, and labor costs. Don’t forget to compare quotes from multiple providers, consider the local market pricing, and explore budget-friendly alternatives if necessary. By weighing these factors and making an informed decision, you can transform your golf cart into a personalized masterpiece that reflects your unique style.

Understanding the Concept of Overstable Discs in Disc Golf

Gain an in-depth understanding of overstable discs in disc golf. Learn about their flight characteristics, advantages, key characteristics, and how to choose and throw them effectively.

Whether you’re new to the sport or a seasoned disc golf enthusiast, understanding the concept of overstable discs is crucial to improving your game. In disc golf, “overstable” refers to the flight characteristics of a disc, specifically its tendency to fade or curve to the left for right-handed throwers (or right for left-handed throwers). This article will delve into the physics behind overstable discs, explaining how they can help you navigate challenging courses, conquer windy conditions, and ultimately enhance your disc golf experience. So grab your favorite overstable disc, and let’s explore the fascinating world of disc flight together.

Understanding the Concept of Overstable Discs in Disc Golf

Disc golf is a thrilling sport that combines the precision of golf with the excitement of throwing flying discs. One crucial aspect of disc golf is the selection of discs, as they come in various shapes, sizes, and designs to cater to different throwing styles and conditions. Among these discs, the concept of “overstable” plays a significant role in determining the flight characteristics and overall performance on the course.

Understanding the Concept of Overstable Discs in Disc Golf

Definition of ‘Overstable’ in Disc Golf

To understand the concept of “overstable” in disc golf, it is essential to grasp the underlying principle of stability in disc flight first. Stability refers to how a disc behaves in flight, specifically how it resists turning and fading at the end. An overstable disc, as the name suggests, is designed to exhibit more stability than other discs.

An overstable disc tends to hold its line throughout the flight, resisting turning and fading significantly. It will curve less to the right (for right-handed throwers) and finish with a predictable and consistent fade at the end. This stability is achieved through various design characteristics, including the disc’s rim shape, weight distribution, and plastic type.

Importance of Overstable Discs in Disc Golf

Overstable discs play a crucial role in the sport of disc golf, offering several advantages to players of all skill levels. One of the primary benefits of using overstable discs is their ability to combat the effects of wind. Wind can have a considerable impact on disc flight, causing less stable discs to turn and fade prematurely. However, overstable discs are specifically designed to resist these wind-induced forces, allowing players to maintain control and accuracy even in challenging weather conditions.

Furthermore, overstable discs excel in a variety of situations on the disc golf course. Their reliable and consistent flight characteristics make them ideal for executing precise shots, such as approaches and drives that require accuracy and control. Whether navigating tight fairways, battling against headwinds, or executing hyzer shots, overstable discs can provide the stability needed to conquer these challenging scenarios.

Key Characteristics of Overstable Discs

Several key characteristics distinguish overstable discs from their stable and understable counterparts. These features determine how the disc performs in flight and contribute to its overall stability. Understanding these characteristics is crucial when selecting the right overstable disc for your game.

The rim design and width of an overstable disc are significant factors that influence its stability. Generally, overstable discs have wider rims compared to stable or understable discs. This wider rim design enhances the disc’s ability to resist turning and provides more control during powerful throws.

Weight distribution is another crucial characteristic of overstable discs. These discs typically feature a more significant weight concentration towards the outer edge, further aiding their stability in flight. This weight distribution helps to neutralize any unwanted turning tendencies and promotes a consistent flight path.

Discs are made from different types of plastic, each with its unique characteristics. The choice of plastic can significantly impact a disc’s stability. Overstable discs are commonly made from stiffer and more durable plastic blends, such as champion or lucid plastic, which enhance their stability and longevity.

Stability ratings and flight numbers are standardized systems used by disc manufacturers to indicate a disc’s stability level. These ratings provide players with a quick reference when selecting discs. Overstable discs usually possess high stability ratings and lower numbers, such as 0 and 1, emphasizing their predictable and fade-heavy flight paths.

Understanding the Concept of Overstable Discs in Disc Golf

Flight Path of Overstable Discs

The flight path of an overstable disc follows a distinct pattern that sets it apart from stable and understable discs. Understanding this flight path is essential for effectively utilizing overstable discs in disc golf.

Upon release, overstable discs demonstrate high-speed stability, meaning they resist turning even at higher velocities. This characteristic ensures that the disc maintains a straighter flight for a more extended period before exhibiting any significant turn.

As the disc begins to slow down, it enters the fade phase, which characterizes overstable discs. The fade refers to the disc’s tendency to finish its flight with a predictable and consistent leftward curve (for right-handed throwers) before coming to a complete stop. This leftward finish helps players shape their shots and adds an extra level of control to their throws.

Another advantage of overstable discs is their ability to resist turnovers and anhyzer shots. Turnovers occur when discs unintentionally turn to the right (for right-handed throwers) during the flight instead of maintaining a straight path. Anhyzer shots, on the other hand, involve intentionally throwing the disc on a curved flight path to the right (for right-handed throwers). Overstable discs resist both these tendencies, allowing players to execute shots with more precision and accuracy.

Overstable Discs vs. Stable and Understable Discs

When comparing overstable discs to their stable and understable counterparts, it is crucial to understand the distinct flight characteristics of each category. Stable discs have a relatively neutral flight path and offer a balance between the tendencies of turning and fading. Understable discs, on the other hand, have a natural tendency to turn to the right (for right-handed throwers) during flight, with minimal fading.

Overstable discs differ from both stable and understable discs by providing a flight path with stronger fade tendencies. While stable discs may have a slight fade at the end, overstable discs exhibit a more pronounced and reliable leftward finish. This fade-heavy flight path allows players to shape their shots more precisely and predictably, especially when navigating obstacles or battling against headwinds.

Different disc selection purposes also exist between overstable, stable, and understable discs. Overstable discs are typically favored for their reliability, consistency, and ability to combat challenging wind conditions. Stable discs, on the other hand, are versatile and well-suited for a wide range of shots, while understable discs are perfect for achieving maximum distance and executing turnover shots.

Understanding the unique flight characteristics of each type of disc is essential for players to effectively use and diversify their disc selection on the course.

Determining the Stability of a Disc

Determining the stability of a disc is crucial when selecting the right disc for your throw. Fortunately, disc manufacturers provide flight ratings and stability guides that facilitate this decision-making process.

Flight ratings consist of four numbers, typically ranging from 0 to 14, that provide a comprehensive snapshot of a disc’s flight characteristics. The first number indicates the disc’s speed, the second represents its glide, the third denotes its stability, and the fourth signifies its fade. For overstable discs, a low stability number (e.g., 0 or 1) is a reliable indicator of their stability level.

Testing the stability of a disc in a controlled environment can be another helpful approach. By throwing the disc with different throwing angles, speeds, and in varying wind conditions, players can observe and evaluate its stability firsthand. This empirical testing can provide valuable insights into how the disc behaves and its suitability for specific situations.

Additionally, seeking the opinions of other players, especially those with experience or expertise, can help in determining the stability of a disc. Learning from the experiences and insights of fellow disc golfers can provide valuable information when making disc selections.

Choosing the Right Overstable Disc

Choosing the right overstable disc requires careful consideration of several factors. By taking these factors into account, players can find a disc that matches their throwing style, arm speed, and course conditions.

One crucial factor to consider is disc speed and arm speed match. Discs are categorized into different speed classes, ranging from 1 to 14. It is essential to match your arm speed with the recommended speed of the disc to achieve optimal results. Overstable discs usually fall into the higher speed classes, and ensuring that your arm speed can generate enough power to utilize the disc’s stability is essential.

Balancing disc stability and control is another factor to consider. While overstable discs provide excellent stability, too much stability might sacrifice control. It is crucial to find a disc that offers the right balance for your throwing style and preferences. Experimenting with different weights, plastic types, and stability ratings within the overstable category can help find the sweet spot between stability and control.

Lastly, experimenting with different disc brands and models is also essential. Each disc manufacturer offers a variety of overstable discs, each with its unique characteristics and flight paths. Trying out different discs can help players discover the ones that best suit their throwing style, comfort, and desired flight paths.

Techniques for Throwing Overstable Discs

Proper technique plays a vital role in maximizing the potential of overstable discs. By employing the right grip, release, and power, players can make the most out of their overstable discs’ stability and flight characteristics.

Achieving a proper grip is crucial for consistent and accurate throws with overstable discs. The power grip, where the thumb rests on the flight plate, and the fingers are spread across the rim, is a popular grip choice for many players. This grip maximizes control and power transfer during the throw, providing a solid foundation for accurate releases.

When releasing an overstable disc, it is vital to focus on a clean and smooth release to prevent any unwanted wobbles or off-axis movement. Practicing the proper technique and release point can enhance disc stability and improve the overall flight path.

Understanding the required power for overstable discs is essential. These discs typically require more power to achieve their desired flight path and maximize the benefits of their stability. Generating enough arm speed and torque through proper body mechanics is crucial for achieving the desired flight characteristics.

The angle of release also plays a significant role in throwing overstable discs effectively. For a right-handed thrower, releasing the disc with a slight hyzer angle (tilted to the left) can help counterbalance the disc’s natural turn tendencies and promote a more reliable and consistent flight.

Additionally, managing the disc’s fade can greatly contribute to maximizing its potential. By understanding and anticipating the fade, players can time their shots and utilize the disc’s stability to shape their throws effectively. Adjusting release angles and shot selection based on the disc’s fade tendencies can greatly enhance control and accuracy.

Common Mistakes When Using Overstable Discs

While overstable discs offer numerous benefits, there are common mistakes that players may make when utilizing them. Being aware of these pitfalls can help players avoid them and fully capitalize on the advantages provided by overstable discs.

One common mistake is relying solely on the disc’s stability to compensate for poor throwing technique. It is essential to focus on improving throwing mechanics and technique to fully utilize the stability of overstable discs. By honing your skills, you can achieve better consistency and accuracy, regardless of the disc’s stability level.

Overcompensating for a disc’s stability by throwing them too hard is another common mistake. Although overstable discs do require more power, it is crucial to find the right balance. Throwing with excessive force can result in an unwanted flex or turn, negating the disc’s intended stability and accuracy.

Relying exclusively on overstable discs and neglecting other disc types can also limit a player’s potential. While overstable discs excel in specific situations, having a well-rounded selection of discs allows players to adapt to a wide range of shot requirements and overcome various course challenges.

Overstable Discs in Different Weather Conditions

Weather conditions have a significant impact on disc flight, and overstable discs perform differently in various weather scenarios. Understanding how overstable discs react in different weather conditions can help players make more informed decisions on the course.

One critical weather consideration is wind. Wind can drastically affect disc flight, causing unstable discs to turn dramatically and lose control. However, overstable discs are designed to combat these wind-induced forces, making them the go-to choice for windy conditions. The stability of overstable discs ensures that they can resist turning and stay on the desired flight path, providing players with reliable control and accuracy.

Rain and moisture can also affect disc flight. Wet discs tend to have a reduced grip, which can impact the overall stability and release of the disc. However, the inherent stability of overstable discs can help counteract the effects of moisture to some extent. Their reliable flight characteristics and fade tendencies offer players greater control, even under wet conditions.

Cold weather can also influence disc flight. Cold temperatures can result in denser air, which affects disc stability and lift. Overstable discs tend to perform better in colder weather due to their stability, resisting the potential changes in flight caused by denser air.

Hot weather, on the other hand, can lead to less stable disc flight. The lighter air density in hot conditions can cause overstable discs to be less effective, as they rely on air resistance for stability. However, the stability of overstable discs still provides an advantage over less stable discs, even in hot weather conditions.

By understanding how overstable discs perform in various weather conditions, players can make calculated decisions when selecting the appropriate disc for their shots, leading to more successful and consistent play.

In conclusion, the concept of “overstable” is an essential aspect of the disc golf game. Overstable discs offer players stability, control, and reliability, making them valuable tools in different weather conditions and shot requirements. Understanding the characteristics, flight paths, and techniques associated with overstable discs can significantly enhance players’ performance and enjoyment of the sport. By incorporating overstable discs into their disc golf arsenal and continually honing their skills, players can elevate their game to new heights.