How to properly charge a golf cart

Learn how to properly charge a golf cart for optimal performance and longevity. Get step-by-step instructions, safety tips, and troubleshooting advice.

Are you a golf enthusiast looking to keep your golf cart in top condition? One crucial aspect of maintaining a golf cart is knowing how to properly charge it. In this article, we will provide you with valuable information and step-by-step instructions on how to charge a golf cart correctly. From understanding the charging process to ensuring you use the right equipment, we’ve got you covered. So, let’s get started and ensure your golf cart stays powered up for all your future rounds of golf!

How to Properly Charge a Golf Cart

Welcome to this comprehensive guide on how to properly charge a golf cart! Whether you’re a seasoned golfer or a first-time owner, understanding the ins and outs of charging your golf cart is crucial for optimal performance and longevity. In this article, we will cover everything you need to know about charging your golf cart, from choosing the right charger to troubleshooting common issues. So let’s dive in and ensure you have the knowledge to keep your golf cart running smoothly!

How to properly charge a golf cart

Choosing the Right Charger

The first step in properly charging your golf cart is selecting the right charger. There are various types of chargers available in the market, so it’s important to choose the one that best suits your specific golf cart model and battery type. The voltage and amperage requirements of your golf cart will determine the charger you need. Consult your golf cart’s manual or contact the manufacturer for guidance on selecting the appropriate charger. It’s also advisable to invest in a charger with safety features such as overcharge protection and automatic shut-off.

Understanding Battery Types

Before diving into the charging process, it’s essential to understand the different types of batteries commonly used in golf carts. The two main types are lead-acid batteries and lithium-ion batteries. Lead-acid batteries are the traditional choice, affordable but requiring regular maintenance. On the other hand, lithium-ion batteries are more expensive upfront but provide longer lifespan and require little maintenance. Familiarize yourself with the specific requirements and recommendations for your battery type to ensure proper charging.

Preparing for Charging

To ensure a smooth charging process, it’s important to prepare your golf cart adequately. First, make sure the cart is parked in a well-ventilated area away from flammable materials. Ensure the battery terminals are clean and free from corrosion, as this can affect the charging efficiency. Inspect the battery cables for any signs of damage and replace them if necessary. Additionally, ensure that all accessories and lights are turned off before connecting the charger.

How to properly charge a golf cart

Connecting the Charger

Once you’ve prepared your golf cart, it’s time to connect the charger. Start by locating the charger port on your cart; it is usually located near the battery compartment. Ensure the charger is unplugged before connecting the charging cable to the cart’s charger port. It’s crucial to make a secure and proper connection to avoid any electrical accidents. Once connected, plug the charger into a grounded electrical outlet. Double-check that all connections are secure and that the charger is displaying the appropriate charging status.

Monitoring the Charging Process

While your golf cart is charging, it’s important to monitor the process to ensure everything goes smoothly. Most chargers have an indicator light that shows the charging status. A solid green light usually indicates that the battery is fully charged, while a flashing light indicates that the battery is still charging. Avoid overcharging the battery, as this can lead to damage and reduce its lifespan. Keep an eye on the charging progress and disconnect the charger once the battery is fully charged.

Charging Safety Measures

Safety should always be a top priority when dealing with any electrical equipment. When charging your golf cart, follow these important safety measures. Avoid charging the battery in extreme temperatures, as this can affect the charging efficiency and potentially damage the battery. Never attempt to charge a damaged or leaking battery, as this can be dangerous. It’s also advisable to keep a fire extinguisher nearby and never leave the charging process unattended.

Maintaining Battery Health

Proper maintenance is crucial for the health and longevity of your golf cart battery. Regularly check the water level in lead-acid batteries and replenish it as needed with distilled water. Keep the batteries clean and free from dirt and debris, as this can hinder their performance. Additionally, avoid deep discharges and recharge the batteries after each use. Following these maintenance practices will help extend the lifespan of your golf cart battery and ensure optimum performance.

Troubleshooting Common Charging Issues

Sometimes, issues may arise during the charging process. One common problem is a charger that fails to start or does not charge the battery properly. In such cases, ensure that all connections are secure and that the charger is receiving power from the electrical outlet. If the charger still does not work, it may be faulty and require professional assistance. Additionally, if the battery does not hold a charge or drains quickly, it may indicate a battery issue that needs to be addressed promptly.

Extending Battery Life

To maximize the lifespan of your golf cart battery, there are a few simple practices to follow. Avoid storing your golf cart with a fully discharged battery, as this can lead to irreversible damage. If you plan to store your golf cart for an extended period, ensure the battery is properly charged before doing so. Regularly check the battery voltage and recharge it whenever it drops below the recommended level. Following these practices will help extend your battery’s life and save you from unnecessary replacement costs.

Using Solar Power for Charging

In recent years, the use of solar power for charging golf cart batteries has gained popularity. Solar chargers harness the sun’s energy to charge your battery and provide an eco-friendly and cost-effective charging solution. If you have access to ample sunlight or are looking to reduce your carbon footprint, investing in a solar charger can be a great option. However, keep in mind that solar charging may take longer than traditional methods, especially on cloudy days. Before purchasing a solar charger, ensure it is compatible with your golf cart and battery type.

In conclusion, properly charging your golf cart is essential for its performance and longevity. By following the steps outlined in this article, from choosing the right charger to understanding battery types, connecting the charger, monitoring the process, and following safety measures, you can ensure that your golf cart battery stays in optimal condition. Regular maintenance, troubleshooting common issues, and considering alternative charging methods like solar power will all contribute to an extended battery life, saving you time, money, and potential headaches in the long run. So go ahead, charge your golf cart with confidence, and enjoy many rounds of golf or leisurely rides!

Understanding the Charging Time for Golf Carts

Learn about the factors that affect the charging time for golf carts. Understand battery types, capacity, state of charge, and charger types. Optimize your charging routine for faster and efficient charging.

Imagine you’re out on the golf course, enjoying a day of leisurely rounds with friends. Suddenly, your trusty golf cart starts to slow down, its battery drained. You’re faced with the dilemma of waiting for it to charge, but how long will that take? In this article, we will delve into the world of golf cart charging time, exploring the factors that affect it, and providing you with the knowledge you need to make informed decisions about getting back on the green. So, let’s take a closer look at understanding the charging time for golf carts.

Understanding the Charging Time for Golf Carts

Factors Affecting Charging Time

When it comes to charging your golf cart, several factors can affect the charging time. Understanding these factors can help you plan your charging routine more effectively and optimize the charging process for your cart. The key factors that influence the charging time include the battery type, battery capacity, state of charge, and charger type. Let’s dive deeper into each of these factors to gain a better understanding.

Battery Type

The type of battery used in your golf cart can significantly impact the charging time. There are primarily two types of batteries commonly used in golf carts: lead-acid batteries and lithium-ion batteries.

Lead-Acid Batteries

Lead-acid batteries have been the industry standard for golf carts for many years. These batteries are known for their durability and affordability. However, they tend to have longer charging times compared to other battery types. Charging a lead-acid battery typically takes anywhere from 8 to 12 hours.

Lithium-Ion Batteries

On the other hand, lithium-ion batteries are gaining popularity in the golf cart industry due to their fast-charging capabilities. These batteries offer a significant reduction in charging time compared to lead-acid batteries. With the right charger, you can charge a lithium-ion battery in as little as 2 to 4 hours.

Battery Capacity

The capacity of your golf cart battery also plays a crucial role in determining the charging time. Battery capacity is typically measured in voltage and amp-hour (Ah) rating.

Voltage

The voltage of the battery indicates its power capacity. Golf carts usually operate on a 36-volt or 48-volt system. Higher voltage batteries tend to charge faster due to their increased power output.

Amp-Hour (Ah) Rating

The amp-hour rating of a battery indicates how much charge it can hold. A higher Ah rating means a larger capacity battery, which may require additional time to fully charge.

Understanding the Charging Time for Golf Carts

State of Charge

The state of charge refers to the amount of charge remaining in your golf cart battery. Two factors affecting the state of charge are the initial charge and the depth of discharge.

Initial Charge

When you initially install a new battery or fully charge a discharged battery, it usually takes longer to complete the charging process. This is because the battery needs to reach its maximum capacity, which can take several hours.

Depth of Discharge

The more deeply discharged your battery is, the longer it will take to recharge. If you frequently run your golf cart until the battery is almost fully depleted, it may take longer to charge back to its full capacity.

Charger Type

The type of charger you use for your golf cart also affects the charging time. There are two main types of chargers: onboard chargers and portable chargers.

Onboard Chargers

Onboard chargers are built into the golf cart and are typically designed to match the battery’s specifications. These chargers are convenient as they are always present and ready to use. However, they may have limitations in terms of charging speed compared to portable chargers.

Portable Chargers

Portable chargers, also known as external or aftermarket chargers, can be connected to your golf cart when needed. These chargers provide more flexibility in terms of charging speed and can often charge the batteries faster than onboard chargers.

Charging Methods

Golf carts can be charged using two main methods: standard charging and fast charging. Each method has its own set of considerations and implications on the charging time.

Standard Charging

Standard charging is the conventional method used for charging golf cart batteries. It involves connecting the charger to the battery and allowing it to charge gradually over a specified period. The charging time for standard charging depends on various factors, including battery type, capacity, and charger specifications.

Fast Charging

Fast charging, as the name suggests, allows for a quicker recharge of your golf cart battery. This method utilizes specialized chargers that deliver a higher current to the battery, allowing it to charge at a faster rate. While fast charging can significantly reduce the charging time, it may have an impact on the long-term health and lifespan of the battery.

Standard Charging

Standard charging is the most commonly used method for charging golf cart batteries. It offers a safe and reliable way to charge your battery without putting excessive stress on its components. The following considerations are important when using standard charging:

Charging Time

The charging time for standard charging can vary depending on the battery type, capacity, and charger specifications. On average, standard charging can take anywhere from 8 to 12 hours for lead-acid batteries, while lithium-ion batteries may require 2 to 4 hours.

Charger Specifications

Using the right charger with the correct voltage and charging capacity is essential for standard charging. Consult your golf cart’s manufacturer guidelines to ensure you are using a charger compatible with your battery’s specifications.

Maintenance and Safety Considerations

During standard charging, it is important to monitor the charging process and ensure proper ventilation. Regular maintenance of the battery, including checking for any signs of damage or corrosion, is crucial for optimal performance and safety.

Fast Charging

If you are looking to reduce your charging time significantly, fast charging may be an option worth considering. However, it is important to understand the implications before using this method.

Charging Time

Fast charging can complete the charging process in a fraction of the time required for standard charging. With the right equipment and charger, you can charge your lead-acid battery in 4 to 6 hours, while lithium-ion batteries may reach full charge in just 1 to 2 hours.

Charger Specifications

Fast charging requires specialized chargers capable of delivering higher current levels. Using a charger with the wrong specifications can damage the battery or pose safety risks. Make sure to use a fast charger recommended by your golf cart manufacturer.

Impact on Battery Life

Although fast charging offers shorter charging times, it may have an impact on the overall lifespan and health of the battery. Fast charging generates more heat and can cause accelerated wear on the battery’s components. It is important to weigh the benefits of reduced charging time against the potential long-term effects on your battery.

Tips to Reduce Charging Time

If you are looking for ways to further reduce your golf cart charging time, consider the following tips:

Optimizing Battery Usage

Efficiently using your golf cart’s battery can help extend its charge and reduce the frequency of charging. Avoiding unnecessary stops and optimizing your driving habits can help maximize your battery’s capacity, resulting in longer durations between charges.

Using Higher Capacity Chargers

Using a charger with a higher charging capacity can significantly reduce the charging time. However, it is important to ensure that the charger is compatible with your battery’s specifications and won’t cause any damage.

Avoiding Overcharging

Overcharging your golf cart battery can lead to decreased performance and increased wear. Avoid leaving your battery on charge for extended periods once it reaches full capacity. Disconnecting the charger once the battery is charged will help maintain its health and prolong its lifespan.

Conclusion

Understanding the factors affecting the charging time of your golf cart battery is crucial for efficient and effective charging. Factors such as battery type, capacity, state of charge, and charger type all play a role in determining the duration of the charging process. By considering these factors and following the tips provided, you can optimize your charging routine, reduce charging time, and ensure optimal performance from your golf cart battery.

Common Issues: Golf Cart Battery Won’t Charge

Having trouble with your golf cart battery not charging? Explore common issues and solutions in this article to get your battery back to its full potential!

Do you find yourself facing the frustrating issue of your golf cart battery not charging? Don’t worry, you’re not alone. In this article, we will explore some common reasons why your golf cart battery may be refusing to charge and provide solutions to help you get back on the green in no time. So, let’s troubleshoot the problem together and get your golf cart battery back to its full potential!

Common Issues: Golf Cart Battery Won’t Charge

If you’re facing the frustrating issue of your golf cart battery not charging, there are several factors that could be responsible for this problem. In this article, we will explore the most common issues that can prevent your golf cart battery from charging and provide you with solutions to help get your battery back up and running.

Common Issues: Golf Cart Battery Wont Charge

1. Battery is Dead

1.1 Battery Age

One possible reason why your golf cart battery is not charging is that it may have reached the end of its lifespan. Over time, batteries naturally deteriorate and lose their ability to hold a charge. If your battery is old and has been used for many years, it may be time to replace it with a new one.

1.2 Battery Has Reached Its Lifespan

Another factor to consider is the lifespan of the battery. Golf cart batteries typically have a lifespan of about 4-6 years, depending on usage and maintenance. If your battery is nearing the end of its lifespan, it may no longer be able to hold a charge effectively, leading to charging issues.

1.3 Battery is Completely Drained

If your golf cart battery is completely drained, it may not accept a charge. This can occur if the battery has been left unused for a long period or if you have accidentally left the lights or other accessories running, draining the battery. In such cases, you may need to jump-start the battery or use an external charger to revive it before attempting to charge it using the golf cart’s charger.

2. Poor Connection

2.1 Loose, Corroded, or Dirty Battery Terminals

A common cause of charging problems in golf cart batteries is poor connection at the battery terminals. Over time, battery terminals can become loose, corroded, or covered in dirt and grime, resulting in a weak or broken connection. Make sure to check the battery terminals and clean them if necessary. Tighten any loose connections to ensure a solid electrical connection for proper charging.

2.2 Faulty Wiring

Faulty wiring can also prevent your golf cart battery from charging. Inspect the wiring connections between the battery, charger, and any other electrical components for any signs of damage or loose connections. If you notice any issues, replace or repair the faulty wiring to restore proper charging functionality.

2.3 Loose or Damaged Charging Port

The charging port on your golf cart can also become loose or damaged over time, leading to charging problems. Ensure that the charging port is securely connected to the battery and that there is no physical damage. If the charging port is loose or damaged, it may need to be repaired or replaced to enable successful charging.

3. Over or Undercharged Battery

3.1 Improper Charging Procedure

Improper charging procedures can have a significant impact on the performance and lifespan of your golf cart battery. It is essential to follow the recommended charging guidelines provided by the battery manufacturer. Overcharging or undercharging the battery can lead to charging issues and reduce the battery’s overall capacity. Make sure to monitor the charging process and avoid leaving the battery connected to the charger for extended periods.

3.2 Malfunctioning Charger

A faulty or malfunctioning charger can hamper the charging process. If you suspect that the charger is not functioning correctly, try using a different charger or have it inspected by a professional. A certified technician can determine whether the charger needs repair or replacement to ensure proper charging of your golf cart battery.

Common Issues: Golf Cart Battery Wont Charge

4. Battery Water Levels

4.1 Inadequate Water Levels

Golf cart batteries are often flooded lead-acid batteries that require regular maintenance, including monitoring the water levels. Low water levels in the battery can hinder proper charging and lead to decreased battery performance. Check the water levels regularly and add distilled water if necessary, ensuring that the plates inside the battery are adequately submerged.

4.2 Overfilled Battery Cells

On the other hand, overfilling the battery cells with water can also cause charging issues. Excessive water levels can result in electrolyte overflow during the charging process, affecting the battery’s performance and charging capacity. Maintain the water levels within the recommended range provided by the battery manufacturer to prevent overfilling.

5. Faulty Charger

5.1 Charger Cables or Plugs are Damaged

Damaged charger cables or plugs can prevent your golf cart battery from charging properly. Inspect the charger cables for any signs of wear, fraying, or damage. Similarly, check the plugs for bent pins or loose connections. If you notice any issues, replace the damaged cables or plugs to ensure a secure and reliable charging connection.

5.2 Charger is not Compatible

Using an incompatible charger can also lead to charging problems. Make sure that the charger you are using is specifically designed for your golf cart battery type and voltage. Using the wrong charger can result in undercharging or overcharging, damaging the battery and affecting its overall performance.

5.3 Charging Mode or Timer Issues

Some chargers allow you to select different charging modes or have built-in timers. If these settings are misconfigured, it can affect the charging process. Review the charger’s user manual and verify that the charging mode and timer settings are correctly adjusted for your battery type and requirements.

6. Battery Sulfation

6.1 Sulfation Build-Up

Sulfation is a common issue in lead-acid batteries and occurs when sulfate crystals accumulate on the battery plates over time. This build-up can impede the charging process and reduce the battery’s capacity. Proper battery maintenance, including regular equalization charges, can help prevent or reduce sulfation build-up.

6.2 Sulfation Due to Deep Discharge

Deep discharging your golf cart battery can contribute to sulfation. Avoid discharging the battery to excessively low levels and recharge it promptly after use. This practice helps prevent sulfation and prolongs the battery’s lifespan.

6.3 Sulfation Caused by Undercharging

Undercharging the battery, particularly when it is used infrequently, can also lead to sulfation. Make sure to adhere to the recommended charging procedures and avoid leaving the battery undercharged for extended periods. Regularly charge the battery to maintain optimal performance and prevent sulfation.

7. Battery Load Test

7.1 Battery Capacity Test

Performing a battery load test can help determine the overall health and capacity of your golf cart battery. This test involves applying a load to the battery while measuring its voltage and observing how it performs. A professional technician can conduct this test and provide you with insights into your battery’s condition.

7.2 Battery Voltage Test

Measuring the battery’s voltage is another way to assess its overall capacity and health. A fully charged 12-volt battery should read around 12.7-12.8 volts. If you notice significantly lower voltage readings, it may indicate a problem with the battery or charging system that requires further investigation.

8. Faulty Voltage Regulator

8.1 Voltage Regulator Failure

The voltage regulator controls the charging voltage provided to the battery. If the voltage regulator fails, it can lead to overcharging or undercharging of the battery, preventing it from charging properly. Professional assistance may be required to diagnose and replace a faulty voltage regulator.

8.2 Voltage Regulator Overcharging

In some cases, a faulty voltage regulator may cause overcharging of the battery. Overcharging can damage the battery and decrease its overall lifespan. If you suspect that your golf cart battery is overcharging, seek professional help to assess and rectify the voltage regulator issue.

9. Thermal Sensor Malfunction

9.1 Thermal Sensor Failure

Golf cart batteries often have thermal sensors that monitor and adjust the charging process to prevent overheating. If the thermal sensor fails, it can impact the charging process, leading to incorrect charging levels or interrupted charging cycles. Consult a professional to diagnose and replace a faulty thermal sensor.

9.2 Thermal Sensor Sensitivity Issues

Thermal sensors can also experience sensitivity issues, causing them to trigger prematurely or not respond to temperature changes correctly. This can disrupt the charging process and affect the battery’s overall performance. Have a trained technician check and recalibrate the thermal sensor for proper functionality.

10. Internal Battery Damage

10.1 Physical Damage

Physical damage to the battery, such as cracks or leaks, can prevent it from charging correctly. Inspect the battery for any visible signs of damage and replace it if necessary. Additionally, excessive vibration or impact while driving the golf cart can also cause internal damage to the battery, affecting its charging capabilities.

10.2 Internal Short Circuit

An internal short circuit within the battery can also hinder the charging process. Short circuits can occur due to damaged or worn-out internal components, resulting in a loss of charge and decreased battery performance. If you suspect an internal short circuit, it is best to consult a professional for assessment and potential battery replacement.

In conclusion, there are several common issues that can prevent your golf cart battery from charging. By understanding these factors and implementing the appropriate solutions, you can address the problem and ensure that your battery regains its charging capabilities. Remember to regularly maintain your battery, follow proper charging procedures, and seek professional help when needed to optimize the lifespan and performance of your golf cart battery.

5 Easy Steps to Charge Your Golf Cart Battery

Learn how to charge your golf cart battery in five easy steps. Get back on the green quickly with these simple instructions for a fully charged ride.

If you’re a proud owner of a golf cart, you probably know the importance of a fully charged battery for a smooth and enjoyable ride. It can be frustrating when your battery starts running low, but fear not, because we’ve got you covered! In this article, we’ll show you five easy steps to charge your golf cart battery. With these simple instructions, you’ll be back on the green in no time, experiencing the thrill of a fully charged ride. So, let’s get started and ensure that your golf cart battery is always ready for action!

5 Easy Steps to Charge Your Golf Cart Battery

Step 1: Prepare Your Golf Cart

Before you begin the charging process, it is essential to prepare your golf cart to ensure a safe and effective charging experience. Follow these three simple steps to get started:

Ensure a Safe Charging Environment

To ensure the safety of yourself and others around you, it is crucial to charge your golf cart battery in a safe environment. Find a well-ventilated area with a flat surface. Avoid charging near flammable materials or in extreme temperatures. Creating a safe charging environment is the first step towards a successful charging process.

Park Your Golf Cart

Before connecting the charger, park your golf cart in a designated area. Make sure the cart is on a level surface and engage the parking brake. This will prevent any unwanted movements during the charging process, keeping both you and your golf cart safe.

Turn Off All Electrical Accessories

To prevent any interference with the charging process, it is important to turn off all electrical accessories on your golf cart. This includes headlights, taillights, radio, and any other accessory that may drain the battery. By turning off these accessories, you can ensure that the battery is solely focused on receiving a complete charge.

Step 2: Check the Battery

Now that your golf cart is prepared for charging, it’s time to check the battery itself. Follow these steps to ensure the battery is in good condition before proceeding with the charging process.

Locate the Battery Compartment

The first step in checking your golf cart battery is to locate the battery compartment. Depending on the make and model of your golf cart, the battery compartment may be located in different areas. Common areas include under the seat, in the front or rear of the cart, or in a specific battery compartment at the back.

Inspect the Battery Terminals

Once you have located the battery compartment, inspect the battery terminals. The terminals are the metal connections on top of the battery. Make sure they are clean, free from corrosion, and securely connected to the battery. Corrosion can hinder the charging process, so it’s important to clean the terminals if necessary.

Clean any Corrosion

If you notice any corrosion on the battery terminals, it is important to clean them before proceeding with the charging process. Use a mixture of baking soda and water to create a paste. Apply this paste to the corroded areas and scrub gently with a wire brush. Once the corrosion is removed, rinse the terminals with clean water and dry them thoroughly.

Check the Battery Water Level

Some golf cart batteries require regular maintenance of the water level. Check your battery to see if water needs to be added. If it does, carefully remove the battery caps and add distilled water to the appropriate level. Be careful not to overfill the cells, as this can lead to electrolyte leakage and potential damage to the battery.

5 Easy Steps to Charge Your Golf Cart Battery

Step 3: Connect the Charger

Now that you have inspected and prepared the battery, it’s time to connect the charger. Follow these steps to ensure a proper connection and a successful charging process.

Choose the Appropriate Charger

Not all chargers are created equal. It’s important to choose the appropriate charger for your golf cart battery. Refer to the manufacturer’s recommendations or consult your golf cart manual to determine the correct charger for your specific battery type and voltage.

Position the Charger

Once you have the correct charger, position it near the golf cart battery. Ensure that the charger cables are long enough to reach the battery terminals without straining or bending. This will ensure a secure and stable connection, reducing the risk of any damage or interruptions during the charging process.

Connect the Charger to the Battery

With the charger in position, it’s time to connect it to the battery. Start by connecting the positive charger clamp, usually color-coded red, to the positive terminal of the battery. Then, connect the negative charger clamp, usually color-coded black, to the negative terminal of the battery. Make sure the clamps are securely attached to the terminals to establish a proper connection.

Double-Check the Connections

Before proceeding, it is crucial to double-check the connections. Ensure that the charger clamps are securely attached to the battery terminals. Loose connections can result in an inefficient charging process or even damage the battery. Take a moment to verify the connections to guarantee a smooth charging experience.

Step 4: Set the Charging Parameters

Now that the charger is connected, it’s time to set the charging parameters. Different golf cart batteries require specific charging settings to ensure optimal performance and longevity. Follow these steps to adjust the charging parameters accordingly.

Refer to the Battery Specifications

To determine the appropriate charging parameters, refer to the battery specifications provided by the manufacturer. This information typically includes the recommended charging voltage, amperage, and charging time. Consult the battery specifications to ensure you select the correct settings for your specific battery.

Adjust the Charging Voltage

Using the charger’s voltage adjustment settings, set the charging voltage to match the recommended voltage for your golf cart battery. This ensures that the battery receives the appropriate level of voltage during the charging process, preventing any potential damage or undercharging.

Select the Correct Amperage

Next, select the appropriate amperage setting on the charger. Amperage determines the rate at which the battery charges. Follow the battery specifications to determine the correct amperage for your specific battery. Selecting the correct amperage setting ensures a safe and efficient charging process.

Set the Charging Time

Lastly, set the charging time according to the manufacturer’s recommendations. This ensures that the battery is charged for the appropriate duration, allowing it to reach its full capacity without the risk of overcharging. Set the charging time accurately to achieve optimal performance and longevity for your golf cart battery.

Step 5: Monitor the Charging Process

With the charging parameters set, it’s time to monitor the charging process. Keeping an eye on the process ensures a safe and effective charge. Follow these steps to effectively monitor the charging process.

Switch on the Charger

Start by switching on the charger. This activates the charging process and allows the battery to receive the necessary charge. Ensure that the charger is securely connected to the power source and is functioning properly.

Observe the Charge Indicator

Most chargers come equipped with a charge indicator light or display. This provides valuable information about the charging status. Keep an eye on the charge indicator throughout the charging process to monitor its progress. Pay attention to any warning lights or changes in the indicator that may signal an issue.

Keep an Eye on the Charging Time

During the charging process, it is important to keep track of the charging time. Refer to the previously set charging time and monitor the progress against the expected completion time. This allows you to ensure that the battery is receiving the appropriate charge and prevents any risk of overcharging.

Ensure Proper Ventilation

While the charging process is underway, it is essential to ensure proper ventilation in the charging area. Some chargers or batteries may produce gases during the charging process, which need to be properly ventilated to avoid any potential hazards. Keep windows or doors open and avoid charging in enclosed spaces.

Tips and Precautions

To ensure a safe and effective charging process for your golf cart battery, consider the following tips and precautions:

Use a Dedicated Golf Cart Battery Charger

Using a dedicated golf cart battery charger is crucial in maintaining the battery’s performance and longevity. These chargers are specifically designed for golf cart batteries and provide the necessary charging parameters for optimal results.

Avoid Overcharging

Overcharging can lead to battery damage, reduced performance, and shortened battery life. Adhere to the recommended charging parameters and avoid leaving the battery on charge for longer than necessary. Once the battery reaches its full charge, disconnect the charger promptly.

Regularly Check the Battery

Regularly inspecting and maintaining your golf cart battery is essential for optimal performance. Check the battery terminals for corrosion, monitor the water level (if applicable), and ensure that the battery is clean and free from dirt or debris.

Follow Manufacturer’s Recommendations

Always follow the manufacturer’s recommendations and guidelines when it comes to charging and maintaining your golf cart battery. The manufacturer has the best knowledge of the specific battery requirements and can provide the necessary instructions to ensure its longevity and performance.

Be Cautious with Acidic Battery Fluid

Golf cart batteries contain acidic electrolytes, which can be harmful if mishandled. Exercise caution when working with the battery, wear protective gloves and goggles, and avoid contact with the battery fluid. In case of accidental contact, rinse the affected area with water immediately.

Do Not Interfere with the Charging Process

Once the charging process has begun, it is important not to interfere with it. Do not disconnect or move the charger, adjust the charging parameters, or touch any exposed wires. Any interference can disrupt the charging process and potentially damage the battery or other components of the golf cart.

Common Troubleshooting

While charging your golf cart battery, you may encounter some issues or face challenges. Here are some common troubleshooting tips to help you overcome these obstacles:

Charger Does Not Start

If the charger does not start when connected to the battery, check the power source and ensure it is functioning correctly. Verify that the charger is securely connected to the power outlet and that there are no loose connections or damaged cables.

Charger Shuts Off Prematurely

If the charger shuts off before the battery reaches its expected charge, check the charging parameters and make sure they are set correctly. Ensure that the charger is compatible with your golf cart battery and consult the manufacturer’s recommendations for troubleshooting specific shutdown issues.

Battery Not Holding a Charge

If your golf cart battery is not holding a charge, it may indicate an underlying issue with the battery itself. Inspect the battery for any signs of damage or deterioration. Consider having a professional check the battery or consult the manufacturer for further guidance.

Slow Charging

If the charging process is significantly longer than expected, it may be due to a low amperage setting or a problem with the charger. Verify that the amperage setting is appropriate for your battery and ensure that the charger is functioning correctly. If the issue persists, it may be necessary to seek professional assistance.

Charger Overheating

If the charger becomes excessively hot during the charging process, it may indicate a malfunction or an incompatible charger. Disconnect the charger immediately and allow it to cool down. Consult the manufacturer’s recommendations or seek professional assistance to diagnose and resolve any issues related to charger overheating.

Conclusion

Properly maintaining and charging your golf cart battery is essential for optimal performance and longevity. By following these five easy steps and adhering to the recommended charging parameters, you can ensure a safe and effective charging process. Remember to monitor the charging process diligently, keep an eye on the battery, and follow the manufacturer’s recommendations. With regular maintenance and care, your golf cart battery will provide reliable power for many rounds of golf.

The Ultimate Guide: Charging an Electric Golf Cart

The Ultimate Guide: Charging an Electric Golf Cart – Learn the essential steps to charge your golf cart properly for optimal performance and longevity. Become an expert in maintaining and extending battery life. Stay safe while charging with our best practices. Read now!

Charging your electric golf cart may seem like a straightforward task, but there are a few key factors to consider to ensure optimal performance and longevity. In this comprehensive guide, we will walk you through the essential steps of charging your electric golf cart, from understanding the charging system to best practices for battery maintenance. Whether you are a seasoned golf cart owner or new to the world of electric vehicles, this guide is packed with valuable tips and insights to help you keep your golf cart running smoothly and efficiently. So grab your charger and get ready to become an expert in charging your electric golf cart!

The Ultimate Guide: Charging an Electric Golf Cart

1. Understanding Electric Golf Cart Batteries

Electric golf carts are powered by rechargeable batteries specifically designed for their use. Understanding the different types of batteries used, their voltage and capacity, as well as proper maintenance and safety precautions, is essential for maximizing the performance and lifespan of your electric golf cart.

1.1 Types of Batteries Used in Electric Golf Carts

Electric golf carts typically use deep cycle lead-acid batteries, specifically designed to provide a steady and consistent flow of power over an extended period. These batteries come in two main types: flooded lead-acid batteries and sealed lead-acid batteries. Flooded lead-acid batteries require regular maintenance, such as checking and adding distilled water, while sealed lead-acid batteries are maintenance-free.

1.2 Voltage and Capacity of the Batteries

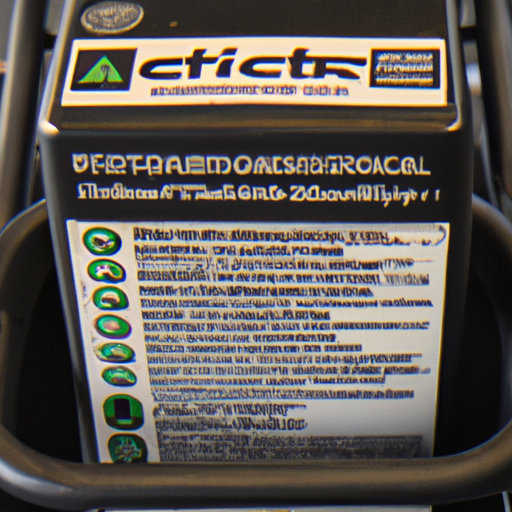
The voltage and capacity of the batteries used in electric golf carts vary depending on the specific model and manufacturer. Most electric golf carts operate on a 36-volt or 48-volt system, with battery capacities ranging from 200 to 400 amp-hours. It is important to consult the owner’s manual or contact the manufacturer to determine the appropriate voltage and capacity for your golf cart.

1.3 Battery Maintenance and Safety Precautions

Proper maintenance of electric golf cart batteries is crucial to ensure optimal performance and extend their lifespan. Regularly check the battery water levels and top them up with distilled water if necessary (for flooded lead-acid batteries). Keep the batteries clean and free from corrosion by using a mixture of baking soda and water. It is important to handle batteries with care, wearing protective gloves and goggles, and follow safety precautions provided by the manufacturer to minimize the risk of accidents or injury.

2. Preparing for the Charging Process

Before charging your electric golf cart, you need to ensure that you have the right charger, locate the charging port on your golf cart, inspect the charging cables, create a safe charging environment, and check the battery charge level.

2.1 Choosing the Right Charger

Selecting the appropriate charger for your electric golf cart is essential for its safe and efficient charging. Consult the owner’s manual or contact the manufacturer to determine the compatible charger specifications. Make sure the charger has the correct voltage and amperage ratings to match your golf cart’s battery system.

2.2 Locating the Charging Port

The charging port of your electric golf cart is typically located in the front or rear of the cart. Consult the owner’s manual or inspect the exterior of your golf cart to find the charging port. Ensure that the charging port is easily accessible and free from any obstructions.

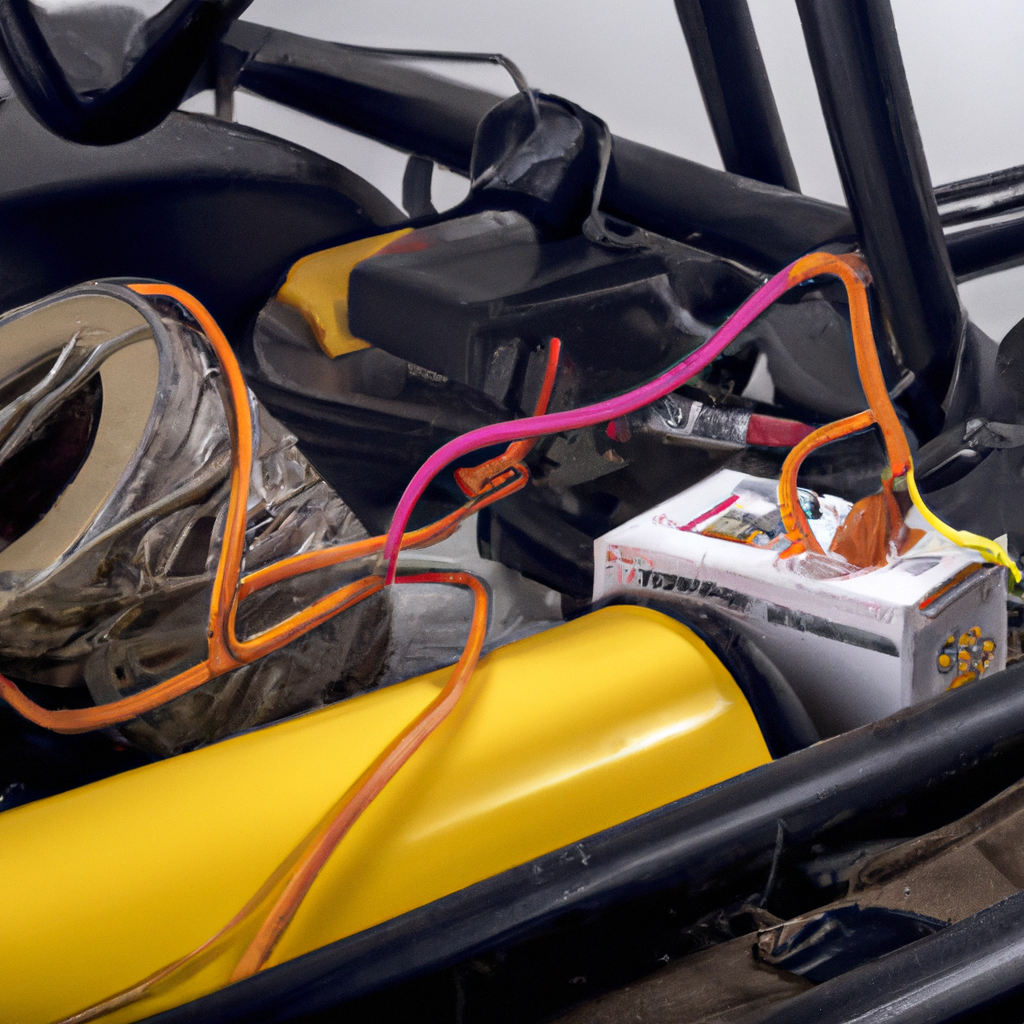
2.3 Inspecting the Charging Cables

Before connecting the charger, inspect the charging cables for any signs of wear or damage. Ensure that the cables are free from cuts, frays, or exposed wires. Damaged cables can lead to safety hazards or ineffective charging. If you notice any issues with the charging cables, replace them before proceeding with the charging process.

2.4 Ensuring a Safe Charging Environment

It is important to create a safe charging environment for your electric golf cart. Find a well-ventilated area that is free from flammable materials and away from open flames or heat sources. Avoid charging the cart in direct sunlight or extreme temperatures, as it can affect the charging process and potentially damage the batteries.

2.5 Checking the Battery Charge Level

Before initiating the charging process, check the battery charge level to determine how much charge is remaining. This will help you determine the estimated charging time required to fully recharge the batteries. Most electric golf carts have a battery charge indicator, such as a gauge or digital display, to provide information about the battery charge level.

3. Step-by-Step Guide to Charging an Electric Golf Cart

Now that you have prepared for the charging process, follow this step-by-step guide to effectively and safely charge your electric golf cart.

3.1 Connecting the Charger to the Cart

Begin by connecting the charger to your electric golf cart. Take the charging cables and plug them into the appropriate charging port on your golf cart. Ensure that the cables are firmly connected and that there are no loose connections or exposed wires.

3.2 Plugging in the Charger

After connecting the charger to your golf cart, plug the charger’s power cord into a nearby electrical outlet. Make sure the outlet is in good condition and properly grounded. Avoid using extension cords if possible, as they can reduce the efficiency of the charging process.

3.3 Monitoring the Charging Process

Once the charger is plugged in, it will begin supplying power to the batteries. Monitor the charging process by observing the charger’s indicator lights or display. These indicators usually show the charging status, such as power on, charging in progress, or charging complete. Avoid leaving the charging process unattended and periodically check the charger and batteries for any unusual signs or issues.

3.4 Charging Time and Factors Affecting it

The charging time required to fully recharge the batteries of an electric golf cart can vary depending on several factors. The capacity of the batteries, the level of discharge, the charger’s amperage rating, and the overall condition of the batteries can all influence the charging time. It is recommended to refer to the manufacturer’s guidelines for estimated charging times or consult the owner’s manual for your specific golf cart model.

3.5 Disconnecting the Charger

Once the batteries are fully charged, it is important to disconnect the charger to prevent overcharging. Unplug the charger’s power cord from the electrical outlet first, and then disconnect the charging cables from the golf cart’s charging port. Properly coil the charging cables and store them in a safe place until the next charging cycle.

The Ultimate Guide: Charging an Electric Golf Cart

4. Maintaining and Extending Battery Life

To ensure the long-term performance and lifespan of your electric golf cart batteries, it is crucial to practice proper maintenance and take necessary precautions.

4.1 Storing Batteries Properly

If you plan to store your electric golf cart or batteries for an extended period, it is important to follow proper storage procedures. Clean the batteries thoroughly, ensure they are fully charged, and disconnect them from the golf cart. Store the batteries in a cool, dry place and periodically check their charge levels to avoid deep discharge or excessive self-discharge.

4.2 Charging Frequency and Depth of Discharge

Regularly charging your electric golf cart batteries is essential to maintain their capacity and prolong their lifespan. Avoid deep discharge, where the batteries are significantly discharged before charging. Instead, aim for shallow discharge cycles where the batteries are recharged after each use. This will help optimize their performance and prevent capacity degradation.

4.3 Avoiding Overcharging and Undercharging

Overcharging or undercharging your electric golf cart batteries can lead to reduced performance and a shorter lifespan. Follow the manufacturer’s recommendations regarding the appropriate charging time and avoid leaving the batteries connected to the charger for an extended period. Similarly, ensure that the batteries are sufficiently charged before each use to prevent undercharging.

4.4 Cleaning and Inspecting Batteries

Regularly clean and inspect your electric golf cart batteries to keep them in good condition. Clean the battery terminals and connections using a mixture of baking soda and water to remove any corrosion. Inspect the batteries for any signs of damage, leakage, or bulging. If you notice any issues, consult a professional or contact the manufacturer for appropriate guidance.

4.5 Replacing Faulty Batteries

Over time, electric golf cart batteries may deteriorate or fail to hold a charge effectively. If you notice a significant decrease in their performance or if they are unable to provide adequate power for your golf cart, it may be necessary to replace them. Consult the owner’s manual or contact the manufacturer for guidance on replacing faulty batteries.

5. Troubleshooting Common Charging Issues

Sometimes, despite following the proper charging procedures, you may encounter various charging issues with your electric golf cart. Here are some common problems you may face and possible solutions.

5.1 Cart Not Charging

If your electric golf cart is not charging, there could be several potential causes. Ensure that the charger is properly connected to the golf cart and the electrical outlet. Check the charging cables for any damage or loose connections. If the issue persists, consult a professional or contact the manufacturer for further troubleshooting or assistance.

5.2 Slow Charging

Slow charging can occur if the charger’s amperage rating is lower than the recommended specifications for your golf cart batteries. Verify that you are using a charger with the correct voltage and amperage ratings. Additionally, check the charging cables and connections for any loose or damaged parts that may impede the charging process.

5.3 Charger Not Working

If your charger is not working at all, ensure that it is receiving power by checking the electrical outlet or trying a different outlet. Inspect the charger’s power cord and plug for any damage or loose connections. If the charger still does not work, it may be faulty and require repair or replacement. Contact the manufacturer or a professional to diagnose and resolve the issue.

5.4 Battery Overheating

Battery overheating during the charging process can be dangerous and lead to performance issues or damage. If you notice excessive heat from your electric golf cart batteries, immediately disconnect the charger and allow the batteries to cool down. Inspect the batteries for any signs of damage or leakage, and if necessary, seek professional assistance to diagnose and address the issue.

5.5 Charging Interruptions

If your charging process is frequently interrupted or automatically stops, it may indicate underlying issues with the charger, batteries, or electrical connections. Check for loose or damaged charging cables or connections. If the interruptions persist, consult a professional to assess and resolve the problem.

6. Safety Precautions and Best Practices

When dealing with electric golf cart batteries and the charging process, it is important to prioritize safety and follow best practices to prevent accidents or injuries.

6.1 Disconnecting Power Before Maintenance

Before performing any maintenance or inspection tasks on your golf cart batteries, ensure that the power is disconnected. This includes both disconnecting the charger from the electrical outlet and disconnecting the charging cables from the golf cart’s charging port. By disconnecting the power, you reduce the risk of electric shocks or short circuits.

6.2 Using Personal Protective Equipment

When handling electric golf cart batteries or engaging in the charging process, wear appropriate personal protective equipment (PPE). This includes gloves, goggles, and protective clothing. PPE helps protect against chemical exposure, acid spills, and potential injuries. Always prioritize your safety by using PPE.

6.3 Charging in a Well-Ventilated Area

Always charge your electric golf cart batteries in a well-ventilated area. Charging batteries can release hydrogen gas, which is highly flammable. Adequate ventilation helps disperse any released gas and minimizes the risk of ignition or explosions. Avoid charging in enclosed spaces or areas with poor ventilation.

6.4 Avoiding Water Exposure

Electric golf cart batteries are sensitive to water exposure, which can lead to damage or reduced performance. Avoid exposing the batteries to excessive moisture or immersion in water. Keep the charging area dry and ensure that the batteries are securely covered to prevent water entry during usage or storage.

6.5 Adhering to Manufacturer’s Instructions

The manufacturer’s instructions and guidelines are essential for proper battery maintenance, charging, and overall safety. Always refer to the owner’s manual or consult the manufacturer’s recommendations before performing any tasks related to your electric golf cart batteries. These instructions provide valuable information specific to your golf cart model and help ensure you follow the correct procedures.

7. Environmental Considerations

Electric golf carts offer several environmental benefits compared to their gasoline-powered counterparts. By incorporating eco-friendly practices and considering environmental factors, you can further enhance the sustainability of your electric golf cart usage.

7.1 Recycling and Disposing of Batteries

When it is time to replace your electric golf cart batteries, it is important to dispose of them properly. Lead-acid batteries should be recycled to mitigate environmental impact and recover valuable materials. Contact local recycling centers or battery retailers to find out how to dispose of your old batteries safely and responsibly.

7.2 Opting for Renewable Energy Sources

Consider utilizing renewable energy sources to power your electric golf cart. Solar panels, for example, can provide clean and sustainable energy for charging the batteries. By reducing reliance on fossil fuel-generated electricity, you can further minimize your environmental footprint and contribute to a greener future.

7.3 Minimizing Energy Consumption

To reduce energy consumption, make sure to turn off the golf cart and disconnect the batteries when not in use. Utilize energy-efficient features, such as LED lights or low-power mode, when available. By minimizing energy usage, you can maximize the battery life and contribute to energy conservation efforts.

7.4 Promoting Eco-Friendly Practices

Encourage and practice eco-friendly practices while using your electric golf cart. Carpooling with fellow golfers or using electric golf carts for short distances instead of larger vehicles can help reduce carbon emissions. By promoting sustainability within your golfing community, you can contribute to a cleaner and healthier environment.

8. Benefits of Electric Golf Carts

Electric golf carts offer numerous advantages over traditional gasoline-powered ones. Understanding these benefits can help you make an informed decision when purchasing or using an electric golf cart.

8.1 Cost Savings

Electric golf carts are more cost-effective to operate and maintain compared to their gasoline counterparts. The cost of electricity is generally lower than the cost of gasoline, resulting in reduced operational expenses. Electric golf carts also require less frequent maintenance, as they have fewer moving parts and do not require oil changes or regular engine tune-ups.

8.2 Eco-Friendly Operation

By using an electric golf cart, you contribute to reducing air pollution and greenhouse gas emissions. Electric golf carts produce zero tailpipe emissions, significantly reducing carbon footprints and environmental impact. This eco-friendly operation aligns with sustainable practices and helps preserve the natural beauty of golf courses.

8.3 Quieter and Smoother Ride

Compared to gasoline-powered golf carts, electric models offer a quieter and smoother ride. The absence of engine noise and vibrations creates a more enjoyable and serene golfing experience. Electric golf carts provide a quieter mode of transportation, reducing noise pollution and maintaining peaceful surroundings for other golfers.

8.4 Low Maintenance Requirements

Electric golf carts have relatively low maintenance requirements due to their simplified design and fewer mechanical components. They do not require frequent oil changes, air filter replacements, or spark plug inspections. Routine maintenance tasks primarily involve checking the batteries, cables, and general cleaning. This translates to lower maintenance costs and less time spent on upkeep.

8.5 Customization Options

Electric golf carts offer a wide range of customization options to suit individual preferences and needs. From choosing the color and design to adding accessories such as stereo systems, coolers, or golf bag holders, you can customize your electric golf cart to reflect your personality and enhance your golfing experience.

9. Conclusion

Charging an electric golf cart requires proper understanding, preparation, and adherence to safety guidelines. By familiarizing yourself with the types of batteries used, understanding the charging process, and practicing regular maintenance, you can maximize the performance and lifespan of your electric golf cart batteries.

Remember to always prioritize safety, wear the appropriate personal protective equipment, and follow the manufacturer’s instructions. Consider eco-friendly practices, such as recycling batteries and utilizing renewable energy sources, to further enhance the sustainability of your electric golf cart usage.

With their cost savings, eco-friendly operation, and various benefits, electric golf carts continue to grow in popularity among golfers. By embracing these efficient and environmentally-friendly alternatives, you can enjoy a quieter, smoother ride while minimizing your impact on the environment.

A Beginner’s Guide: How to Charge Your Electric Golf Cart

A beginner’s guide to charging your electric golf cart. Learn the charging process, battery types, choosing the right equipment, and best practices.

So you’ve just acquired an electric golf cart and you’re excited to hit the greens with eco-friendly ease! But hang on, do you know how to charge it? Fear not, as this beginner’s guide is here to help you navigate the world of electric golf cart charging. Whether you’re a novice or a seasoned golfer, understanding the charging process is essential for maximizing your cart’s performance and longevity. In this article, we’ll walk you through the steps to ensure you’re charging your electric golf cart correctly, so you can spend less time worrying about battery life and more time perfecting your swing.

A Beginner’s Guide: How to Charge Your Electric Golf Cart

A Beginners Guide: How to Charge Your Electric Golf Cart

1. Understanding Your Electric Golf Cart

When it comes to charging your electric golf cart, it’s important to have a good understanding of the various components and features of your vehicle. This will help ensure a safe and efficient charging process. Let’s start by looking at the different battery types commonly used in electric golf carts.

1.1 Battery Types

Electric golf carts typically use either lead-acid batteries or lithium-ion batteries. Lead-acid batteries are less expensive but require regular maintenance, including checking water levels and cleaning terminals. On the other hand, lithium-ion batteries are more expensive but require less maintenance and offer a longer lifespan.

1.2 Voltage and Capacity

Understanding the voltage and capacity of your electric golf cart’s batteries is crucial for choosing the correct charger and ensuring optimal charging. Voltage refers to the electrical potential difference in the batteries, while capacity indicates the amount of energy the batteries can store. It’s important to match the charger voltage to your cart’s battery voltage to avoid damage.

1.3 Charging Port Locations

The charging port of your electric golf cart is where you connect the charger. It’s usually located either on the front or rear of the vehicle, depending on the make and model. Familiarize yourself with the charging port’s location to make the charging process more convenient.

2. Preparing for Charging

Before you begin the charging process, there are a few important steps to take to ensure everything goes smoothly.

2.1 Check Battery Condition

Inspect the condition of your golf cart’s batteries before charging. Look for any signs of damage or corrosion on the terminals. If you notice any issues, such as loose connections or leaking batteries, address them before proceeding with charging.

2.2 Ensure Proper Ventilation

Charging batteries release hydrogen gas, which can be flammable in high concentrations. To prevent any potential accidents, ensure that you charge your electric golf cart in a well-ventilated area, such as an open garage or outdoors. Good ventilation will help dissipate any gas that may be released during the charging process.

2.3 Gather Necessary Tools

Before you begin charging, gather all the necessary tools, such as the charger, charging cable, and any additional accessories. It’s important to have everything on hand to avoid interruptions during the charging process. If you’re unsure about which charger or cable to use, refer to the manufacturer’s guidelines or consult an expert.

3. Choosing the Right Charging Equipment

Selecting the right charging equipment is essential for a safe and efficient charging process. Let’s explore the key factors to consider when choosing a charger and understanding charging cables.

3.1 Selecting a Charger

When selecting a charger for your electric golf cart, consider the charger’s compatibility with your battery type (lead-acid or lithium-ion), voltage, and charging capacity. It’s essential to choose a charger that meets the specific requirements of your golf cart’s batteries to prevent damage and ensure optimal charging.

3.2 Understanding Charging Cables

Charging cables come in different lengths and connector types. Make sure to choose a charging cable that is long enough to reach the charging port without stretching or straining. Additionally, ensure that the connector on the cable matches the port on your golf cart. Using the correct charging cable will help establish a secure and efficient connection during the charging process.

3.3 Evaluating Charging Time

Different chargers and batteries have varying charging times. Consider the charging time required for your specific electric golf cart and plan accordingly. It’s important to note that charging times can be influenced by factors such as battery capacity, charger efficiency, and power input. A longer charging time may be required for deeply discharged batteries.

A Beginners Guide: How to Charge Your Electric Golf Cart

4. Connecting the Charger

Once you have the appropriate charging equipment and have completed the necessary preparations, it’s time to connect the charger to your electric golf cart.

4.1 Locating the Charging Port

Locate the charging port on your golf cart. As mentioned earlier, it is typically situated at the front or rear of the vehicle. Inspect the port to ensure it is free from any obstructions or debris that may hinder the connection between the charger and the cart.

4.2 Checking Charger Compatibility

Before connecting the charger to your electric golf cart, double-check the compatibility between the charger and the batteries. Ensure that the voltage and charger type match the power requirements of your batteries to prevent damage.

4.3 Properly Inserting the Charging Cable

Insert the charging cable into the charging port of your golf cart until it is securely in place. Make sure the connection is tight to ensure a stable flow of electricity. Once connected, you can proceed with the charging process.

5. Monitoring the Charging Process

While your electric golf cart is charging, it’s important to monitor the process to ensure everything is progressing smoothly.

5.1 Charger Indicators and Controls

Most chargers are equipped with indicator lights or displays that provide essential information about the charging process, including the current charging status. Pay attention to these indicators to ensure the charger is functioning correctly and the charging process is underway.

5.2 Safety Precautions

While it may be tempting to leave your electric golf cart charging unattended, it’s crucial to prioritize safety. Never leave your charging cart unattended for an extended period, especially if charging indoors. Monitor the charging process periodically to ensure there are no unusual sounds, smells, or signs of overheating.

5.3 Monitoring the Charging Time

Keep track of the charging time to estimate when the charging process will be complete. It’s a good practice to avoid overcharging, as it can have adverse effects on your batteries’ lifespan and performance. Refer to the manufacturer’s guidelines or consult an expert to determine the recommended charging time for your specific golf cart batteries.

6. Charging Etiquette and Best Practices

To ensure the longevity and optimal performance of your electric golf cart batteries, it’s essential to adopt proper charging etiquette and follow best practices.

6.1 Avoiding Overcharging

Overcharging can negatively impact your batteries’ lifespan and performance. Avoid leaving your golf cart plugged in for an extended period once the batteries are fully charged. Overcharging can result in electrolyte loss and the formation of sulfation, which can diminish battery capacity.

6.2 Charging Frequency

Establish a regular charging routine based on your usage patterns. It is generally recommended to charge your electric golf cart after each use or when the battery level drops to a certain threshold. Avoid deep discharges, as they can be detrimental to battery health.

6.3 Maintaining Battery Health

Proper battery maintenance is crucial for extending their lifespan. Regularly clean the battery terminals to prevent corrosion and ensure a good connection. Additionally, check the water levels in lead-acid batteries and top them up if needed. Preventing battery sulfation, which occurs when batteries are left in a discharged state for prolonged periods, is also essential for maintaining battery health.

7. Charging Troubleshooting

Sometimes, charging-related issues may arise. Let’s explore common charging issues, troubleshooting steps, and when it’s best to seek professional assistance.

7.1 Common Charging Issues

Some common issues include faulty charger connections, charger not turning on, slow or incomplete charging, or abnormal charger behavior. These issues could be a result of issues with the charger, batteries, or other electrical components.

7.2 Troubleshooting Steps

If you encounter charging issues, first ensure that all connections are secure and that the charger and batteries are compatible. Check for loose or damaged wires, blown fuses, or other visible signs of damage. If you’re unable to identify or resolve the issue, consult the manufacturer’s manual or contact a professional for assistance.

7.3 Seeking Professional Assistance

If troubleshooting steps do not resolve the charging issue, it’s best to seek professional assistance. Certified technicians who specialize in electric golf carts will have the expertise to diagnose and address any electrical or charging-related problems effectively.

8. Safety Considerations

Safety should always be a top priority when charging your electric golf cart. Here are some key safety considerations to keep in mind:

8.1 Charging in Well-Ventilated Areas

As mentioned earlier, charging batteries emit hydrogen gas, which can be flammable in high concentrations. Always charge your golf cart in a well-ventilated area to minimize the risk of any gas buildup. Avoid enclosed spaces or areas with poor ventilation.

8.2 Handling Batteries Correctly

Batteries contain corrosive chemicals and should be handled with caution. Always wear protective gloves and eyewear when working with batteries. Avoid contact with skin or eyes, and immediately rinse with water if any contact occurs. If you suspect a battery is damaged or leaking, do not touch it and seek professional assistance.

8.3 Disconnecting Charger Safely

When the charging process is complete, make sure to disconnect the charger from the electric golf cart. Disconnect the charging cable by gently pulling on the connector, ensuring a smooth disconnection. Avoid yanking or pulling forcefully, as this can damage the connector or the charging port.

9. Battery Maintenance Tips

Proper battery maintenance is essential for ensuring the longevity and performance of your electric golf cart batteries. Here are some tips to help you maintain your batteries:

9.1 Cleaning Battery Terminals

Regularly clean the battery terminals to prevent corrosion and maintain a good electrical connection. Use a mixture of baking soda and water to clean the terminals, and gently scrub with a wire brush or toothbrush. Afterward, rinse with clean water and dry the terminals thoroughly.

9.2 Checking Water Levels

If your electric golf cart uses lead-acid batteries, regularly check the water levels and top them up if necessary. Use distilled or deionized water and fill the cells to the appropriate level, as indicated by the manufacturer. Avoid overfilling, as it can cause electrolyte overflow during charging.

9.3 Preventing Battery Sulfation

Battery sulfation occurs when the batteries are left in a discharged state for an extended period. To prevent sulfation, ensure your batteries are regularly charged and avoid deep discharges. If you anticipate not using your golf cart for an extended period, consider using a battery maintainer or storing the batteries in a fully charged state.

10. Extending Battery Life

Extending the lifespan of your electric golf cart batteries is beneficial both for your wallet and the environment. Follow these tips to maximize battery life:

10.1 Avoiding Deep Discharges

Deep discharges can be detrimental to battery health and reduce their lifespan. Avoid running the batteries until their charge level is critically low before recharging. Instead, strive to recharge the batteries when they reach around 50% to 70% capacity.

10.2 Storing Batteries Properly

If you plan to store your electric golf cart batteries for an extended period, make sure to store them in a cool and dry location. Optimal storage temperature is typically between 50°F and 80°F (10°C and 27°C). Avoid locations that are excessively hot or cold, as extreme temperatures can degrade battery performance.

10.3 Using Proper Charging Techniques

Proper charging techniques play a significant role in extending battery life. Avoid using fast chargers or chargers with a higher voltage than recommended by the manufacturer. Stick to the recommended charging time and voltage to prevent overcharging or damage to the batteries.

By following these guidelines and best practices, you can safely and effectively charge your electric golf cart, ensuring optimal performance and extending battery life. Remember to prioritize safety, regular maintenance, and proper charging etiquette to make the most of your golfing experience with an electric golf cart!

Charging Golf Cart Batteries: A Guide to Using a 12V Charger

Learn how to charge golf cart batteries using a 12V charger. Our guide provides step-by-step instructions and important safety precautions. Keep your golf cart powered up and ready to go!

If you’re a golf enthusiast, you know the importance of having a fully charged golf cart battery. A dead battery can put a damper on your day out on the course. That’s where a 12V charger comes in handy. In this guide, we’ll show you the step-by-step process of charging your golf cart batteries using a 12V charger. Whether you’re a seasoned golfer or just starting out, this article will provide you with all the information you need to keep your golf cart powered up and ready to go. So grab your clubs and let’s get started!

Charging Golf Cart Batteries: A Guide to Using a 12V Charger

Getting Started

Understanding your 12V Charger

Before you begin charging your golf cart batteries, it’s important to familiarize yourself with your 12V charger. The charger is an essential tool in the charging process, and understanding its features and functions will ensure a smooth and efficient charging experience. Take a moment to read the user manual that came with your charger, as it will provide important information regarding proper usage and safety precautions.

Preparing your Golf Cart

Before you can start charging your golf cart batteries, you’ll need to make sure your golf cart is prepared for the process. Begin by turning off the golf cart’s power and removing the key. This will prevent any accidental engagement of the cart during the charging process. Additionally, you should make sure that the battery compartment is clean and free of any debris that could interfere with the charging process.

Finding a Suitable Charger

Not all chargers are created equal, and it’s important to find a charger that is suitable for your golf cart batteries. Look for a charger specifically designed for 12V batteries, as this will ensure compatibility and safe charging. Additionally, consider the amperage of the charger. A higher amperage charger will charge your batteries faster, but it’s important to ensure that your batteries can handle the higher charge rate. Consult the manufacturer’s recommendations for your golf cart batteries to determine the appropriate charger amperage.

Charging Process

Connecting the Charger to the Battery

Once you have prepared your golf cart and selected a suitable charger, it’s time to connect the charger to the battery. Start by locating the positive and negative terminals on your golf cart battery. The positive terminal is typically marked with a plus sign (+), and the negative terminal is marked with a minus sign (-). Ensure that the charger is unplugged before making any connections.

Next, connect the charger’s positive clamp to the positive battery terminal, and the negative clamp to the negative terminal. It’s important to make sure the clamps are securely attached to the terminals to ensure a solid connection. Once the clamps are securely attached, you can plug in the charger.

Setting the Charging Parameters

Once the charger is connected to the battery, you’ll need to set the charging parameters. The parameters you choose will depend on your specific golf cart batteries and the charger you are using. Consult the charger’s user manual for guidance on setting the appropriate voltage and amperage for your batteries.

It’s important to note that overcharging or undercharging your batteries can lead to reduced performance and potentially shorten their lifespan. It’s recommended to follow the manufacturer’s guidelines for charging parameters to ensure optimal charging while maintaining the integrity of your batteries.

Monitoring the Charging Progress

As your golf cart batteries charge, it’s important to monitor the charging progress. Most chargers come equipped with indicators or display screens that provide information about the charging process. Take note of the charging time and ensure that the charging progress is steady and consistent.

While it may be tempting to leave the charging process unattended, it’s important to stay nearby and keep an eye on the charger. This will allow you to address any potential issues that may arise during the charging process and ensure the safety and efficiency of the charging process.

Safety Precautions

Using Proper Personal Protective Equipment (PPE)

When dealing with batteries and chargers, it’s important to prioritize safety. One of the first safety precautions you should take is to wear proper personal protective equipment (PPE). This includes safety glasses or goggles to protect your eyes from any potential battery acid splashes, gloves to protect your hands, and closed-toe shoes to protect your feet.

Avoiding Common Hazards

During the charging process, there are a few common hazards to be aware of and avoid. Firstly, never smoke or have open flames near the charging area, as batteries release flammable gases during the charging process. Additionally, ensure that the charging area is well-ventilated to prevent the buildup of potentially harmful gases.

Another common hazard to avoid is overcharging or undercharging your batteries. Both can lead to reduced performance and potentially damage your batteries. Follow the manufacturer’s guidelines for charging parameters to prevent these hazards.

Preventing Overcharging and Undercharging

Overcharging and undercharging are two common issues that can occur during the charging process. Overcharging can lead to excessive heat and damage to the battery, while undercharging can result in decreased battery performance and capacity.

To prevent overcharging, it’s important to set the charging parameters correctly and monitor the charging progress. Once the batteries are fully charged, unplug the charger to avoid any further charging.

To prevent undercharging, ensure that you are using a charger with the appropriate voltage and amperage for your batteries. Follow the manufacturer’s recommendations for charging parameters and ensure that the charging process is uninterrupted until the batteries are fully charged.

Maintenance Tips

Regular Inspection and Cleaning

Regular inspection and cleaning of your golf cart batteries are essential for their optimal performance and longevity. Periodically check the battery terminals for any signs of corrosion or buildup. If you notice any corrosion, clean the terminals with a mixture of baking soda and water. Use a wire brush or a battery terminal cleaner to remove any stubborn corrosion.

Maintaining Proper Water Levels

Many golf cart batteries are of the flooded lead-acid type, which requires regular maintenance of water levels. Check the water levels in your batteries regularly and ensure they are topped up. Use distilled water to refill the batteries, as tap water may contain impurities that can affect battery performance and lifespan. Be careful not to overfill the batteries, as excessive water can lead to electrolyte overflow during the charging process.

Avoiding Deep Discharges

Deep discharges, where the battery is discharged to a very low state, can be detrimental to battery performance and lifespan. To avoid deep discharges, it’s important to monitor your battery’s state of charge regularly. If you notice that your batteries are consistently reaching a low state of charge, consider recharging them more frequently to prevent deep discharges. Additionally, avoid leaving your golf cart batteries in a discharged state for extended periods, as this can also lead to decreased performance and capacity.

Troubleshooting

Identifying Charging Issues

Sometimes, despite taking all the necessary precautions, issues may arise during the charging process. If you experience any difficulties or notice any abnormalities, it’s important to troubleshoot the problem to ensure safe and efficient charging. Common charging issues include slow charging, charger not turning on, or charger shutting off prematurely.

Common Solutions

For slow charging, first ensure that the charging parameters are set correctly. If the charger is not turning on or is shutting off prematurely, check the power source and make sure it is functioning properly. Additionally, inspect the charger’s cables and connections for any signs of damage or loose connections. If any issues are detected, rectify them before attempting to charge again.

Seeking Professional Help if Needed

If you are unable to troubleshoot the issue or if you suspect a more serious problem with your golf cart batteries or charger, it’s best to seek professional help. There are professionals who specialize in golf cart battery maintenance and repair and can identify and address any issues you may be facing. Contact your golf cart manufacturer or a reputable service center for assistance if needed.

Frequently Asked Questions

What is the ideal charging time for golf cart batteries?

The ideal charging time for golf cart batteries can vary depending on several factors, including the battery capacity, charger amperage, and state of charge. On average, it can take anywhere from 4 to 8 hours to fully charge a set of golf cart batteries. It is important to follow the manufacturer’s recommendations for charging time to prevent overcharging or undercharging.

Can I use a higher voltage charger for faster charging?

Using a higher voltage charger for faster charging is not recommended unless your batteries are specifically designed to handle higher charging voltages. Using a charger with a higher voltage than recommended can lead to overcharging and damage to the batteries. It is best to use a charger that is specifically designed for your golf cart batteries and follow the manufacturer’s guidelines for charging parameters.

Can I charge a dead battery?

Yes, it is possible to charge a dead golf cart battery. However, it is important to note that deeply discharged batteries may require special treatment or a specific type of charger to recover. In some cases, it may be necessary to seek professional assistance to properly revive a completely dead battery. To prevent deep discharges in the future, it is recommended to maintain regular charging intervals.

How often should I charge my golf cart batteries?

The frequency of charging your golf cart batteries will depend on how often you use your golf cart and the battery capacity. As a general guideline, it is recommended to charge your batteries after each use or at least once every 30 days. Regular charging helps maintain the battery’s state of charge and prevents deep discharges. Follow the manufacturer’s recommendations for charging intervals to optimize the lifespan and performance of your batteries.