A Step-by-Step Guide on How to Cut a Golf Shaft

Learn how to cut a golf shaft with ease in this step-by-step guide. Perfect for both beginners and seasoned golfers. Take your golf game to the next level!

If you’ve ever found yourself in need of adjusting the length of your golf club, fear not! This article is here to offer you a step-by-step guide on how to cut a golf shaft with ease. Whether you’re a seasoned golfer or a beginner just getting into the sport, this handy tutorial will provide you with the knowledge and confidence to tackle this task with precision. So grab your tools and get ready to take your golf game to the next level!
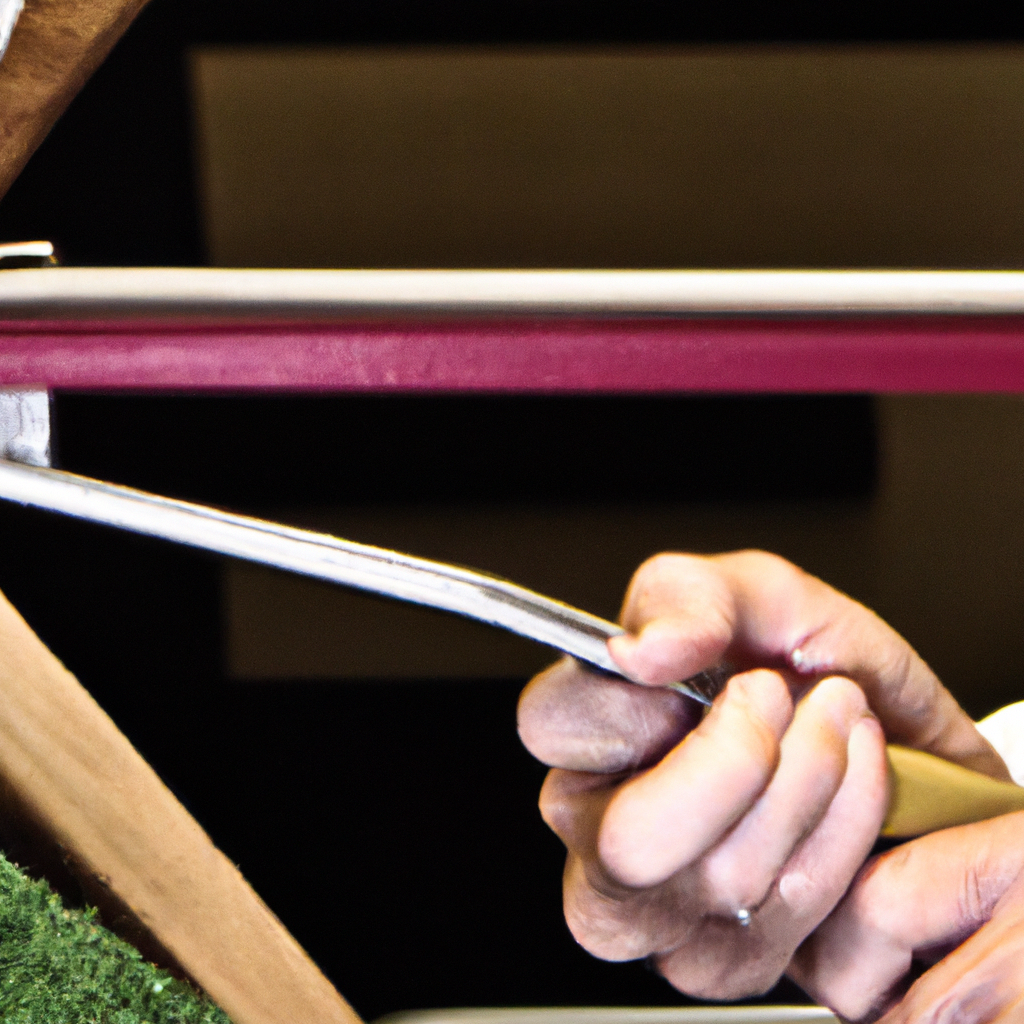
A Step-by-Step Guide on How to Cut a Golf Shaft

Materials Needed

Before you begin cutting a golf shaft, it’s important to gather all the necessary materials. Here’s a list of what you’ll need:

Golf shaft cutting tool

A golf shaft cutting tool is specifically designed to cut through the graphite or steel shafts of golf clubs. It ensures a clean and precise cut without damaging the integrity of the shaft.

Measuring tape or ruler

To determine the desired length of the golf shaft, you’ll need a measuring tape or ruler. This will help you accurately measure from the grip end of the shaft to the cutting point.

Marker or pencil

A marker or pencil will be used to mark the cutting point on the shaft. This ensures that you make an accurate and precise cut.

Safety goggles

Safety goggles are essential to protect your eyes from any debris or flying particles that may occur during the cutting process. Safety should always be a priority, so make sure to wear these goggles throughout the entire process.

Gloves

Using gloves is important to prevent any injuries or cuts to your hands. It also helps maintain a firm grip on the shaft and tools.

Vise clamp

A vise clamp is necessary to secure the golf shaft in place while you cut it. This will provide stability and ensure a clean cut.

Hacksaw or pipe cutter

You have two options when it comes to cutting the golf shaft – using a hacksaw or a pipe cutter. Both tools are effective, but the choice between them depends on personal preference and the type of shaft you are cutting.

Step 1: Measure

The first step in cutting a golf shaft is to measure and determine the desired length. Take your measuring tape or ruler and measure from the grip end of the shaft to the point where you want to make the cut. This measurement will vary depending on your personal preference, swing style, and the type of club you are working with.

Once you have determined the desired length, use a marker or pencil to make a clear and visible mark on the shaft indicating the cutting point. This will serve as a guide during the cutting process and ensure that you achieve the desired length accurately.

Step 2: Prepare the Shaft

After you have measured and marked the cutting point, it’s time to prepare the golf shaft for cutting. Begin by securing the shaft in a vise clamp. This will hold the shaft in place and provide stability throughout the cutting process.

To protect the shaft from any potential damage, wrap a soft material such as cloth or rubber around the clamped area. This will prevent any unwanted marks or scratches on the shaft while it is being cut.

Ensure that the vice clamp is tightened securely and that the clamped area is stable. This will prevent any movement or shifting of the shaft during the cutting process, allowing for a clean and precise cut.

A Step-by-Step Guide on How to Cut a Golf Shaft

Step 3: Cutting with a Hacksaw

If you have chosen to use a hacksaw to cut the golf shaft, follow these steps:

  1. Position the hacksaw blade at the marked cutting point on the shaft. Ensure that the blade is perpendicular to the shaft and aligned with the marked line.
  2. Using a steady motion, cut through the shaft using the hacksaw. Apply gentle pressure and allow the blade to do the work. Avoid applying excessive force, as this can damage the shaft or cause an uneven cut.
  3. Keep the blade moving in a steady motion to create a clean and even cut. Take your time and be patient, as rushing can lead to mistakes or an uneven cut.
  4. Pay attention to the cutting angle to ensure that the shaft is being cut straight. This will affect the overall performance and balance of the club, so it’s important to maintain a consistent angle throughout the cut.
  5. Once the cut is complete, inspect the end of the shaft for any burrs or rough edges. These can be removed using sandpaper or a file to ensure a smooth finish.

Step 4: Cutting with a Pipe Cutter

If you have chosen to use a pipe cutter to cut the golf shaft, follow these steps:

  1. Place the golf shaft inside the pipe cutter, making sure it is securely inserted.
  2. Tighten the pipe cutter around the shaft by rotating the cutter’s handle. This will gradually apply pressure to the shaft and create a groove for the cutting process.
  3. Rotate the pipe cutter around the shaft in a circular motion. Make sure to maintain a steady and consistent pressure as you rotate the cutter.
  4. Continue rotating the pipe cutter around the shaft until the cut is complete. This may require multiple rotations, depending on the thickness of the shaft and the type of pipe cutter you are using.
  5. Once the cut is made, inspect the end of the shaft to ensure a clean and even cut. If there are any rough edges or burrs, use sandpaper or a file to smooth them out.

Step 5: Check the Cut

After cutting the golf shaft, it’s important to check the cut to ensure that it meets your desired specifications. Inspect the end of the shaft and verify that it is straight and smooth.

Look for any sharp burrs or unevenness that may affect the functionality of the club. These can be removed using sandpaper or a file to create a clean and polished finish.

Step 6: Finalize the Shaft

Once you have inspected the cut and made any necessary adjustments, it’s time to finalize the golf shaft. Begin by cleaning the cut end of the shaft to remove any debris or particles that may have accumulated during the cutting process.

If you are reinstalling the grip, ensure that it is properly aligned and securely attached to the cut end of the shaft. If you are adding a new grip, follow the manufacturer’s instructions for installation.

Step 7: Test and Adjust

After finalizing the golf shaft, it’s important to test the clubhead attachment and make any necessary adjustments. Attach the clubhead to the cut shaft following the manufacturer’s instructions.

Perform swing tests to assess the performance and feel of the club. If you notice any issues such as a loss of distance, inconsistent ball flight, or discomfort during the swing, it may be necessary to make further adjustments to the length or balance of the shaft.

Step 8: Safety Precautions

Throughout the entire process of cutting a golf shaft, it’s important to prioritize safety. Here are some important safety precautions to keep in mind:

  • Always wear safety goggles to protect your eyes from any debris or flying particles that may occur during the cutting process.
  • Use gloves to prevent injuries, provide a secure grip, and protect your hands from sharp edges or burrs.
  • Be cautious while cutting to avoid accidents. Pay attention to your surroundings, and make sure you have a clear and stable workspace.

Step 10: Practice and Master

Cutting golf shafts requires practice to develop proficiency. With each successful cut, you’ll gain confidence and improve your skills. It’s important to remember that practice makes perfect. The more you practice, the more comfortable you will become at cutting golf shafts.

Repetition is key to mastering this skill. As you continue to cut golf shafts, you’ll develop a deeper understanding of the process, refine your technique, and achieve consistent and accurate results.

So, whether you’re customizing your club or replacing a damaged shaft, follow these step-by-step instructions to cut a golf shaft and unleash your full potential on the golf course! Remember to prioritize safety, take your time, and enjoy the satisfaction of creating a perfectly customized club. Happy cutting!
How to Cut a Golf Ball in Half

Learn the art of cutting a golf ball in half. Discover the tools and step-by-step process to dissect a golf ball and uncover its secrets.

Have you ever wondered what’s inside a golf ball? If you’ve ever been curious about the inner workings of this small but mighty sphere, you’re in for a treat. In this article, you’ll learn the intriguing art of cutting a golf ball in half. From the tools you’ll need to the step-by-step process, we’ll guide you through the fascinating task of dissecting a golf ball and uncovering its secrets. So, grab your knife and let’s embark on this captivating journey together.

How to Cut a Golf Ball in Half

Safety Precautions

When it comes to cutting a golf ball in half, safety should always be your top priority. By following a few simple precautions, you can ensure a safe and successful cutting process.

Wear proper protective gear

Before you begin, make sure to equip yourself with the necessary protective gear. This includes safety goggles or glasses to protect your eyes from any flying debris, as well as gloves to safeguard your hands from any potential injuries. It’s always better to be safe than sorry, so take a moment to gather your protective gear before proceeding.

Choose a suitable location

Selecting the right location for this task is crucial. Find an area that is well-ventilated and well-lit, allowing you to comfortably work without any obstructions. It’s advisable to work outdoors or in a workshop, as these settings provide ample space and minimize the risk of any accidents occurring in a confined area.

Ensure a stable cutting surface

Having a stable cutting surface is essential for maintaining control and achieving accurate cuts. Whether you choose to work on a workbench or a sturdy table, ensure that it is level and secure. This will prevent any unnecessary movement or wobbling during the cutting process, reducing the risk of injury and ensuring a clean cut.

Gather Necessary Tools

To successfully cut a golf ball in half, you’ll need to gather a few essential tools. These tools will aid you in each step of the process, from preparing the golf ball to splitting it in half.

Utility knife or a serrated knife

To make the initial cut and score the golf ball, a utility knife or a serrated knife is a must-have. These tools provide a sharp and precise edge, allowing you to create a clean incision along the marked line. Remember to handle these knives with caution and keep them away from children or anyone who is not involved in the cutting process.

Vise or clamp

A vise or a clamp is necessary for securing the golf ball during the cutting process. It helps to keep the ball stable, allowing you to apply the necessary pressure without the fear of it slipping or moving. Ensure that the vise or clamp you choose is sturdy and properly aligned to hold the golf ball securely in place.

Hack saw or coping saw

To deepen the initial cut and split the golf ball, a hack saw or a coping saw comes in handy. These saws have small, sharp teeth, which allow for precise cutting along the marked line. When working with saws, it is important to exercise caution and practice proper hand placement to prevent any accidents.

Pliers or vice grips

To separate the halves of the golf ball and remove the inner core, pliers or vice grips are essential tools. These tools provide a firm grip and leverage, enabling you to twist and apply pressure without exerting excessive force. Choose pliers or vice grips that are comfortable to hold and have a good grip to ensure smooth operation.

Preparing the Golf Ball

Before you embark on cutting the golf ball, it is important to take a few preparatory steps to ensure a clean and successful cut.

Clean the golf ball

Start by cleaning the golf ball thoroughly to remove any dirt or debris that may be present on its surface. Simply rinse the ball under warm water and gently scrub it with a soft brush or sponge. This will help to eliminate any potential particles that could interfere with the cutting process or cause damage to the tools.

Dry the golf ball

Once the golf ball is clean, it is crucial to dry it thoroughly. Moisture can make the ball slippery and cause it to shift during the cutting process. Use a clean, dry cloth or towel to pat the ball dry, ensuring that there is no remaining moisture. Taking this extra step will help to facilitate a stable and controlled cutting process.

How to Cut a Golf Ball in Half

Securing the Golf Ball

In order to make precise and accurate cuts, it is essential to secure the golf ball firmly in place. This is where a vise or a clamp comes into play.

Place the golf ball in a vise

Open the vise and carefully position the golf ball between its jaws. Make sure that the ball is centered and that each jaw is firmly gripping the ball. When tightening the vise, exercise caution to avoid applying excessive pressure that could damage the ball or cause it to deform.

Use a clamp for additional stability

In some cases, using a clamp in conjunction with a vise can provide added stability and prevent any movement of the golf ball. If you find that the ball is not securely held in place by the vise alone, you can position a clamp on the side of the vise and tighten it to reinforce the grip. This additional measure will ensure that the ball remains steady throughout the cutting process.

Making the Initial Cut

With the golf ball secured, it’s now time to make the initial cut along the marked line. This step will set the foundation for splitting the ball in half.

Mark a line along the equator

Using a pen or a sharp marker, carefully mark a line along the equator of the golf ball. This line will serve as a guide for making an accurate and straight cut. Take your time to ensure that the line is straight and well-placed, as it will determine the outcome of the final cut.

Score the line with a utility knife

With the line marked, take the utility knife or serrated knife and carefully score along it. Apply consistent and firm pressure, allowing the blade to penetrate the outer layer of the golf ball. Maintain a slow and controlled pace to create a clean incision without causing any unnecessary damage.

Apply consistent and firm pressure

Continue scoring along the marked line, applying consistent and firm pressure. Remember to maintain a steady pace to ensure an even and accurate cut. Take breaks if needed to rest your hand and regain your focus. By exercising patience and control during this step, you’ll be one step closer to successfully cutting the golf ball in half.

Deepening the Cut

Once the initial cut has been made, it’s time to deepen it in preparation for splitting the golf ball.

Use a hack saw or coping saw

To deepen the cut, switch to a hack saw or coping saw. These tools allow for more precise cutting, thanks to their small serrated blades. Align the blade with the scored line and apply gentle pressure to gradually deepen the incision. Take your time, ensuring that you are following the marked line accurately.

Carefully follow the marked line

As you deepen the cut, pay close attention to the marked line. Maintain a slow and controlled sawing motion, moving the saw along the line and gradually increasing the depth of the incision. Keeping the saw upright and perpendicular to the golf ball’s surface will help maintain accuracy and prevent any deformations or unwanted angles.

Apply steady sawing motion

As you progress, maintain a steady sawing motion to maintain control and accuracy. Avoid rushing or applying excessive force, as this can lead to uneven cuts or damage to the golf ball. Instead, focus on smooth and deliberate movements, allowing the saw to do the work gradually.

Splitting the Golf Ball

Once you have deepened the cut, it’s time to split the golf ball into two halves.

Use pliers or vice grips

To separate the halves, grab hold of the golf ball with a pair of pliers or vice grips. The firm grip and leverage provided by these tools will make the splitting process easier and more controlled. Ensure that the jaws of the pliers or vice grips are securely positioned around the golf ball to prevent slipping or accidents.

Gently twist and apply pressure to separate halves

With a steady grip on the golf ball, gently twist the pliers or vice grips in opposite directions. Gradually increase the pressure, applying force until you start to feel the ball separating. Exercise caution and be patient during this step, as forcing the separation may cause the halves to break or shatter.

Continue twisting until the ball splits

Keep twisting the pliers or vice grips until the golf ball splits into two halves. The strength and resilience of golf balls can vary, so the amount of force required may differ from ball to ball. Continue twisting until you achieve a clean split, ensuring that both halves remain intact and undamaged.

Removing the Inner Core

Now that you have successfully split the golf ball, it is time to remove its inner core.

Pry open each half with pliers

Using the same pliers or vice grips, gently pry open each half of the golf ball. Position the jaws of the pliers or vice grips at the edge of the cut and gently exert pressure to open the halves. Take your time and be cautious to prevent any damage to the outer surfaces of the halves.

Carefully remove the core

With the halves pried open, you can now carefully remove the core. Apply gentle pressure to the core and extract it from each half, taking care not to cause any tears or damage to the outer surfaces. This step is crucial for accessing the inside of the golf ball.

Inspect the core for any damage or defects

Take a moment to inspect the removed core for any signs of damage or defects. This may include cracks, deformities, or any other irregularities that could impact the functionality of the golf ball. If you plan to reuse or repurpose the halves, it is important to ensure that the core is in good condition.

Optional Steps

Now that you have successfully cut the golf ball in half and removed the core, there are a few optional steps you can take to further enhance the halves.

Cleaning the inside of the halves

If you plan to use the halves for crafts or decoration, it’s a good idea to clean the inside of the halves. Simply wipe the inside surfaces with a clean, dry cloth to remove any debris or residue that may have accumulated during the cutting process. This will ensure that the halves are ready to be used in any creative project.

Polishing the halves

To give the halves a more refined and finished look, you can polish the outer surfaces. Using a polishing cloth or a soft cloth, gently buff the surfaces in a circular motion. This will help to remove any minor scratches or imperfections, leaving the halves looking clean and shiny.

Using the halves for crafts or decoration

While not necessary, you may find various creative uses for the halves of the golf ball. From making custom keychains and jewelry to incorporating them into art projects or decorations, the possibilities are endless. Let your imagination run wild and explore the potential of these versatile golf ball halves.

Safety and Legal Considerations

To ensure a safe and responsible cutting process, it’s important to keep in mind a few final considerations.

Dispose of any leftover golf ball fragments properly

Once you have completed the cutting process, it is crucial to dispose of any leftover golf ball fragments properly. Do not leave small pieces or shards lying around, as they can pose a safety hazard to yourself, others, or the environment. Be sure to gather all fragments and dispose of them in accordance with local waste management regulations.

Understand and comply with local regulations

Before attempting to cut a golf ball, familiarize yourself with any specific regulations or guidelines that apply in your area. Some countries or regions may have restrictions on modifying or repurposing golf balls, and it is important to abide by these rules. By understanding and complying with local regulations, you can ensure that you are engaging in a safe and legal activity.

In conclusion, cutting a golf ball in half can be a fun and rewarding DIY project. By following the safety precautions, gathering the necessary tools, and carefully executing each step, you can successfully achieve clean and precise cuts. Remember to exercise patience, take breaks as needed, and prioritize safety at all times. Whether you plan to repurpose the halves or explore creative uses for them, cutting a golf ball in half opens up a world of possibilities. So grab your tools, prepare your workspace, and embark on this exciting endeavor with confidence!