How to Re-grip Golf Clubs: A Step-by-Step Guide

Learn how to re-grip your golf clubs in this step-by-step guide. Save money, enhance performance, and maintain your equipment with ease.

If you’re a golf enthusiast looking to improve your game, one essential aspect to consider is the condition of your golf clubs. Over time, the grips on your clubs can wear out and lose their effectiveness, resulting in compromised control and reduced performance. In this article, you will find a comprehensive step-by-step guide on how to re-grip your golf clubs, allowing you to save money and ensure optimal performance on the course. Whether you’re a seasoned golfer or a beginner, this guide will equip you with the knowledge and skills needed to maintain the quality of your golf clubs and enhance your overall golfing experience. So, let’s dive in and discover the art of re-gripping golf clubs.

How to Re-grip Golf Clubs: A Step-by-Step Guide

If you’ve noticed that the grips on your golf clubs are worn out or not providing you with the necessary grip, it may be time to re-grip them. Re-gripping your golf clubs is an important part of maintaining your equipment and ensuring optimal performance on the course. In this comprehensive guide, we will walk you through the step-by-step process of re-gripping your golf clubs. So let’s get started!

How to Re-grip Golf Clubs: A Step-by-Step Guide

Preparation

Before you begin the re-gripping process, it’s essential to gather the necessary materials. You will need the following items:

Gather necessary materials

  • New golf grips
  • Grip tape
  • Grip solvent
  • Razor blade or grip removal tool
  • Adhesive remover
  • Clean cloth or paper towels
  • Grip clamp or air compressor
  • Finishing tape or grip cap (optional)
  • Golf club vise or sturdy workbench

Once you have gathered all the materials, it’s time to set up your workspace.

Set up your workspace

Find a well-lit and spacious area where you can comfortably work on re-gripping your golf clubs. Make sure you have a sturdy workbench or a golf club vise to secure the club firmly during the process. Having a clean and organized workspace will help you complete the task efficiently.

Removing the Old Grip

To remove the old grip from your golf club, follow these steps:

Secure the club

Place your golf club securely in the vise or workbench, ensuring that it is stable before proceeding with the grip removal.

Cut the old grip

Using a razor blade or a grip removal tool, cut the old grip lengthwise from the top to the bottom. Be cautious not to damage the shaft while cutting the grip.

Remove any tape or adhesive residue

After removing the grip, you may find leftover tape or adhesive residue on the shaft. Gently peel off any old grip tape and use an adhesive remover to clean the shaft surface completely. Wipe off any residue with a clean cloth or paper towel to ensure a smooth grip installation.

Cleaning the Club Shaft

Before installing the new grip, it’s important to clean the club shaft thoroughly. This ensures a clean surface for proper grip adhesion. Follow these steps to clean the club shaft:

Inspect the shaft

Take a closer look at the club shaft and check for any dings, nicks, or rust. If you notice any significant damage, it may be necessary to repair or replace the club before re-gripping.

Clean the shaft surface

Use a clean cloth or paper towel dampened with a mild soap and water solution to wipe down the club shaft. Ensure that all dirt, grime, and oils are removed. Rinse the shaft with clean water and dry it thoroughly before moving on to the next step.

Preparing the Club Grip

Now that the club shaft is clean and ready, it’s time to prepare the new grip. Consider the following factors when preparing your club grip:

Choose the right grip size

Golf grips come in various sizes, so it’s crucial to select one that suits your hand size and grip preference. Grip size affects your swing mechanics and can greatly impact your performance on the course. If you are unsure about the right grip size, consult with a professional club fitter or golf instructor for guidance.

Select the desired grip type

Golf grips come in different materials, textures, and designs. Consider factors such as weather conditions, personal preferences, and playing style when choosing the grip type. Popular grip materials include rubber, corded, and hybrid variations. Experiment with different grip types to find the one that feels comfortable and enhances your performance.

Apply grip tape

Before installing the new grip, apply grip tape to the club shaft. Grip tape helps create a secure bond between the grip and the club. It also helps to layer the grip tape in a way that feels comfortable in your hands. Start from the bottom of the club and wrap the grip tape upwards, overlapping each layer slightly. Cut off any excess tape at the top so that the grip can easily slide over it.
How to Re-grip Golf Clubs: A Step-by-Step Guide

Applying Grip Solvent

Once the grip tape is in place, it’s time to apply grip solvent. Grip solvent acts as a lubricant, allowing you to position and adjust the grip before it dries. Here’s how you can apply grip solvent:

Apply grip solvent to the tape

Pour a small amount of grip solvent onto the exposed grip tape. The solvent should be evenly distributed and cover the entire length of the tape. Be careful not to oversaturate the tape, as excessive solvent can affect the grip’s performance.

Spread the solvent evenly

Using your fingers or a grip brush, spread the grip solvent evenly over the grip tape. This helps to activate the adhesive properties of the tape and makes it easier to slide the grip onto the shaft. Ensure that the solvent is evenly distributed without any excess pooling at the top or bottom of the grip.

Installing the New Grip

With the grip tape and solvent in place, it’s time to install the new grip onto the golf club. Follow these steps for a successful grip installation:

Align the grip

Before sliding the grip onto the shaft, check for any alignment markings on both the grip and the shaft. Align these markings to ensure that the grip is oriented correctly. This step is crucial to maintain proper club face alignment during your swing.

Slide the grip onto the shaft

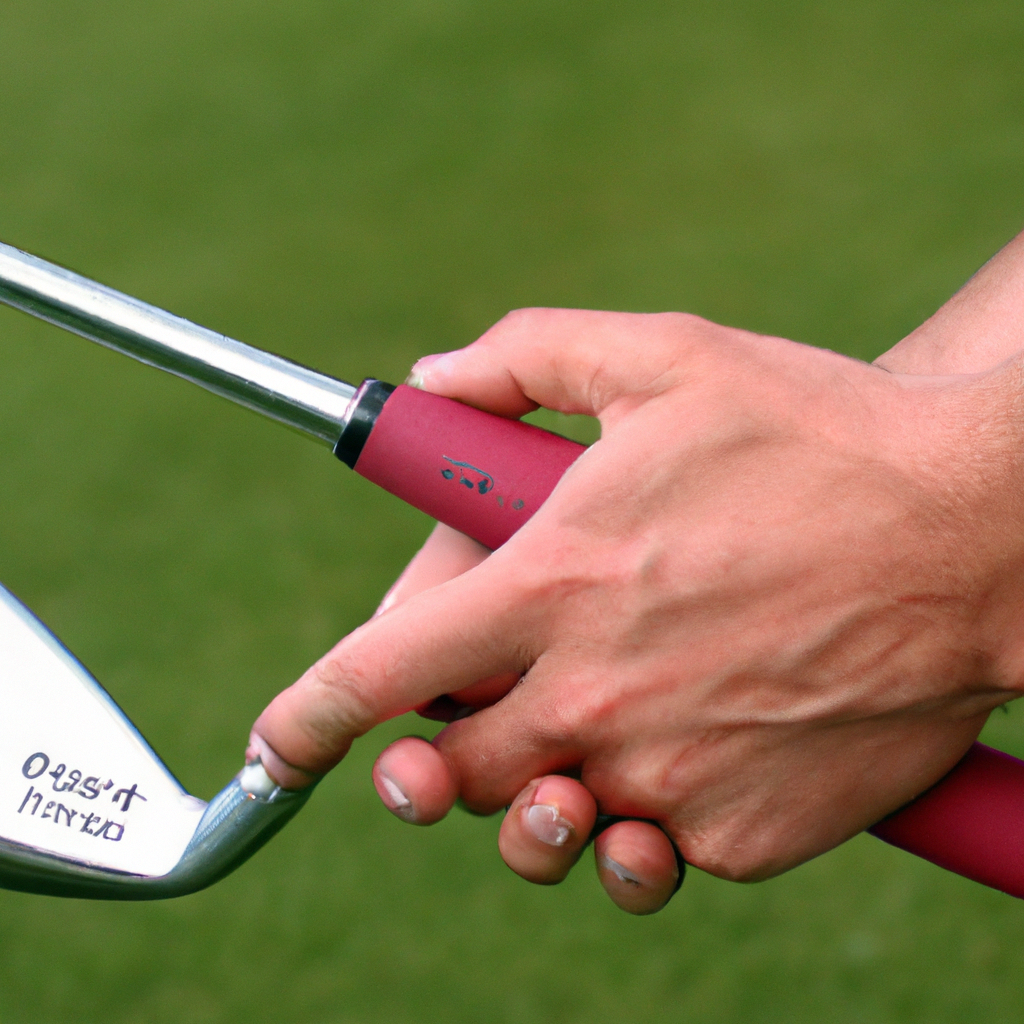
Place one hand inside the open end of the grip and position your other hand on the top of the grip. Using a steady twisting motion, slide the grip onto the shaft. Be sure to move the grip all the way down until it reaches the end of the shaft.

Position the grip correctly

Once the grip is fully on the shaft, double-check its positioning. Ensure that the grip’s end aligns with the bottom of the shaft or any alignment markings. Make any necessary adjustments by twisting or sliding the grip until it is in the desired position.

Securing the Grip

To ensure that the grip is securely in place, follow these steps:

Remove excess solvent

Use a clean cloth or paper towel to remove any excess grip solvent that may have seeped out of the grip during installation. This allows the grip to dry properly without any slippery residue.

Use grip clamp or air compressor

To facilitate the drying process and create a tight bond between the grip and the tape, you can use a grip clamp or an air compressor. If using a grip clamp, position it at the top of the grip and tighten it gently. Alternatively, you can use an air compressor to blow compressed air into the open end of the grip. This helps to expand the grip, creating a snug fit and accelerating the drying time.

Allow the grip to dry and set

After securing the grip, let it dry and set for a minimum of 24 hours. This allows the adhesive properties of the grip tape to fully bond with the grip and the club shaft. Avoid using the club during this drying period to ensure a strong and long-lasting grip.

Checking and Adjusting

Once the grip is completely dry, it’s important to check for proper alignment and feel. Follow these steps to assess the grip’s performance:

Check for proper alignment and feel

Hold the golf club as you would during a swing and evaluate the grip’s alignment. Ensure that the grip’s alignment markings match your desired hand positioning. Additionally, take note of the grip’s feel in your hands. It should provide a secure and comfortable grip, allowing you to have proper control over the club during your swing.

Make any necessary adjustments

If you find that the grip’s alignment or feel is not optimal, you may need to make some adjustments. Remove the grip by repeating the steps for grip removal, clean the shaft, and start the re-gripping process again. It may take some trial and error to find the perfect grip for your game, so be patient and willing to make adjustments as needed.

Finishing Touches

To complete the re-gripping process, attend to the finishing touches. Follow these steps:

Remove any leftover adhesive residue

After removing the old grip and adhesive residue, there may still be some sticky residue on the shaft. Use an adhesive remover and a clean cloth or paper towel to remove any remaining residue. This ensures a clean and professional appearance.

Clean the grip surface

With a clean cloth or paper towel, wipe down the grip surface to remove any dirt, debris, or excess grip solvent. This final cleaning step ensures that your new grip is ready to perform flawlessly on the golf course.

Add finishing tape or grip cap if desired

If you want to add extra cushioning or customization to your grip, consider adding finishing tape or a grip cap. Finishing tape can be wrapped around the top of the grip to provide additional comfort and support. Alternatively, a grip cap can be added to the end of the grip for a polished look. These finishing touches are optional but can enhance your grip experience.

Troubleshooting

During the re-gripping process, you may encounter some common issues. Here are a few troubleshooting tips and solutions:

Common issues and solutions

  • Issue: Difficulty sliding the grip onto the shaft. Solution: Ensure that you have applied enough grip solvent and that the grip tape is properly layered. You can also use a grip alignment tool to assist with grip installation.

  • Issue: Grip feels loose or spins when swinging. Solution: This may indicate insufficient grip tape layers or improper installation. Recheck the grip tape layers, apply more adhesive if necessary, and ensure a secure fit when sliding the grip onto the shaft.

  • Issue: Excessive grip solvent seeping out during installation. Solution: Be mindful of the grip solvent amount applied. Excess solvent can affect the grip’s adhesion. Use a clean cloth or paper towel to remove any excess solvent before securing the grip.

  • Issue: Adhesive residue remains on the shaft after old grip removal. Solution: Adhesive remover and a clean cloth or paper towel can effectively remove leftover residue. Take care not to damage the shaft surface when cleaning.

  • Issue: Discomfort or blisters while using the new grip. Solution: The grip size or type may not be suitable for your hands and playing style. Consider re-gripping with a different grip size or material that provides a more comfortable feel.

Congratulations! You have successfully re-gripped your golf club. This process is a crucial aspect of maintaining your golf equipment and ensuring peak performance on the golf course. Remember, practicing good equipment maintenance leads to a better golfing experience and improved playability.

Conclusion

Re-gripping your golf clubs may seem like a daunting task, but with the right materials and a step-by-step approach, you can easily accomplish it. By following the comprehensive guide we’ve provided, you are now equipped with the knowledge to successfully re-grip your golf clubs, ensuring comfort, control, and optimal performance during your rounds. So go ahead and give your golf clubs the makeover they deserve – your game will thank you!

Note: The cost of re-gripping golf clubs can vary depending on factors such as the grip type, quality, and additional services offered by professional club fitters. It’s advisable to research local golf stores or consult with professionals to get an accurate estimate of the cost involved.
A Comprehensive Guide on How to Use a Golf Rangefinder

Learn how to use a golf rangefinder to improve your game! From choosing the right device to mastering distance measurements, this guide has you covered.

So, you’ve just purchased a shiny new golf rangefinder and you’re excited to take your game to the next level. But wait, how exactly do you use this nifty device to improve your golfing skills? Well, fear not, because in this comprehensive guide, we will walk you through all the ins and outs of using a golf rangefinder. From understanding the different types of rangefinders to mastering the features and techniques, you’ll soon be confidently measuring distances, calculating slopes, and making accurate shots on the golf course. Get ready to take your golf game to new heights with our step-by-step instructions and tips. Let’s dive in!

A Comprehensive Guide on How to Use a Golf Rangefinder

Choosing the Right Golf Rangefinder

When it comes to choosing the right golf rangefinder, there are a few important factors to consider. The first thing to think about is your budget. Rangefinders can vary greatly in price, so it’s important to determine how much you are willing to spend. Next, you’ll want to think about the type of rangefinder you prefer. There are two main types to choose from: laser rangefinders and GPS rangefinders. Laser rangefinders use a laser beam to determine distance, while GPS rangefinders use satellite technology. Finally, consider the necessary features that you need in a rangefinder. Are you looking for a simple device that only measures distance, or do you want additional features such as slope adjustment or hazard detection? By considering these factors, you can choose a rangefinder that best suits your needs.

Understanding the Basic Functions

Before you can start using your golf rangefinder effectively, it’s important to understand the basic functions. One of the first things you’ll need to know is how to power on and off the device. This is usually done with a simple button or switch. Once your rangefinder is powered on, you’ll want to familiarize yourself with the display. The display will show you the distance measurement and other relevant information. Lastly, most rangefinders have a mode button that allows you to switch between different modes, such as slope mode or non-slope mode. By understanding these basic functions, you’ll be ready to start measuring distances on the golf course.

Mastering Distance Measurements

Distance measurements are the primary function of a golf rangefinder, so it’s important to know how to accurately measure yardage. Most rangefinders allow you to choose between different yardage units, such as yards or meters. Make sure you understand which unit you are using and how to switch between them if necessary. Another important feature to understand is the ability to switch between slope and non-slope mode. Slope mode takes into account the elevation changes on the course and provides adjusted distance measurements. Non-slope mode, on the other hand, provides the actual distance without adjusting for slope. Lastly, targeting the flagstick is a key skill to develop. Practice aiming your rangefinder at the flagstick to get the most accurate distance measurement.

A Comprehensive Guide on How to Use a Golf Rangefinder

Using the First Target or Pin-Seeking Mode

Pin-seeking mode, also known as first target mode, is a helpful feature to have on your golf rangefinder. This mode allows you to focus specifically on the flagstick and ignore any background objects. To activate pin-seeking mode, simply press the designated button on your rangefinder. This will help you lock in on the flagstick and get an accurate distance measurement. Additionally, some rangefinders offer a continuous scan mode, which allows you to scan the area while still keeping the flagstick as the main target. This can be helpful when you need to survey the entire course or quickly find multiple distance measurements.

Utilizing the Second Target or Scan Mode

In addition to pin-seeking mode, many golf rangefinders offer a second target or scan mode. This mode is useful when you need to measure distances to multiple targets in a row. By activating the scan mode, the rangefinder will continuously measure and display distances as you pan across the course. This can be especially helpful when you’re trying to determine the distance to hazards, bunkers, or other landmarks. Simply press the designated button to activate the scan mode and begin scanning multiple targets. It’s important to note that not all rangefinders have this feature, so be sure to choose a model that includes it if it’s something you find valuable.

Accounting for Slope and Elevation

For a more precise understanding of the course, some golf rangefinders offer slope and elevation adjustments. Slope adjustment takes into account the angle of the slope and provides a compensated distance measurement. Elevation adjustment, on the other hand, takes into account the difference in elevation between you and your target. To activate these features, you’ll typically need to press a button or switch on your rangefinder. It’s important to note that slope-adjusted measurements are not allowed in tournament play and should only be used for practice rounds or casual play. Be sure to familiarize yourself with the rules and regulations of your local golf courses before using these features.

Taking Advantage of Advanced Features

Many modern golf rangefinders offer advanced features that can enhance your game. One such feature is the golf GPS function. This allows you to view a map of the course and see the distances to various targets and hazards. GPS rangefinders typically require a subscription or internet connection to access this feature. Navigating hazards and bunkers is another helpful feature that some rangefinders offer. If you frequently find yourself needing to avoid hazards or strategize around bunkers, look for a rangefinder that includes this capability. These advanced features can provide valuable information and help you make more informed decisions on the golf course.

Maintaining and Cleaning Your Rangefinder

To keep your golf rangefinder in good working condition, it’s important to properly maintain and clean it. When you’re not using your device, store it in a protective case or pouch. This will help prevent any accidental damage or scratches. Additionally, make sure to clean the lens and body of your rangefinder regularly. Use a soft, lint-free cloth to wipe away any dirt, debris, or fingerprints. Avoid using harsh chemicals or abrasive materials that could damage the lens or body. By following these maintenance and cleaning practices, you can ensure that your rangefinder stays in optimal condition for years to come.

Practicing and Getting Accustomed

Using a golf rangefinder effectively takes practice and getting accustomed to the device. Take the time to practice with different distances on the golf course or at the driving range. This will help you become familiar with how your rangefinder works and how to adjust your shots accordingly. Additionally, it’s important to learn to trust your rangefinder. Once you have confidence in the accuracy of your device, you can rely on it to make informed decisions about club selection and shot strategy. The more you practice and use your rangefinder, the more comfortable and competent you will become.

Understanding Local Regulations and Etiquette

Before you bring your golf rangefinder onto a golf course, it’s important to understand the local regulations and etiquette surrounding its use. Confirm whether the use of a rangefinder is allowed in tournaments or competitive play. Some tournaments may have specific rules regarding the use of rangefinders or may only allow certain types to be used. It’s also important to use your rangefinder respectfully on the course. Be mindful of other golfers and avoid disturbing them while using your device. It’s best to take measurements quickly and efficiently to keep the pace of play moving smoothly.

In conclusion, using a golf rangefinder can greatly improve your game by providing accurate distance measurements and additional features. By understanding the basic functions, mastering distance measurements, and utilizing advanced features, you can enhance your decision-making on the golf course. Taking the time to maintain and clean your rangefinder, practice with it, and understand the local regulations and etiquette will ensure a positive experience for both you and your fellow golfers. So, choose the right golf rangefinder for your needs and start experiencing the benefits it brings to your game. Happy golfing!

A Step-by-Step Guide to Registering a Golf Cart in Florida

Learn how to register a golf cart in Florida with this step-by-step guide. From understanding the requirements to completing the application, we’ve got you covered. Cruise around town with a properly registered golf cart by following these simple steps.

So, you’ve got yourself a golf cart and you’re ready to hit the sunny streets of Florida, but there’s just one problem – you’re not exactly sure how to register it. Well, fear not! In this step-by-step guide, we’ll walk you through the entire process of registering a golf cart in Florida. From gathering the necessary documents to completing the application, we’ve got your back. By the end of this article, you’ll be cruising around town with a properly registered golf cart and a smile on your face. Let’s get started, shall we?

A Step-by-Step Guide to Registering a Golf Cart in Florida

Step 1: Understand the Requirements

Check the legal definition of a golf cart

Before you can register your golf cart in Florida, it’s important to understand the legal definition of a golf cart. According to Florida law, a golf cart is defined as a motor vehicle that is designed and manufactured for operation on a golf course for sporting or recreational purposes. It typically has a maximum speed of 20 miles per hour, is equipped with safety equipment such as seat belts and rearview mirrors, and is not designed to carry more than four persons.

Determine if your cart meets the state requirements

Once you understand the legal definition of a golf cart, the next step is to determine if your cart meets the state requirements. Ensure that your golf cart meets the specifications mentioned in the definition, such as the maximum speed and capacity.

Know the age restrictions for operating a golf cart

In Florida, there are age restrictions for operating a golf cart. It is illegal for anyone under the age of 14 to operate a golf cart on public roads, except when accompanied by a responsible adult. It is important to be aware of these age restrictions to ensure compliance with the law.

Familiarize yourself with local rules and regulations

In addition to the state requirements, it is essential to familiarize yourself with any local rules and regulations regarding golf cart registration. Some cities or counties may have specific rules regarding the operation and registration of golf carts, so it’s important to be aware of these regulations to avoid any penalties or fines.

Gather all necessary documentation

Before you begin the registration process, gather all the necessary documentation. This may include proof of ownership, insurance policy, and any additional supporting documents required by the registration authority. Having all the necessary paperwork ready will make the registration process smoother and faster.

Step 2: Prepare Your Golf Cart

Ensure your golf cart is in good working condition

Before registering your golf cart, it’s crucial to ensure that it is in good working condition. Check the brakes, lights, horn, and steering to make sure everything is functioning properly. If you notice any issues, get them fixed before proceeding with the registration process.

Obtain a valid proof of ownership

To register your golf cart, you will need to provide a valid proof of ownership. This can be in the form of a bill of sale, manufacturer’s certificate of origin, or any other document that proves you are the legal owner of the golf cart. Make sure you have this document ready before moving on to the next step.

Obtain a valid insurance policy

In Florida, it is mandatory to have insurance coverage for your golf cart. Obtain a valid insurance policy that meets the minimum requirements set by the state. The insurance policy should provide liability coverage for any bodily injury or property damage that may occur while operating the golf cart.

Get your golf cart inspected (if required)

Depending on the local regulations, you may need to get your golf cart inspected before registering it. An inspection may involve checking the vehicle identification number (VIN), safety equipment, and any modifications made to the golf cart. If an inspection is required, schedule it and ensure that your golf cart passes all the necessary checks.

Ensure all modifications comply with state laws

If you have made any modifications to your golf cart, such as adding lights or a rearview mirror, ensure that they comply with the state laws. Some modifications may be prohibited or require additional approvals. Check the Florida statutes or consult a professional to ensure your modifications are legal before proceeding with the registration process.

Step 3: Complete the Application

Obtain the appropriate registration form

To register your golf cart in Florida, obtain the appropriate registration form. You can usually find this form on the website of the Florida Department of Highway Safety and Motor Vehicles (DHSMV) or at your local DHSMV office. Ensure that you have the most up-to-date version of the form.

Fill out the form with accurate information

Carefully fill out the registration form with accurate information. Provide your personal details, including your name, address, and contact information. Also, provide the necessary information about your golf cart, such as the make, model, year, and vehicle identification number (VIN). Double-check all the information before submitting the form to avoid any delays in the registration process.

Provide proof of ownership

Attach a copy of your proof of ownership document to the registration form. This document could be the bill of sale, manufacturer’s certificate of origin, or any other document that proves your ownership. Ensure that the document is clear and legible so that it can be easily verified.

Attach a copy of your insurance policy

Include a copy of your valid insurance policy with the registration form. The policy should meet the minimum coverage requirements set by the state. Ensure that the copy is clear and includes all the necessary information, such as the policy number, coverage period, and contact details of the insurance provider.

Include any required supporting documents

Some registration processes may require additional supporting documents. For example, if you have made modifications to your golf cart, you may need to provide documentation showing that these modifications comply with the state laws. Make sure to include all the required supporting documents to avoid any delays or complications in the registration process.

A Step-by-Step Guide to Registering a Golf Cart in Florida

Step 4: Pay the Registration Fees

Determine the required registration fees

Before submitting your application, determine the required registration fees. The registration fees may vary depending on factors such as the county where you reside and the type of golf cart you own. Check the DHSMV website or contact your local DHSMV office to find out the exact fee amount.

Choose an acceptable method of payment

Choose an acceptable method of payment for the registration fees. Most DHSMV offices accept payment in the form of cash, check, or credit card. Ensure that you have the necessary funds or payment method ready before submitting your application.

Submit the payment along with your application

When submitting your application, include the payment for the registration fees. Make sure that the payment is included in the correct amount and in the acceptable form. Be sure to double-check everything before submitting to avoid any issues with the payment or delays in the registration process.

Step 5: Submit Your Application

Choose the appropriate submission method

Choose the appropriate submission method for your registration application. You can usually submit your application in person at your local DHSMV office or through mail. Depending on your preference and the availability of services, choose the method that is most convenient for you.

Submit your completed application and payment

Submit your completed application along with the payment for the registration fees. Ensure that all the required documents are enclosed properly and that the application is signed where necessary. If submitting in person, hand over the documents to the DHSMV representative. If mailing, use a secure envelope and ensure that you have the correct mailing address.

Retain a copy of the submitted documents

Before submitting your application, make sure to keep a copy of all the submitted documents for your records. This will serve as proof of your registration application in case of any disputes or issues that may arise in the future. It’s always better to have a copy of important documents for your own reference.

Step 6: Receive Your Registration

Wait for the processing of your application

Once you have submitted your application, you will need to wait for the processing of your registration. The processing time may vary depending on several factors, such as the workload of the DHSMV office and the accuracy of your application. Be patient and refrain from contacting the DHSMV repeatedly to check on the status. Most offices provide a timeframe for processing, so you can have an idea of when to expect your registration.

Receive your golf cart registration

Once your application has been processed and approved, you will receive your golf cart registration. This will include important information such as your registration number, expiration date, and any applicable stickers or decals that need to be displayed on your golf cart.

Keep the registration document in a safe place

After receiving your golf cart registration, it is important to keep the document in a safe and accessible place. You may need to present the registration if requested by law enforcement or other authorities. It is crucial to have the registration readily available to comply with any legal requirements while operating your golf cart.

Display the registration sticker as required

Make sure to display the registration sticker or decal on your golf cart as required by law. The registration sticker is usually placed in a visible location, such as the rear of the golf cart. Ensure that the sticker is clearly displayed and not obstructed by any accessories or modifications.

Renewal and Other Considerations

Understand the expiration date of your registration

It is essential to understand the expiration date of your golf cart registration. In Florida, golf cart registrations typically expire annually, and it is your responsibility to renew the registration before it expires. Familiarize yourself with the expiration date on your registration document to avoid any penalties or issues due to expired registration.

Renew your registration before it expires

To avoid any disruptions in driving your golf cart, it is crucial to renew your registration before it expires. Renewal processes may vary depending on the county or city you reside in, so make sure to follow the specific renewal requirements mentioned on your registration document or on the DHSMV website. Start the renewal process well in advance to ensure that you receive your renewed registration on time.

Follow any additional renewal requirements

In addition to renewing your registration, there may be additional requirements for renewal, such as providing proof of insurance or passing an inspection. Make sure to follow any additional renewal requirements specified by the DHSMV to ensure a smooth renewal process.

Update your registration if you change any details

If any details on your golf cart registration change, such as your address or ownership, it’s important to update your registration accordingly. Notify the DHSMV of any changes within the specified timeframe to ensure that your registration remains accurate and up to date.

Inform the DMV if you sell or dispose of your golf cart

If you decide to sell or dispose of your golf cart, it is essential to inform the DHSMV promptly. This will allow them to update their records and transfer the ownership of the golf cart to the new owner. Contact the DHSMV or visit their website for the specific process and requirements for transferring ownership.

Transferring Ownership

Research the process for transferring ownership

If you are buying or selling a golf cart, it is important to research the process for transferring ownership. Each state may have different requirements for transferring ownership, so make sure to understand the process specific to Florida. Contact the DHSMV or consult local authorities to get accurate information about transferring ownership.

Obtain the necessary transfer documents

To transfer ownership of a golf cart, you will need to obtain the necessary transfer documents. These may include a bill of sale, title certificate, or any other documents required by the DHSMV. Ensure that you have all the necessary transfer documents ready to complete the ownership transfer process smoothly.

Fill out the transfer forms accurately

When transferring ownership, fill out the transfer forms accurately. Provide all the required information about the buyer and seller, as well as details about the golf cart. Double-check all the information before submitting the transfer forms to avoid any delays or complications in the process.

Pay any applicable fees

Transferring ownership of a golf cart may involve paying certain fees. These fees could include transfer fees, taxes, or other charges levied by the DHSMV. Make sure to pay all the applicable fees promptly to ensure a smooth transfer process.

Submit the completed transfer documents

Once you have filled out the transfer forms and paid the necessary fees, submit the completed transfer documents to the DHSMV. Follow the specific instructions provided by the DHSMV for submitting the transfer documents. Retain a copy of the submitted documents for your records.

Operating Regulations and Safety

Follow the speed limits for golf carts

When operating a golf cart in Florida, it is important to follow the speed limits. Golf carts are generally allowed on roads with speed limits of 30 miles per hour or less. However, it is still essential to drive at a safe and reasonable speed, considering the conditions of the road and the presence of pedestrians or other vehicles.

Observe any local restrictions or prohibitions

In addition to speed limits, there may be local restrictions or prohibitions on where golf carts are allowed to operate. Some neighborhoods, roads, or specific areas may have restrictions on golf cart usage. Familiarize yourself with any local rules and abide by them to avoid any violations or penalties.

Operate your golf cart safely

Safety is of utmost importance when operating a golf cart. Always follow safe driving practices, such as wearing seat belts, using turn signals, and paying attention to the road. Avoid distractions while driving, such as using electronic devices. By operating your golf cart safely, you can reduce the risk of accidents and ensure the safety of yourself and others.

Use caution when driving on public roads

When driving your golf cart on public roads, it is important to use caution and be aware of your surroundings. Yield to other vehicles, follow traffic signs and signals, and use proper hand signals when turning. Always be vigilant and prepared for unexpected situations to ensure a safe driving experience.

Be aware of golf cart parking regulations

When parking your golf cart, be aware of any regulations or restrictions. Some areas may have designated parking spots or zones for golf carts, while others may prohibit parking in certain areas. Familiarize yourself with the parking regulations in your area to avoid any parking violations or inconvenience.

Understanding Golf Cart Designations

Know the difference between LSVs and golf carts

It’s important to understand the difference between LSVs (Low-Speed Vehicles) and golf carts. LSVs are similar to golf carts but have additional safety features and can be driven on roads with higher speed limits. Golf carts, on the other hand, are generally limited to golf courses and roads with lower speed limits. Knowing the distinction will help you determine the appropriate regulations and requirements for your specific vehicle.

Understand the limitations of different designations

Each golf cart designation, whether LSV or standard golf cart, has its own limitations. LSVs, for example, are required to meet certain safety standards, including the installation of lights, mirrors, and seat belts. Standard golf carts may have restrictions on the roads they can operate on or the capacity of passengers they can carry. Understanding these limitations will ensure that you comply with the appropriate regulations for your golf cart.

Follow the specific rules for each designation

Depending on the designation of your golf cart, you will need to follow the specific rules and regulations set by the state. This may include registration, insurance, and safety equipment requirements. Familiarize yourself with the specific rules for your golf cart’s designation to ensure compliance and avoid any legal issues.

Comply with any licensing or registration requirements

Different designations may have different licensing or registration requirements. LSVs, for example, may require a valid driver’s license and additional registration processes. Standard golf carts may have simpler registration requirements. Make sure to comply with any licensing or registration requirements specific to your golf cart’s designation to ensure that you are legally operating your vehicle.

Registering your golf cart in Florida may seem like a complex process, but by following these step-by-step guidelines, you can successfully navigate through the registration process. Remember to gather all the necessary documentation, ensure your golf cart meets the requirements, and fill out the application accurately. Pay the required fees and submit your application, then patiently wait for your registration to be processed. Once you have your registration, be sure to comply with all operating regulations and safety guidelines. By following these steps, you can enjoy using your golf cart legally and responsibly in the state of Florida.

The Ultimate Guide: Choosing the Best Golf Cart

The Ultimate Guide: Choosing the Best Golf Cart” provides essential information to help you make an informed decision. From types of carts to factors to consider, this guide will steer you in the right direction. Find the perfect golf cart for your needs and hit the greens in style with our expert advice.

Are you in the market for a new golf cart but feeling overwhelmed by the sheer number of options available? Look no further! In “The Ultimate Guide: Choosing the Best Golf Cart,” we’ve got you covered. We’ve compiled all the essential information you need to make an informed decision on finding the perfect golf cart. From the different types of carts to consider, such as gas or electric, to the various features to look out for, this guide will steer you in the right direction. Get ready to hit the greens in style with our expert advice on selecting the best golf cart for your needs.

Factors to Consider

Choosing the best golf cart requires considering several factors to ensure that it meets your specific needs and preferences. Let’s dive into the key factors that you should keep in mind throughout your purchasing journey:

The Ultimate Guide: Choosing the Best Golf Cart

Budget

First and foremost, determine your budget for buying a golf cart. Remember to consider not only the initial cost of the cart but also any additional expenses such as accessories, maintenance, and repairs. Establishing a budget upfront will help you narrow down your options and make a more informed decision.

Intended Use

Think about how you plan to use your golf cart. Will it be primarily for golfing purposes, or do you also intend to use it for other activities such as cruising around your property or running errands? Knowing the primary use of the cart will guide you in choosing the right type and features that align with your needs.

Terrain

Consider the type of terrain you will be traversing with your golf cart. If you primarily play on hilly or rough terrains, you might want to consider a cart that offers enhanced suspension and power. For those playing on flat and smooth courses, a cart with standard features might suffice. Understanding the terrain will help you select a cart that can handle the challenges of your golfing environment.

Type of Golf Course

Different golf courses may have specific regulations or requirements for golf carts. Some courses may only allow traditional golf carts, while others might permit utility carts or even lifted carts. Make sure to check with the golf courses you frequently play at to ensure your choice of golf cart complies with their guidelines.

Size and Capacity

Consider the number of passengers and amount of cargo space you require in a golf cart. If you often play alone or with a partner, a two-seater cart may be sufficient. However, if you frequently golf with a group of friends or family, you might need a larger cart with seating for four or more. Assessing the size and capacity of the cart will ensure everyone can comfortably enjoy the ride.

Features and Accessories

Take note of the features and accessories that are essential to you. Some common features to consider include a windshield, headlights, turn signals, a reversing alarm, a sound system, and storage compartments. Accessories such as coolers, rain covers, and golf bag holders can also enhance your golfing experience. Make a list of must-have features and accessories to help you choose a cart that aligns with your preferences.

Battery Life

If you opt for an electric golf cart, pay attention to the battery life. The battery’s capacity will determine how far you can travel on a single charge. Consider the distance you typically cover on the golf course and ensure that the cart’s battery life can comfortably accommodate your needs. It’s also worth considering the charging time and availability of charging stations.

Maintenance and Repair

Factor in the maintenance and repair requirements of the golf carts you are considering. Electric carts generally have fewer moving parts and require less maintenance compared to gas carts, which may need regular tune-ups and oil changes. Be sure to research the manufacturer’s recommendations for maintenance and consider the availability and cost of repair services in your area.

Brand and Reputation

When investing in a golf cart, it’s wise to consider the brand’s reputation and reliability. Look for established brands with a track record of producing high-quality carts and providing excellent customer service. Research online reviews and seek recommendations from other golf cart owners to ensure that you choose a reputable brand that stands the test of time.

Electric or Gas?

One of the primary decisions you need to make when choosing a golf cart is whether to opt for an electric or gas-powered model. Each has its advantages and disadvantages, so let’s examine them in detail:

Advantages of Electric Golf Carts

Electric golf carts have become increasingly popular over the years, and for good reason:

  1. Quiet Operation: Electric carts run silently, allowing for a more peaceful golfing experience.

  2. Eco-Friendly: Zero emissions make electric carts an environmentally conscious choice.

  3. Lower Operational Costs: Electricity is generally cheaper than gas, resulting in lower operational expenses.

  4. Smooth Acceleration: Electric carts offer smoother acceleration, providing a more enjoyable ride.

  5. Low Maintenance: With fewer moving parts, electric carts require less maintenance and have fewer chances of mechanical failure.

Advantages of Gas Golf Carts

Despite the rise in popularity of electric carts, gas models still have their benefits:

  1. Longer Range: Gas carts typically offer a longer range, allowing you to cover more distance before refueling.

  2. More Power: Gas-powered engines provide robust torque, making them ideal for hilly or rough terrains.

  3. Quick Refueling: Unlike electric carts that require recharging, gas carts can be refueled rapidly.

  4. Lower Initial Cost: Gas models often have a lower upfront cost compared to electric carts.

  5. Familiarity: If you are accustomed to gas-powered vehicles, the transition to a gas golf cart may feel more natural.

Disadvantages of Electric Golf Carts

While electric golf carts bring many advantages, they also have a few downsides to consider:

  1. Limited Range: Electric carts typically have a shorter range, requiring frequent recharging for extended use.

  2. Charging Time: Recharging the cart’s batteries can take several hours, which may be inconvenient if you need to use the cart immediately.

  3. Upfront Cost: Electric carts tend to have a higher initial cost compared to gas models.

  4. Dependency on Batteries: Battery performance can deteriorate over time, necessitating eventual replacement, which can be costly.

Disadvantages of Gas Golf Carts

Gas golf carts also come with some drawbacks that should be taken into account:

  1. Noisy Operation: Gas-powered carts generate more noise, which may disrupt the tranquility on the golf course.

  2. Emissions: Gas carts produce exhaust emissions, contributing to air pollution.

  3. Higher Maintenance: Gas engines require more frequent maintenance, including oil changes, tune-ups, and fuel filter replacements.

  4. Higher Fuel Costs: Gasoline prices can fluctuate, making fuel costs less predictable compared to electricity.

When deciding between electric and gas golf carts, weigh these advantages and disadvantages against your specific preferences and needs. Consider the terrain you’ll be encountering, your budget, and the availability of charging stations or refueling options in your area.

Types of Golf Carts

Golf carts come in various types, each designed to cater to different needs and purposes. Let’s explore the most common types:

Traditional Golf Carts

Traditional golf carts are the standard models commonly used on golf courses. These carts usually seat two passengers facing forward and are primarily designed for golfing purposes. They often come equipped with essentials such as a golf bag holder, windshield, and basic features like headlights and taillights. Traditional golf carts are an excellent choice if you primarily plan on using your cart for golfing.

Utility Golf Carts

Utility golf carts, also known as multipurpose or work carts, are designed to handle a variety of tasks beyond golfing. They typically have a larger seating capacity and additional cargo space, making them ideal for transportation and hauling purposes. Utility carts are a versatile option, suitable for camping trips, maintenance work, and other outdoor activities. If you require a golf cart for more than just golfing, a utility cart might be the perfect fit.

Lifted Golf Carts

Lifted golf carts are modified versions of traditional carts with lifted suspensions and larger tires. These carts offer increased ground clearance and improved off-road capabilities, allowing you to tackle rough terrain with ease. Lifted carts are popular among off-road enthusiasts who enjoy exploring diverse terrains while still benefiting from the convenience of a golf cart. If you plan on taking your golf cart on adventures beyond the golf course, a lifted cart might be the right choice for you.

Off-Road Golf Carts

Off-road golf carts are designed explicitly for rugged terrains and rough environments. These carts feature advanced suspension systems, high-powered engines, and enhanced traction, enabling them to conquer challenging off-road trails. Off-road golf carts come equipped with specialized tires, lockable differentials, and heavy-duty frames to withstand the demands of off-roading. If you intend to venture into extreme off-road conditions, an off-road cart is your best bet.

When selecting a type of golf cart, consider your intended use, the terrain you’ll be traversing, and your personal preferences. Understanding the different types will help you choose a cart that aligns with your specific needs.

New or Used?

In addition to deciding on the type of golf cart, you must also contemplate whether to buy a new or used one. Both options have their advantages and disadvantages, so let’s explore them in more detail:

The Ultimate Guide: Choosing the Best Golf Cart

Pros of Buying New Golf Carts

  1. Warranty Coverage: New golf carts often come with manufacturer warranties, providing peace of mind in case of any defects or issues.

  2. Latest Features and Technology: Buying new allows you to enjoy the most up-to-date features and technological advancements available in the market.

  3. Customization Options: New carts often offer customization options, allowing you to choose specific colors, features, and accessories that suit your preferences.

  4. Reliability and Condition: Since new carts haven’t been subjected to the wear and tear of previous owners, you can expect them to be in pristine condition and offer reliable performance.

Cons of Buying New Golf Carts

  1. Higher Price: New golf carts typically have higher price tags compared to used ones, which may not be within everyone’s budget.

  2. Depreciation: Similar to cars, new carts experience significant depreciation in their first year, resulting in a loss of value should you decide to sell it in the future.

  3. Limited Selection: The availability of new carts may vary depending on your location or the specific model you desire, potentially limiting your options.

Pros of Buying Used Golf Carts

  1. Lower Price: Used carts generally come at a more affordable price point, making them a budget-friendly option.

  2. Greater Selection: The used market offers a wide range of golf carts with various features and accessories, allowing you to find one that suits your needs and preferences.

  3. Reduced Depreciation: Used carts have already undergone significant depreciation, eliminating the worry of losing substantial value shortly after purchase.

  4. Cost of Ownership: Insurance costs and registration fees for used carts are usually lower compared to new ones, resulting in reduced long-term expenses.

Cons of Buying Used Golf Carts

  1. Condition and Repairs: Used carts may have experienced wear and tear, requiring potential repairs or replacements that could incur additional costs.

  2. Limited Warranty: Used carts may not come with a standard manufacturer’s warranty, leaving you responsible for any unforeseen repairs or maintenance.

  3. Unknown History: Without proper research or inspection, it may be challenging to determine the maintenance history and overall condition of a used cart.

Certified Pre-Owned Golf Carts

An alternative purchasing option is certified pre-owned (CPO) golf carts. These carts have undergone thorough inspections, repairs (if necessary), and often come with warranties, giving you a balance between the benefits of new and used carts. Certified pre-owned carts offer peace of mind in terms of condition and reliability, making them an excellent choice for those seeking reassurance.

Consider your budget, desired warranty coverage, customization options, and the overall condition of the used carts available in your area. Weigh the pros and cons of new and used carts to make an informed decision based on your personal circumstances and preferences.

Brand Comparison

Choosing a reputable brand is crucial when investing in a golf cart. Let’s explore the elements to consider when comparing brands:

Top Golf Cart Brands

Several well-established brands dominate the golf cart market. Some of the top brands known for their quality and reliability include Club Car, EZGO, Yamaha, and Star EV. Each brand offers a range of models catering to different needs and preferences, ensuring you have various options to choose from.

Brand Reputation and Reliability

Researching brand reputation and reliability is paramount. Look for brands that have been in the industry for a significant period, as they often have refined manufacturing processes and proven track records. Reading customer reviews and testimonials can also provide insights into the overall experience and satisfaction of those who have purchased from a particular brand.

Quality of Build and Components

Examine the quality of build and components offered by different brands. Consider the durability of the frame, the performance of the motor, and the overall craftsmanship. A solidly built golf cart with high-quality components is likely to offer better reliability and longevity.

Customer Support and Warranty

Evaluate the customer support provided by each brand. Look for brands that offer accessible customer service channels, such as helplines or online support, to address any queries or concerns. Additionally, inquire about the warranty coverage offered, ensuring that it aligns with your expectations and provides adequate protection for your investment.

Considering these factors and doing thorough research on various brands will help you select a reputable and reliable brand that offers the features and performance you desire in a golf cart.

Pricing and Budget

Understanding the average pricing of golf carts and factoring it into your budget is crucial. While prices can vary depending on factors such as brand, model, features, and accessories, here’s a general overview:

Average Pricing

Entry-level golf carts usually start around $5,000 – $6,000. As you move towards higher-end models with advanced features and accessories, the price can range from $8,000 – $12,000 or more. Keep in mind that specialized carts such as lifted or off-road models may come with an additional premium.

Additional Costs to Consider

In addition to the initial purchase price, consider other costs associated with owning a golf cart. These may include:

  1. Sales Tax: Depending on your location, you may need to pay sales tax when purchasing a new or used cart. Research the tax rate in your area to accurately budget for this cost.

  2. Insurance: Some states or golf courses may require you to have insurance coverage for your golf cart. Check the regulations in your area and factor in the potential cost of insurance premiums.

  3. Registration and License: Certain states or municipalities may require you to register your golf cart and obtain a license plate. Determine the registration fees and any renewals required to comply with local regulations.

  4. Accessories and Upgrades: If there are specific accessories or upgrades you desire, such as a rain cover, additional storage, or premium seating, consider their cost and factor it into your budget.

  5. Charging Infrastructure (For Electric Carts): If you choose an electric golf cart, evaluate the availability and cost of installing a charging station at your home or the golf course. Necessary electrical upgrades may impact the overall cost.

By considering these additional costs alongside the purchase price, you can create a comprehensive budget and ensure you are financially prepared for owning a golf cart.

Test Drive and Evaluation

Once you have narrowed down your options, it’s essential to test drive the golf carts you are interested in. Here’s what you should keep in mind during the test drive and evaluation process:

Visit a Dealership

Visit a local golf cart dealership to explore and test drive the models you have shortlisted. Dealerships offer the opportunity to physically examine the carts, ask questions, and gather more information about each model’s features and specifications.

Ask for a Test Drive

Request a test drive of the specific golf carts you are considering. This allows you to experience firsthand how the cart handles, accelerates, brakes, and turns. Pay attention to the overall comfort and ergonomics during the test drive to ensure a pleasant experience.

Assessing Performance and Handling

Evaluate the performance and handling characteristics of the golf carts. Consider aspects such as acceleration, maneuverability, braking efficiency, and steering responsiveness. These factors contribute to both safety and enjoyment while using the cart.

Comfort and Ergonomics

Assess the overall comfort and ergonomics of the golf cart. Take note of the seating position, legroom, ease of entering and exiting the cart, and the intuitiveness of control placement. Considering the comfort and ergonomics will help ensure an enjoyable and user-friendly experience while on the golf course or performing other activities.

By test driving and evaluating the golf carts you are interested in, you can make a more informed decision based on your personal preferences and requirements.

Consider Reviews and Recommendations

Before finalizing your decision, it’s beneficial to consult reviews and seek recommendations from other golf cart owners. Here’s how you can utilize reviews and recommendations to your advantage:

Read Online Reviews

Search for online reviews of the golf carts you are considering. Look for reputable sources such as industry publications or well-established golfing forums where owners share their experiences. These reviews can provide valuable insights into the performance, durability, and overall satisfaction of owning specific models.

Seek Recommendations

Seek recommendations from friends, family, or colleagues who own golf carts. Their first-hand experiences can offer practical advice and help you gain a better understanding of a particular brand or model’s pros and cons. Personal recommendations often carry significant weight when making such a significant investment.

Golf Club Opinions

Engage with members of your golf club, as they may have valuable insights regarding specific golf cart models. Ask for their opinions, experiences, and any recommendations they may have. Fellow golf club members can provide informed perspectives based on their direct interactions with various carts.

By considering reviews and seeking recommendations, you can gather diverse viewpoints that will assist you in making a well-rounded and informed decision.

Maintenance and Service

Maintaining your golf cart properly is essential to ensure its longevity and optimal performance. Here are key aspects to keep in mind:

Scheduled Maintenance

Follow the manufacturer’s recommended maintenance schedule to keep your golf cart in top shape. This usually involves regular inspection, cleaning, and possible component replacements. Adhering to the recommended intervals will help prevent major issues and keep your cart running smoothly.

Choosing a Reliable Service Provider

Identify a reliable service provider in your area who specializes in golf cart maintenance and repairs. Research their reputation, customer reviews, and experience in handling the specific brand and model you own. A reputable service provider will ensure that your cart receives the necessary care and attention it needs throughout its lifespan.

Adhering to scheduled maintenance and working with a trusted service provider will help preserve the performance and longevity of your golf cart, ultimately optimizing your ownership experience.

Conclusion

Choosing the best golf cart requires thoughtful consideration of various factors, including budget, intended use, terrain, type of golf course, size and capacity, features and accessories, battery life, maintenance and repair, brand, and reputation. Understanding the advantages and disadvantages of electric and gas carts, as well as the different types available, will help you narrow down your options. Assessing whether to buy new or used and comparing brands will further guide your decision-making process. By factoring in pricing, test driving and evaluating different models, considering reviews and recommendations, planning for maintenance and service, and making an informed decision, you can select the best golf cart that meets your needs and enhances your overall golfing experience. Happy golfing!

A Guide on Buying a Golf Course in GTA 5

Looking to buy a golf course in GTA 5? Our guide covers everything you need to know. From researching courses to legal requirements and managing the business.

Looking to expand your empire in Grand Theft Auto 5? Look no further than the world of golf! In this guide, we will show you everything you need to know about buying a golf course in GTA 5. From the process of acquiring the property to the potential benefits it can bring, we’ve got you covered. So grab your club and get ready to tee off in style with our comprehensive guide on buying a golf course in GTA 5.

A Guide on Buying a Golf Course in GTA 5

Researching Golf Courses in GTA 5

Exploring the different golf courses available in GTA 5

When researching golf courses in GTA 5, the first step is to explore the various options available in the game. There are three beautiful golf courses to choose from: Los Santos Golf Club, the Golf Club near the Alamo Sea, and the Golf Course in Paleto Bay. Each course offers its own unique challenges and stunning views, so taking the time to explore and compare their features is essential.

Understanding the benefits of owning a golf course in GTA 5

Owning a golf course in GTA 5 can be a rewarding experience. Not only do you have the opportunity to immerse yourself in the world of golf, but there are also several benefits to consider. Firstly, owning a golf course can be a lucrative investment, as you can generate revenue through green fees, tournament hosting, and clubhouse events. Additionally, owning a golf course provides a sense of pride and accomplishment, allowing you to contribute to the local GTA 5 community.

Considering the location of the golf course

Location is one of the most important factors to consider when researching golf courses in GTA 5. Each golf course has its own unique setting, and choosing the right location can greatly impact the success of your investment. Consider factors such as accessibility, nearby amenities, and the surrounding environment. Golf courses situated in prime locations tend to attract more players, which can result in higher revenues and increased popularity within the game.

Researching the reputation of the golf course

Before finalizing your decision, it’s crucial to research the reputation of the golf courses you are considering. Look for reviews and feedback from other players who have experienced these courses firsthand. Pay attention to factors such as course design, challenge level, and the overall player experience. A good reputation ensures that your investment will be well-received by the GTA 5 community and increases the chances of attracting a loyal customer base.

Understanding the Financial Aspects

Setting a budget for purchasing a golf course in GTA 5

Purchasing a golf course in GTA 5 involves a significant financial commitment, so it’s essential to set a realistic budget. Consider factors such as the initial purchase cost, ongoing maintenance expenses, staffing costs, and marketing expenses. It is recommended to consult with a financial advisor to determine a budget that aligns with your financial goals and ensures a successful investment.

Evaluating the potential revenue of the golf course

When assessing the financial aspects of owning a golf course, understanding the potential revenue is crucial. Calculate the projected revenue by estimating the number of players, green fees, and potential income from tournaments and clubhouse events. Additionally, consider opportunities for generating additional income, such as pro shop sales and food and beverage services. This evaluation will help you determine the profitability of the golf course and make an informed decision.

Assessing the operating costs and expenses of owning a golf course

Owning a golf course involves various operating costs and expenses that need to be carefully evaluated. These costs may include staff salaries, maintenance and landscaping expenses, clubhouse upkeep, utilities, and insurance. It is important to conduct a thorough analysis of these costs to ensure they can be effectively managed within your budget. Understanding and accounting for these expenses will contribute to the long-term success of your golf course investment.

Legal and Licensing Requirements

Understanding the legal process of buying a golf course in GTA 5

Before purchasing a golf course in GTA 5, it’s essential to have a clear understanding of the legal process involved. This may include conducting due diligence, reviewing contracts, and negotiating the purchase agreement. To navigate this process smoothly, it is recommended to consult with a lawyer specializing in real estate transactions. They can guide you through the legal requirements and ensure that all necessary documentation is in order.

Researching zoning restrictions and permits

When buying a golf course in GTA 5, it’s crucial to research and understand the zoning restrictions and permits associated with the property. Zoning restrictions define the allowed use of the land, so it’s important to ensure that the property is zoned for golf course purposes. Additionally, obtaining the necessary permits ensures that you are operating legally and in compliance with local regulations. Conduct thorough research and consult with local authorities to ensure a smooth and hassle-free process.

Examining licensing requirements for operating a golf course

Operating a golf course in GTA 5 often requires obtaining specific licenses and permits. These may include business licenses, liquor licenses (if providing alcohol service), and permits for organizing tournaments or events. Research the specific licensing requirements in your jurisdiction and ensure compliance with all relevant regulations. Failing to obtain the necessary licenses can result in penalties and legal complications that could negatively impact your business.

A Guide on Buying a Golf Course in GTA 5

Analyzing the Golf Course Business

Understanding the current market demand for golf in GTA 5

Analyzing the current market demand for golf in GTA 5 is crucial to determine the potential success of your golf course investment. Consider the number of players actively participating in golf activities, the popularity of golf-related events, and the overall interest in the sport within the game. This information will help you assess whether there is sufficient demand to sustain your business and make it a profitable venture.

Analyzing the competition in the golf course industry

A thorough analysis of the competition in the golf course industry is necessary to identify potential challenges and opportunities for your investment. Research other existing golf courses in GTA 5 and analyze their strengths, weaknesses, and pricing strategies. Understanding their offerings and customer base will enable you to position your golf course effectively and differentiate yourself from competitors, thereby attracting more players and increasing revenue.

Assessing the potential for growth and expansion

When considering buying a golf course in GTA 5, assessing the potential for growth and expansion is vital. Look for opportunities to enhance the course’s offerings, such as adding additional amenities, upgrading facilities, or introducing new events and tournaments. Conduct market research to identify potential untapped segments and target marketing efforts towards those demographics. By focusing on growth and maintaining a responsive approach to the market, you can ensure the long-term success and profitability of your investment.

Inspecting the Golf Course

Examining the overall condition of the golf course

Before finalizing the purchase of a golf course in GTA 5, it’s essential to inspect the overall condition of the course. Consider factors such as the quality of the fairways, greens, and bunkers, as well as the cleanliness and maintenance of the entire course. Walk the course, play a few holes, and evaluate its playability. This examination will help you assess the current state of the course and determine if any investments or improvements are required to make it more enticing to players.

Inspecting the clubhouse and amenities

In addition to the golf course itself, it’s important to inspect the clubhouse and other amenities provided by the property. Consider the condition of the clubhouse, including its size, facilities, and overall ambiance. Assess the offerings, such as a pro shop, restaurant or bar, locker rooms, and practice facilities. A well-maintained and attractive clubhouse and amenities can greatly enhance the overall experience for players and attract a broader audience.

Checking the maintenance and landscaping

Maintaining the golf course and its landscaping is crucial for its long-term success. During the inspection, evaluate the quality of the maintenance practices, including turf care, irrigation systems, and pest control. Additionally, assess the landscaping and aesthetics of the course, as a visually appealing environment can contribute to a positive player experience. Considering the current state of maintenance and landscaping will provide valuable insight into the effort required to maintain and improve the course.

Engaging Professionals

Hiring a real estate agent specializing in golf course transactions

When buying a golf course in GTA 5, it’s highly recommended to engage a real estate agent who specializes in golf course transactions. These professionals possess the knowledge and expertise to guide you through the buying process, ensuring you make an informed decision. They can help you identify suitable properties, negotiate favorable terms, and navigate any unique aspects of golf course purchases. The expertise of a specialized real estate agent will greatly facilitate your purchase journey.

Consulting with a lawyer for legal advice and contract review

Engaging the services of a lawyer specializing in real estate transactions is essential when purchasing a golf course. They can provide valuable legal advice, review contracts and agreements, and ensure that all legal requirements are met. A lawyer will help protect your interests and ensure that the transaction proceeds smoothly and in accordance with the law. Their knowledge and guidance are crucial for a successful and legally sound golf course purchase.

Engaging a golf course appraiser to assess the property value

To ensure that you are making a sound investment, engaging a golf course appraiser is highly recommended. A golf course appraiser specializes in evaluating golf course properties and can provide an accurate assessment of its value. By considering factors such as the course’s condition, location, amenities, and market demand, an appraiser can provide an unbiased evaluation, enabling you to make an informed decision on the price and potential return on investment.

Negotiating the Purchase

Determining the negotiating strategy for buying the golf course

Negotiating the purchase of a golf course requires careful consideration of various factors. Determine your negotiating strategy by understanding your budget, desired terms, and potential areas where you can add value. Be prepared to compromise while keeping in mind your long-term goals. Working with your real estate agent and lawyer, develop a negotiation plan that maximizes your chances of securing a favorable deal that aligns with your needs and objectives.

Exploring financing options and obtaining necessary funding

Purchasing a golf course in GTA 5 often requires significant funding, so it’s important to explore suitable financing options. Consult with financial institutions or specialized lenders who offer loans tailored for golf course investments. Evaluate their terms and interest rates to determine the best financing option for your circumstances. Obtaining necessary funding will enable you to complete the purchase and lay the groundwork for a successful golf course business.

Reviewing the terms and conditions of the purchase agreement

Before finalizing the purchase, carefully review the terms and conditions of the purchase agreement. Work closely with your lawyer to ensure all legal aspects are properly addressed and that you fully understand the obligations and rights outlined in the agreement. Pay particular attention to clauses related to warranties, contingencies, and any potential liabilities. Reviewing the purchase agreement in detail will provide reassurance and mitigate potential risks associated with the acquisition.

Managing the Golf Course

Developing a business plan and marketing strategy

To effectively manage the golf course, it’s important to develop a comprehensive business plan and marketing strategy. The business plan will outline your goals, financial projections, and operational strategies, while the marketing strategy will identify target demographics, promotional activities, and pricing structures. Consult with industry experts or professionals familiar with the golf course business to ensure your business plan and marketing strategy are well-designed and poised for success.

Hiring a competent golf course manager and staff

The success of a golf course relies heavily on the competence and expertise of the golf course manager and staff. When managing a golf course in GTA 5, ensure you hire a qualified and experienced golf course manager who understands the game, industry best practices, and customer service. Additionally, assemble a reliable and professional staff to handle various responsibilities, such as course maintenance, administrative tasks, and customer interactions. A competent team will create a positive player experience and contribute to the overall success of the golf course.

Ensuring regular maintenance and improvement of the golf course

Regular and effective maintenance is crucial to the success of any golf course. Establish a maintenance schedule and prioritize tasks such as turf care, irrigation system maintenance, and pest control. Additionally, continuously seek opportunities for improvement, whether it’s upgrading facilities, enhancing landscaping, or introducing new technologies. Regular maintenance and improvement will ensure that the golf course remains in excellent condition, attracting players and fostering a positive reputation within the GTA 5 community.

Promoting and Developing the Golf Course

Creating a strong online presence and marketing the golf course

In today’s digital age, creating a strong online presence is vital for the success of any business, including a golf course in GTA 5. Develop a professional and user-friendly website that showcases the features, amenities, and unique qualities of your golf course. Implement effective search engine optimization strategies to improve visibility and ensure potential customers can find your course easily. Additionally, utilize social media platforms and online advertising to reach a broader audience and generate more interest in your golf course.

Organizing promotional events and tournaments

Promotional events and tournaments are excellent ways to attract new players to your golf course and generate buzz within the community. Consider organizing special events, such as charity tournaments or themed golf days, to create a unique and memorable experience for players. Collaborating with local businesses or partnering with charities can create positive associations and increase visibility for your golf course. Promotional events and tournaments not only increase revenue but also establish your golf course as a vibrant and community-oriented establishment.

Exploring potential partnerships and sponsorships

Partnering with local businesses or securing sponsorships can be mutually beneficial for both your golf course and the partnering organizations. Consider collaborating with local hotels or resorts to offer special packages that include golfing experiences. Seek potential sponsorships from golf equipment manufacturers or local businesses that align with your target market. These partnerships and sponsorships can enhance your golf course’s reputation, generate additional revenue, and provide an elevated experience for players.

Continual Evaluation and Growth

Analyzing financial performance and making necessary adjustments

Continual evaluation of your golf course’s financial performance is crucial for identifying areas that need improvement and making necessary adjustments. Regularly review financial statements, track revenue streams, and analyze expenses to ensure profitability. By identifying trends, patterns, and potential areas for growth, you can make informed decisions to optimize financial performance and steer the business towards continued success.

Seeking customer feedback and implementing improvements

Listening to customer feedback is key to providing an exceptional golfing experience and ensuring customer satisfaction. Encourage players to provide feedback or complete surveys to gather valuable insights into areas that require improvement. Actively address suggestions and concerns raised by players and make necessary improvements to enhance the quality of the service you provide. Fostering a customer-centric approach will result in a loyal customer base and positive word-of-mouth recommendations.

Exploring opportunities for expansion and diversification

As the golf course business evolves, it’s essential to explore opportunities for expansion and diversification. Consider options such as introducing additional amenities, enhancing the clubhouse facilities, or diversifying the offerings with mini-golf or other related activities. Expanding and diversifying your golf course can attract a broader audience, increase revenue streams, and solidify your position as a key player in the GTA 5 golf industry. Continuously evaluate market trends and customer preferences to identify potential expansion opportunities and stay ahead of the competition.

In conclusion, buying a golf course in GTA 5 requires thorough research, careful consideration of financial aspects, compliance with legal requirements, analysis of the golf course business environment, meticulous inspection of the property, engagement of professionals, effective negotiation, and well-managed operations. By following this comprehensive guide, you will be well-equipped to make a successful golf course purchase, establish a thriving business, and contribute to the vibrant golfing community of GTA 5.

A Step-by-Step Guide on How to Cut a Golf Shaft

Learn how to cut a golf shaft with ease in this step-by-step guide. Perfect for both beginners and seasoned golfers. Take your golf game to the next level!

If you’ve ever found yourself in need of adjusting the length of your golf club, fear not! This article is here to offer you a step-by-step guide on how to cut a golf shaft with ease. Whether you’re a seasoned golfer or a beginner just getting into the sport, this handy tutorial will provide you with the knowledge and confidence to tackle this task with precision. So grab your tools and get ready to take your golf game to the next level!

A Step-by-Step Guide on How to Cut a Golf Shaft

Materials Needed

Before you begin cutting a golf shaft, it’s important to gather all the necessary materials. Here’s a list of what you’ll need:

Golf shaft cutting tool

A golf shaft cutting tool is specifically designed to cut through the graphite or steel shafts of golf clubs. It ensures a clean and precise cut without damaging the integrity of the shaft.

Measuring tape or ruler

To determine the desired length of the golf shaft, you’ll need a measuring tape or ruler. This will help you accurately measure from the grip end of the shaft to the cutting point.

Marker or pencil

A marker or pencil will be used to mark the cutting point on the shaft. This ensures that you make an accurate and precise cut.

Safety goggles

Safety goggles are essential to protect your eyes from any debris or flying particles that may occur during the cutting process. Safety should always be a priority, so make sure to wear these goggles throughout the entire process.

Gloves

Using gloves is important to prevent any injuries or cuts to your hands. It also helps maintain a firm grip on the shaft and tools.

Vise clamp

A vise clamp is necessary to secure the golf shaft in place while you cut it. This will provide stability and ensure a clean cut.

Hacksaw or pipe cutter

You have two options when it comes to cutting the golf shaft – using a hacksaw or a pipe cutter. Both tools are effective, but the choice between them depends on personal preference and the type of shaft you are cutting.

Step 1: Measure

The first step in cutting a golf shaft is to measure and determine the desired length. Take your measuring tape or ruler and measure from the grip end of the shaft to the point where you want to make the cut. This measurement will vary depending on your personal preference, swing style, and the type of club you are working with.

Once you have determined the desired length, use a marker or pencil to make a clear and visible mark on the shaft indicating the cutting point. This will serve as a guide during the cutting process and ensure that you achieve the desired length accurately.

Step 2: Prepare the Shaft

After you have measured and marked the cutting point, it’s time to prepare the golf shaft for cutting. Begin by securing the shaft in a vise clamp. This will hold the shaft in place and provide stability throughout the cutting process.

To protect the shaft from any potential damage, wrap a soft material such as cloth or rubber around the clamped area. This will prevent any unwanted marks or scratches on the shaft while it is being cut.

Ensure that the vice clamp is tightened securely and that the clamped area is stable. This will prevent any movement or shifting of the shaft during the cutting process, allowing for a clean and precise cut.

A Step-by-Step Guide on How to Cut a Golf Shaft

Step 3: Cutting with a Hacksaw

If you have chosen to use a hacksaw to cut the golf shaft, follow these steps:

  1. Position the hacksaw blade at the marked cutting point on the shaft. Ensure that the blade is perpendicular to the shaft and aligned with the marked line.
  2. Using a steady motion, cut through the shaft using the hacksaw. Apply gentle pressure and allow the blade to do the work. Avoid applying excessive force, as this can damage the shaft or cause an uneven cut.
  3. Keep the blade moving in a steady motion to create a clean and even cut. Take your time and be patient, as rushing can lead to mistakes or an uneven cut.
  4. Pay attention to the cutting angle to ensure that the shaft is being cut straight. This will affect the overall performance and balance of the club, so it’s important to maintain a consistent angle throughout the cut.
  5. Once the cut is complete, inspect the end of the shaft for any burrs or rough edges. These can be removed using sandpaper or a file to ensure a smooth finish.

Step 4: Cutting with a Pipe Cutter

If you have chosen to use a pipe cutter to cut the golf shaft, follow these steps:

  1. Place the golf shaft inside the pipe cutter, making sure it is securely inserted.
  2. Tighten the pipe cutter around the shaft by rotating the cutter’s handle. This will gradually apply pressure to the shaft and create a groove for the cutting process.
  3. Rotate the pipe cutter around the shaft in a circular motion. Make sure to maintain a steady and consistent pressure as you rotate the cutter.
  4. Continue rotating the pipe cutter around the shaft until the cut is complete. This may require multiple rotations, depending on the thickness of the shaft and the type of pipe cutter you are using.
  5. Once the cut is made, inspect the end of the shaft to ensure a clean and even cut. If there are any rough edges or burrs, use sandpaper or a file to smooth them out.

Step 5: Check the Cut

After cutting the golf shaft, it’s important to check the cut to ensure that it meets your desired specifications. Inspect the end of the shaft and verify that it is straight and smooth.

Look for any sharp burrs or unevenness that may affect the functionality of the club. These can be removed using sandpaper or a file to create a clean and polished finish.

Step 6: Finalize the Shaft

Once you have inspected the cut and made any necessary adjustments, it’s time to finalize the golf shaft. Begin by cleaning the cut end of the shaft to remove any debris or particles that may have accumulated during the cutting process.

If you are reinstalling the grip, ensure that it is properly aligned and securely attached to the cut end of the shaft. If you are adding a new grip, follow the manufacturer’s instructions for installation.

Step 7: Test and Adjust

After finalizing the golf shaft, it’s important to test the clubhead attachment and make any necessary adjustments. Attach the clubhead to the cut shaft following the manufacturer’s instructions.

Perform swing tests to assess the performance and feel of the club. If you notice any issues such as a loss of distance, inconsistent ball flight, or discomfort during the swing, it may be necessary to make further adjustments to the length or balance of the shaft.

Step 8: Safety Precautions

Throughout the entire process of cutting a golf shaft, it’s important to prioritize safety. Here are some important safety precautions to keep in mind:

  • Always wear safety goggles to protect your eyes from any debris or flying particles that may occur during the cutting process.
  • Use gloves to prevent injuries, provide a secure grip, and protect your hands from sharp edges or burrs.
  • Be cautious while cutting to avoid accidents. Pay attention to your surroundings, and make sure you have a clear and stable workspace.

Step 10: Practice and Master

Cutting golf shafts requires practice to develop proficiency. With each successful cut, you’ll gain confidence and improve your skills. It’s important to remember that practice makes perfect. The more you practice, the more comfortable you will become at cutting golf shafts.

Repetition is key to mastering this skill. As you continue to cut golf shafts, you’ll develop a deeper understanding of the process, refine your technique, and achieve consistent and accurate results.

So, whether you’re customizing your club or replacing a damaged shaft, follow these step-by-step instructions to cut a golf shaft and unleash your full potential on the golf course! Remember to prioritize safety, take your time, and enjoy the satisfaction of creating a perfectly customized club. Happy cutting!

A Complete Guide on How to Refurbish Golf Cart Batteries

Learn how to refurbish golf cart batteries in this complete guide. Save time and money with step-by-step instructions and helpful tips. Improve battery performance and extend their lifespan.

Have you ever wondered how to give your golf cart batteries a new lease on life? In this comprehensive guide, you will learn the step-by-step process of refurbishing your golf cart batteries, saving you valuable time and money. From gathering the necessary tools to reconditioning the batteries, we will walk you through each stage with detailed instructions and helpful tips. So, if you’re ready to revive your golf cart batteries and improve their performance, let’s dive into this complete guide on how to refurbish golf cart batteries.

A Complete Guide on How to Refurbish Golf Cart Batteries

Understanding Golf Cart Batteries

Golf cart batteries are a crucial component of a golf cart, providing the necessary power to drive the vehicle. There are different types of golf cart batteries available in the market, each with its own advantages and disadvantages. It is important to have a good understanding of these different types before making a decision.

Different types of golf cart batteries

The most common types of golf cart batteries are lead-acid batteries, which come in two variations: flooded lead-acid batteries and sealed lead-acid batteries. Flooded lead-acid batteries are the traditional type and require regular maintenance, such as checking water levels and cleaning the terminals. Sealed lead-acid batteries, on the other hand, are maintenance-free and have a longer lifespan but come at a higher price.

Lithium-ion batteries are another type of golf cart batteries, known for their longer lifespan and lighter weight. They are more expensive upfront but require less maintenance and provide better performance in terms of power and efficiency.

Importance of maintaining and refurbishing batteries

Whether you have flooded lead-acid batteries or sealed lead-acid batteries, regular maintenance is crucial to ensure their performance and longevity. Over time, golf cart batteries can lose their capacity and efficiency due to sulfation, which is the build-up of lead sulfate crystals on the battery plates. Refurbishing batteries can help reverse this process and extend their lifespan, saving you money in the long run.

Assessing the Condition of Golf Cart Batteries

Before diving into the process of refurbishing golf cart batteries, it is essential to assess their condition to determine the level of maintenance required.

Inspecting for physical damage

Start by inspecting the batteries for any physical damage, such as leaks, cracks, or bulging. These signs indicate a serious problem and may require immediate replacement. A damaged battery can be dangerous and should be handled with caution.

Testing battery voltage

Using a multimeter, measure the voltage of each battery in your golf cart. Ideally, a fully charged battery should have a voltage reading between 12.6 and 12.8 volts. Anything below 12 volts indicates a partially discharged or weak battery that may require refurbishing.

Checking battery terminals

Inspect the battery terminals for any corrosion or build-up of dirt. Corrosion can interfere with the electrical connection and affect the battery’s performance. Use a wire brush or battery cleaner to clean the terminals thoroughly.

Cleaning and Preparing Golf Cart Batteries

To properly refurbish golf cart batteries, it is necessary to clean and prepare them before moving on to the next steps.

Removing battery cables

Before cleaning the batteries, disconnect the battery cables carefully. Start with the negative cable, followed by the positive cable. This step ensures your safety and prevents any potential electrical accidents.

Cleaning battery terminals

Using a wire brush or battery cleaner, remove any corrosion or dirt from the battery terminals. It is important to have clean and properly connected terminals for optimal battery performance.

Using baking soda solution for cleaning

For stubborn corrosion, mix a solution of baking soda and water and apply it to the terminals. The baking soda helps neutralize the acid and makes it easier to clean. After applying the solution, scrub the terminals gently with a brush until the corrosion is completely removed.

Checking battery water levels

For flooded lead-acid batteries, it is crucial to check the water levels regularly. Open the battery caps and inspect the water levels in each cell. Add distilled water if the levels are below the recommended mark, but be careful not to overfill.

Replacing or adding distilled water

If the battery water levels are consistently low, it may be necessary to replace the batteries or cells. In some cases, you can also add distilled water to maintain the proper electrolyte levels. However, it is important to use only distilled water, as tap water contains impurities that can damage the batteries.

A Complete Guide on How to Refurbish Golf Cart Batteries

Recharging Golf Cart Batteries

Once the batteries are cleaned and prepared, it is time to recharge them using a suitable battery charger. Recharging golf cart batteries correctly is essential for their longevity and performance.

Using a suitable battery charger

Invest in a good quality battery charger specifically designed for golf cart batteries. Avoid using automotive chargers, as they may damage the batteries due to incompatible charging algorithms. Follow the manufacturer’s instructions for the proper use of the charger.

Determining battery voltage

Before connecting the charger, measure the voltage of each battery again to determine their current state of charge. This step helps you understand how much charging is needed and prevents overcharging.

Charging batteries individually vs. in a series

If your golf cart has multiple batteries connected in a series, you have two options: charging the batteries individually or charging them all at once. Charging batteries individually allows you to determine the specific needs of each battery, while charging them in a series saves time. Evaluate the condition of each battery and make an informed decision based on their individual voltage readings.

Refurbishing Golf Cart Batteries with Epsom Salt

Epsom salt is a popular and cost-effective method for refurbishing golf cart batteries. It helps remove sulfation from the battery plates and restore their capacity.

Understanding the role of Epsom salt

Epsom salt, also known as magnesium sulfate, dissolves in water and creates a favorable environment for removing lead sulfate crystals from the battery plates. It acts as a desulfator, improving the battery’s performance and extending its lifespan.

Preparing Epsom salt solution

To prepare the Epsom salt solution, mix one tablespoon of Epsom salt with one liter of distilled water. Stir the solution until the salt is completely dissolved. Make sure to use the correct ratio to avoid adverse effects on the batteries.

Desulfating the battery with Epsom salt

To desulfate the battery, carefully remove the battery caps and add the Epsom salt solution to each cell. It is important to pour the solution slowly to prevent any overflow. Once the solution is added, reattach the battery caps and gently shake the battery to help distribute the solution.

Charging the battery after desulfation

After adding the Epsom salt solution, connect the battery charger and initiate the charging process. Allow the battery to charge fully to ensure the complete desulfation process. It may take several charging cycles to see significant improvements in battery performance.

Monitoring battery performance

Once the battery is fully charged, reconnect it to the golf cart and monitor its performance closely. Observe any changes in the battery’s capacity, power delivery, and overall performance. Regularly test the battery voltage to track its progress and determine if further maintenance or reconditioning is necessary.

Using a Battery Desulfator to Refurbish Golf Cart Batteries

A battery desulfator is another tool that can be used to refurbish golf cart batteries. It works by breaking down the lead sulfate crystals and restoring the battery’s capacity.

Understanding how battery desulfators work

Battery desulfators generate high-frequency pulses that dissolve the lead sulfate crystals on the battery plates. These crystals are the main cause of sulfation, which reduces the battery’s performance and capacity.

Choosing a suitable desulfator

There are various battery desulfators available in the market, ranging from simple pulse generators to advanced microprocessor-controlled units. Consider the size and type of your golf cart batteries and choose a desulfator that is compatible with your specific battery requirements.

Connecting the desulfator to the battery

Follow the manufacturer’s instructions to properly connect the battery desulfator to your golf cart batteries. It typically involves attaching the desulfator to the battery terminals or connecting it directly to the charging system. Ensure that all connections are secure and the desulfator is properly installed.

Using the desulfator regularly for maintenance

Once the desulfator is installed, it should be left connected to the batteries as a maintenance tool. The desulfator will continuously work to prevent sulfation, improving the battery’s performance over time. Regularly monitor the battery’s voltage, capacity, and overall performance to assess the effectiveness of the desulfator.

Reconditioning Golf Cart Batteries with Battery Reconditioners

Battery reconditioners are devices designed to restore the capacity and performance of old or weak batteries. They can be a valuable tool for extending the lifespan of your golf cart batteries.

Exploring the benefits of battery reconditioners

Battery reconditioners offer several benefits when it comes to refurbishing golf cart batteries. They can help remove sulfation, increase the battery’s capacity, improve its overall performance, and extend its lifespan. By reconditioning the batteries, you can save money on replacement batteries and minimize environmental impact.

Selecting the right battery reconditioner

When choosing a battery reconditioner, consider factors such as the type and size of your golf cart batteries, the features offered by the reconditioner, and customer reviews. Look for a reputable brand with positive feedback and select a reconditioner that suits your specific battery needs.

Using the reconditioner for optimal results

Follow the instructions provided by the manufacturer to use the battery reconditioner effectively. Typically, the reconditioning process involves connecting the device to the battery terminals and initiating the reconditioning cycle. The device will automatically run a series of charging and discharging cycles to remove sulfation and restore the battery’s capacity.

Monitoring battery condition post reconditioning

After using the battery reconditioner, monitor the battery’s condition closely. Check the voltage, capacity, and overall performance to assess the effectiveness of the reconditioning process. Regularly test the battery to ensure it maintains its capacity and consider further maintenance or reconditioning if necessary.

Replacing Golf Cart Battery Cells

In some cases, when the damage to a golf cart battery is beyond repair, it may be necessary to replace the faulty battery cells. This process requires careful handling and should be done only if you have experience working with batteries.

Identifying faulty battery cells

Using a multimeter, measure the voltage of each battery cell. If you notice a significant voltage difference between cells, it indicates a faulty cell that needs to be replaced. Additionally, physical damage such as bulging or leakage may also indicate a damaged cell.

Removing the damaged cells

To remove the damaged battery cells, start by disconnecting the battery cables following the necessary safety precautions. Open the battery casing and carefully remove the damaged cells using appropriate tools. Take note of the cell arrangement for proper placement during reinstallation.

Replacing with new cells

Before replacing the damaged cells, ensure you have obtained the correct replacement cells that match the specifications of your golf cart batteries. Install the new cells in the correct order as per the original arrangement. Securely reconnect the battery cables, ensuring proper connections.

Balancing the battery after cell replacement

After replacing the damaged cells, it is important to balance the battery to ensure equal charging and discharging among all cells. Use a battery balancer or a specialized charger with balancing capabilities to achieve this. The balancing process helps extend the lifespan of the battery and ensure optimal performance.

Implementing Regular Battery Maintenance

Regular battery maintenance is essential for the overall health and longevity of your golf cart batteries. By following a maintenance schedule and implementing the right practices, you can maximize their performance.

Following a maintenance schedule

Create a maintenance schedule that includes routine inspections, cleaning, and charging of your golf cart batteries. Stick to the schedule and make it a priority to avoid unnecessary battery issues. Regular maintenance will help identify any potential problems early on and prevent costly repairs or replacements.

Checking for corrosion and cleaning

Inspect the battery terminals regularly for any signs of corrosion or build-up. Clean the terminals using a wire brush or battery cleaner to ensure proper electrical connections. Additionally, clean the battery casing and remove any dirt or debris that may affect the battery’s performance.

Ensuring proper battery charging

Follow the manufacturer’s guidelines for proper battery charging. Avoid overcharging or undercharging the batteries, as both can impact their performance and overall lifespan. Pay attention to the charging process and monitor the battery’s voltage and capacity to ensure it is charged optimally.

Avoiding common battery-damaging practices

To extend the lifespan of your golf cart batteries, avoid common practices that can damage them. Avoid deep discharges, as they can cause sulfation and reduce the battery’s capacity. Avoid leaving the batteries in a discharged state for an extended period. Additionally, avoid exposing the batteries to extreme temperatures, both hot and cold, as it can impact their performance and overall lifespan.

Extending the Lifespan of Golf Cart Batteries

By implementing proper maintenance techniques and adopting good battery practices, you can significantly extend the lifespan of your golf cart batteries.

Implementing proper charging techniques

Proper charging techniques are crucial for extending the lifespan of golf cart batteries. Avoid overcharging or undercharging, as they can damage the battery and reduce its overall capacity. Follow the manufacturer’s recommendations and use a suitable battery charger specifically designed for golf cart batteries.

Storing batteries correctly during winter or off-season

If you’re not using your golf cart batteries during the winter or off-season, it is important to store them correctly. Fully charge the batteries before storing them in a cool and dry place. Avoid exposing the batteries to extreme temperatures or leaving them in a discharged state for an extended period. Regularly check the battery voltage during storage to ensure they remain in good condition.

Avoiding deep discharges

Deep discharges can significantly impact the lifespan of golf cart batteries. Avoid running the batteries to a low voltage level, as it can cause sulfation and irreversibly damage the battery plates. Keep an eye on the battery voltage and recharge them before they reach a critically low level.

Maintaining appropriate electrolyte levels

For flooded lead-acid batteries, maintaining appropriate electrolyte levels is essential. Regularly check the water levels and add distilled water as needed. Avoid overfilling the batteries, as it can lead to overflow during charging. Proper electrolyte levels ensure the batteries function optimally and extend their overall lifespan.

By understanding the different types of golf cart batteries, assessing their condition, and implementing regular maintenance, you can optimize the performance and extend the lifespan of your golf cart batteries. Whether you choose to use Epsom salt desulfation, battery desulfators, reconditioning techniques, or cell replacement, it is important to prioritize safety and follow the manufacturer’s guidelines. With proper care and maintenance, your golf cart batteries will provide reliable power for years to come.

The Ultimate Guide on How to Clean Golf Hats

Learn how to clean your golf hats like a pro with this ultimate guide. From choosing the right method to spot cleaning and removing odors, we’ve got you covered. Say goodbye to dirty hats and hello to pristine golf attire!

Are your golf hats in desperate need of a cleaning? Look no further! This ultimate guide will provide you with all the tips and tricks you need to keep your golf hats looking fresh and clean. From removing stubborn stains to preserving the shape of your caps, we’ve got you covered. So say goodbye to dirty hats and hello to pristine golf attire with our comprehensive guide on how to clean golf hats.

The Ultimate Guide on How to Clean Golf Hats

Choosing the Right Cleaning Method

When it comes to cleaning your golf hats, it’s important to choose the right cleaning method to ensure that you don’t damage the hat or alter its shape. The first step in this process is to identify the materials of your hat. Golf hats can be made from various materials such as cotton, polyester, straw, leather, or even mesh. Each material requires a different cleaning method to ensure the best results.

Next, it’s crucial to consider the manufacturer’s cleaning instructions for your hat. They often provide specific guidelines on how to clean and care for their hats. These instructions may include recommendations for hand washing, machine washing, spot cleaning, or professional cleaning. By following these instructions, you can ensure that your hat remains in good condition and retains its shape and color.

Lastly, before deciding on the cleaning method, it’s important to assess the condition of your hat. If your hat is heavily stained, damaged, or has delicate embellishments, you may need to opt for a more gentle cleaning method or consider professional cleaning. Conversely, if your hat is in relatively good condition with only minor stains or sweat marks, you can choose a cleaning method accordingly.

Hand Washing

Hand washing is a safe and effective method for cleaning most golf hats, especially those made of delicate materials or with intricate designs. Here’s a step-by-step guide on how to hand wash your hat:

  1. Gather the necessary supplies. You will need a bucket or sink, mild detergent, a soft brush or cloth, and lukewarm water.

  2. Pre-treat stains by applying a small amount of mild detergent directly to the stained areas. Gently rub the detergent into the stains using a soft brush or cloth.

  3. Fill the bucket or sink with lukewarm water and add a small amount of mild detergent. Swirl the water to create suds.

  4. Place your hat into the soapy water and gently agitate it to clean off dirt and grime. Avoid scrubbing too vigorously as it may damage the hat.

  5. Rinse the hat thoroughly with clean water to remove any soap residue. Ensure that all suds are completely washed away.

  6. Gently reshape the hat to its original form while it is still damp. Avoid wringing or twisting the hat as it can cause misshaping.

  7. Place the hat on a clean, dry towel and allow it to air dry naturally in a well-ventilated area, away from direct sunlight or heat sources. Ensure that the hat is placed on a towel or in a shape-preserving device to maintain its shape during the drying process.

Machine Washing

Machine washing can be a convenient option for cleaning golf hats made of more durable materials such as cotton or polyester. However, it’s important to take precautions to prevent any damage to your hat. Here’s a step-by-step guide on how to machine wash your golf hat safely:

  1. Prepare your hat by removing any detachable elements such as pins, badges, or decorations. These items can be hand washed separately.

  2. Select the right washing cycle on your washing machine. Choose a delicate or gentle cycle with cold water to minimize the risk of fabric damage.

  3. Use a gentle detergent suitable for the hat’s material. Avoid using harsh detergents or bleach that can fade or stain the hat.

  4. To protect the hat during the wash, place it inside a mesh laundry bag or pillowcase. This will prevent the hat from getting twisted or damaged by other clothes in the machine.

  5. Start the washing machine and allow it to complete the cycle.

  6. Once the wash cycle is finished, remove the hat from the laundry bag or pillowcase and inspect it for any remaining stains or dirt. If necessary, spot clean the hat using appropriate methods as discussed later in this article.

  7. To dry the hat properly, reshape it to its original form and place it on a clean, dry towel. Allow it to air dry naturally in a well-ventilated area, away from direct sunlight or heat sources. Ensure that the hat is supported and placed on a towel or in a shape-preserving device to maintain its shape during the drying process.

The Ultimate Guide on How to Clean Golf Hats

Spot Cleaning

Spot cleaning is a handy option for removing small stains or marks on your golf hats without having to clean the entire hat. Here’s how you can effectively spot clean your hat:

  1. Identify the stain on your hat. Different types of stains require different cleaning methods. For example, oil stains may require a degreaser, while sweat stains may need the use of a mild detergent.

  2. Choose a spot cleaning method suitable for the type of stain and hat material. For general stains, you can use a mild detergent mixed with water. Stubborn stains may require the use of specialized stain removers or techniques.

  3. Follow the instructions provided with the stain remover or mix a small amount of mild detergent with water. Create a soapy mixture and apply it directly to the stained area using a soft brush or cloth.

  4. Gently scrub the stained area in a circular motion, taking care not to damage the fabric or alter the shape of the hat.

  5. Rinse the area thoroughly with clean water to remove any soap residue.

  6. Pat the area dry with a clean towel or cloth. Check if the stain has been completely removed. If not, you may need to repeat the spot cleaning process or consider professional cleaning for stubborn stains.

Cleaning Sweatbands

Sweatbands in golf hats tend to absorb sweat, oils, and dirt over time, which can lead to unpleasant odors and stains. Cleaning the sweatbands regularly can help maintain the freshness and condition of your hat. Here’s how to clean the sweatbands in your golf hat:

  1. Remove the sweatbands from your hat. Most sweatbands can be easily detached from the hat for cleaning purposes. Check for any specific instructions provided by the manufacturer on how to remove the sweatband.

  2. Spray the sweatbands with a fabric stain remover. This will help to break down any oils or sweat stains present on the sweatband. Follow the instructions on the stain remover packaging for best results.

  3. Create a mild detergent solution by mixing a small amount of gentle detergent with water. Submerge the sweatbands in the solution and let them soak for a few minutes to loosen any remaining dirt or stains.

  4. Rinse the sweatbands thoroughly with clean water to remove any detergent residue.

  5. Gently squeeze out excess water from the sweatbands, ensuring not to wring or twist them as it may damage the fabric.

  6. Place the sweatbands on a clean, dry towel and allow them to air dry naturally. Avoid using direct heat or sunlight, as it can cause shrinkage or color fading.

By following these steps, you can effectively clean and maintain the sweatbands of your golf hats, ensuring maximum comfort and longevity.

Removing Odors

Over time, golf hats can develop unwanted odors due to sweat, dirt, or other external factors. However, there are several methods you can use to effectively eliminate these odors and restore freshness to your hat:

  1. Sunlight Odor Removal: Place your hat in direct sunlight for a few hours. Sunlight has natural deodorizing properties that can help eliminate odors. However, be cautious with hats made of delicate materials, as prolonged exposure to sunlight may cause fading or damage.

  2. Baking Soda Odor Absorption: Sprinkle a generous amount of baking soda inside your hat and leave it overnight. Baking soda has excellent odor-absorbing properties and can effectively neutralize unpleasant smells. In the morning, remove the baking soda by gently tapping and shaking the hat, followed by brushing off any residue.

  3. Freezing Odor Elimination: Place your hat in a sealed plastic bag and leave it in the freezer overnight. The extreme cold temperature can eliminate bacteria and odor-causing elements. After removing the hat from the freezer, allow it to come to room temperature before using or storing.

  4. Vinegar Deodorizing Method: Mix equal parts of white vinegar and water in a spray bottle. Lightly mist the interior of your hat with the vinegar solution. Vinegar helps neutralize odors by breaking down bacteria and odor-causing molecules. Allow the hat to air dry naturally before using or storing.

These odor-removal methods are safe to use on most golf hats but always test them on a small, inconspicuous area first to ensure they do not cause any damage or discoloration.

Cleaning Mesh Hats

Mesh hats are popular for their breathability and sporty look, but they can accumulate sweat stains and dirt over time. Here’s how to effectively clean your mesh hats:

  1. Removing Sweat Stains from Mesh: Mix a small amount of gentle detergent with water to create a soapy solution. Use a soft brush or cloth to scrub the sweat-stained areas gently. Rinse thoroughly with clean water to remove any soapy residue.

  2. Hand Washing Mesh Hats: Fill a sink or bucket with lukewarm water and add a small amount of gentle detergent. Submerge the mesh hat and gently agitate it to remove any dirt or stains. Rinse thoroughly with clean water and reshape the hat while it is damp. Allow it to air dry naturally in a well-ventilated area.

  3. Machine Washing Mesh Hats: Place the mesh hat inside a mesh laundry bag or pillowcase to protect it during the wash. Select a gentle or delicate cycle with cold water on your washing machine. Use a mild detergent suitable for the hat’s material. Once the wash cycle is completed, reshape the hat and allow it to air dry naturally.

Always follow the specific care instructions provided by the manufacturer for your mesh hat, as some hats may have specific cleaning requirements or may not be suitable for machine washing.

Cleaning Leather Hats

Leather hats require special care to maintain their appearance and durability. Here’s how to effectively clean and care for your leather golf hats:

  1. Spot Cleaning Leather: To remove minor stains or marks, use a damp cloth or sponge and gently clean the affected area. Avoid using excessive water or soaking the hat, as it can damage the leather. For stubborn stains, consult a professional leather cleaner.

  2. Hand Washing Leather: If your leather hat is heavily soiled and requires a thorough cleaning, it’s best to seek professional cleaning services. Leather hats are not typically recommended for hand washing, as excessive water can cause the leather to shrink or lose its shape.

  3. Conditioning Leather Hats: Regularly conditioning your leather hat is essential to maintain its suppleness and prevent cracking or drying. Use a specialized leather conditioner or cream and apply it evenly across the surface of the hat. Follow the instructions provided with the conditioner and allow it to dry completely before using or storing the hat.

It’s important to note that the specific cleaning and care requirements may vary depending on the type of leather used in your hat. Always check the manufacturer’s instructions or consult a professional leather cleaner for best results.

Cleaning Straw Hats

Straw hats are lightweight and perfect for sunny days on the golf course. However, they require gentle care and cleaning to preserve their shape and natural fibers. Here’s how to effectively clean your straw hats:

  1. Removing Dust and Debris: Gently brush your straw hat using a soft-bristled brush or a clean, dry cloth to remove any loose dust or debris. Start from the crown and work your way outward. Avoid using excessive force to prevent damaging the straw.

  2. Spot Cleaning Straw Hats: Mix a small amount of mild detergent with water to create a soapy solution. Dampen a soft cloth or sponge with the solution and gently blot the stained areas on the straw hat. Avoid rubbing or scrubbing, as it may cause the straw to unravel or deform.

  3. Deep Cleaning Straw Hats: If your straw hat requires a thorough cleaning, you can immerse it in lukewarm water with a small amount of mild detergent. Gently agitate the hat to remove dirt or stains. Rinse the hat thoroughly with clean water and reshape it while it is still damp. Allow it to air dry naturally in a well-ventilated area, away from direct sunlight or heat sources.

It’s important to remember that straw hats are delicate and require careful handling. Avoid excessive moisture, heat, or pressure that can damage the straw fibers or alter the hat’s shape.

Tips for Hat Care

To ensure the longevity and optimal condition of your golf hats, here are some essential tips for proper hat care:

  1. Avoid Heat and Direct Sunlight: Excessive heat and prolonged exposure to direct sunlight can cause fading, shrinkage, or deformation of your hat. It’s best to store your hats in a cool, dry place away from heat sources and protect them from sunlight when not in use.

  2. Avoid Harsh Chemicals: Harsh chemicals such as bleach or strong detergents should never be used on your golf hats, as they can damage the fabric, alter colors, or weaken the hat’s structure. Stick to mild detergents and spot cleaning methods recommended for your hat’s material.

  3. Storing Hats Properly: When storing your hats, it’s important to protect their shape. Use a hat rack, hat box, or specialty hat form to prevent them from getting crushed or losing their form. Avoid stacking heavy objects on top of your hats, as it can cause misshaping.

By following these tips and the recommended cleaning methods discussed above, you can keep your golf hats clean, fresh, and in great condition for many rounds of golf to come. Remember to always refer to the specific care instructions provided by the manufacturer for your hats to ensure the best results and longevity. Happy hat cleaning!

The Ultimate Guide: How to Cheat at Golf

Learn how to enhance your golf game with clever techniques in this ultimate guide. Discover subtle ball placement adjustments and strategic scorekeeping methods that will keep the fun alive while staying one step ahead of your opponents. Grab your clubs and dive into this tactical guide to cheat at golf.

So you’ve found yourself in a friendly game of golf, but your skills aren’t quite up to par? Don’t worry, we’ve got you covered. In this ultimate guide, we’ll take you through some clever, yet friendly, techniques to help you enhance your golf game. From subtle ball placement adjustments to strategic scorekeeping techniques, we’ll show you how to cheat at golf in a way that keeps the fun alive and your opponents none the wiser. So grab your clubs, and let’s dive into this tactical guide that will have you a step ahead on the fairway in no time.

The Ultimate Guide: How to Cheat at Golf

Welcome, fellow golfer, to the ultimate guide on how to cheat at golf! Now, before we dive into the exciting world of golf manipulation, it’s important to note that cheating is not condoned by official golfing bodies and goes against the spirit of fair play. However, this guide seeks to provide you with a lighthearted exploration of the devious ways some individuals have resorted to bending the rules. So, let’s explore the ten sneaky strategies that could help you gain an unfair advantage on the golf course!

The Ultimate Guide: How to Cheat at Golf

1. Manipulating the Scorecard

Changing Numbers:

One classic technique is to discreetly alter your scorecard to reflect a better result than reality. By adjusting the numbers, you can make yourself appear to have achieved a lower score, boosting your chances of success. However, remember that honesty is always the best policy!

“Mulligans” and “Gimmes”:

Another popular method is to use “mulligans” and “gimmes” to lower your final score. A mulligan refers to a free do-over shot, while a gimme is when an opponent concedes a short putt without making you actually sink it. Practice your negotiation skills to increase your chances of these flexible score-keeping benefits.

2. Concealing Rule Violations

Slight Footwork Adjustments:

One way to gain an unfair advantage is through clever footwork. By subtly altering your stance or position during a shot, you can ensure a more favorable outcome. Just be cautious not to draw attention to your movements!

Brushing the Grass:

Artfully brushing the grass with your club before your swing can nudge the golf ball into a more advantageous position. It’s a subtle technique that can subtly manipulate the course to your benefit without raising suspicion.

3. Club Selection Tricks

The “Mystery Club”:

To keep your opponents guessing, occasionally carry an extra club in your bag. When it comes time to select a club for a particular shot, reach for the mystery club. This element of surprise can potentially leave your competitors bewildered and off their game.

The Custom Shaft:

Another crafty trick is to have a club with a specially modified shaft. This subtle adjustment can enable you to gain more distance or control over your shots, giving you an edge over your unsuspecting opponents.

The Ultimate Guide: How to Cheat at Golf

4. Mastering the Art of Foot Wedging

Skillful Footwork:

Foot wedging involves surreptitiously using your foot to improve your lie when your ball ends up in an undesirable spot on the course. With a blend of agility and misdirection, you can nudge the ball into a more favorable position without attracting attention.

The Well-Placed Divot:

By discreetly creating a divot near your ball, you can subtly alter the course’s terrain. This clever maneuver can provide you with an opportunity for a better lie, ensuring a more successful subsequent shot.

5. Creative Tee Shot Strategies

The Misdirected Tee:

To gain a competitive edge, subtly manipulate the tee’s positioning. By slightly angling it in favor of your shot, you can increase your chances of hitting the fairway, while leaving your opponents mystified by your natural ability.

Favorable Tee Placement:

When setting up your tee shot, evaluate the landscape and position the ball to your advantage. By selecting a tee area closer to your intended target, you can improve your chances of success. Remember, every little advantage counts!

6. Effective Ball Placement Techniques

The Subtle Nudge:

When placing your ball on the fairway, giving it a gentle nudge can position it in your favor. By rotating the ball subtly, you can adjust its lie to gain better access and control for your next shot.

Tiger Woods’ “Back of the Ball” Trick:

Tiger Woods once famously shared a technique where he places the ball slightly behind the ideal spot. This strategy enables him to hit the ball with a steeper angle, adding more backspin and control to his shots. Give it a try and see if it elevates your game!

7. Secret Putting Tactics

The “Hovering” Putter:

Hovering your putter over the ball without actually grounding it can give you an advantageous preview of the greens’ subtle undulations. This sneak peek allows for more accurate putting, increasing your chances of sinking those critical shots.

Mind Games:

When facing a crucial putt, engage in psychological warfare by employing tactics to distract your opponents. Whistling, humming, or even a well-timed joke can throw off their focus and potentially lead to a missed putt.

8. Sabotaging Opponents

Clever Distractions:

Subtle distractions can knock your opponents off their game. Coordination with fellow players or discreetly making noise during their swing can impact their concentration, destabilizing their performance.

“Misplacing” Equipment:

Tactically misplacing an opponent’s golf clubs or balls can create moments of confusion and frustration, potentially affecting their performance. Remember, it’s all part of the mischievous fun!

9. Exploiting Course Features

Making use of Natural Hazards:

Strategically leveraging natural hazards, such as strategically hitting into a sand bunker or water hazard, can give you an advantage over your rivals. By positioning yourself closer to the green, you avoid potential obstacles that may hinder your progress.

Timing your Shots:

Analyzing factors such as wind direction and speed can help you time your shots to coincide with gusts that favor your intended trajectory. By mastering this skill, you can ensure better control over your shots and outsmart the elements.

10. Psychological Warfare

Mental Game Tactics:

The human mind is a powerful tool, and exploiting your opponents’ mental state can lead to success. Engage them in conversations about their self-doubt, subtly questioning their skills, and gradually eroding their confidence. Remember to do it with a friendly, playful tone to avoid crossing the line into intimidation.

Confidence Booster:

On the flip side, exude confidence in your own abilities, even if you’re not a seasoned player. Presented with an air of knowledge and expertise, you can exert influence over others, impacting their self-assurance. Be sure to maintain a friendly and supportive demeanor to preserve the spirit of camaraderie on the golf course.

Remember, this guide was meant to explore the playful aspects of bending the rules – not to encourage cheating or unsportsmanlike conduct. Golf is a game of integrity and fair play, and it’s important always to respect the rules and your fellow players. So, take this guide as a lighthearted exploration into the sometimes mischievous side of golf, but remember to enjoy the game for what it truly is – a great way to connect with friends, enjoy the outdoors, and challenge yourself both mentally and physically. Happy golfing!

The Ultimate Guide to Clearing Your Hips in the Golf Swing

Unlock the secrets to clearing your hips in the golf swing with this ultimate guide! Improve your technique and power with valuable tips and techniques.

Have you ever wondered how to achieve that perfect swing in golf? Look no further! In “The Ultimate Guide to Clearing Your Hips in the Golf Swing,” you will discover the secrets to mastering the art of hip clearance. Whether you’re a beginner or an experienced golfer, this guide will provide you with valuable techniques and tips to help you improve your game. From understanding the importance of hip clearance to learning the proper body positioning, this article will equip you with the knowledge you need to enhance your golf swing and achieve greater accuracy and power. Get ready to elevate your golf game to new heights with the ultimate guide to clearing your hips in the golf swing.

The Ultimate Guide to Clearing Your Hips in the Golf Swing

Understanding the Importance of Clearing Hips in the Golf Swing

When it comes to the golf swing, hip clearance plays a crucial role in achieving proper technique and maximizing power. The hips act as the engine that drives the swing, transferring energy from your legs to your upper body and ultimately to the club. Clearing the hips refers to the rotation and lateral movement of the hips during the swing, allowing for a full and unrestricted release of power. This not only helps generate clubhead speed but also promotes proper sequencing and timing in the swing.

The Role of the Hips in the Golf Swing

The hips are the center of rotational power in the golf swing. They play a vital role in maintaining balance and stability while allowing for a full range of motion. During the backswing, the hips should rotate away from the target, creating torque and potential energy. As the downswing begins, the hips initiate the sequence of movements, driving the lower body forward and leading the upper body into a powerful release. Clearing the hips effectively allows for a smooth and efficient transfer of energy, resulting in greater distance and accuracy.

Benefits of Clearing Hips Properly

Proper hip clearance in the golf swing offers several benefits for golfers of all skill levels. First and foremost, it allows for increased power and distance. By maximizing the rotation and lateral movement of the hips, you can generate more speed and force in your swing, translating into longer drives and stronger iron shots. Clearing the hips also improves stability and balance, preventing common swing faults such as swaying or sliding. This promotes a consistent ball strike and helps maintain control throughout the swing. Additionally, proper hip clearance allows for better sequencing and timing of the swing, increasing the chances of hitting the ball squarely for improved accuracy.

Common Mistakes in Hip Clearance

While understanding the importance of clearing hips is essential, many golfers struggle with achieving proper hip clearance due to common mistakes. One common error is limited hip mobility and flexibility. Tightness in the hips restricts the range of motion and inhibits the ability to clear the hips fully. Another mistake is an early release of the hips, often referred to as “hip extension.” This occurs when the hips start to rotate too early in the downswing, resulting in a loss of power and accuracy. Overturning the hips is another common fault, wherein the hips rotate excessively, leading to an unbalanced and inconsistent swing. Addressing these mistakes and focusing on proper hip clearance can greatly improve your golf swing and overall performance.

Developing Flexibility and Mobility

Developing flexibility and mobility in the hips is crucial for achieving proper hip clearance. Key muscles for hip mobility include the hip flexors, glutes, and hamstrings. Stretching and warm-up exercises can help increase flexibility in these areas, allowing for greater hip rotation and lateral movement in the swing. Simple exercises such as hip circles and dynamic stretches can be incorporated into your pre-round routine to enhance hip mobility. Additionally, incorporating yoga into your fitness regimen can provide significant benefits for hip mobility, as well as overall strength and flexibility.

Key Muscles for Hip Mobility

To improve hip mobility, it is important to target the key muscles involved. The hip flexors, including the psoas and iliacus muscles, play a significant role in hip rotation. Stretching exercises such as lunges and kneeling hip flexor stretches can help lengthen and release tension in these muscles. The glutes, which consist of the gluteus maximus, medius, and minimus, contribute to both hip rotation and stability. Strengthening exercises such as glute bridges and lateral band walks can activate and strengthen these muscles. Lastly, the hamstrings, located at the back of the thigh, aid in hip extension and flexibility. Regular hamstring stretches can improve hip mobility and help prevent limitations in the swing.

Effective Warm-up and Stretching Exercises

Before engaging in any physical activity, it is essential to warm up and stretch to prepare your body for the demands of the golf swing. Dynamic stretches such as leg swings, torso rotations, and arm circles can increase blood flow, warm up the muscles, and improve joint mobility. These exercises should be performed in a controlled and fluid manner, gradually increasing the range of motion. It is also important to incorporate specific stretching exercises for the hips, such as hip rotations, figure-four stretches, and butterfly stretches. These stretches target the hip joints and surrounding muscles, promoting flexibility and mobility necessary for proper hip clearance in the golf swing.

Incorporating Yoga for Hip Mobility

Yoga can be a valuable addition to any golfer’s training regimen, particularly for improving hip mobility. Various yoga poses such as the Warrior poses, Triangle pose, and Pigeon pose can target the muscles involved in hip rotation and clearance. These poses not only promote flexibility but also help in building strength and stability in the hips. Additionally, practicing yoga can enhance body awareness and mindfulness, which can translate into improved control and focus in your golf swing. Consider incorporating yoga into your fitness routine to unlock the full potential of your hips and improve your overall golf performance.

Proper Setup for Clearing Hips

Setting up correctly is crucial for allowing proper clearance of the hips during the golf swing. Addressing the ball with the correct stance and alignment helps establish the foundation for an efficient swing. First, ensure that your feet are shoulder-width apart, with the toes slightly flared out. This stance provides a stable base and allows for optimal hip rotation. Next, align your body parallel to the target line, with your shoulders, hips, and feet all pointing in the same direction. Proper alignment not only promotes consistent hip clearance but also aids in square contact with the ball. Lastly, maintain a slight forward tilt in your spine, known as the spine angle, to encourage a proper weight transfer and rotation of the hips throughout the swing.

Balancing Weight Distribution

Maintaining a balanced weight distribution is essential for efficient hip clearance. During the setup, the weight should be evenly distributed between both feet, with a slight bias towards the balls of your feet. This balanced setup allows for optimal stability and mobility in the hips. As you initiate the swing, the weight should shift gradually onto the inside of your back foot during the backswing, then transfer smoothly to the front foot during the downswing. This weight transfer enables a proper sequence of movements, with the hips leading the way. By maintaining a balanced weight distribution, you can effectively clear the hips and transfer power from the ground up, resulting in a more powerful and controlled swing.

Understanding the Correct Spine Angle

The spine angle is another crucial element in achieving proper hip clearance. The spine angle refers to the forward tilt or bend of the upper body at address. It is essential to maintain a consistent spine angle throughout the swing to ensure a proper transfer of energy and avoid any restrictions in hip rotation. At setup, the spine should be tilted slightly forward, maintaining a straight line from the top of the head to the tailbone. This position allows the hips to rotate freely and facilitates an efficient transfer of power from the lower body to the upper body. By understanding and maintaining the correct spine angle, you can enhance your ability to clear the hips and achieve a more powerful and consistent golf swing.

Mastering the Backswing

The backswing sets the foundation for a powerful and effective golf swing. Mastering the backswing involves balancing the movements of the upper and lower body while maintaining a coiled position that maximizes potential energy. Proper arm and shoulder movement play a crucial role in achieving the ideal backswing.

Balancing Upper and Lower Body Movements

To execute a balanced backswing, it is crucial to coordinate the movements of the upper and lower body. As you initiate the backswing, focus on coiling the upper body while allowing the hips to rotate naturally. The upper body should turn away from the target, with the shoulders turning under the chin. At the same time, the hips should rotate, maintaining their position without excessive lateral movement. Balancing the movements of the upper and lower body allows for a connected and synchronized backswing, setting the stage for a powerful downswing.

Maintaining a Coiled Position

Maintaining a coiled position in the backswing is instrumental in generating power and maximizing clubhead speed. The coil refers to the twisting motion created by the separation between the upper and lower body during the backswing. As you rotate the upper body away from the target, focus on keeping the lower body stable and resisting the urge to slide or sway. This coiled position can be likened to a tightly wound spring, ready to unleash energy in the downswing. By maintaining a solid and coiled position in the backswing, you can generate stored energy and unleash it with explosive power through the clearing of the hips in the downswing.

Creating Proper Arm and Shoulder Movement

Proper movement of the arms and shoulders is crucial in creating a balanced and effective backswing. As you turn the upper body away from the target, allow the arms to swing naturally, maintaining a relaxed and fluid motion. Avoid any excessive tension or forced movements that may restrict the rotation of the hips. The shoulders play a vital role in the backswing, rotating around the spine and providing stability and control. Focus on turning the shoulders under the chin, while keeping the upper body relatively centered over the lower body. By creating a seamless and coordinated movement of the arms and shoulders, you can achieve a powerful and efficient backswing that sets the stage for clearing the hips in the downswing.

Initiating the Downswing

The downswing is where the power and accuracy of the golf swing come to fruition. Initiating the downswing correctly is essential for unlocking the potential energy stored during the backswing and properly transferring it through the hips to the club.

Understanding the Kinetic Chain

The downswing is a dynamic and sequential movement that involves the transfer of energy from the lower body to the upper body and ultimately to the club. This transfer of energy is known as the kinetic chain. To initiate the downswing effectively, it is important to understand the sequence of movements involved in the kinetic chain. The downswing begins with a slight shift of weight onto the front foot while the hips start to rotate towards the target. This rotation of the hips then leads to the rotation of the torso and shoulders, followed by the arms, and finally, the release of the club. By understanding and utilizing the kinetic chain, you can generate maximum power and efficiency in your downswing.

Starting the Downswing with the Lower Body

To unleash the power stored in the backswing, it is crucial to start the downswing with the lower body, particularly the hips. As the weight shifts onto the front foot, initiate the downswing by rotating the hips towards the target. This lateral movement and rotation of the hips provide the foundation for mobilizing the rest of the body and transferring energy efficiently. It is important to emphasize the hip rotation and ensure that it starts before any arms or upper body movement. By starting the downswing with the lower body, you can effectively clear the hips and create a powerful and coordinated movement through the rest of the swing.

The Ultimate Guide to Clearing Your Hips in the Golf Swing

Generating Power from the Hips

Clearing the hips in the downswing is essential for generating power and clubhead speed. As the hips rotate towards the target, the energy stored in the coiled position is unleashed and transferred to the upper body and, ultimately, to the club. The hips act as the engine that powers the swing, providing the necessary torque and momentum. To fully maximize power from the hips, focus on maintaining a solid base and engaging the core muscles. The glutes and abdominal muscles play a significant role in generating power by stabilizing the lower body and assisting in hip rotation. By generating power from the hips, you can achieve greater distance, control, and consistency in your golf shots.

Clearing Hips in the Downswing

Clearing the hips in the downswing is a critical component of a powerful and effective golf swing. Proper hip clearance allows for efficient rotation and contribution of the lower body, maximizing power and accuracy. While maintaining flexibility and rotation in the hips is essential, proper timing and sequencing are equally important.

Maintaining Flexibility and Rotation in the Hips

To clear the hips effectively in the downswing, it is crucial to maintain flexibility and rotation in the hips. This can be achieved by continuing to focus on the key muscles involved in hip mobility, such as the hip flexors, glutes, and hamstrings. Regular stretching exercises, both before and after your golf rounds or practice sessions, can help maintain and improve hip flexibility. Additionally, incorporating exercises that specifically target hip rotation, such as pelvic rotations and hip twists, can further enhance rotational mobility in the hips. By maintaining flexibility and rotation in the hips, you can enhance your ability to clear the hips and generate power in the downswing.

Proper Timing and Sequencing

In addition to maintaining flexibility and rotation, proper timing and sequencing of movements are crucial for clearing the hips effectively in the downswing. It is essential to initiate the downswing with the lower body, specifically the hips, before initiating any upper body or arm movements. This ensures a synchronized and efficient transfer of energy through the swing. As the hips start the downswing, allow the torso, arms, and club to follow naturally, without any excessive or forced movements. Focus on maintaining a smooth and coordinated sequence of movements, with the hips leading the way. By mastering the timing and sequencing of movements, you can achieve proper hip clearance and unlock the full potential of your golf swing.

Avoiding Overturning or Early Hip Extension

When striving to clear the hips effectively, it is important to avoid two common mistakes: overturning and early hip extension. Overturning occurs when the hips rotate excessively, leading to an unbalanced and inconsistent swing. This can result in a loss of power and compromised control. To prevent overturning, focus on maintaining a stable lower body and allowing for a natural and controlled rotation of the hips. Early hip extension, on the other hand, refers to the premature straightening of the lower back and hips during the downswing. This can cause an inefficient transfer of energy and lead to inconsistent ball striking. To prevent early hip extension, focus on maintaining proper posture and keeping the lower body stable throughout the downswing. By avoiding these common mistakes, you can ensure proper hip clearance and achieve a more powerful and consistent golf swing.

Improving Hip Clearance Through Drills

To improve hip clearance in the golf swing, various drills can be incorporated into your practice routine. These drills specifically target hip rotation, weight transfer, and overall coordination of the swing. By incorporating these drills, you can enhance your ability to clear the hips effectively and improve your swing mechanics.

Hip Rotation Drills

Hip rotation drills focus on enhancing the range of motion and flexibility in the hips for optimal clearance. One effective drill is the seated hip rotation drill. Sit on a stability ball or chair with good posture and slowly rotate the hips from side to side. This drill can be performed with or without a club, allowing you to focus solely on hip rotation. Another beneficial drill is the standing hip rotation drill. Stand with your feet shoulder-width apart and your arms extended in front of you. Initiate the movement by rotating the hips to the right, following the rotation with the upper body and arms. Repeat the movement on the opposite side. These hip rotation drills can be performed as part of your warm-up routine or incorporated into your practice sessions to improve hip mobility and clearance.

Weight Transfer Drills

Weight transfer drills help promote a balanced and coordinated transfer of weight from the back foot to the front foot during the downswing. One effective drill is the step drill. Start by addressing the ball with a slightly open stance. Begin your backswing, and as you transition into the downswing, take a small step forward with your front foot, allowing your weight to follow. This drill emphasizes shifting the weight smoothly and incrementally, leading with the lower body. Another useful drill is the swing-within-a-swing drill. Start with a shortened backswing, creating a “mini” swing. As you initiate the downswing, focus on shifting your weight fully onto the front foot, emphasizing the weight transfer and hip clearance. These weight transfer drills can be practiced on the driving range or even in your backyard, reinforcing the proper sequence of movements and developing a more efficient swing.

Hip Bump and Slide Drills

Hip bump and slide drills are designed to improve the lateral movement and rotation of the hips during the golf swing. One effective drill is the wall drill. Stand with your back against a wall and assume your address position. As you initiate the downswing, focus on bumping your hips laterally against the wall, then sliding them towards the target as you rotate. This drill helps promote the proper lateral movement and hip clearance necessary for an effective swing. Another beneficial drill is the step-through drill. Start with a slightly closed stance and initiate the downswing by stepping forward with your front foot, allowing the hips to clear and rotate naturally. This drill reinforces proper hip movement and encourages a smooth and coordinated swing. Incorporating these hip bump and slide drills into your practice routine can enhance your ability to clear the hips effectively and promote a more powerful and controlled golf swing.

Working with a Golf Instructor

Working with a golf instructor can be highly beneficial in developing and refining your technique, including hip clearance. A professional instructor can provide personalized guidance, identify specific areas to improve, and offer tailored drills and exercises to enhance your hip clearance. From beginners to advanced players, receiving professional instruction can help ensure that you are utilizing proper mechanics, maximizing power, and achieving your full potential on the course.

Benefits of Professional Guidance

Professional guidance from a golf instructor offers numerous benefits for golfers of all levels. First and foremost, working with an instructor can help identify any swing faults or inconsistencies that may be hindering proper hip clearance. Through video analysis and observation, an instructor can pinpoint specific areas for improvement and provide corrective feedback. Additionally, an instructor can provide valuable insights and knowledge on proper technique and mechanics, ensuring that you are practicing and playing with optimal efficiency. Working with a golf instructor can also enhance your learning experience, as they can answer questions, provide guidance on various aspects of the game, and offer ongoing support and motivation.

Finding an Experienced Instructor

To find an experienced golf instructor, consider visiting your local golf club or driving range. Inquire about the instructors available and ask for recommendations from fellow golfers. Research online reviews and testimonials to gain insights into the experience and teaching style of potential instructors. Look for instructors who are certified or trained by recognized golf teaching organizations such as the PGA or LPGA. A good instructor should have extensive knowledge and experience in teaching all aspects of the game, including proper hip clearance. Take the time to interview potential instructors, asking about their teaching philosophy and approach to ensure they align with your goals and learning style.

Progressive Training Programs

Working with a golf instructor can also involve developing progressive training programs tailored to your specific needs and goals. These programs typically involve a combination of drills, exercises, and practice routines designed to enhance hip clearance and overall swing mechanics. The programs may span several weeks or months and include regular lessons and feedback sessions to track progress and make necessary adjustments. Progressive training programs allow for a structured and systematic approach to developing your skills, ensuring that you are consistently improving and reaching your desired outcomes.

Common Issues and Corrections

Understanding and addressing common issues related to hip clearance can greatly enhance your overall golf performance. Recognizing and correcting these issues can help alleviate swing faults and promote more consistent and powerful ball striking.

Slicing or Hooking Due to Poor Hip Clearance

One common issue related to poor hip clearance is slicing or hooking the golf ball. Slicing occurs when the clubface is open relative to the swing path, resulting in a left-to-right ball flight for right-handed golfers. Hooking, on the other hand, occurs when the clubface is closed relative to the swing path, resulting in a right-to-left ball flight for right-handed golfers. Both the slice and hook can be caused by improper hip clearance, often due to an overactive upper body or an early release of the arms. To correct slicing or hooking, focus on starting the downswing with the lower body, emphasizing proper hip rotation and lateral movement. This promotes a more neutral swing path and encourages the clubface to square up at impact, reducing the chances of slicing or hooking.

Lack of Distance and Power in Shots

Another common issue stemming from poor hip clearance is a lack of distance and power in shots. Inefficient hip clearance restricts the transfer of energy from the lower body to the upper body and, ultimately, to the club. This can result in weak and abbreviated swings, leading to shorter distances. To improve distance and power, focus on generating a complete and unrestricted hip clearance. This involves initiating the downswing with the lower body, maintaining balance and stability, and allowing for a full rotation and lateral movement of the hips. By clearing the hips effectively, you can maximize the transfer of power from the ground up, resulting in longer and more powerful shots.

Fixing Inconsistencies in Ball Flight

Inconsistencies in ball flight can also be attributed to poor hip clearance. When the hips do not clear properly, it can lead to swing faults and compensations that cause the ball to be struck inconsistently. For example, if the hips do not clear sufficiently and the upper body becomes too active, it can result in a variety of mishits, from thin shots to fat shots. To fix inconsistencies in ball flight, focus on maintaining a stable lower body and allowing for a full rotation and lateral movement of the hips. This promotes a more consistent and repeatable swing, leading to improved ball striking and a more predictable ball flight.

Practicing with Purpose

Practicing with purpose is essential for improving any aspect of your golf game, including hip clearance. Building muscle memory through repetition and incorporating specific exercises into your practice routine can significantly enhance your ability to clear the hips effectively.

Building Muscle Memory through Repetition

Repetition is key when it comes to building muscle memory and developing consistent and efficient hip clearance. Incorporate hip clearance drills into your practice sessions and perform them regularly to reinforce proper technique and movement patterns. Start with slow and controlled movements, focusing on the correct sequence and timing. Gradually increase the speed and intensity as you become more comfortable and confident. By practicing with purpose and repetition, you can train your body to consistently clear the hips in the golf swing, leading to improved performance on the course.

Incorporating Hip Clearance Exercises in Practice Routine

In addition to specific hip clearance drills, incorporating exercises that target hip mobility and strength can further improve your ability to clear the hips effectively. Exercises such as lunges, squats, and lateral band walks can strengthen the muscles involved in hip rotation and lateral movement. These exercises can be incorporated into your warm-up routine or performed during dedicated strength and conditioning sessions. By strengthening and mobilizing the hips, you can enhance your ability to clear the hips and generate power in the golf swing.

Monitoring and Analyzing Swing Data

Monitoring and analyzing swing data can provide valuable insights into your hip clearance and overall swing mechanics. Utilize video analysis tools or seek professional assistance to capture your swing from different angles. Analyze the footage to assess your hip clearance, posture, alignment, and sequencing of movements. Compare your swing to that of professional golfers or golfers with similar body types and playing styles. Pay attention to any discrepancies or areas for improvement. By actively monitoring and analyzing your swing data, you can identify specific areas to focus on in your practice sessions and track your progress over time.

In conclusion, understanding and implementing proper hip clearance in the golf swing is essential for maximizing power, distance, and accuracy. By emphasizing hip mobility, flexibility, and coordination, and focusing on proper mechanics and timing, you can unlock the full potential of your swing. From incorporating warm-up and stretching exercises to working with a golf instructor, practicing with purpose, and monitoring your swing data, there are various steps you can take to improve your hip clearance. By consistently addressing and refining your hip clearance, you can enhance your overall golf performance and enjoy greater success on the course.

The Perfect Guide to Making a Golf Ball Cake

Learn how to make the perfect golf ball cake with this comprehensive guide. From choosing the right ingredients to mastering fondant, this article has all the steps you need. Impress your friends and family with a unique and delicious dessert that looks just like a golf ball!

You are about to embark on an exciting baking adventure as you learn how to make the perfect golf ball cake. Whether you are a golf enthusiast or simply looking to impress your friends and family with a unique and delicious dessert, this guide will provide you with all the necessary steps to create a cake that looks just like a golf ball. From selecting the right ingredients to mastering the art of fondant, this article will be your trusty companion on your journey to baking greatness. So grab your apron and get ready to tee off into the world of baking!

The Perfect Guide to Making a Golf Ball Cake

Are you ready to impress your friends and family with a stunning and delicious golf ball cake? Whether you’re hosting a golf-themed party or surprising a golf enthusiast with a special treat, creating a golf ball cake is easier than you think. By following this comprehensive guide, you’ll learn everything you need to know – from choosing the right ingredients to adding the finishing touches. So, put on your apron and get ready to show off your cake decorating skills!

The Perfect Guide to Making a Golf Ball Cake

Choosing the Right Ingredients

To ensure your golf ball cake turns out perfectly, it’s important to start with high-quality ingredients. Here are the key elements you’ll need:

Cake mix

Begin by selecting a cake mix that suits your preferences. Vanilla or white cake mixes work best for creating the traditional golf ball color, but feel free to experiment with other flavors if you’d like. Make sure to follow the instructions on the box and bake the cake accordingly.

Icing

For a golf ball cake, you’ll need a white icing to create the base color of the golf ball. It’s essential to choose a smooth and spreadable icing that can be easily shaped and textured. Consider using a buttercream or cream cheese icing for a delicious and visually appealing result.

Food coloring

While white icing forms the base color of the golf ball, it’s important to have food coloring on hand for adding any necessary shading or highlights. Gel-based food colorings are recommended, as they provide vibrant colors without altering the consistency of the icing.

Fondant

To achieve the golf ball texture and design, you’ll need fondant. Fondant is a pliable icing that can be shaped, rolled, and molded to create various cake decorations. Make sure to choose a white fondant for your golf ball cake.

Edible decorations

Finally, gather any edible decorations you’d like to use to enhance the appearance of your golf ball cake. Consider using edible pearls, sugar crystals, or other small ornaments that resemble golf ball embellishments. These will add an extra touch of elegance and realism to your creation.

Preparing the Cake

Before embarking on the creative process, it’s crucial to prepare the cake properly. By following these steps, you’ll ensure a sturdy and well-shaped foundation for your golf ball cake.

Baking the cake

Once you’ve chosen your cake mix and prepared the batter, follow the instructions for baking the cake. It’s recommended to use a round cake pan to achieve the shape of a golf ball. Ensure that the cake is fully baked and has cooled to room temperature before continuing.

Crumb coating

To create a smooth base for the fondant, it’s essential to apply a crumb coat. This involves covering the entire cake with a thin layer of icing to seal in any loose crumbs. Spread a thin layer of icing all over the cake using a spatula or butter knife.

Shaping the cake

Now comes the exciting part of shaping the cake to resemble a golf ball. Use a sharp knife to trim any uneven edges and create a round shape. Remember, a golf ball is not a perfect sphere but has a slightly flattened bottom. Take your time to achieve the desired shape.

Refrigerating the cake

Once the cake has been shaped, place it in the refrigerator for at least 30 minutes. Chilling the cake not only helps it hold its shape better but also makes it easier to work with when applying the icing and fondant.

Creating the Golf Ball Texture

The texture of a golf ball is what makes it instantly recognizable. By following these steps, you’ll be able to recreate this distinctive texture on your cake.

Covering the cake in white icing

Start by covering the chilled cake with a layer of white icing. Use a spatula or an offset icing knife to spread the icing evenly over the entire cake, making sure to smooth out any lumps or bumps. The icing should be thick enough to completely cover the cake but thin enough to allow the fondant to adhere to it.

Using a textured sponge

To create the dimples that are characteristic of a golf ball, you’ll need a textured sponge. Gently press the sponge onto the surface of the cake, using light and even pressure. Work your way around the entire cake, applying the sponge in a random pattern. This will create an authentic golf ball texture.

Marking the dimples

Using a toothpick or the end of a paintbrush, carefully mark small indentations in the areas where the dimples should be. These marks will serve as a guide when applying the fondant later on.

Adding shading and highlights

To add depth and realism to the golf ball texture, apply shades and highlights using food coloring. Using a small brush or even a cotton swab, lightly dab darker shades of food coloring into some of the dimples. Then, using a clean brush or finger, lightly blend a lighter shade of food coloring around the edges of the dimples to create highlights. This will give the golf ball cake a more three-dimensional appearance.

The Perfect Guide to Making a Golf Ball Cake

Adding the Golf Ball Design

Now that you’ve achieved the perfect golf ball texture, it’s time to add the golf ball design using fondant. Follow these steps to create an eye-catching and professional-looking golf ball cake.

Creating a stencil

Start by creating a stencil that resembles the design of a golf ball. You can find printable templates online or create your own by drawing circles on a piece of cardboard or sturdy paper. Cut out the circles to form the stencil.

Coloring the fondant

Take a portion of the white fondant and knead it until it becomes pliable. Add a small amount of food coloring to achieve a soft gray color. Remember to add the coloring gradually, as it is easier to darken the fondant later than to lighten it. Knead the fondant until the color is evenly distributed and fully mixed.

Applying the stencil

Place the stencil on top of the cake and press it gently against the icing. Using a small knife or fondant tool, trace around the edges of the stencil to create the outline of the golf ball design. Carefully remove the stencil.

Smoothing out the design

With the outline of the golf ball design in place, it’s time to fill in the rest of the design. Roll out the colored fondant into a thin, even layer. Carefully place the rolled fondant over the outlined design on the cake, making sure to smooth it out gently to avoid any air bubbles. Trim away any excess fondant around the edges of the design.

Filling in the Dimples

To complete the golf ball cake, it’s important to fill in the dimples with royal icing. Follow these steps to achieve a polished and professional finish.

Preparing royal icing

Royal icing is the ideal choice for filling in the dimples of the golf ball cake. It is a thick and smooth icing that can be piped easily. Prepare a small batch of royal icing according to the recipe or using a pre-made mix.

Piping the icing into the dimples

Transfer the royal icing into a piping bag fitted with a small round tip. Carefully pipe the icing into each dimple, ensuring that it fills the entire depression. Start from the center and work your way outward to avoid any excess icing spilling over the edges.

Smoothing out the icing

Once all the dimples have been filled, use a small spatula or the back of a spoon to smooth out the royal icing. Gently spread the icing across the surface of the cake, making sure it fills in any gaps and covers the entire dimpled area. Aim for a smooth and even finish.

Adding the Finishing Touches

Now that the golf ball cake is nearly complete, it’s time to add those final touches that will truly make it stand out. Here are some ideas to consider:

Painting the dimples

To give your golf ball cake an extra touch of realism, consider painting the dimples with an edible silver or pearl luster dust. Mix the dust with a small amount of vodka or clear extract to create a paint-like consistency. Using a small brush, carefully apply the dust to the dimples, giving them a shiny and metallic appearance.

Adding writing or logos

If you’re personalizing the cake for a specific occasion or event, consider adding writing or logos using edible ink or colored icing. This can be done using small piping bags with fine tips or specialty decorating pens. Choose colors that complement the overall design of the cake.

Applying final decorations

To add a decorative element to the golf ball cake, consider adding some final edible decorations. Place edible pearls or sugar crystals around the base of the cake for an elegant touch. You can also add edible golf tees, miniature golf clubs, or sugarpaste flowers to enhance the overall presentation.

Alternative Design Options

Although the traditional golf ball cake is a classic choice, there are several alternative design options you might want to explore. Consider these ideas for your next golf-themed event:

Creating a golf course cake

Instead of focusing solely on the golf ball, you can create an entire golf course cake. Use a rectangular cake as the base and decorate it to resemble a golf course. Add buttercream icing that resembles grass, create sand traps using crushed cookies, and even include small marzipan or fondant golfers.

Making a golf bag cake

For a unique twist, consider making a golf bag cake. Use a rectangular or square cake as the base and carve it into the shape of a golf bag. Cover the cake in fondant or buttercream icing and use additional fondant or modeling chocolate to create the details of the golf bag, such as zippers, handles, and pockets.

Designing a golf-themed cupcakes display

If you’re looking for individual servings, consider creating a golf-themed cupcakes display. Bake cupcakes in golf-themed liners and decorate them with green frosting to resemble grass. Add small fondant golf balls, flags, or even tiny golf clubs as cupcake toppers. Arrange the cupcakes on a tiered stand to create a visually appealing centerpiece.

Tips for Success

While the process of creating a golf ball cake can be exciting, it’s essential to keep a few things in mind to ensure a smooth and enjoyable experience. Here are some tips for success:

Planning ahead

Before you begin, take the time to plan out your cake design and gather all the necessary ingredients and tools. This will help you stay organized and avoid any unnecessary stress during the decorating process.

Working with chilled cake

Chilling the cake before applying the icing and fondant helps it hold its shape better and makes it easier to work with. Take breaks to re-chill the cake if needed, especially during warmer weather, as this will prevent the icing and fondant from melting.

Using the right tools

Invest in good-quality cake decorating tools, such as spatulas, rolling pins, and textured sponges, to achieve professional results. These tools will make the process easier and more enjoyable.

Taking breaks

Cake decorating can be a time-consuming process, so it’s important to take breaks when needed. This will help you stay focused and avoid getting overwhelmed by the intricate details of the cake.

Being patient

Creating a golf ball cake requires attention to detail and patience. Take your time throughout the process and don’t rush, as this will ensure a beautifully finished product.

Common Mistakes to Avoid

While creating a golf ball cake is a fun and rewarding experience, it’s also important to be aware of some common mistakes that could affect the final result. Here are a few things to avoid:

Uneven shaping

Take your time when shaping the cake to ensure it is symmetrical and resembles a golf ball. Uneven shaping can result in an unbalanced and lopsided cake.

Not chilling the cake enough

Chilling the cake is crucial to maintain its shape and make it easier to work with. Skipping or reducing the chilling time could lead to a cake that is difficult to ice and cover with fondant.

Applying too thick fondant

When rolling out the fondant, make sure it is thin and even. Applying overly thick fondant can result in a heavy and dense texture, and it may be more challenging to achieve the desired golf ball design.

Rushing the decorating process

Cake decorating is an art that requires time and patience. Rushing the process may result in sloppy and less polished results. Take your time and enjoy the creative journey.

Conclusion

Congratulations! You’ve now learned how to create an impressive golf ball cake from start to finish. By following this comprehensive guide, you can confidently tackle this cake decorating challenge and impress both yourself and others with your skills. Whether you choose to stick with the classic golf ball design or explore alternative options, you’re sure to create a visually stunning and delicious centerpiece for any golf-themed event. So, gather your ingredients, roll up your sleeves, and have fun creating your very own golf ball masterpiece!

Mastering the Golf Downswing: A Step-by-Step Guide

Master your golf downswing with this step-by-step guide. Improve your technique, weight transfer, and sequencing for a more powerful game.

Are you tired of struggling with your golf downswing? Look no further! In this step-by-step guide, we will walk you through the process of mastering the golf downswing. From the importance of proper weight transfer to the correct sequencing of movements, we will provide you with all the necessary tips and techniques to improve your game. So grab your club and get ready to take your golf skills to the next level!

Mastering the Golf Downswing: A Step-by-Step Guide

Welcome to our comprehensive guide on mastering the golf downswing! Whether you’re a beginner looking to improve your skills or an experienced golfer aiming to take your game to the next level, understanding and perfecting the downswing is crucial for achieving consistent and powerful shots. In this article, we will take you through each step of the downswing process, providing detailed explanations and tips to help you unlock your full potential on the golf course.

Mastering the Golf Downswing: A Step-by-Step Guide

Understanding the Downswing

Before we dive into the specific techniques involved in the downswing, it’s essential to have a clear understanding of its significance in the golf swing. The downswing is the transition phase between the backswing and the impact, where the clubhead accelerates towards the ball, generating power and control. A well-executed downswing can lead to explosive shots, while a faulty one can result in inconsistency and undesirable ball flight. By grasping the mechanics and principles of the downswing, you’ll be better equipped to refine your technique and optimize your performance.

Establishing Proper Alignment

Proper alignment is a fundamental aspect of a successful downswing. It ensures that your body, club, and target are all in harmony, maximizing your chances of hitting accurate shots. To establish proper alignment, focus on three key elements: grip and hand placement, stance and foot position, and the alignment of the shoulders, hips, and feet. By paying attention to these details, you’ll create a solid foundation that sets you up for a smooth and efficient downswing.

Maintaining a Balanced Posture

Maintaining a balanced posture throughout the downswing is crucial for delivering consistent and powerful shots. Begin by finding the optimal spine angle, which allows for a natural rotation and weight transfer. Next, focus on distributing your weight evenly between both feet, ensuring stability and control. Finally, keep your head stable and neutral, avoiding any excessive movement that may affect your swing dynamics. By prioritizing a balanced posture, you’ll be able to execute the downswing with precision and confidence.

Starting the Downswing

The initiation of the downswing serves as a crucial moment in the golf swing. To start the downswing effectively, begin by relaxing your grip pressure. This helps to promote a fluid and unhindered motion of the clubhead. Additionally, utilize the ground for power by pushing off the ground with your lead foot, initiating the transfer of energy from the lower body to the upper body. By mastering the art of starting the downswing, you’ll be able to unleash the full potential of your swing sequence.

Mastering the Golf Downswing: A Step-by-Step Guide

Initiating the Lower Body Movement

The lower body plays a pivotal role in the downswing, providing the necessary power and stability for a successful shot. Start by shifting your weight from your trail side (right side for right-handed golfers) to your lead side (left side for right-handed golfers). This weight shift triggers the hip rotation, generating rotational power and creating separation between the upper and lower body. Engage your legs and hips throughout the downswing to maintain control and maximize energy transfer.

Hinging the Wrists

For optimal clubhead speed and control, mastering the proper wrist hinge is essential during the downswing. Maintain a controlled wrist position during the backswing and transition, avoiding any excessive wrist movement or breakdown. As you approach the downswing, focus on creating lag by maintaining a hinge in your wrists. This lag allows the clubhead to trail behind, storing energy that can be released at impact. Avoid casting or scooping the wrists, as this can lead to inconsistent ball contact and loss of power.

Maintaining Connection between Arms and Body

To achieve a powerful and efficient downswing, it’s crucial to maintain a connection between your arms and body. Keep your arms in front of your body during the downswing, avoiding any excessive separation or disconnection. Maintain the triangle formed by your arms and shoulders, ensuring that it stays intact throughout the swing. Avoid overextension or collapsing of the arms, as this can result in loss of control and compromised power.

Executing the Hip Rotation

Proper execution of hip rotation is key to achieving a consistent and powerful downswing. Initiate the hip rotation from your trail side (right side for right-handed golfers), allowing for a smooth and sequential transfer of energy. Ensure proper timing between the lower body and upper body rotation, allowing the hips to lead the swing and creating the necessary torque for optimal clubhead speed. Engage your core muscles to support and stabilize the movement, maximizing power generation.

Generating Lag and Power

Generating lag is a crucial component of a powerful downswing. Aim to maintain the lag between your clubshaft and wrists as you approach impact, storing and then releasing energy for maximum clubhead speed. Focus on a smooth transition from the backswing to the downswing, allowing for a gradual increase in acceleration. By mastering the art of generating lag, you’ll unlock the potential for long and explosive shots.

Maintaining a Smooth Transition

A smooth transition from the backswing to the downswing is vital for consistency and control in your golf swing. Avoid any abrupt or jerky movements that may disrupt the fluidity of your swing sequence. Aim for a seamless transfer of energy and momentum, maintaining a rhythmic and synchronized motion. Practice proper tempo and timing, emphasizing a gradual acceleration throughout the downswing. By prioritizing a smooth transition, you’ll enhance your ability to deliver consistent and accurate shots.

Perfecting the Impact and Follow-Through

The impact and follow-through stages of the downswing heavily influence the outcome of your shot. Focus on maintaining control of the clubface at impact, ensuring that it remains square to the target for maximum accuracy. Deliver a balanced follow-through by allowing your body to rotate fully after impact, maintaining stability and control. Analyze your technique and make necessary adjustments to refine your impact and follow-through, maximizing the effectiveness of your downswing.

With this comprehensive step-by-step guide to mastering the golf downswing, you now have the tools and knowledge to take your game to new heights. Remember to break down each aspect of the downswing, practicing and refining each step until it becomes second nature. With dedication and perseverance, you’ll be well on your way to achieving a consistent, powerful, and controlled downswing that will positively impact your golf game. Happy swinging!

The Ultimate Guide on How to Remove Golf Spikes

Learn how to effortlessly remove golf spikes with this ultimate guide. Discover the different types of spikes, tools needed, and step-by-step procedures. Improve your gameplay and keep your shoes in top condition. Say goodbye to frustration and hello to enjoyable golf!

Are you tired of struggling with your golf spikes? Look no further! This ultimate guide will provide you with simple and effective tips on how to remove golf spikes effortlessly. Whether you’re a professional golfer or just starting out, having the right equipment is crucial for your game. So, let’s dive into the world of golf spike removal and discover the secrets to keeping your shoes in top-notch condition. Say goodbye to the frustration and hello to smooth and enjoyable gameplay!

The Ultimate Guide on How to Remove Golf Spikes

Types of Golf Spikes

When it comes to golf spikes, there are generally three types that players can choose from: metal spikes, soft spikes, and replacement spikes. Each type has its own advantages and disadvantages, so it’s important to consider your playing style and the golf course regulations before making a decision.

Metal Spikes

Metal spikes were once the most popular choice among golfers due to their excellent traction. However, in recent years, many golf courses have banned metal spikes due to the damage they can cause to the greens. Metal spikes are known to dig deeper into the ground, which can result in more wear and tear on the course. Despite this, some players still prefer the added stability and grip that metal spikes provide.

Soft Spikes

Soft spikes, also known as plastic spikes or molded spikes, have become the go-to choice for most golfers. These spikes are made of durable plastic materials and are designed to be gentle on the greens. Soft spikes offer good traction while reducing the impact on the golf course. They are also more comfortable to wear and easier to walk in compared to metal spikes. Additionally, many golf courses now require players to wear soft spikes to protect the playing surface.

Replacement Spikes

Replacement spikes are a versatile option that allows golfers to customize their footwear. These spikes come in various designs, materials, and thread patterns, allowing players to choose the ones that best suit their playing style and the course conditions. Replacement spikes are available in both metal and soft options, providing the benefits of each type while giving players the flexibility to swap them out when needed.

Tools Required for Removing Golf Spikes

Before you begin removing golf spikes, it’s important to gather the necessary tools. Depending on the type of spikes and your personal preference, here are a few tools that you might need:

Spike Wrench

A spike wrench is a special tool designed specifically for removing golf spikes. It typically has a handle and a socket that fits over the spike’s head, allowing you to turn and loosen it. Spike wrenches come in various sizes, so be sure to choose one that matches the size of your spikes.

Screwdriver

If you don’t have a spike wrench, a screwdriver can serve as an alternative tool for removing golf spikes. Make sure to use a screwdriver with a narrow blade that can fit into the spaces between the spikes.

Spiked Shoe Cleaner

A spiked shoe cleaner is a handy tool for keeping your golf shoes in top condition. It features stiff bristles or metal prongs that can easily remove dirt and debris from the spikes and the shoe soles. While not essential for removing spikes, using a shoe cleaner can help prolong the lifespan of your golf shoes.

Needle-nose Pliers

Needle-nose pliers can be useful for removing stubborn spikes that are difficult to loosen with a wrench or screwdriver. The long, slender jaws of the pliers allow for a better grip, making it easier to twist and remove the spikes.

Removal Procedure for Metal Spikes

Metal spikes typically require a spike wrench for removal. Follow these step-by-step instructions to safely remove metal spikes from your golf shoes:

Step 1: Clean the Shoes

Before attempting to remove the spikes, it’s important to clean the shoes to ensure that no dirt or debris enters the threads of the spikes. Use a shoe brush or a soft cloth to remove any dirt and wipe down the shoe surface.

Step 2: Insert the Spike Wrench

Insert the spike wrench into the socket of the metal spike. Make sure it fits securely over the spike head.

Step 3: Loosen the Spike

Hold the spike wrench firmly and turn it counterclockwise to loosen the spike. Apply steady pressure until the spike begins to loosen.

Step 4: Remove the Spike

Once the spike is loose enough, continue turning the wrench counterclockwise until the spike is fully removed. Repeat the process for each remaining spike.

The Ultimate Guide on How to Remove Golf Spikes

Removal Procedure for Soft Spikes

Soft spikes are typically easier to remove compared to metal spikes. Here’s a step-by-step guide to removing soft spikes from your golf shoes:

Step 1: Clean the Shoes

Just like with metal spikes, start by cleaning your shoes to remove any dirt or debris that could interfere with the removal process.

Step 2: Insert the Screwdriver

Choose a screwdriver with a narrow blade that can fit between the spikes. Insert the screwdriver between the spikes and push it into the base of the spike.

Step 3: Loosen the Spike

With the screwdriver wedged securely into the base of the spike, apply gentle pressure and rotate the screwdriver counterclockwise to loosen the spike. Continue this motion until the spike becomes loose.

Step 4: Remove the Spike

Once the spike is sufficiently loose, you can use your fingers or the screwdriver to pull it out of the shoe. Repeat the process for each spike until all soft spikes have been removed.

Removal Procedure for Replacement Spikes

Removing and replacing replacement spikes follows a similar procedure to removing soft spikes. However, there are a few additional steps to consider. Here’s a comprehensive guide:

Step 1: Clean the Shoes

As always, start by cleaning your shoes to ensure a clean and hassle-free removal process.

Step 2: Identify the Spike Type

Before removing the old spikes, take note of the type of replacement spikes you have. This will help you choose the correct tool and ensure a proper fit when replacing them.

Step 3: Remove the Old Spikes

Using the appropriate tool (either a screwdriver or a spike wrench), follow the removal procedure outlined for soft spikes or metal spikes, depending on the type of replacement spikes you have.

Step 4: Insert and Tighten the New Spikes

Once the old spikes have been removed, it’s time to insert the new replacement spikes. Align the new spikes with the threads on the shoe and carefully twist them clockwise until they are securely in place. Avoid overtightening, as this can damage the threads or the spike itself. Repeat this process for each spike until all new replacement spikes have been installed.

How to Replace Lost or Damaged Spikes

At some point, you may find that you’ve lost a spike or two, or perhaps one of your spikes has become damaged. Here’s a step-by-step guide on how to replace lost or damaged spikes:

Step 1: Purchase Replacement Spikes

Before you can replace a lost or damaged spike, you’ll need to purchase replacement spikes. Check with your local golf store or sporting goods retailer to find the appropriate spikes for your shoes. Make sure to choose the correct type and size to ensure a proper fit.

Step 2: Identify the Spike Type

Once you have your replacement spikes, identify the type that matches your remaining spikes on the shoe. This will help you choose the correct tool and ensure a seamless replacement process.

Step 3: Remove the Damaged Spike

If you’re replacing a damaged spike, follow the appropriate removal procedure outlined for the spike type. Cleaning the area around the damaged spike beforehand can make the removal process easier.

Step 4: Insert and Tighten the New Spike

Using the same procedure as replacing replacement spikes, carefully insert the new spike into the shoe and twist it clockwise until it is securely in place. Repeat this process for any additional lost or damaged spikes.

When Should Golf Spikes be Replaced?

To ensure optimal performance and safety on the golf course, it’s essential to replace your golf spikes when necessary. Here are a few signs that indicate it’s time to replace your golf spikes:

Worn Out Spikes

Over time, the tread on your golf spikes will wear down, resulting in reduced traction. If you notice that your spikes are significantly worn and no longer providing the grip you need, it’s time to replace them. Worn-out spikes can affect your stability during your swing and increase the risk of slipping on wet or uneven surfaces.

Damaged Spikes

If any of your spikes are damaged, either due to wear and tear or accidental damage, it’s important to replace them. Damaged spikes can affect your balance and stability, potentially leading to inconsistent swings or even injury.

Poor Traction and Stability

If you’re struggling to maintain proper traction and stability during your swings, even with relatively new spikes, it may be time for a replacement. Poor traction can adversely affect your performance and confidence on the course, so it’s crucial to have reliable spikes.

Tips to Maintain Golf Spikes

To prolong the lifespan of your golf spikes and ensure their optimal performance, here are a few tips to keep in mind:

Clean Regularly

Regularly clean your golf shoes after each round of play. Remove any dirt, grass, or debris from the spikes and sole to prevent build-up that can impact your traction. Use a brush or a damp cloth to wipe away the dirt and let your shoes air dry before storing them.

Inspect for Damage

Periodically check your golf spikes for any signs of damage or wear. Look for cracks, missing parts, or spikes that no longer provide sufficient grip. Catching any issues early will allow you to address them promptly and avoid potential safety hazards.

Store Properly

When not in use, store your golf shoes in a cool, dry place. Avoid leaving them in extreme temperatures or damp environments, as this can damage the spikes and the overall quality of your shoes. It’s also a good idea to use a shoe bag or a shoe-specific storage solution to keep them protected and organized.

Benefits of Removing Golf Spikes

There are several benefits to removing and replacing golf spikes regularly. Here are a few advantages that come with proper spike maintenance:

Improved Comfort

Worn-out or damaged spikes can cause discomfort and even pain during your round of golf. By replacing your spikes when needed, you can ensure that your shoes provide the necessary support and cushioning, allowing you to focus on your game without any distractions.

Better Traction

One of the primary functions of golf spikes is to provide traction and stability during your swings. By regularly removing and replacing your spikes, you can ensure that you have the best possible grip on all types of terrain, including wet or slippery conditions.

Extended Shoe Lifespan

Proper spike maintenance can also help extend the overall lifespan of your golf shoes. By regularly removing and replacing your spikes, you reduce the wear and tear on the shoe soles, allowing them to last longer. This can save you money in the long run by minimizing the need for frequent shoe replacements.

Frequently Asked Questions (FAQs)

Are metal spikes better than soft spikes?

Metal spikes were once favored by many golfers for their superior traction. However, due to their potential damage to golf course greens, many courses now require players to wear soft spikes. Soft spikes offer sufficient traction while being gentler on the golf course. They are generally considered the better option for most golfers.

Can I remove golf spikes without any tools?

While it’s possible to remove some spikes with your bare hands or using makeshift tools, such as pliers or a knife, it’s highly recommended to use the appropriate tools for the job. Spike wrenches and screwdrivers are specifically designed for this purpose, ensuring a safe and efficient removal process without damaging the spikes or your shoes. Investing in the right tools will make the removal and replacement process much easier and more effective.

A Guide to Reaching Fantasia Mini Golf

Discover the secrets to reaching Fantasia Mini Golf in this comprehensive guide. Whether by car, public transportation, or on foot, we’ve got you covered. Get ready for a memorable experience!

Imagine yourself surrounded by lush greenery and whimsical sculptures while enjoying a delightful game of mini golf. In this comprehensive guide, we will unveil the secrets to reaching Fantasia Mini Golf, ensuring that your visit to this enchanting destination is a seamless and memorable experience. Whether you’re a local resident or a curious traveler, get ready to embark on a journey filled with fun, adventure, and unforgettable moments at Fantasia Mini Golf.

Getting to Fantasia Mini Golf

Fantasia Mini Golf is a popular destination for both avid golfers and families looking for a fun day out. Located in a picturesque area, getting to Fantasia Mini Golf is a breeze. Whether you prefer traveling by car, public transportation, or on foot, there are several options available to suit your needs. In this comprehensive guide, we will explore all the different routes and modes of transportation you can take to reach this fantastic mini golf course.

A Guide to Reaching Fantasia Mini Golf

Routes by Car

If you prefer the convenience of traveling by car, there are several routes you can take to reach Fantasia Mini Golf. Depending on your starting point, you can choose from three main options: from downtown, from the airport, or from local hotels.

From Downtown

If you are coming from downtown, the easiest way to reach Fantasia Mini Golf is by taking Main Street and then turning onto Park Avenue. This route will take you directly to the entrance of the mini golf course, and you will also have the opportunity to enjoy the beautiful scenery along the way.

From the Airport

For those arriving at the airport, getting to Fantasia Mini Golf is a straightforward journey. Simply follow the signs for the city center and then take the highway heading towards the downtown area. From there, you can follow the directions provided for reaching the mini golf course from downtown.

From Local Hotels

If you are staying at one of the many hotels in the vicinity of Fantasia Mini Golf, chances are there will be a shuttle service available to transport guests to the attraction. It is recommended to check with your hotel reception for the schedule and availability of these shuttle services.

Routes by Public Transportation

For those who prefer to use public transportation, there are a couple of options available to reach Fantasia Mini Golf: using the metro or taking the bus.

Using the Metro

If you are familiar with the city’s metro system, you will be pleased to know that there is a metro station conveniently located near Fantasia Mini Golf. Simply take the metro line that serves the city center and get off at the stop closest to the mini golf course. From there, it will be a short walk to the entrance.

Taking the Bus

Another option for reaching Fantasia Mini Golf is by taking the bus. The city’s bus system provides efficient and reliable services to most major attractions, including the mini golf course. Check the bus schedule and find the route that passes by Fantasia Mini Golf. Get off at the nearest bus stop, and you’ll be just a few minutes away from enjoying a round of mini golf.

Walking Routes

If you are a fan of walking, there are also a couple of routes you can take to reach Fantasia Mini Golf. Whether you are coming from nearby parking lots or other attractions in the area, walking can be a great way to enjoy the scenery and get some exercise before hitting the greens.

From Nearby Parking Lots

If you decide to drive to Fantasia Mini Golf but prefer not to park on-site, there are several nearby parking lots available. Simply park your car and take a pleasant stroll to the mini golf course. The walk will give you a chance to take in the beauty of the surroundings and get into a relaxed state of mind before your game.

From Nearby Attractions

If you are visiting other attractions in the area and want to make a stop at Fantasia Mini Golf as well, you can easily walk from these nearby attractions. Whether it’s a park, a museum, or a shopping center, check the map to find the best walking route to the mini golf course. Enjoy the leisurely walk and make the most of your time exploring the surrounding area.

A Guide to Reaching Fantasia Mini Golf

Choosing the Best Time to Visit

To ensure the most enjoyable experience at Fantasia Mini Golf, it is important to consider the best time to visit. There are two main categories to take into account: peak hours and off-peak hours.

Peak Hours

Peak hours at Fantasia Mini Golf are generally during weekends and holidays, as well as in the late afternoon and early evening. During these times, the mini golf course can be quite busy, with longer wait times and potential crowds. If you don’t mind the lively atmosphere and want to be immersed in the excitement, peak hours might be the perfect time for you.

Off-Peak Hours

If you prefer a more relaxed and tranquil experience, visiting Fantasia Mini Golf during off-peak hours is highly recommended. Typically, weekday mornings and early afternoons are less crowded, allowing you to enjoy the course at your own pace. This is also a great option for families with young children or seniors who prefer a quieter environment.

Parking Options

When visiting Fantasia Mini Golf, you will have two main parking options: on-site parking or off-site parking.

On-site Parking

For maximum convenience, on-site parking is available at Fantasia Mini Golf. This option allows you to park your car just steps away from the entrance, ensuring easy access to the course. However, it is important to note that during peak hours, on-site parking may fill up quickly. Arriving early or considering off-site parking alternatives can help avoid any parking-related stress.

Off-site Parking

If you prefer to explore alternative parking options, there are off-site parking facilities near Fantasia Mini Golf. These parking lots are situated within a short walking distance of the attraction, offering a cost-effective and convenient solution. Plus, walking to the mini golf course can add to the overall experience, allowing you to take in the surroundings and get a taste of the local atmosphere.

Entrance and Ticket Information

Now that you know how to get to Fantasia Mini Golf, it’s time to dive into the details of the entrance and ticket information. Understanding the ticket pricing, online booking options, and walk-in ticket purchases will help streamline your visit.

Ticket Pricing

The ticket pricing for Fantasia Mini Golf is affordable and offers great value for money. Prices may vary depending on factors such as age and the time of visit. Children, students, and seniors often enjoy discounted rates, while group packages may be available for larger parties. Be sure to check the official website or contact the ticket office directly for the most up-to-date pricing information.

Online Booking

To make your visit even more convenient, Fantasia Mini Golf offers online booking options. By purchasing your tickets in advance, you can secure your preferred date and time slot, avoiding any potential disappointment. Online booking also allows you to skip the ticket queue on the day of your visit, saving you valuable time.

Walk-in Ticket Purchase

If you prefer a more spontaneous visit and haven’t booked your tickets in advance, there is also the option to purchase tickets on-site. The ticket booth at Fantasia Mini Golf is easily accessible, and friendly staff will be there to assist you with your ticket purchase. However, it is important to note that during peak hours, there may be a higher demand for tickets, so it is advisable to arrive early to secure your entry.

Planning Your Visit

Now that you have all the necessary information about reaching Fantasia Mini Golf and obtaining your tickets, it’s time to plan the details of your visit. Knowing the opening hours, recommended duration of the visit, and accessibility services will help you make the most of your time at the mini golf course.

Opening Hours

Fantasia Mini Golf is open seven days a week, providing ample opportunities to enjoy a round of mini golf. The opening hours may vary depending on the season, so it is always a good idea to check the official website or contact the mini golf course beforehand. By planning your visit to coincide with the operating hours, you can ensure a seamless and stress-free experience.

Duration of Visit

The duration of your visit to Fantasia Mini Golf can vary depending on various factors, including the size of your group, the number of rounds you wish to play, and your overall pace. On average, a visit to the mini golf course may last between one to two hours. This timeframe allows for sufficient time to complete at least one round of mini golf while still leaving room for breaks and enjoying the additional amenities.

Accessibility Services

Fantasia Mini Golf aims to provide an inclusive and enjoyable experience for all visitors. The mini golf course is wheelchair accessible, with smooth pathways and ramps leading to each hole. Additionally, the staff is trained to assist visitors with disabilities or special needs, ensuring that everyone can fully participate in the fun.

Exploring Fantasia Mini Golf

Now that you’ve arrived at Fantasia Mini Golf, it’s time to explore the course and all the exciting features it has to offer. From the course layout to the obstacles and challenges, here’s what you can expect during your mini golf adventure.

Course Layout

The Fantasia Mini Golf course boasts a beautifully designed layout that takes full advantage of the natural landscape. Lush greens, meandering streams, and colorful flower beds create a whimsical atmosphere, making each hole a joy to play. The course is carefully crafted to offer a mix of challenges and fun, suitable for players of all ages and skill levels.

Obstacles and Challenges

As you make your way through the course, you will encounter a variety of obstacles and challenges that add excitement and difficulty to the game. From tricky slopes and narrow passages to water hazards and windmills, each hole presents a unique set of challenges to test your skills. Enjoy the thrill of navigating these obstacles and see if you can conquer them with finesse.

Tips for Success

While mini golf is all about having fun, a few tips can help you improve your game and increase your chances of success. Start by carefully studying each hole and planning your shots. Take your time and visualize the path your ball needs to take. Pay attention to the position of the obstacles and adjust your aim accordingly. Practice your putting technique and maintain a steady hand. And most importantly, don’t forget to relax, enjoy the experience, and embrace the friendly competition with your fellow players.

Additional Amenities

To enhance your visit, Fantasia Mini Golf offers additional amenities that cater to your needs and provide extra enjoyment throughout your time at the course.

Snack Bar

If you’re feeling peckish or in need of a refreshing beverage, the snack bar at Fantasia Mini Golf has you covered. Choose from a selection of tasty snacks, beverages, and ice cream treats to satisfy your cravings and refuel before or after your game. The snack bar provides a cozy seating area where you can relax, take a break, and indulge in delicious treats.

Gift Shop

Before leaving Fantasia Mini Golf, don’t forget to stop by the gift shop. Here, you will find a wide range of souvenirs, merchandise, and golf-related items to commemorate your visit. Whether you’re looking for a mini golf-themed t-shirt, a set of novelty golf balls, or a unique gift for someone back home, the gift shop offers something for everyone. Take a piece of Fantasia Mini Golf with you and create lasting memories of your time at this fantastic destination.

In conclusion, reaching Fantasia Mini Golf is a breeze, thanks to the various transportation options available. Whether you prefer driving, using public transportation, or walking, there are routes that cater to your needs. Once you arrive, plan your visit carefully, considering the best time to avoid crowds, parking options, and ticket information. Take your time to explore the beautifully designed course, overcome obstacles, and make use of the additional amenities provided. Fantasia Mini Golf offers a fun-filled experience for all ages, promising a day of enjoyment and memorable moments. Enjoy your visit to Fantasia Mini Golf – a true haven for mini golf enthusiasts!

A Step-by-Step Guide on Wiring Golf Cart Batteries

Learn how to wire golf cart batteries with our step-by-step guide! Whether you’re a beginner or experienced owner, this informative article will get you back on the green in no time. Grab your tools and start wiring today!

Imagine this scenario: you’re eager to hit the golf course on a beautiful sunny day, only to find out that your golf cart batteries have died. Don’t worry, because we’ve got you covered! In this informative article, we will provide you with a step-by-step guide on how to effectively wire your golf cart batteries. Whether you’re a seasoned golf cart owner or a beginner, this simple and friendly guide will ensure that you’re back on the green in no time. So grab your tools and let’s get started!

A Step-by-Step Guide on Wiring Golf Cart Batteries

Preparing for Wiring

Gather the Necessary Tools and Materials

Before you begin wiring your golf cart batteries, it’s important to gather all the necessary tools and materials. You will need a set of screwdrivers (both Phillips and flathead), wire cutters/strippers, terminal crimper, cable ties or wire clamps, and a battery brush. Additionally, you will need new battery cables and terminal lugs if the existing ones are worn out or damaged.

Ensure Safety Measures

Safety should always be a top priority when working with electrical components. Make sure to wear protective gloves and safety goggles to prevent any injuries. It is also advisable to disconnect the golf cart from any power source, including turning off the ignition and removing the key. In addition, ensure that the area you are working in is well-ventilated to prevent any build-up of potentially harmful gases.

Identify the Battery Connections

Before disconnecting any wiring, it is essential to identify the battery connections. Take note of how the batteries are currently arranged and which terminals are connected to one another. This will help you in determining the correct order later when wiring in series or parallel. It’s also a good idea to take pictures or label the connections to avoid confusion during the reconnection process.

Disconnecting Existing Wiring

Turn off the Golf Cart

To ensure safety, the first step in disconnecting the existing wiring is to turn off the golf cart. Make sure the ignition is switched off and remove the key from the ignition switch. This will prevent any accidental electrical shorts or damage during the process.

Remove the Battery Cables

Next, you need to detach the battery cables from the batteries. Start by removing the negative cable first, followed by the positive cable. Use a screwdriver to loosen the terminal nuts and then carefully remove the cables from the battery terminals. Be cautious not to touch any metal parts or allow the cable ends to come into contact with each other to prevent short circuits.

Disconnect Any Other Attached Wires

In addition to the battery cables, there may be other wires attached to the batteries, such as those connected to accessories or the onboard charger. Carefully disconnect these wires, ensuring that you remember their positions for later reconnection. Use a screwdriver or appropriately sized wrench to loosen any terminal nuts or bolts that secure these wires.

Determining the Battery Order

Understand the Series and Parallel Connections

Before you start wiring the new batteries, it’s essential to understand the concepts of series and parallel connections. In a series connection, the positive terminal of one battery is connected to the negative terminal of the next battery, creating a cumulative voltage in the system. In a parallel connection, all positive terminals are connected together and all negative terminals are connected together, increasing the overall current capacity without affecting the voltage.

Identify the Positive and Negative Terminal

To wire the batteries correctly, you must be able to identify the positive and negative terminals of each battery. The positive terminal is usually marked with a plus sign (+) or the letters “POS,” while the negative terminal is marked with a minus sign (-) or the letters “NEG”. Familiarize yourself with these markings to ensure accurate wiring.

Arrange the Batteries in the Correct Order

Once you understand series and parallel connections and can identify the positive and negative terminals, arrange the batteries in the correct order. Remember the original configuration if you’re replacing old batteries, or refer to the golf cart’s manual for the recommended battery arrangement. Ensure that the batteries are placed securely and aligned properly, avoiding any potential contact between terminals or other metal surfaces.

A Step-by-Step Guide on Wiring Golf Cart Batteries

Wiring in Series

Connect the Positive Terminal of the First Battery to the Negative Terminal of the Second Battery

To wire the batteries in series, start by connecting the positive terminal of the first battery to the negative terminal of the second battery. Use a battery cable with terminal lugs on each end to make the connection. Slide the terminal lug onto the battery terminal, ensuring a tight fit, and then secure it with the terminal nut or bolt. Repeat this step for each subsequent battery, connecting the positive terminal of the previous battery to the negative terminal of the next battery.

Continue Wiring in Sequence

Continue wiring in sequence until you have connected all the batteries in series. Each positive terminal should be connected to the negative terminal of the next battery. Take your time to ensure that each connection is secure and tightened properly. Double-check the connections to confirm that they are made in the correct order.

Ensure Proper Connections

Once you have completed wiring the batteries in series, it’s crucial to ensure that all the connections are properly secured. Make sure each terminal nut or bolt is tightened securely, but be careful not to overtighten and damage the battery terminals. Wiggle the cables gently to check for any loose connections. If any connections appear loose or unstable, tighten them further until they are secure.

Wiring in Parallel

Connect all the Positive Terminals Together

To wire the batteries in parallel, start by connecting all the positive terminals together. Use a battery cable with terminal lugs on each end to make these connections. Slide the terminal lugs onto the positive terminals of each battery, ensuring a tight fit, and secure them with the terminal nuts or bolts. This connection will increase the overall current capacity of the battery bank without affecting the voltage.

Connect all the Negative Terminals Together

Similar to connecting the positive terminals, connect all the negative terminals together using another battery cable with terminal lugs. Slide the terminal lugs onto the negative terminals of each battery and secure them with the terminal nuts or bolts. This will complete the parallel wiring, allowing the batteries to work together efficiently and share the load evenly.

Ensure Correct and Secure Connections

Once you have connected all the positive and negative terminals in parallel, ensure that the connections are correct and secure. Tighten all the terminal nuts or bolts, being careful not to overtighten. Gently wiggle the cables to check for any loose connections. If you notice any unstable connections, tighten them further until they are secure. Proper connections are vital for the batteries to function effectively and safely.

Installing Battery Cables

Measure and Cut Cables to Desired Lengths

To install new battery cables, start by measuring and cutting them to the desired lengths. Take into account the distance between batteries and any accessories that will require connections. It’s recommended to add a few inches of extra length to allow for flexibility and ease of installation. Use wire cutters or a suitable tool to cut the cables cleanly and avoid fraying.

Strip the Cable Insulation

After cutting the cables, strip off a small section of the insulation from each end using wire cutters or strippers. The length of the exposed copper wire should match the length of the terminal lug’s connection barrel or slightly less. Be careful not to nick or cut the wire when stripping the insulation, as this can weaken the connection and potentially cause issues later on.

Crimp Terminal Lugs to the Cables

Once the cable insulation is stripped, slide a terminal lug onto each end of the cable. Ensure that the terminal lugs match the size of the battery terminals and have a snug fit. Using a terminal crimper, crimp the terminal lug onto the cable securely. This will create a reliable and durable connection between the cable and the battery terminal.

Attach the Cables to the Batteries

With the terminal lugs properly crimped onto the cables, it’s time to attach them to the batteries. Slide each terminal lug onto its corresponding battery terminal, making sure the positive cable is attached to the positive terminal and the negative cable to the negative terminal. Tighten the terminal nuts or bolts securely, ensuring a strong and reliable connection. Double-check that all the cables are properly attached and tightened.

Securing the Wiring

Use Cable Ties or Wire Clamps

To keep the wiring organized and secure, use cable ties or wire clamps. These accessories help to bundle the cables together neatly and prevent them from moving around or becoming tangled. Secure the cables at regular intervals, ensuring that they are neither too loose nor too tight. Cable ties or wire clamps can be attached to the golf cart’s frame or any other suitable location.

Organize and Bundle the Wires

Along with using cable ties or wire clamps, it’s crucial to organize and bundle the wires effectively. Arrange the cables in a way that minimizes exposure to potential hazards such as sharp edges or moving parts. Group them together according to their functions or connections, making it easier to trace and troubleshoot any potential issues in the future.

Ensure No Loose or Exposed Wires

When securing the wiring, always double-check for any loose or exposed wires. Loose wires can lead to poor connections or potential hazards, while exposed wires can cause shorts or electrical shocks. Ensure that all the cables are tightly secured and that no bare wires are visible. If you notice any loose or exposed wires, address them immediately by tightening the connections or adding insulation.

Performing a System Check

Inspect the Connections

Once the wiring is complete and secured, it’s essential to perform a system check to ensure everything is in order. Begin by inspecting all the connections, including the battery terminals, cable attachments, and any other connected wires or accessories. Look for any signs of looseness, corrosion, or damage. Tighten any loose connections and clean the terminals if necessary.

Double-Check Polarity

In addition to inspecting connections, double-check the polarity of the battery wiring. Ensure that all positive terminals are connected to positive terminals and negative terminals to negative terminals. Swapping the polarity can damage electrical components and potentially cause harm. Verify that the batteries are arranged correctly according to their series or parallel connections.

Test Golf Cart’s Electrical System

To confirm that the wiring has been done correctly, it’s crucial to test the golf cart’s electrical system. Turn on the ignition and check if all the electrical components, such as lights, horn, and accessories, are functioning as expected. Pay attention to any signs of abnormal behavior, such as dim lights or weak performance. If any issues arise, recheck the connections and consult the golf cart’s manual or an expert.

Maintaining the Batteries

Clean Terminal Connections Regularly

To prolong the lifespan and ensure optimal performance of your golf cart batteries, it’s essential to clean the terminal connections regularly. Over time, corrosion and dirt can build up on the battery terminals, inhibiting proper electrical contact. Use a battery brush to gently scrub away any corrosion or dirt, ensuring that the terminals are clean and free from debris. This will help maintain good conductivity and prevent potential issues.

Check Battery Water Levels

Lead-acid golf cart batteries require periodic maintenance to check and maintain the water levels. Open the battery caps carefully and visually inspect the water levels in each cell. If the water level is below the recommended level, add distilled water to ensure proper electrolyte balance. Use caution not to overfill the cells, as this can lead to acid spills or reduced battery performance.

Perform Routine Maintenance

In addition to cleaning the terminals and checking the water levels, it’s important to perform routine maintenance on your golf cart batteries. This includes regular charging to maintain the battery’s charge state, keeping the batteries clean and dry, and inspecting for any signs of damage or wear. Following the manufacturer’s recommendations and guidelines will help ensure the longevity and reliability of your golf cart batteries.

Troubleshooting Common Issues

Identify and Resolve Voltage Drop

One common issue that golf cart owners encounter is voltage drop, which can result in reduced performance or a shortened battery life. If you notice a significant decrease in voltage when checking the battery terminals, it is crucial to identify and resolve the issue promptly. Check for loose or corroded connections, damaged cables, or the presence of resistance in the wiring. Addressing these issues will help prevent voltage drop and maintain efficient electrical performance.

Address Loose or Damaged Connections

Loose or damaged connections can lead to poor electrical contact, voltage drop, or even complete failure of the golf cart’s electrical system. If you experience any issues, such as intermittent power loss or malfunctioning accessories, inspect all the connections for signs of looseness or damage. Tighten any loose connections and replace any damaged cables or terminal lugs. Ensuring secure and reliable connections is key to resolving these issues.

Check for Battery Failure Symptoms

Sometimes, batteries can fail due to various reasons such as age, improper maintenance, or manufacturing defects. If your golf cart is experiencing issues like a slow engine start, reduced speed, or frequent battery draining, it may be an indication of battery failure. Perform battery load tests or consult with a professional to determine if replacement batteries are necessary. Promptly addressing battery failure symptoms will help prevent further damage and ensure proper functioning of the golf cart.

In conclusion, wiring golf cart batteries requires careful consideration of series and parallel connections, proper identification of terminals, and secure connections. By following the step-by-step guide outlined above, you can successfully wire your golf cart batteries and ensure a reliable electrical system. Remember to prioritize safety measures, perform routine maintenance, and address any issues promptly to keep your golf cart running smoothly. Enjoy your time on the greens with a properly wired and maintained golf cart!

A Beginner’s Guide to Painting Golf Balls

A Beginner’s Guide to Painting Golf Balls: Learn how to personalize your golf balls with custom designs. Select the right supplies, prepare the balls, and create unique artwork. Take your golf game to a whole new level with some colorful creativity!

So, you’ve recently taken up the exhilarating sport of golf and find yourself searching for ways to stand out on the greens. Look no further, as we have just the thing for you: a beginner’s guide to painting golf balls. Whether you want to add a personal touch to your equipment or simply make your golf balls easier to spot, this article will provide you with all the tips and tricks you need to create your own custom designs. From selecting the right materials to mastering the art of precision, get ready to take your golf game to a whole new level with some colorful creativity!

A Beginners Guide to Painting Golf Balls

Choosing the Right Supplies

When it comes to painting golf balls, choosing the right supplies is essential for a successful and satisfying outcome. From selecting the golf balls themselves to gathering the necessary paints, brushes, and tools, each decision you make will impact the final result of your painted golf balls.

Selecting the Golf Balls

The first step in painting golf balls is selecting the right ones for your project. It’s important to choose golf balls that have a smooth and clean surface, as this will ensure that the paint adheres well and lasts longer. You can use either used golf balls or new ones, depending on your preference and budget. Just make sure to inspect used golf balls for any cracks or damage that could affect the painting process.

Gathering the Necessary Paints

Once you have your golf balls, it’s time to gather the necessary paints. Acrylic paints are a popular choice for painting golf balls due to their vibrant colors, quick drying time, and durability. You can find a wide variety of acrylic paints in art supply stores, with different finishes and shades. Be sure to choose paints that are suitable for outdoor use and are compatible with the golf ball material.

Choosing Brushes and Tools

In addition to paints, you’ll need brushes and tools to create your artwork on the golf balls. A set of fine detail brushes is recommended for painting intricate designs and adding small details. You may also consider using a sponge or a soft brush for applying the base coat. Additionally, having masking tape, stencils, or templates on hand can help simplify the process and ensure clean lines and shapes in your designs.

Preparing the Golf Balls

Before you start painting, it’s important to properly prepare the golf balls to ensure the best results for your artwork. Preparing the golf balls involves cleaning them, removing any old paint, and taping them to create a stable working surface.

Cleaning the Golf Balls

Cleaning the golf balls is an essential step to remove any dirt, oils, or debris that may hinder paint adhesion. Simply fill a bowl with warm water and mild soap, and soak the golf balls for a few minutes. Then, use a soft cloth or sponge to gently scrub away any dirt or grime. Rinse the golf balls thoroughly with clean water and allow them to dry completely before moving on to the next step.

Removing the Old Paint

If you are working with pre-painted golf balls or have previously painted them, you’ll need to remove the old paint before starting your new design. One method for removing paint is to soak the golf balls in a paint stripper solution for a few hours, following the manufacturer’s instructions. Afterward, use a scrub brush to gently remove the loosened paint. Once the old paint is removed, rinse the golf balls thoroughly and let them dry completely.

Taping the Golf Balls

To create a stable working surface for painting, taping the golf balls can be helpful. You can use masking tape or painter’s tape to cover the areas of the golf ball that you don’t want to paint. This will help ensure clean edges and prevent any accidental smudging or spreading of the paint. Take your time to apply the tape carefully and make any necessary adjustments before moving on to the next step.

Applying the Base Coat

The base coat is the foundation of your artwork and sets the stage for all the designs and details you’ll be adding later. Applying a base coat will not only enhance the appearance of your painted golf balls but also provide a smooth and even surface for your designs.

Choosing the Base Color

When selecting the base color for your golf balls, consider the overall theme or aesthetic you want to achieve. A solid color, such as white or black, can serve as a versatile base for different designs. Alternatively, you can choose a color that complements or contrasts with the accent colors you plan to use in your artwork. Make sure the base color is conducive to good visibility of the design and suits your personal preferences.

Applying the First Layer of Paint

To apply the base coat, start by shaking the paint bottle well to ensure an even consistency. Using a sponge or a soft brush, apply the paint to the golf ball in smooth and even strokes. Be careful not to apply too much paint at once, as it can drip or pool on the surface. It’s better to build up the color gradually with multiple thin layers rather than one thick layer. Allow each layer to dry before applying the next one.

Allowing the Base Coat to Dry

After applying the first layer of paint, allow the golf balls to dry completely before proceeding to the next steps. This usually takes about 30 minutes to an hour, depending on the type of paint and the environmental conditions. Be patient and avoid touching or moving the golf balls during this drying period to prevent smudging or uneven drying. Once the base coat is dry to the touch, you can continue with the creative process.

A Beginners Guide to Painting Golf Balls

Creating Designs

With the base coat applied and dry, it’s time to unleash your creativity and start painting unique designs on your golf balls. There are various methods you can use to create your designs, whether it’s sketching ideas, using stencils or templates, or experimenting with freehand painting techniques.

Sketching Ideas

Before diving into painting, you may find it helpful to sketch some ideas on paper. This will allow you to plan and visualize your designs before applying them to the golf balls. Consider the theme or motif you want to incorporate, as well as any specific patterns, shapes, or images that resonate with you. Sketching can serve as a valuable guide throughout the painting process and help you stay focused on your desired end result.

Using Stencils or Templates

If you’re looking for precise shapes or patterns, using stencils or templates can be a great way to achieve consistent and professional-looking designs. You can find a wide variety of stencil options in craft stores or create your own using flexible plastic sheets. Secure the stencil or template in place on the golf ball using masking tape, and then carefully apply the paint using a small brush or sponge. Once the paint is dry, carefully remove the stencil to reveal your design.

Freehand Painting Techniques

For those who prefer a more organic and spontaneous approach, freehand painting techniques offer endless possibilities. With a steady hand and some practice, you can create intricate designs, abstract patterns, or even paint small pictures directly on the golf balls. Use fine detail brushes for precision and experiment with different strokes, techniques, and color combinations to bring your imagination to life. Embrace the freedom of freehand painting and let your creativity guide your brush.

Adding Details and Accents

Once you’ve created the main designs, adding details and accents can elevate your painted golf balls to the next level. Details and accents can be used to enhance the overall design, create depth and dimension, or highlight specific areas of interest.

Selecting Accent Colors

When choosing accent colors, think about complementary or contrasting hues that will make your designs pop. Consider colors that add visual interest or create a focal point within your artwork. Metallic or shimmering paints can also be fantastic choices for adding a touch of glamour or elegance to your designs. Experiment with different accent colors to find the ones that truly bring your painted golf balls to life.

Applying Accent Paint

To apply accent paint, use a small brush or sponge and carefully add the desired colors to the designated areas of your designs. Accent colors can be used for details, outlines, shading, or any other elements you want to highlight. Take your time and work with a steady hand to ensure clean and precise application. Remember, details and accents should enhance the overall design without overshadowing the main elements.

Experimenting with Different Techniques

Don’t be afraid to step outside your comfort zone and experiment with different techniques to add variety and interest to your painted golf balls. You can try techniques like blending colors, layering paints, creating texture using different brush strokes, or even using unconventional tools like toothpicks or sponges for unique effects. Exploring new techniques will not only make your artwork more dynamic but also expand your artistic skills and possibilities.

Adding Logos or Personalizations

If you want to take your painted golf balls to the next level of personalization, adding logos or personalizations can be a fantastic way to make them truly one-of-a-kind. Whether you want to represent your favorite sports team, display your initials, or showcase a special symbol, there are a few steps to follow when incorporating logos or personalizations into your designs.

Choosing Logos or Personalization Options

Start by selecting the logos or personalization options you want to include on your golf balls. You can search online for high-resolution images of logos or symbols that hold significance to you. Alternatively, you can create your own custom designs using graphic design software or by hand-drawing them. Consider the size and placement of the logos or personalizations to ensure they fit well within the overall design of the golf ball.

Transferring the Design

To transfer the logos or personalizations onto the golf balls, you can use a variety of methods. One option is to print the designs onto transfer paper and carefully apply them to the golf balls following the manufacturer’s instructions. Another option is to trace the designs onto tracing paper and then transfer them onto the golf balls using transfer gel or a fine-tip marker. Whichever method you choose, take your time and work with care to ensure accurate placement and alignment.

Painting or Stamping the Logos

Once the design is transferred, you can use fine detail brushes and suitable paint colors to paint the logos or personalizations onto the golf balls. Alternatively, if you prefer a quicker and easier method, you can use custom-made stamps or even rubber stamps to apply the designs using ink. Experiment with different techniques to achieve the desired effect and ensure that the logos or personalizations are well-integrated into the overall artwork.

Allowing the Paint to Dry

After completing the painting process, it’s crucial to allow the paint to dry thoroughly before moving on to the next steps. Drying time can vary depending on factors such as the type of paint used, the number of layers, and the environmental conditions. To ensure the best results, follow these guidelines for proper drying of your painted golf balls.

Determining Drying Time

Refer to the instructions provided by the paint manufacturer for an approximate drying time. However, it’s essential to note that these are general guidelines, and the specific conditions in your environment may affect drying time. It’s always better to err on the side of caution and allow the paint to dry for at least 24 hours or longer, if possible. Patience is key when it comes to achieving a durable and long-lasting finish.

Ensuring Proper Ventilation

While the paint is drying, ensure that the area is well-ventilated to promote airflow and aid in the drying process. Open windows or use fans to circulate the air, especially if you’re working indoors. Adequate ventilation will help the paint dry evenly and prevent any potential smudging or sticking of the golf balls to surfaces they come in contact with.

Avoiding Smudging or Smearing

To avoid smudging or smearing the paint while the golf balls are drying, handle them with care and avoid touching any painted areas. If you need to move the golf balls, use clean and dry gloves or carefully hold them by areas that are not painted. It’s better to be cautious and wait until the paint is completely dry before handling the golf balls extensively.

Applying a Protective Coating

To ensure the longevity and durability of your painted golf balls, applying a protective coating is highly recommended. The protective coating acts as a barrier between the paint and external elements, such as moisture, dirt, and UV rays, offering added protection and preserving the quality of your artwork.

Choosing a Clear Coat

Select a clear coat specifically designed for outdoor use and suitable for the type of paint you used. Look for a clear coat that offers UV protection to prevent fading and yellowing over time. Matte, satin, or gloss finishes are available, depending on your desired final appearance. Take into consideration that some clear coats may slightly alter the color or finish of your painted golf balls, so it’s a good idea to conduct a test on a small area before applying it to the entire surface.

Spraying or Brushing the Protective Coating

To apply the clear coat, read the instructions provided by the manufacturer and follow them carefully. Depending on the type of clear coat you choose, you can either spray it onto the golf balls or use a small brush to apply it evenly. If using a spray, hold the can at a distance and use thin, even coats to prevent drips and pooling. If using a brush, make sure to use smooth and consistent strokes, covering the entire surface of the golf balls. Reapply additional coats as necessary, allowing each coat to dry between applications.

Curing the Coating

After applying the protective coating, allow the golf balls to cure according to the manufacturer’s instructions. The curing time can range from a few hours to several days, depending on the specific product and environmental conditions. Avoid touching or using the golf balls during the curing process, as this can disrupt the formation of a hard and durable protective layer. Once the clear coat is completely cured, your painted golf balls will be ready for use and display.

Caring for Painted Golf Balls

To maintain the appearance and longevity of your painted golf balls, proper care is essential. While they are durable, painted golf balls require some attention to preserve their original beauty and protect the artwork you’ve created.

Avoid Excessive Rough Use

While it’s tempting to showcase your painted golf balls in action, excessive rough use can cause the paint to chip or peel over time. It’s best to reserve your painted golf balls for special occasions or use them as display pieces rather than using them in competitive or demanding golf games. Treat them with care to ensure their longevity and enjoy them for years to come.

Cleaning the Balls Properly

When it’s time to clean your painted golf balls, make sure to use gentle and non-abrasive methods. Fill a bucket with warm water and mild soap, and soak the golf balls for a few minutes. Then, use a soft cloth or sponge to gently wipe away any dirt or debris. Avoid using harsh chemicals, abrasive scrub brushes, or abrasive materials, as these can damage or remove the paint from the golf balls. After cleaning, rinse the golf balls thoroughly with clean water and pat them dry with a soft towel.

Checking for Damage or Wear

Regularly inspect your painted golf balls for any signs of damage or wear. Look for chips, cracks, or discoloration that may require touch-ups or repairs. If you notice any areas that need attention, carefully remove any loose or damaged paint, apply a small amount of matching paint, and allow it to dry thoroughly. Performing these small touch-ups as needed will help maintain the overall appearance and integrity of your painted golf balls.

Conclusion

Painting golf balls is a wonderful way to personalize your golfing experience and unleash your creativity. By choosing the right supplies, preparing the golf balls properly, and following the step-by-step process, you can create unique and eye-catching artwork on your golf balls. Whether you’re a seasoned artist or a beginner, the journey of painting golf balls is filled with enjoyment and the opportunity to explore new ideas and techniques. So grab your supplies, let your imagination run wild, and embark on an exciting adventure of transforming ordinary golf balls into extraordinary pieces of art. Enjoy the creative process, personalize your golfing experience, and discover the joy of expressing yourself through painted golf balls.

Top flight golf clubs: A guide to choosing the best ones

A comprehensive guide to choosing the best top flight golf clubs. Find the perfect set to enhance your performance and take your game to new heights.

If you’re an avid golfer looking to upgrade your equipment, finding the perfect set of golf clubs can be a daunting task. With countless options available on the market, it can be overwhelming to determine which ones are truly top-notch. This article aims to provide a comprehensive guide to help you navigate through the sea of choices and make an informed decision. Whether you’re a beginner or a seasoned pro, choosing the right golf clubs can greatly enhance your performance on the course and take your game to new heights. So, let’s tee off and explore the world of top-flight golf clubs together!

Top flight golf clubs: A guide to choosing the best ones

Factors to Consider

Choosing the best golf clubs for your game can be a daunting task, especially with the multitude of options available in the market. However, by considering a few key factors, you can narrow down your choices and find the perfect set of clubs that will enhance your performance on the course. Here are some important factors to take into account when selecting golf clubs:

Skill Level

Your skill level is perhaps the most crucial factor to consider when choosing golf clubs. As a beginner, you may want to opt for clubs that are forgiving and provide maximum distance and accuracy. On the other hand, if you are an advanced player, you may have specific preferences when it comes to club design and feel. Understanding your skill level will help you determine the right clubs that match your playing style and abilities.

Budget

Another important factor to consider when purchasing golf clubs is your budget. Golf clubs can vary significantly in price, ranging from budget-friendly options to high-end, premium clubs. It’s essential to set a budget beforehand and look for clubs that fit within that range. Remember, expensive clubs don’t always guarantee superior performance, so be sure to find a balance between quality and affordability.

Shaft Material

The material of the club’s shaft is a key consideration that can greatly affect your performance on the course. The two main options available are steel and graphite shafts. Steel shafts are known for their durability and provide more stability, making them a popular choice among experienced golfers. On the other hand, graphite shafts are lighter and more flexible, providing greater swing speed and distance, which can benefit beginners and players with slower swing speeds.

Clubhead Design

The design of the clubhead plays a significant role in determining the club’s forgiveness and playability. There are two main types of clubhead designs: cavity back and blade. Cavity back irons have a larger, hollowed-out back, making them more forgiving and suitable for beginners or players seeking forgiveness on off-center hits. Blade irons, on the other hand, have a smaller clubhead with a solid back, providing more control and precision for advanced players who prioritize shot shaping and workability.

Clubhead Material

The material used in the construction of the clubhead can also impact your game. The most common materials for clubheads are stainless steel, titanium, and composite materials. Stainless steel clubheads are durable, affordable, and provide excellent forgiveness. Titanium clubheads offer enhanced distance, thanks to their lighter weight and larger sweet spot. Composite clubheads, made from a combination of materials, often provide a balance between the two, offering forgiveness and distance.

Types of Golf Clubs

Golf clubs can be categorized into several types, each serving a specific purpose on the course. Understanding the different types of clubs available will help you make informed decisions when building your ideal golf club set. Here are the various types of golf clubs:

Drivers

Drivers, also known as 1-woods, are designed to hit the ball the farthest off the tee. They have the largest clubheads and the lowest lofts, typically ranging from 8 to 12 degrees. Drivers are crucial for gaining maximum distance and should be chosen based on factors such as clubhead size, loft angle, shaft flexibility, and adjustable features.

Fairway Woods

Fairway woods are versatile clubs designed for shots from the fairway or rough. They have slightly smaller clubheads compared to drivers, making them more forgiving and easier to control. Fairway wood clubheads are typically made of stainless steel, and they come in varying lofts, providing options for different distances. When selecting a fairway wood, you should consider factors such as clubhead material, loft angle options, shaft length, and forgiveness.

Hybrids

Hybrids, also known as rescue clubs, are a combination of irons and fairway woods. They offer the forgiveness of irons and the distance of fairway woods, making them ideal for difficult shots or long approach shots. Hybrids come in various loft angles and are designed to replace hard-to-hit long irons. When exploring hybrids, it’s important to consider factors such as clubhead design, loft angle, and shaft flexibility.

Irons

Irons are essential clubs for precision shots, providing distance and accuracy. They are categorized into different numbers based on their loft angles, with lower numbers having lower lofts and longer distances. Irons can be further classified into cavity back and blade irons, depending on your preference for forgiveness or control. Additionally, the shaft material is a crucial factor to consider when selecting irons, as different materials can affect the feel and performance of the club.

Wedges

Wedges are specialized clubs designed for short approach shots, shots around the green, and bunker shots. They provide high loft angles, allowing players to generate maximum spin and control when hitting these delicate shots. There are several types of wedges available, including pitching wedges, gap wedges, and lob wedges. When considering wedges, it’s important to understand their specific uses and the various features, such as the bounce angle, which can impact performance.

Putters

Putters are the most frequently used clubs in a golfer’s bag, designed specifically for rolling the ball on the green. Putters come in various head designs, such as blade and mallet, each offering different alignments and forgiveness. Additionally, factors like toe hang, offset, and length can impact the putting stroke and overall feel. Choosing the right putter is crucial for consistency and confidence on the greens.

Choosing the Right Driver

When selecting a driver, several factors come into play, ensuring that you find the perfect club to maximize your distance and accuracy off the tee. Let’s explore some key considerations when choosing the right driver for your game:

Clubhead Size

The size of the driver’s clubhead dramatically affects its forgiveness and sweet spot. Larger clubheads provide a larger sweet spot, making it easier to achieve maximum distance even on off-center hits. Therefore, if you prioritize forgiveness and want to improve your chances of hitting longer, more accurate drives, a driver with a larger clubhead might be the right choice for you.

Loft Angle

The loft angle of a driver determines the trajectory of your shot, with lower loft angles providing a lower ball flight and higher loft angles generating a higher trajectory. The ideal loft angle depends on your swing speed and launch conditions. Generally, slower swing speeds benefit from higher loft angles to maximize carry distance, while faster swing speeds require lower loft angles for a more penetrating ball flight.

Shaft Flexibility

The flexibility of the driver’s shaft can significantly impact your swing and distance. Shafts come in various flex options, ranging from extra stiff to ladies’ flex, indicating how much the shaft bends during the swing. Players with fast swing speeds typically benefit from stiffer shafts, as they provide better control and generate more power. Alternatively, players with slower swing speeds may benefit from more flexible shafts, as they help generate more clubhead speed and distance.

Adjustable Features

Many modern drivers come with adjustable features, allowing you to fine-tune your club based on your swing characteristics and preferences. These features may include adjustable loft options, movable weights, and hosel adjustability. The ability to adjust these elements enables you to optimize your launch and spin conditions, helping you achieve the desired ball flight. If customization is important to you, be sure to consider drivers with adjustable features.

Top flight golf clubs: A guide to choosing the best ones

Selecting Fairway Woods

Fairway woods are versatile clubs that can help you cover considerable distances from both the fairway and the rough. When selecting fairway woods, consider the following factors:

Clubhead Material

The material used in the construction of the fairway wood’s clubhead can influence its performance and feel. Stainless steel clubheads are commonly found in fairway woods, offering a balance of durability, forgiveness, and distance. Alternatively, some fairway woods feature clubheads made of titanium or composite materials for enhanced distance and playability. Each material has its advantages, so it’s important to consider your preferences when selecting fairway woods.

Loft Angle Options

Fairway woods come in various loft angles, ranging from strong 3-woods with lower lofts to higher lofted 7-woods or 9-woods. The choice of loft angle depends on the gap you are looking to fill between your driver and irons, as well as your personal playing style. If you want more distance and a lower ball flight, a lower lofted fairway wood might be suitable. Conversely, if you prioritize higher shots and easier launch, a higher lofted fairway wood may be the better choice.

Shaft Length

The length of the fairway wood’s shaft plays a significant role in controlling the club and generating clubhead speed. Shorter shafts tend to offer better control but may sacrifice some distance, while longer shafts can provide greater distance but may be more difficult to control. It’s important to find a balance between control and distance when selecting the shaft length of your fairway woods.

Forgiveness

Forgiveness in fairway woods refers to their ability to maintain distance and accuracy on off-center hits. Some fairway woods come with features such as perimeter weighting and low center of gravity, which enhance forgiveness by expanding the sweet spot and reducing the negative effects of mis-hits. If you tend to hit the ball off-center, prioritizing forgiveness in your fairway woods can help you maintain consistency and control.

Exploring Hybrids

Hybrids, also known as rescue clubs, are becoming increasingly popular among golfers of all skill levels. These clubs combine the forgiveness and ease of hitting of an iron with the distance and versatility of a fairway wood. When exploring hybrids, consider the following factors:

Clubhead Design

Hybrids are available in different clubhead designs, offering varying levels of forgiveness and playability. Some hybrids have a larger profile, similar to fairway woods, which provides more forgiveness and a higher launch. Others have a more compact design, resembling irons, providing greater workability and shot control. Choosing the right clubhead design depends on your personal playing style and preference for forgiveness or workability.

Loft Angle

The loft angle of a hybrid determines its trajectory and distance. Hybrids can have a range of loft angles, similar to fairway woods and irons. Higher lofted hybrids are generally easier to launch and offer more carry distance, making them ideal for hitting shots into greens or getting out of trouble. Lower lofted hybrids, on the other hand, provide more distance and are suitable for replacing long irons. Consider your shot requirements and distance needs when selecting hybrid loft angles.

Shaft Flexibility

The flexibility of the hybrid’s shaft can greatly affect its performance. As with other clubs, shaft flex options vary from extra stiff to ladies’ flex, depending on your swing characteristics. Players with faster swing speeds usually benefit from stiffer shafts in their hybrids, as they provide better control and accuracy. Conversely, players with slower swing speeds may benefit from more flexible shafts, as they help launch the ball higher and generate more distance.

Finding the Right Irons

Irons are crucial clubs in every golfer’s bag, providing distance, accuracy, and control for approach shots and shots off the fairway. When searching for the right irons, consider the following factors:

Cavity Back vs Blade

Irons are available in two main designs: cavity back and blade. Cavity back irons have a larger cavity behind the clubface, distributing weight to the perimeter of the clubhead. This design offers maximum forgiveness on off-center hits and helps get the ball airborne more easily. Blade irons, also known as muscle-back irons, have a more compact design and a solid clubhead, providing greater workability and control for skilled players. Choose between cavity back and blade irons depending on your skill level and preference for forgiveness or workability.

Forgiveness

The forgiveness of irons refers to their ability to minimize the impact of off-center hits and maintain distance and accuracy. Cavity back irons, with their perimeter weighting, offer higher forgiveness and are suitable for beginners or players who prioritize forgiveness. Blade irons, with their smaller sweet spots, provide less forgiveness but more control, ensuring shots that require precision. Balancing forgiveness and control is important when selecting irons for your game.

Shaft Material

The material of the iron’s shaft can affect its feel and performance. Steel shafts are the most common choice for irons due to their durability, stability, and consistency. They provide a solid feel and better control, making them popular among experienced players. Graphite shafts, on the other hand, are lighter and more flexible, generating greater swing speeds and distance. Graphite shafts can benefit players with slower swing speeds or those seeking additional distance. Consider your swing characteristics and preferences when choosing the shaft material for your irons.

Considering Wedges

Wedges are short-range clubs designed to help you hit precise shots around the green, in bunkers, or when faced with challenging lies. There are several types of wedges available, each designed to fulfill specific shots. When considering wedges, pay attention to the following factors:

Pitching Wedges

Pitching wedges have the lowest loft angle among wedges, typically ranging from 44 to 48 degrees. They are primarily used for full swing shots into the greens and for shots that require distance control. When selecting a pitching wedge, consider the loft angle that complements the rest of your iron set, ensuring a smooth transition and consistent distances throughout.

Gap Wedges

Gap wedges, also known as approach wedges or utility wedges, are designed to fill the gap between pitching wedges and sand wedges. They typically have loft angles ranging from 50 to 54 degrees. Gap wedges are versatile clubs that can be used for a variety of shots, including full swing approaches, pitch shots, and chip shots. Choose a gap wedge that provides the desired loft angle and fills the distance gap in your bag effectively.

Lob Wedges

Lob wedges, as the name suggests, are used for high, soft shots that require significant loft and spin around the greens. These wedges typically have loft angles ranging from 58 to 64 degrees. Lob wedges are ideal for getting the ball to stop quickly on the green or hitting shots over hazards or bunkers when a high trajectory is required. When considering a lob wedge, think about how often you encounter shots that require heightened trajectory and how comfortable you are playing these shots.

Bounce Angle

The bounce angle of a wedge is the angle between the leading edge and the lowest point on the sole. This angle determines how the club interacts with the turf and sand. Higher bounce angles are beneficial for players with steeper swing paths or soft turf conditions, as they prevent the club from digging too much into the ground. Lower bounce angles are better suited for players with shallow swing paths or firm turf conditions, allowing for cleaner contact. Consider the playing conditions and your swing characteristics when selecting wedges with the appropriate bounce angles.

Understanding Putter Options

Putters are perhaps the most personal and individualized clubs in a golfer’s bag. They are the clubs you use most frequently and directly affect your putting stroke and accuracy. Here are some essential factors to consider when exploring putter options:

Head Design

Putters come in various head designs, the two most common being blade and mallet putters. Blade putters have a traditional, more compact design with a thin, flat clubhead. They offer a simpler alignment and are generally favored by players who prefer a more traditional look and feel. Mallet putters, on the other hand, have larger clubheads with more weight distributed to the perimeter. They often have alignment aids and provide additional stability, making them popular among players seeking forgiveness and improved alignment.

Toe Hang

To determine the toe hang of a putter, imagine a line passing through the shaft and extending beyond the clubhead. If this line falls slightly to the toe side, the putter is said to have a toe hang. The amount of toe hang affects the putter’s natural swinging motion and is important for players with arc-type strokes. Putters with more toe hang are better suited for players with more pronounced arcing strokes, while those with less toe hang are suitable for players with more straight-back, straight-through strokes.

Offset

Offset refers to the distance between the leading edge of the putter and the shaft. A putter with offset has the clubface positioned slightly behind the shaft, while a putter with no offset will have the clubface in line with the shaft. Offset can aid in squaring the putter face at impact and is most beneficial for players with an arcing stroke. Players with a straight-back, straight-through stroke may prefer no offset. Consider your stroke type and preference when selecting a putter with the appropriate amount of offset.

Length

The length of the putter is crucial for achieving proper setup and alignment. Putters come in various lengths, typically ranging from 32 to 36 inches. The length that works best for you will depend on your height, posture, and personal comfort. Longer putters can provide better control for players with a more upright posture, while shorter putters may be preferred by players with a more crouched stance. Experimenting with different putter lengths and finding the one that promotes a comfortable, consistent stroke is key.

Customizing Clubs

Customizing your golf clubs through fitting sessions and selecting the right shaft and grip options can greatly enhance your performance on the course. Here are some factors to consider when customizing your clubs:

Fitting Sessions

Professional fitting sessions provide invaluable insights into your swing characteristics and help determine the appropriate club specifications. During a fitting session, a certified professional will analyze your swing speed, launch angles, and ball flight to recommend the ideal club specifications, such as shaft flex, loft angle, lie angle, and grip size. Investing time in a fitting session can ensure that your clubs are optimized for your unique swing and playing style, ultimately maximizing your performance.

Shaft Options

The right shaft can significantly impact your club’s performance, feel, and consistency. Shafts come in various flex options, such as extra stiff, stiff, regular, senior, and ladies’ flex. Choosing the appropriate shaft flex based on your swing speed and tempo will help you generate optimum distance and accuracy. Additionally, shafts have different characteristics, such as weight, kick point, and torque, which affect the club’s feel and control. Exploring different shaft options and finding the one that matches your swing is essential for customized performance.

Grip Options

The grip on your clubs can influence your swing, control, and comfort. Grips come in various sizes, materials, and textures, allowing you to find the perfect fit for your hands and playing style. Larger grips can help reduce excessive hand action and promote a smoother stroke, while smaller grips can provide more feel and control. Additionally, selecting the right grip material can impact grip pressure and vibration dampening. Experimenting with different grip options and finding the one that feels comfortable and helps you maintain control is crucial for customized performance.

Researching Top Flight Golf Clubs

Researching and gathering information about top-flight golf clubs is essential to make an informed purchasing decision. Here are some reliable sources to consider during your research:

Product Reviews

Reading product reviews from reputable sources, such as golf magazines, professional golfers, and online communities, can provide valuable insights into the performance, features, and quality of top-flight golf clubs. Genuine customer reviews can also offer additional perspectives and experiences, helping you understand the real-world performance of the clubs you’re interested in.

Professional Recommendations

Professional golfers and golf instructors often provide recommendations based on their knowledge, experience, and player feedback. Keep an eye out for endorsement deals and recommendations from respected professionals in the golf industry. Their insights can be particularly helpful when narrowing down your choices and identifying top-quality golf clubs.

User Ratings

Online platforms and forums dedicated to golfing often feature user ratings and feedback on specific golf clubs. These user-generated ratings can provide an overall sense of customer satisfaction, durability, and performance. Take note of consistent positive or negative feedback to make informed decisions when considering specific golf clubs.

Testing Equipment

Many golf retailers and golf facilities offer equipment testing sessions, allowing you to try out various golf clubs and assess their performance firsthand. Testing sessions provide an opportunity to experience how different clubs feel, sound, and perform, which can significantly influence your decision-making process. Take advantage of these testing facilities to try out multiple clubs and find the ones that resonate with you before making a final purchase.

By considering the factors mentioned above, exploring the different types of golf clubs, and understanding the key aspects of each type, you can make an informed decision when selecting top-flight golf clubs. Remember, the right golf clubs will not only improve your performance but also enhance your enjoyment of the game. Happy golfing!

The Cost of a Golf Ball: A Comprehensive Guide

Discover the factors influencing the cost of golf balls with this comprehensive guide. From materials to brand reputation, explore the world of golf ball pricing.

Have you ever wondered about the price tag attached to that little white sphere in a golfer’s hand? Whether you’re an avid golfer or simply curious about the sport, “The Cost of a Golf Ball: A Comprehensive Guide” is here to unravel the mystery. In this article, we will explore the various factors that influence the price of a golf ball, from the materials used to the brand reputation. Prepare to be enlightened as we delve into the world of golf ball pricing.

The Cost of a Golf Ball: A Comprehensive Guide

Factors Affecting the Cost of a Golf Ball

When it comes to the cost of a golf ball, several factors come into play. Understanding these factors can help you make an informed decision when purchasing golf balls. Here, we will explore the various elements that contribute to the price of a golf ball, including the material, brand, performance, technology, design, quantity, target audience, customization options, product features, and exclusivity.

Material

The material used in the construction of a golf ball plays a significant role in its cost. Different materials offer varying levels of performance and durability. Some commonly used materials in golf balls include:

Surlyn

Surlyn is a highly durable and affordable material commonly used in entry-level golf balls. It provides good distance and durability but may lack the feel and spin control of higher-end materials.

Urethane

Urethane is a premium material that provides excellent performance and feel. It offers enhanced spin control and is preferred by skilled golfers. Due to its high-quality construction, golf balls with urethane covers tend to be more expensive.

Ionomer

Ionomer is a popular material in mid-range golf balls. It combines durability, distance, and a soft feel. While not as high-performing as urethane, ionomer covers are more affordable.

Rubber

Rubber golf balls are typically used for practice or novelty purposes. They are inexpensive, but their performance and durability may not meet the standards of serious golfers.

Balata

Balata is a soft and responsive material that provides excellent feel and control. However, it is less durable than other materials and is not commonly found in modern golf balls.

Polyurethane

Polyurethane is another advanced material used in premium golf balls. It offers exceptional spin control, feel, and durability. Golf balls with polyurethane covers are generally on the higher end of the price spectrum.

Brand

The brand of a golf ball can also significantly impact its cost. Established and reputable brands often offer high-quality products that come at a premium price. Some of the most popular golf ball brands on the market include:

Titleist

Titleist is well-known for its premium golf balls that cater to all skill levels. They offer a wide range of options and are trusted by professional golfers and amateurs alike. Titleist golf balls are generally considered on the higher end of the price scale.

Callaway

Callaway produces a variety of golf balls to suit different playing styles and skill levels. They are known for their innovative designs and technologies that enhance performance. Callaway golf balls cover a range of price points, from affordable options to higher-end models.

TaylorMade

TaylorMade is another leading brand in the golf ball industry, offering high-performance balls designed for players of all abilities. Known for their cutting-edge technologies, TaylorMade golf balls are often priced at the higher end of the market.

Srixon

Srixon offers a wide selection of golf balls, including options for beginners, intermediate players, and professionals. They provide good performance and durability at a more affordable price point compared to some other premium brands.

Bridgestone

Bridgestone is recognized for its extensive research and development in golf ball technology. They offer a range of performance-driven options that cater to different skill levels. Bridgestone golf balls are typically positioned in the mid to high price range.

Wilson

Wilson is a long-standing brand that offers a range of golf balls suitable for various skill levels and preferences. They offer golf balls at different price points, making them accessible to a wide range of golfers.

Volvik

Volvik is known for its vibrant and colored golf balls, which are highly visible on the course. They offer a range of options for players looking for both performance and visual appeal. Volvik golf balls are generally priced in the mid to high range.

Vice

Vice is a relatively new brand in the golf ball market, offering high-quality balls at more affordable prices. They focus on delivering exceptional performance without the premium price tag.

Mizuno

Mizuno, a renowned name in the golf equipment industry, produces golf balls that combine performance and quality. With a focus on precision, Mizuno golf balls cater to golfers who prioritize feel and control.

Nike

Although Nike is no longer in the golf equipment manufacturing business, their golf balls are still available in the market. Nike golf balls offer a range of options for different players, but their availability may vary.

Performance Categories of Golf Balls

Golf balls are designed to cater to different playing styles and skill levels. The performance categories of golf balls determine their cost and suitability for specific golfers. Here are some common performance categories:

Tour-Level Golf Balls

Tour-level golf balls are designed for professionals and low-handicap golfers who prioritize maximum distance, spin control, and feel. These high-performance balls often come with a premium price due to their advanced construction and materials.

Distance Golf Balls

Distance golf balls are engineered to provide longer distances off the tee. They typically feature low spin and a firmer feel, making them suitable for golfers who prioritize distance over spin control or feel. These balls can vary in price, with options available for different budgets.

Spin Golf Balls

Spin golf balls are designed to generate increased spin, allowing golfers to have better control over the ball’s trajectory and stopping power on the green. These balls often feature softer covers and more advanced construction, making them pricier than distance-focused options.

Soft Feel Golf Balls

Soft feel golf balls prioritize a responsive and cushioned feel when struck. They often offer a good balance of distance and control, making them popular among a wide range of golfers. These balls can range in price depending on the brand and materials used.

Value/Recreational Golf Balls

Value or recreational golf balls are typically more affordable options that cater to beginners, high-handicap golfers, or those looking for budget-friendly options. While they may not offer the same performance attributes as higher-end balls, they still provide a suitable option for casual play.

The Cost of a Golf Ball: A Comprehensive Guide

Technological Advancements in Golf Ball Manufacturing

Technological advancements play a crucial role in improving the performance and characteristics of modern golf balls. Here are some key advancements to consider:

Multi-Layer Construction

Many golf balls now feature multi-layer construction, consisting of a core, mantle layer(s), and cover. This enables manufacturers to fine-tune the ball’s performance by optimizing each layer’s characteristics. Multi-layer construction can increase a ball’s cost, as it requires more materials and intricate manufacturing processes.

Dimple Pattern

Dimple pattern affects a golf ball’s aerodynamics, allowing it to achieve optimal lift and reduce drag. Advanced dimple designs can enhance overall distance, stability, and trajectory control. Golf balls with more advanced dimple patterns may have a higher price due to the research and development involved.
Core Technology

The core of a golf ball plays a significant role in its performance. Different core materials and designs can impact factors such as distance, spin rate, and feel. Advanced core technologies, such as dual cores or low-compression cores, can contribute to a ball’s higher cost.

Cover Technology

The cover material and design influence a golf ball’s feel, spin, and durability. Advanced cover technologies, such as urethane or proprietary blends, can provide enhanced performance characteristics. Golf balls with advanced cover technologies often come at a premium price.

Alignment Aids

Some golf balls feature alignment aids, such as visual or marking features to help golfers line up their shots accurately. These aids can vary in complexity, from simple alignment lines to more elaborate alignment patterns. Golf balls with alignment aids may have a slightly higher cost due to the additional manufacturing processes.

Innovative Golf Ball Designs

Golf ball designs have evolved over the years to enhance performance and cater to different playing preferences. Here are some innovative design features to consider:

Dual Core Design

Golf balls with dual core designs have an inner and outer core layer. This design helps optimize spin rate, distance, and feel by providing a different compression experience during impact. Dual core golf balls often offer premium performance and come at a higher cost.

Tri-Core Design

Tri-core golf balls take the concept of dual core designs a step further by incorporating an additional core layer. This design allows for better energy transfer and can optimize performance based on swing speeds. Tri-core golf balls are typically priced at the higher end due to their advanced construction.

Low Compression Design

Low compression golf balls are engineered for golfers with slower swing speeds. They compress more upon impact, resulting in increased distance and a softer feel. These balls often cater to a specific target audience and can be priced higher due to their specialized construction.

High Compression Design

High compression golf balls are designed for golfers with faster swing speeds. They have a firmer feel and provide more distance due to their ability to resist compression. These balls may have a higher price point as they are geared toward a specific category of players.

Mantle Layer Design

The mantle layer is located between the core and cover of a golf ball. Different mantle designs and materials can influence the ball’s performance characteristics, such as spin control and distance. Golf balls with advanced mantle layer designs may be more expensive due to the added features and technical construction.

Buying Golf Balls in Bulk vs. Individual Packs

Deciding whether to buy golf balls in bulk or individual packs can impact the overall cost and convenience of your purchase. Here are some factors to consider:

Economy and Cost Savings

Buying golf balls in bulk often provides cost savings compared to purchasing individual packs. Manufacturers and retailers often offer discounts or bulk pricing that can make purchasing larger quantities more economical in the long run.

Convenience

Buying individual packs of golf balls may offer convenience, especially if you prefer trying out different brands or models before committing to a larger quantity. However, keep in mind that buying in bulk can save you from frequent trips to the store or online orders, ensuring you always have enough golf balls on hand.

Customization Limitations

If you prefer personalized or customized golf balls, buying in bulk may limit your options. Customized golf balls often require specific minimum orders, and bulk purchases may not fit your customization needs. Individual packs, on the other hand, usually offer more customization options and flexibility.

Sustainability

Buying golf balls in bulk can contribute to packaging waste, which may be a concern for environmentally conscious golfers. Individual packs often have less packaging and can be a more sustainable choice. However, some brands and retailers are adopting eco-friendly packaging, providing more sustainable options for bulk purchases.

Different Golf Balls for Different Golfers

Golf balls are designed with various golfers in mind, taking into account their skill levels and playing preferences. Here are some considerations for different types of golfers:

Beginners and High-Handicap Golfers

Beginners and high-handicap golfers may benefit from using value or recreational golf balls. These balls are often more forgiving and offer a balance of distance and durability at an affordable price point. Starting with a softer ball may also help beginners develop their swing and feel more comfortable on the course.

Intermediate-Level Golfers

Intermediate-level golfers who have developed a consistent swing and are looking to improve their performance may opt for mid-range golf balls. These balls typically offer a good blend of distance, control, and feel without the premium price tag of tour-level options. They provide a stepping stone to higher-performing golf balls as skills continue to improve.

Low-Handicap and Professional Golfers

Low-handicap and professional golfers demand maximum performance and control from their golf balls. They are more likely to choose tour-level balls that offer exceptional distance, spin control, and feel. These high-performance balls often come at a higher cost due to their advanced construction and materials.

Senior Golfers

Senior golfers may have specific needs and preferences due to changes in swing speed and flexibility. Low compression golf balls designed for slower swing speeds can help maximize distance and provide a softer feel. These balls often cater to senior golfers and can come at a slightly higher cost compared to other recreational options.

Junior Golfers

Junior golfers require golf balls specifically designed for their swing speeds and skill levels. Junior golf balls are typically available at affordable prices and cater to the needs of young players. These balls prioritize distance and control, allowing junior golfers to develop their skills without breaking the bank.

Customizing Your Golf Balls

Customizing your golf balls can add a personal touch and make them stand out on the course. Here are some common customization options to consider:

Personalized Text or Logo

Many golf ball manufacturers offer the option to imprint personalized text or logos on the balls. This customization can be a great way to add a personal touch or showcase a company or organization logo. Depending on the brand and customization, additional costs may apply.

Alignment Aid Colors

Alignment aids on golf balls can be customized to suit personal preferences. Different colors or patterns can help golfers line up their shots more effectively. While some brands offer pre-designed alignment aids, others may allow customization based on color choices. Customization options may vary in availability and cost.

Unique Numbering

Golf balls can be customized with unique numbers to aid in identification and personalization. This customization option allows golfers to select their preferred numbers or special combinations. Unique numbering customization may come at an additional cost, depending on brand and availability.

Photo Printing

Some golf ball manufacturers provide the option to print photos directly onto the golf balls. This customization option can be a fun way to showcase personal photos or graphics. Photo printing customization tends to be more expensive due to the specialized printing processes involved.

Special Packaging

Custom packaging can add an additional layer of personalization and make a statement on the golf course. This could include customized boxes, sleeves, or other unique packaging options. Special packaging customization often incurs additional costs, depending on the brand and design complexity.

Additional Features Impacting Golf Ball Cost

Additional features and characteristics can further impact the cost of a golf ball. Here are some noteworthy considerations:

UV Protection

Golf balls with UV protection coatings can help maintain their appearance and durability over time. These coatings minimize discoloration and damage caused by exposure to sunlight. Golf balls with UV protection may have a slightly higher cost due to the additional coatings involved.

Enhanced Durability

Some golf balls are designed to offer enhanced durability, increasing their lifespan and reducing the likelihood of scuffing or cutting. These balls may feature reinforced covers or proprietary materials that contribute to their longevity. Enhanced durability often comes at a higher cost due to the specialized construction.

Improved Visibility

Golf balls with improved visibility features, such as high-visibility colors or specialized markings, can be easier to spot on the course. These balls are particularly useful in low-light conditions or when playing on courses with dense foliage. Improved visibility customization or features may affect the overall cost of the golf ball.

Weather Conditions

Certain golf balls are designed specifically for particular weather conditions, such as wet or windy conditions. These balls often feature specialized construction or materials that optimize performance in challenging weather. Golf balls tailored for specific weather conditions may come at a higher cost due to their unique design and research involved.

Special Editions

Special edition golf balls, often released to commemorate events or collaborations, can be collector’s items and have a higher price. These limited edition balls may feature unique designs, finishes, or branding. The exclusivity and limited availability of special edition golf balls contribute to their higher cost.

In conclusion, the cost of a golf ball is influenced by various factors. Understanding the impact of each factor, whether it be the material, brand, performance, technology, design, quantity, target audience, customization, product features, or exclusivity, can help you make an informed decision when purchasing golf balls. Consider your individual preferences, budget, and skill level to determine the most suitable golf balls for your game.

The Ultimate Guide: Charging an Electric Golf Cart

The Ultimate Guide: Charging an Electric Golf Cart – Learn the essential steps to charge your golf cart properly for optimal performance and longevity. Become an expert in maintaining and extending battery life. Stay safe while charging with our best practices. Read now!

Charging your electric golf cart may seem like a straightforward task, but there are a few key factors to consider to ensure optimal performance and longevity. In this comprehensive guide, we will walk you through the essential steps of charging your electric golf cart, from understanding the charging system to best practices for battery maintenance. Whether you are a seasoned golf cart owner or new to the world of electric vehicles, this guide is packed with valuable tips and insights to help you keep your golf cart running smoothly and efficiently. So grab your charger and get ready to become an expert in charging your electric golf cart!

The Ultimate Guide: Charging an Electric Golf Cart

1. Understanding Electric Golf Cart Batteries

Electric golf carts are powered by rechargeable batteries specifically designed for their use. Understanding the different types of batteries used, their voltage and capacity, as well as proper maintenance and safety precautions, is essential for maximizing the performance and lifespan of your electric golf cart.

1.1 Types of Batteries Used in Electric Golf Carts

Electric golf carts typically use deep cycle lead-acid batteries, specifically designed to provide a steady and consistent flow of power over an extended period. These batteries come in two main types: flooded lead-acid batteries and sealed lead-acid batteries. Flooded lead-acid batteries require regular maintenance, such as checking and adding distilled water, while sealed lead-acid batteries are maintenance-free.

1.2 Voltage and Capacity of the Batteries

The voltage and capacity of the batteries used in electric golf carts vary depending on the specific model and manufacturer. Most electric golf carts operate on a 36-volt or 48-volt system, with battery capacities ranging from 200 to 400 amp-hours. It is important to consult the owner’s manual or contact the manufacturer to determine the appropriate voltage and capacity for your golf cart.

1.3 Battery Maintenance and Safety Precautions

Proper maintenance of electric golf cart batteries is crucial to ensure optimal performance and extend their lifespan. Regularly check the battery water levels and top them up with distilled water if necessary (for flooded lead-acid batteries). Keep the batteries clean and free from corrosion by using a mixture of baking soda and water. It is important to handle batteries with care, wearing protective gloves and goggles, and follow safety precautions provided by the manufacturer to minimize the risk of accidents or injury.

2. Preparing for the Charging Process

Before charging your electric golf cart, you need to ensure that you have the right charger, locate the charging port on your golf cart, inspect the charging cables, create a safe charging environment, and check the battery charge level.

2.1 Choosing the Right Charger

Selecting the appropriate charger for your electric golf cart is essential for its safe and efficient charging. Consult the owner’s manual or contact the manufacturer to determine the compatible charger specifications. Make sure the charger has the correct voltage and amperage ratings to match your golf cart’s battery system.

2.2 Locating the Charging Port

The charging port of your electric golf cart is typically located in the front or rear of the cart. Consult the owner’s manual or inspect the exterior of your golf cart to find the charging port. Ensure that the charging port is easily accessible and free from any obstructions.

2.3 Inspecting the Charging Cables

Before connecting the charger, inspect the charging cables for any signs of wear or damage. Ensure that the cables are free from cuts, frays, or exposed wires. Damaged cables can lead to safety hazards or ineffective charging. If you notice any issues with the charging cables, replace them before proceeding with the charging process.

2.4 Ensuring a Safe Charging Environment

It is important to create a safe charging environment for your electric golf cart. Find a well-ventilated area that is free from flammable materials and away from open flames or heat sources. Avoid charging the cart in direct sunlight or extreme temperatures, as it can affect the charging process and potentially damage the batteries.

2.5 Checking the Battery Charge Level

Before initiating the charging process, check the battery charge level to determine how much charge is remaining. This will help you determine the estimated charging time required to fully recharge the batteries. Most electric golf carts have a battery charge indicator, such as a gauge or digital display, to provide information about the battery charge level.

3. Step-by-Step Guide to Charging an Electric Golf Cart

Now that you have prepared for the charging process, follow this step-by-step guide to effectively and safely charge your electric golf cart.

3.1 Connecting the Charger to the Cart

Begin by connecting the charger to your electric golf cart. Take the charging cables and plug them into the appropriate charging port on your golf cart. Ensure that the cables are firmly connected and that there are no loose connections or exposed wires.

3.2 Plugging in the Charger

After connecting the charger to your golf cart, plug the charger’s power cord into a nearby electrical outlet. Make sure the outlet is in good condition and properly grounded. Avoid using extension cords if possible, as they can reduce the efficiency of the charging process.

3.3 Monitoring the Charging Process

Once the charger is plugged in, it will begin supplying power to the batteries. Monitor the charging process by observing the charger’s indicator lights or display. These indicators usually show the charging status, such as power on, charging in progress, or charging complete. Avoid leaving the charging process unattended and periodically check the charger and batteries for any unusual signs or issues.

3.4 Charging Time and Factors Affecting it

The charging time required to fully recharge the batteries of an electric golf cart can vary depending on several factors. The capacity of the batteries, the level of discharge, the charger’s amperage rating, and the overall condition of the batteries can all influence the charging time. It is recommended to refer to the manufacturer’s guidelines for estimated charging times or consult the owner’s manual for your specific golf cart model.

3.5 Disconnecting the Charger

Once the batteries are fully charged, it is important to disconnect the charger to prevent overcharging. Unplug the charger’s power cord from the electrical outlet first, and then disconnect the charging cables from the golf cart’s charging port. Properly coil the charging cables and store them in a safe place until the next charging cycle.

The Ultimate Guide: Charging an Electric Golf Cart

4. Maintaining and Extending Battery Life

To ensure the long-term performance and lifespan of your electric golf cart batteries, it is crucial to practice proper maintenance and take necessary precautions.

4.1 Storing Batteries Properly

If you plan to store your electric golf cart or batteries for an extended period, it is important to follow proper storage procedures. Clean the batteries thoroughly, ensure they are fully charged, and disconnect them from the golf cart. Store the batteries in a cool, dry place and periodically check their charge levels to avoid deep discharge or excessive self-discharge.

4.2 Charging Frequency and Depth of Discharge

Regularly charging your electric golf cart batteries is essential to maintain their capacity and prolong their lifespan. Avoid deep discharge, where the batteries are significantly discharged before charging. Instead, aim for shallow discharge cycles where the batteries are recharged after each use. This will help optimize their performance and prevent capacity degradation.

4.3 Avoiding Overcharging and Undercharging

Overcharging or undercharging your electric golf cart batteries can lead to reduced performance and a shorter lifespan. Follow the manufacturer’s recommendations regarding the appropriate charging time and avoid leaving the batteries connected to the charger for an extended period. Similarly, ensure that the batteries are sufficiently charged before each use to prevent undercharging.
4.4 Cleaning and Inspecting Batteries

Regularly clean and inspect your electric golf cart batteries to keep them in good condition. Clean the battery terminals and connections using a mixture of baking soda and water to remove any corrosion. Inspect the batteries for any signs of damage, leakage, or bulging. If you notice any issues, consult a professional or contact the manufacturer for appropriate guidance.

4.5 Replacing Faulty Batteries

Over time, electric golf cart batteries may deteriorate or fail to hold a charge effectively. If you notice a significant decrease in their performance or if they are unable to provide adequate power for your golf cart, it may be necessary to replace them. Consult the owner’s manual or contact the manufacturer for guidance on replacing faulty batteries.

5. Troubleshooting Common Charging Issues

Sometimes, despite following the proper charging procedures, you may encounter various charging issues with your electric golf cart. Here are some common problems you may face and possible solutions.

5.1 Cart Not Charging

If your electric golf cart is not charging, there could be several potential causes. Ensure that the charger is properly connected to the golf cart and the electrical outlet. Check the charging cables for any damage or loose connections. If the issue persists, consult a professional or contact the manufacturer for further troubleshooting or assistance.

5.2 Slow Charging

Slow charging can occur if the charger’s amperage rating is lower than the recommended specifications for your golf cart batteries. Verify that you are using a charger with the correct voltage and amperage ratings. Additionally, check the charging cables and connections for any loose or damaged parts that may impede the charging process.

5.3 Charger Not Working

If your charger is not working at all, ensure that it is receiving power by checking the electrical outlet or trying a different outlet. Inspect the charger’s power cord and plug for any damage or loose connections. If the charger still does not work, it may be faulty and require repair or replacement. Contact the manufacturer or a professional to diagnose and resolve the issue.

5.4 Battery Overheating

Battery overheating during the charging process can be dangerous and lead to performance issues or damage. If you notice excessive heat from your electric golf cart batteries, immediately disconnect the charger and allow the batteries to cool down. Inspect the batteries for any signs of damage or leakage, and if necessary, seek professional assistance to diagnose and address the issue.

5.5 Charging Interruptions

If your charging process is frequently interrupted or automatically stops, it may indicate underlying issues with the charger, batteries, or electrical connections. Check for loose or damaged charging cables or connections. If the interruptions persist, consult a professional to assess and resolve the problem.

6. Safety Precautions and Best Practices

When dealing with electric golf cart batteries and the charging process, it is important to prioritize safety and follow best practices to prevent accidents or injuries.

6.1 Disconnecting Power Before Maintenance

Before performing any maintenance or inspection tasks on your golf cart batteries, ensure that the power is disconnected. This includes both disconnecting the charger from the electrical outlet and disconnecting the charging cables from the golf cart’s charging port. By disconnecting the power, you reduce the risk of electric shocks or short circuits.

6.2 Using Personal Protective Equipment

When handling electric golf cart batteries or engaging in the charging process, wear appropriate personal protective equipment (PPE). This includes gloves, goggles, and protective clothing. PPE helps protect against chemical exposure, acid spills, and potential injuries. Always prioritize your safety by using PPE.

6.3 Charging in a Well-Ventilated Area

Always charge your electric golf cart batteries in a well-ventilated area. Charging batteries can release hydrogen gas, which is highly flammable. Adequate ventilation helps disperse any released gas and minimizes the risk of ignition or explosions. Avoid charging in enclosed spaces or areas with poor ventilation.

6.4 Avoiding Water Exposure

Electric golf cart batteries are sensitive to water exposure, which can lead to damage or reduced performance. Avoid exposing the batteries to excessive moisture or immersion in water. Keep the charging area dry and ensure that the batteries are securely covered to prevent water entry during usage or storage.

6.5 Adhering to Manufacturer’s Instructions

The manufacturer’s instructions and guidelines are essential for proper battery maintenance, charging, and overall safety. Always refer to the owner’s manual or consult the manufacturer’s recommendations before performing any tasks related to your electric golf cart batteries. These instructions provide valuable information specific to your golf cart model and help ensure you follow the correct procedures.

7. Environmental Considerations

Electric golf carts offer several environmental benefits compared to their gasoline-powered counterparts. By incorporating eco-friendly practices and considering environmental factors, you can further enhance the sustainability of your electric golf cart usage.

7.1 Recycling and Disposing of Batteries

When it is time to replace your electric golf cart batteries, it is important to dispose of them properly. Lead-acid batteries should be recycled to mitigate environmental impact and recover valuable materials. Contact local recycling centers or battery retailers to find out how to dispose of your old batteries safely and responsibly.

7.2 Opting for Renewable Energy Sources

Consider utilizing renewable energy sources to power your electric golf cart. Solar panels, for example, can provide clean and sustainable energy for charging the batteries. By reducing reliance on fossil fuel-generated electricity, you can further minimize your environmental footprint and contribute to a greener future.

7.3 Minimizing Energy Consumption

To reduce energy consumption, make sure to turn off the golf cart and disconnect the batteries when not in use. Utilize energy-efficient features, such as LED lights or low-power mode, when available. By minimizing energy usage, you can maximize the battery life and contribute to energy conservation efforts.

7.4 Promoting Eco-Friendly Practices

Encourage and practice eco-friendly practices while using your electric golf cart. Carpooling with fellow golfers or using electric golf carts for short distances instead of larger vehicles can help reduce carbon emissions. By promoting sustainability within your golfing community, you can contribute to a cleaner and healthier environment.

8. Benefits of Electric Golf Carts

Electric golf carts offer numerous advantages over traditional gasoline-powered ones. Understanding these benefits can help you make an informed decision when purchasing or using an electric golf cart.

8.1 Cost Savings

Electric golf carts are more cost-effective to operate and maintain compared to their gasoline counterparts. The cost of electricity is generally lower than the cost of gasoline, resulting in reduced operational expenses. Electric golf carts also require less frequent maintenance, as they have fewer moving parts and do not require oil changes or regular engine tune-ups.

8.2 Eco-Friendly Operation

By using an electric golf cart, you contribute to reducing air pollution and greenhouse gas emissions. Electric golf carts produce zero tailpipe emissions, significantly reducing carbon footprints and environmental impact. This eco-friendly operation aligns with sustainable practices and helps preserve the natural beauty of golf courses.

8.3 Quieter and Smoother Ride

Compared to gasoline-powered golf carts, electric models offer a quieter and smoother ride. The absence of engine noise and vibrations creates a more enjoyable and serene golfing experience. Electric golf carts provide a quieter mode of transportation, reducing noise pollution and maintaining peaceful surroundings for other golfers.

8.4 Low Maintenance Requirements

Electric golf carts have relatively low maintenance requirements due to their simplified design and fewer mechanical components. They do not require frequent oil changes, air filter replacements, or spark plug inspections. Routine maintenance tasks primarily involve checking the batteries, cables, and general cleaning. This translates to lower maintenance costs and less time spent on upkeep.

8.5 Customization Options

Electric golf carts offer a wide range of customization options to suit individual preferences and needs. From choosing the color and design to adding accessories such as stereo systems, coolers, or golf bag holders, you can customize your electric golf cart to reflect your personality and enhance your golfing experience.

9. Conclusion

Charging an electric golf cart requires proper understanding, preparation, and adherence to safety guidelines. By familiarizing yourself with the types of batteries used, understanding the charging process, and practicing regular maintenance, you can maximize the performance and lifespan of your electric golf cart batteries.

Remember to always prioritize safety, wear the appropriate personal protective equipment, and follow the manufacturer’s instructions. Consider eco-friendly practices, such as recycling batteries and utilizing renewable energy sources, to further enhance the sustainability of your electric golf cart usage.

With their cost savings, eco-friendly operation, and various benefits, electric golf carts continue to grow in popularity among golfers. By embracing these efficient and environmentally-friendly alternatives, you can enjoy a quieter, smoother ride while minimizing your impact on the environment.

Becoming a Golf Course Architect: The Ultimate Guide

Learn how to become a golf course architect in this comprehensive guide. Discover the necessary qualifications, skills, and steps to establish yourself in the industry. Uncover the secrets to designing stunning golf courses.

If you’ve always been fascinated by the art of designing pristine fairways and breathtaking landscapes, then “Becoming a Golf Course Architect: The Ultimate Guide” is the article for you. In this comprehensive and friendly guide, you’ll uncover the secrets to pursuing a career as a golf course architect. From the necessary qualifications and skills, to the steps you can take to establish yourself in the industry, this article will provide you with all the insights you need to embark on an exciting and fulfilling journey as a golf course architect. So grab your drafting tools and get ready to create the golf courses of your dreams.

Becoming a Golf Course Architect: The Ultimate Guide

1. Understanding the Role of a Golf Course Architect

1.1 What is a Golf Course Architect?

As a golf course architect, you have the thrilling opportunity to design and create golf courses. Your role is to combine your knowledge of design, engineering, and the sport to create challenging and visually stunning courses for players to enjoy. Golf course architects make decisions about the layout of the course, the placement of hazards and bunkers, the strategic design of fairways and greens, and the overall aesthetic appeal of the course.

1.2 Responsibilities of a Golf Course Architect

Your responsibilities as a golf course architect are multifaceted and require a keen eye for detail, creativity, and effective communication skills. You will be responsible for conducting site visits, analyzing the land and its features, working closely with clients to understand their vision and expectations, creating detailed design plans, collaborating with other professionals such as landscape architects and engineers, overseeing the construction process, and ensuring the final result meets your client’s needs and desired level of playability.

1.3 Skills Required for Golf Course Architects

To excel as a golf course architect, you must possess a unique combination of skills. Strong design and artistic abilities are essential, as you will need to create visually appealing and functional layouts. Additionally, a deep understanding of the game of golf and its strategic elements is crucial to designing courses that challenge players of all skill levels. Excellent communication skills are also vital, as you will be working closely with clients, collaborating with other professionals, and overseeing the construction process.

1.4 Importance of Golf Course Architects

Golf course architects play a pivotal role in shaping the sport and its courses. They have the ability to create courses that enhance the player’s experience, challenge their skills, and contribute to the overall growth and popularity of the game. By designing innovative and iconic courses, golf course architects leave a lasting impact on the sport and leave players with unforgettable memories. They also have the opportunity to integrate sustainable design practices, create environmentally friendly courses, and preserve natural resources.

2. Education and Training

2.1 Educational Requirements

Becoming a golf course architect requires a relevant educational background. While there is no strict educational path, most professionals in this field pursue a bachelor’s or master’s degree in landscape architecture or a related field. These programs provide a strong foundation in design principles, environmental sciences, and project management, which are crucial for success as a golf course architect.

2.2 Degree Programs in Golf Course Architecture

Several universities offer specialized degree programs in golf course architecture. These programs focus specifically on the knowledge and skills needed to design and create golf courses. Students in these programs study topics such as golf course design principles, environmental considerations, construction techniques, plant selection, and maintenance practices. These specialized programs provide students with a deep understanding of the intricacies of golf course architecture.

2.3 Golf Course Architecture Certification

While not mandatory, obtaining certification in golf course architecture can enhance your professional credibility and open doors to more opportunities. Organizations such as the American Society of Golf Course Architects (ASGCA) offer certification programs that assess your expertise in golf course design and construction. Certification programs typically require candidates to submit a portfolio of their work, pass a written exam, and demonstrate professional experience in the field.

2.4 Continuing Education and Professional Development

The field of golf course architecture is constantly evolving, and it’s crucial for professionals to stay updated on the latest trends, technologies, and design principles. Participating in continuing education programs, attending conferences and workshops, and staying connected with industry experts can help you expand your knowledge and refine your skills. Additionally, joining professional associations and networking with other industry professionals can provide valuable opportunities for learning and growth.

3. Building a Professional Network

3.1 Connecting with Established Golf Course Architects

Building relationships with established golf course architects can provide valuable guidance and mentorship as you embark on your career. Reach out to accomplished professionals in the field through networking events, conferences, or online platforms. Show genuine interest in their work and seek their advice on how to navigate the industry. By connecting with experienced architects, you gain insight into the profession and may even find opportunities to collaborate on projects down the line.

3.2 Joining Professional Associations

Joining professional associations, such as the American Society of Golf Course Architects (ASGCA) or the European Institute of Golf Course Architects (EIGCA), can be highly beneficial for your career. These associations provide a platform for networking, professional development opportunities, access to industry publications and resources, and exposure to potential clients and employers. Membership in these associations demonstrates your commitment to the profession and enhances your professional credibility.

3.3 Volunteering or Interning at Golf Courses

Volunteering or interning at golf courses can offer invaluable hands-on experience and allow you to build connections within the industry. Reach out to local golf courses or golf course construction companies and inquire about any available opportunities. By volunteering or interning, you can gain insights into the day-to-day operations of a golf course, observe the interaction between architects and course maintenance staff, and gain practical knowledge of course management and construction processes.

3.4 Networking with Other Industry Professionals

Building a strong professional network extends beyond connecting with golf course architects. Reach out to other industry professionals such as golf course owners, developers, landscape architects, and golf course superintendents. Attend industry events, conferences, and trade shows to meet professionals from various sectors of the golf industry. Collaborating and networking with these individuals can lead to exciting opportunities, referrals, and a broader understanding of the industry as a whole.

4. Gaining Practical Experience

4.1 Assisting Established Golf Course Architects

Gaining practical experience under the guidance of established golf course architects is a critical step towards becoming a successful architect yourself. Seek out opportunities to assist experienced professionals in their projects, whether through internships, apprenticeships, or entry-level positions. By working alongside seasoned architects, you will gain firsthand experience in all aspects of the design and construction process, develop your skills, and build a strong foundation for your own career.

4.2 Designing Personal Golf Course Projects

In addition to assisting established architects, it’s important to work on your own golf course design projects. Designing personal projects allows you to showcase your creativity and vision, experiment with different design elements, and build a portfolio of your work. Start small with personal projects, such as redesigning existing courses or creating hypothetical courses based on real-world locations. Developing your own design concepts and seeing them come to life will strengthen your skills and confidence as a golf course architect.

4.3 Working at a Golf Course Construction Company

Working at a golf course construction company provides valuable hands-on experience in the construction and implementation of golf course designs. In this role, you will work closely with construction teams, gaining insights into construction techniques, project management, and the practical considerations of bringing a design to life. This experience will deepen your understanding of the construction process and enhance your ability to create designs that are feasible and sustainable.

4.4 Collaborating with Golf Course Developers

Collaborating with golf course developers can provide unique opportunities to design and create golf courses from inception to completion. Forming partnerships with developers allows you to work closely with them throughout the entire process, from site selection and land acquisition, to design and construction. By collaborating with developers, you can play a vital role in shaping the overall vision and strategic direction of the golf course, integrating your design expertise with the developer’s business objectives.

5. Developing Design Skills

5.1 Studying Golf Course Design Principles

To become a skilled golf course architect, it’s crucial to immerse yourself in the study of golf course design principles. Explore the work of renowned architects and seek to understand their design philosophies. Study the strategic placement of hazards, bunkers, and tee locations, as well as the flow and playability of the course. Familiarize yourself with the key elements that make a course challenging, while still enjoyable for players of various skill levels.

5.2 Analyzing Existing Golf Course Layouts

Analyzing existing golf course layouts can provide valuable insights and inspiration for your own designs. Visit and play different courses to experience firsthand how the layout influences the game. Pay attention to the unique features and design elements of each course, and consider how they enhance or detract from the overall experience. Take note of successful design concepts and consider how you can incorporate similar ideas into your own projects.

5.3 Utilizing Golf Course Design Software

As technology continues to advance, utilizing golf course design software can greatly enhance your design capabilities. These software programs allow you to create detailed 3D models of your designs, analyze the topography of the site, and visualize the course from various angles. Additionally, many software programs offer tools for simulating gameplay and analyzing the strategic elements of the course. Familiarize yourself with these tools to streamline your design process and create more accurate representations of your ideas.

5.4 Improving Creativity and Visualization

Enhancing your creativity and visualization skills is essential for effective golf course design. Engage in activities that stimulate your imagination, such as sketching, model-making, or exploring other forms of art and design. Practice translating your ideas onto paper or into digital design tools, refining your ability to communicate your vision effectively. Embrace opportunities to collaborate and engage in constructive discussions with others to gain different perspectives and expand your creative horizons.

6. Understanding Environmental Considerations

6.1 Balancing Aesthetics and Environmental Impact

Designing golf courses requires a delicate balance between aesthetics and the environmental impact. As a golf course architect, it’s important to create visually appealing courses while minimizing the environmental footprint. Consider the natural features of the site and work to preserve and enhance them. Incorporate native plant species, minimize water usage through efficient irrigation systems, and utilize sustainable construction practices. Strive to create courses that are not only beautiful but also environmentally responsible.

6.2 Incorporating Sustainable Design

Incorporating sustainable design practices is essential for golf course architects in today’s environmentally conscious world. Explore innovative techniques, such as using recycled materials, incorporating renewable energy sources, and designing water management systems that reduce runoff and promote water conservation. By embracing sustainable design principles, you can create golf courses that are more environmentally friendly and demonstrate your commitment to responsible design.

6.3 Preserving Natural Resources

Preserving natural resources is a fundamental consideration for any golf course architect. Conduct thorough site assessments to identify sensitive ecosystems or areas of ecological importance. Design your course with minimal disruption to these areas, and implement measures to protect and enhance them. Work closely with environmental consultants to ensure that your designs comply with local regulations and best practices for environmental preservation.

6.4 Working with Environmental Consultants

Collaborating with environmental consultants is crucial to navigate the complex environmental considerations associated with golf course design. Environmental consultants can assess the site, provide expert guidance on preserving natural resources, and help you navigate any regulatory requirements. By partnering with environmental consultants, you can ensure your designs are environmentally sustainable and meet the necessary environmental standards and regulations.

7. Collaborating with Other Professionals

7.1 Coordinating with Landscape Architects

Collaborating with landscape architects is essential to create cohesive and visually appealing golf courses. Landscape architects can provide valuable input on plant selection, placement of trees and shrubs, and overall aesthetics of the course. By coordinating with landscape architects, you can ensure that the design of the course integrates seamlessly with the natural surroundings, creating a harmonious and inviting environment for golfers.

7.2 Engaging with Engineers and Contractors

Engaging with engineers and contractors is crucial to bring your design concepts to life. Work closely with civil engineers to ensure that your designs meet the necessary structural and safety requirements. Communicate effectively with contractors to ensure that construction aligns with your design intent. By fostering collaborative relationships with these professionals, you can ensure that the construction process runs smoothly and that your design vision is realized.

7.3 Consulting with Golf Course Superintendents

Golf course superintendents play a vital role in maintaining and managing the long-term health and playability of golf courses. Engage with golf course superintendents throughout the design process to gain insights into maintenance considerations and best practices. By collaborating with superintendents, you can ensure that your design is practical and feasible, taking into account the long-term maintenance and management needs of the course.

7.4 Collaborating with Golf Course Owners and Developers

Collaborating with golf course owners and developers is crucial to understand their vision and objectives for the project. By working closely with these stakeholders, you can align your design with their business goals, target market, and budgetary considerations. Foster open and transparent communication throughout the design process to ensure that your design meets the expectations and requirements of the owners and developers.

8. Navigating the Business Side of Golf Course Architecture

8.1 Estimating Project Costs and Budgeting

Navigating the business side of golf course architecture requires a solid understanding of project costs and budgeting. Develop the ability to estimate the costs associated with various design elements, materials, and construction processes. Work closely with contractors and suppliers to obtain accurate pricing information. By effectively estimating project costs and creating realistic budgets, you can demonstrate your professionalism and ensure the financial success of your projects.

8.2 Negotiating Contracts and Agreements

Negotiating contracts and agreements is a critical skill for golf course architects. Ensure that all client agreements and contracts clearly define your scope of work, deliverables, timelines, and compensation terms. Collaborate with legal professionals to draft contracts that protect both your interests and those of your clients. Developing strong negotiation skills will help you secure favorable terms and build trust with your clients.

8.3 Managing Timelines and Deadlines

Effective time management is crucial for successful golf course architects. Develop the ability to create comprehensive project timelines that identify key milestones and deadlines. Regularly communicate and collaborate with all stakeholders to ensure everyone is aware of the project timeline and their respective responsibilities. By managing timelines and deadlines effectively, you can ensure that projects are completed on time and within budget, earning you a reputation for professionalism and reliability.

8.4 Marketing and Promoting your Golf Course Architectural Services

Marketing and promoting your golf course architectural services are essential for establishing a successful career. Develop a strong online presence through a professional website, social media platforms, and online portfolios showcasing your past work. Attend industry events and conferences to network with potential clients and industry professionals. Seek opportunities to speak at conferences or contribute articles to industry publications to establish yourself as an authority in the field. By effectively marketing yourself and your services, you can attract clients and build a solid reputation within the industry.

9. Staying Updated on Industry Trends

9.1 Attending Golf Course Architecture Conferences

Attending golf course architecture conferences is a valuable way to stay updated on the latest trends and innovations in the industry. These conferences provide opportunities to learn from industry experts, attend seminars and workshops, and network with other professionals. Stay informed about upcoming conferences, both locally and internationally, and make attending them a priority in order to stay at the forefront of the industry.

9.2 Subscribing to Industry Publications and Journals

Subscribing to industry publications and journals is an excellent way to stay informed about industry trends, best practices, and innovative design approaches. These publications often feature articles written by leading golf course architects and industry experts, providing valuable insights and inspiration. Make it a habit to read and analyze these publications regularly to stay up-to-date with the latest developments in golf course architecture.

9.3 Participating in Continuing Education Programs

Participating in continuing education programs is essential for continuous growth and development as a golf course architect. These programs offer opportunities to learn new design techniques, understand emerging technologies, and explore sustainable design practices. Many professional associations and universities offer continuing education programs specifically tailored to golf course architects. Actively seek out and participate in these programs to expand your knowledge and skills.

9.4 Following Leading Golf Course Architects

Following the work of leading golf course architects is an effective way to stay inspired and informed. Study the latest projects by renowned architects and analyze their design philosophies, techniques, and construction methods. Many architects share their work and insights on social media platforms or through their websites. Actively engage with their content, ask questions, and participate in discussions to deepen your understanding of the industry and stay connected with industry influencers.

10. Establishing a Successful Career

10.1 Becoming a Licensed Golf Course Architect

Becoming a licensed golf course architect can enhance your professional credibility and open doors to more opportunities. Research and comply with the licensing requirements specific to your region or country. Typically, becoming licensed involves completing a combination of education, work experience, and passing a licensing exam. Taking the necessary steps to become licensed demonstrates your commitment to professionalism and competence in the field.

10.2 Securing Projects and Building a Portfolio

Securing projects and building a strong portfolio are essential steps to establishing a successful career as a golf course architect. Actively seek out opportunities to design and create golf courses, whether through networking, responding to Requests for Proposals (RFPs), or collaborating with developers. As you complete projects, diligently document your work through professional photographs, detailed design plans, and client testimonials. A comprehensive and visually appealing portfolio will showcase your skills, expertise, and unique design approach, helping you attract new clients and secure future projects.

10.3 Cultivating Professional Relationships

Cultivating professional relationships is key to establishing a successful career as a golf course architect. Nurture the connections you make throughout your journey, both with clients and industry professionals. Respond promptly to inquiries, deliver projects on time and within budget, and maintain open and transparent communication. Strive to exceed client expectations, earning their trust and loyalty. Additionally, stay connected with fellow golf course architects, landscape architects, contractors, and golf course owners, as they can provide valuable referrals and collaborations.

10.4 Evolving and Adapting in the Industry

The golf course architecture industry is constantly evolving, and successful architects must be willing to adapt and embrace change. Stay open to new design approaches, construction techniques, and emerging technologies. Continuously seek opportunities for professional development and continuing education to broaden your skill set and stay ahead of industry trends. By embracing change and continuously evolving, you can establish a long and successful career as a golf course architect.

A Guide to Choosing the Perfect Golf Balls

Looking to improve your golf game? This comprehensive guide will help you choose the perfect golf balls. From types to compression, find all the info you need in one place!

Looking to improve your golf game? Look no further than this comprehensive guide on choosing the perfect golf balls. Whether you’re a beginner or a seasoned pro, selecting the right golf balls can make all the difference in your performance on the green. From understanding the different types of balls to considering factors like compression and construction, this article will provide you with all the necessary information to make an informed decision. So, grab your clubs and get ready to take your golf game to the next level!

A Guide to Choosing the Perfect Golf Balls

Overview of Golf Balls

Golf balls are an essential part of the game, and selecting the right ones can significantly impact your performance on the course. Understanding the construction, types, and their effects on your game is crucial in making an informed decision.

Construction and components

Golf balls are typically made up of several components, including the core, cover, and dimples. The core is the central part of the ball and determines its compression, while the cover provides protection and contributes to spin and feel. The dimples, strategically designed on the surface of the ball, help reduce drag and increase lift, allowing for greater distance and accuracy.

Types of golf balls

There are various types of golf balls available, designed to cater to different players’ needs and playing styles. These include distance balls, which prioritize maximizing distance off the tee, and control balls, which offer enhanced spin and control around the greens. Additionally, there are premium balls for advanced players and softer balls for those seeking a softer feel.

How golf balls affect your game

The choice of golf balls can have a significant impact on your game. Higher compression balls tend to be more suitable for golfers with faster swing speeds, as they allow for optimal energy transfer and greater distance. On the other hand, lower compression balls can benefit players with slower swing speeds, providing a better feel and increased control. The cover material also affects spin and control, making it essential to consider your playing conditions and preferences.

Determining Your Skill Level

Determining your skill level is a crucial step in choosing the right golf balls for your game. Consider the following factors to assess your abilities accurately.

Understanding your swing speed

Your swing speed plays a vital role in determining the type of golf balls that will work best for you. Those with higher swing speeds often benefit from balls with higher compression, as they can utilize the added power to achieve greater distance. Conversely, players with slower swing speeds may find lower compression balls more forgiving and easier to control.

Considering your handicaps or ability

Taking into account your handicaps or skill level can also guide you in selecting the right golf balls. Higher handicap players may benefit from using distance-focused balls that can help maximize their distance off the tee. Lower handicap players, on the other hand, might prefer balls that offer more control and spin, allowing them to finely tune their shots around the greens.

Determining your ball flight tendencies

Understanding your typical ball flight tendencies can provide valuable insights into the type of golf balls that work best for you. If you tend to hit the ball with a fade or slice, choosing a ball that promotes a straighter flight or has a softer cover can help minimize these sidespin tendencies. For players who struggle with hooking the ball, a ball with low spin might help reduce excessive side spin and keep shots more in control.

Understanding Golf Ball Compression

To make an informed decision when choosing golf balls, it is essential to understand what golf ball compression is and how it can influence your game.

What is golf ball compression?

Golf ball compression refers to the density and firmness of the ball’s core. Compression values typically range from 0 to 200, with higher values denoting firmer cores. Higher compression balls require greater force to compress and are generally better suited for players with faster swing speeds, while lower compression balls are more forgiving and ideal for players with slower swing speeds.

How compression affects distance and feel

The compression of a golf ball can significantly impact both distance and feel. Higher compression balls tend to offer more distance, as they can efficiently transfer energy from the clubhead to the ball. However, they may feel harder and less responsive upon impact. Conversely, lower compression balls often provide a softer feel and improved control but may sacrifice some distance.

Matching compression to your swing speed

Finding the right compression level that matches your swing speed is crucial for optimal performance. If you have a faster swing speed, typically above 100 miles per hour, higher compression balls in the range of 90-100 might be a suitable choice. Alternatively, if your swing speed is slower, below 90 miles per hour, you may find better results with a lower compression ball in the range of 70-80.

A Guide to Choosing the Perfect Golf Balls

Considerations for Golf Ball Cover Material

The cover material of a golf ball is another essential factor to consider when choosing the right ball for your game. It affects the ball’s performance, including spin, control, and durability.

The importance of cover material

The cover material directly interacts with the clubface and greatly impacts the ball’s spin rates and overall control. It is crucial to select a cover material that suits your playing style, course conditions, and personal preferences.

Types of cover material (surlyn, urethane, etc.)

Two primary types of cover materials are commonly used in golf balls: surlyn and urethane. Surlyn covers are typically more durable and less expensive, making them a popular choice for amateur golfers. Urethane covers, on the other hand, offer enhanced spin and control, which appeals to more advanced players. It is important to note that urethane covers are generally pricier and can be more susceptible to scuffing.

Understanding the impact of cover material on spin and control

The cover material significantly affects the spin rates and control of a golf ball. Urethane covers generally generate more spin, allowing the ball to stop quicker on the greens and offer greater control around the course. Surlyn covers, while offering less spin, provide increased durability and are less likely to scuff during play. Consider your playing style, course conditions, and personal preference when choosing the ideal cover material.

Choosing the Right Golf Ball for Different Weather Conditions

Golfers often face varying weather conditions that can influence the performance of their golf balls. Considering the impact of weather can help in selecting the most suitable balls for different conditions.

How weather affects golf ball performance

Weather conditions, such as temperature, humidity, and wind, can significantly impact the performance of golf balls. As the temperature changes, the air density also varies, affecting the ball’s lift and distance. Similarly, higher humidity can reduce the ball’s carry distance, while wind can affect its trajectory and accuracy.

Considerations for hot and humid conditions

In hot and humid conditions, it is advisable to select golf balls with a firmer cover material, such as those with surlyn covers. The increased heat and humidity can make the ball compress more, so a firm cover helps maintain optimal playability and durability. Additionally, considering balls with lower compression can counteract the potential loss of distance caused by the conditions.

Choosing golf balls for rainy or wet conditions

When playing in rainy or wet conditions, it is essential to prioritize a ball’s ability to repel water and minimize moisture absorption. Opting for golf balls with urethane covers can enhance performance in these conditions, as urethane is more water-resistant than surlyn. These balls offer improved control and spin, allowing you to maintain consistency and precision even in adverse weather.

Finding the Correct Golf Ball for Your Swing Speed

Matching your swing speed with the right golf ball is crucial for maximizing distance and control. Here are some steps to find the most suitable ball for your swing speed.

Determining your swing speed

To determine your swing speed accurately, it is recommended to visit a professional club fitter or a launch monitor-equipped facility. These tools can measure your swing speed and provide valuable data that will help guide your selection.

Selecting the appropriate compression

Once you have determined your swing speed, you can narrow down your options by focusing on the compression rating of golf balls. As mentioned earlier, higher compression balls are better suited for faster swing speeds, while lower compression balls are more forgiving for slower swing speeds.

Matching ball construction to swing speed

Aside from compression, it is also essential to consider the overall construction of the golf ball when matching it to your swing speed. Some balls are specifically designed for higher swing speeds, incorporating features to maximize distance and control. Conversely, balls designed for slower swing speeds often prioritize a softer feel and improved accuracy. Considering these factors will ensure that your golf ball complements your unique swing characteristics.

Understanding Spin and Control

Spin plays a crucial role in the game of golf, influencing both distance and control. Understanding your desired amount of spin and choosing golf balls accordingly is vital for optimizing your performance.

The role of spin in golf

Spin is a critical factor that affects a golf ball’s behavior in-flight and upon landing. Backspin helps the ball lift and allows for better control and stopping power on the greens. Conversely, sidespin can cause undesirable ball flights, leading to inconsistency and loss of accuracy.

Finding the right amount of spin for your game

Determining the ideal amount of spin for your game involves finding the right balance between distance and control. A higher spinning ball can provide more stopping power and control but may sacrifice a bit of distance. On the other hand, a lower spinning ball may offer greater distance but may be more challenging to control around the greens. Assessing your playing style, skill level, and desired shot shapes can help you decide on the appropriate spin characteristics.

Choosing low or high spin golf balls

The choice between low and high spin golf balls depends on your swing characteristics and preferences. Golfers who tend to generate excessive spin might benefit from using low spin balls, as they can help minimize sidespin and promote a straighter ball flight. Conversely, players who struggle with achieving enough spin to control their shots might find high spin balls more suitable. Experimenting with different types of balls and seeking professional advice can help you find the optimal spin characteristics for your game.

Budget-Friendly Golf Ball Options

While some golf balls on the market boast premium prices, there are also budget-friendly options that provide excellent performance and value for money. Consider the following factors when looking for affordable golf balls.

Are expensive golf balls worth it?

Expensive golf balls often offer advanced features and performance benefits that can be advantageous for skilled players. However, for many golfers, the additional cost may not necessarily translate into a significant improvement in their game. It’s important to evaluate your skill level, playing frequency, and budget before deciding whether to invest in high-end golf balls.

Affordable golf ball brands to consider

Several reputable golf ball brands offer affordable options without compromising performance. These include mid-tier balls from well-known manufacturers that provide a balance of distance, control, and durability. It may be worth trying out different affordable golf balls to see which brand and model suit your game and preferences.

Balancing quality and cost

When searching for budget-friendly golf balls, it’s crucial to strike a balance between quality and cost. While you may want to save money, selecting balls that are too cheap might compromise their overall performance and durability. Look for reliable brands and models that offer the best combination of price and performance, ensuring you get the most out of your investment.

Personal Preferences and Feel

When selecting golf balls, personal preferences and feel are subjective factors that play a significant role in your overall satisfaction and performance.

Considerations for personal preferences

Each golfer has unique preferences when it comes to the feel and characteristics of a golf ball. Some players prefer a softer feel with enhanced feedback, while others prefer a firmer, more responsive sensation upon impact. Personal preferences can also extend to factors such as color, alignment aids, and brand loyalty. It’s important to consider these subjective factors when choosing your golf balls to ensure an enjoyable and confident playing experience.

Importance of ball feel and feedback

The feel of a golf ball upon impact can greatly impact your confidence and overall performance. Some players prefer the soft, buttery feel of certain balls, while others find more satisfaction from a solid, crisp feedback. It is advisable to try out different balls and pay attention to how they feel during your swings to determine which one suits your personal preference and enhances your game.

Using trial and error to find your perfect golf ball

Finding the perfect golf ball that aligns with your personal preferences and optimizes your performance often involves a process of trial and error. Experimenting with different brands, models, and construction types can help you narrow down your options. Don’t be afraid to try out various balls and take note of their characteristics and how they feel during your rounds. Through this process, you can discover the golf ball that feels like an extension of your game.

Getting Recommendations and Seeking Expert Advice

While personal experience and preferences are essential, seeking recommendations and expert advice can provide valuable insights when choosing golf balls.

Consulting with golf professionals

Golf professionals, such as instructors, club fitters, or PGA professionals, possess a wealth of knowledge and experience in the golf industry. Their expertise can help guide you in selecting the most suitable golf balls based on your swing characteristics, abilities, and specific requirements. Consulting with a professional can provide personalized recommendations tailored to your game, ensuring you make an informed decision.

Using online resources for golf ball reviews

Online resources, such as golf ball reviews and forums, can be valuable sources of information when researching different ball options. These platforms offer insights from golfers who have tested and evaluated various brands and models. Reading reviews and engaging in discussions can help you gain a broader perspective on different golf balls, their performance, and the experiences of fellow golf enthusiasts.

Seeking recommendations from fellow golfers

Finally, don’t underestimate the power of seeking recommendations from fellow golfers. Engaging with other golfers, both through playing partners and online golfing communities, can provide firsthand insights and recommendations on specific golf balls. Sharing experiences and listening to others’ opinions can help you make a more informed decision and potentially discover hidden gems that suit your game.

In conclusion, choosing the perfect golf balls requires thorough understanding of their construction, your skill level, swing speed, ball compression, cover material, weather conditions, spin and control preferences, budget considerations, personal preferences and feel, and seeking expert advice when needed. By considering all these factors and conducting thorough research, you can select the golf balls that optimize your performance, enhance your enjoyment of the game, and ultimately help you reach your full potential on the golf course.