The Ultimate Guide on How to Clean Golf Clubs

Learn the secrets to keeping your golf clubs pristine and performing at their best with “The Ultimate Guide on How to Clean Golf Clubs.” Say goodbye to dirty clubs and hello to improved performance and longevity with this comprehensive guide. Elevate your golf game with clean clubs that make a statement.

Imagine playing a round of golf with gleaming, pristine golf clubs that not only look great but also perform at their best. With “The Ultimate Guide on How to Clean Golf Clubs,” you’ll uncover the secrets to keeping your clubs in top-notch condition. From removing dirt and debris to polishing and protecting the clubheads, this comprehensive guide will equip you with the knowledge and techniques needed to ensure your golf clubs shine on the course. Say goodbye to dirty clubs and hello to improved performance and longevity. It’s time to elevate your golf game with clean clubs that make a statement.

The Ultimate Guide on How to Clean Golf Clubs

Why is it important to clean golf clubs regularly?

Maintains the performance of the clubs

Regularly cleaning your golf clubs is essential to maintain their performance on the course. When you play golf, dirt, grass, sand, and other debris can accumulate on the clubheads, affecting the club’s ability to make clean contact with the ball. Clean clubheads ensure consistent ball striking and help maximize the distance and accuracy of your shots. By cleaning your clubs regularly, you remove any built-up dirt and ensure that your swings remain smooth and effective.

Improves the lifespan of the clubs

Cleaning your golf clubs regularly can significantly improve their lifespan. When dirt and debris build upon the clubheads, it can lead to wear and tear over time. This can include scratches, corrosion, or even loose clubhead attachments. Proper cleaning and maintenance help prevent these issues and extend the longevity of your clubs. By taking good care of your clubs, you can enjoy them for many years, saving you the cost of frequent replacements.

Prevents rust and corrosion damage

Golf clubs are often exposed to moisture, especially during early morning rounds or when playing in damp conditions. When moisture is left on the clubheads, it can lead to rust and corrosion, causing irreversible damage. Regular cleaning allows you to remove any moisture and prevent rust from forming. Additionally, cleaning solutions specifically designed for golf clubs can help to dissolve any stubborn dirt or grime that may contribute to corrosion.

Enhances the look and feel of the clubs

Clean golf clubs not only perform better but also look more appealing. Maintaining the aesthetics of your clubs can give you a sense of pride and confidence on the course. After all, you’ve invested in quality clubs, and keeping them clean ensures they always look their best. Moreover, when your clubs are clean, their grips feel much better in your hands, providing greater comfort and control during your swings.

Essential tools and materials for cleaning golf clubs

To effectively clean your golf clubs, you will need the following tools and materials:

Warm water

Warm water is the foundation for cleaning your golf clubs. It helps to loosen dirt and debris from the clubheads and grips, making the cleaning process more effective.

Mild dish soap

A mild dish soap is an excellent cleaning agent for removing dirt, grease, and other grime from your clubheads and grips. Be sure to choose a mild soap that is safe for use on your clubs.

Soft-bristled brush

A soft-bristled brush is essential for cleaning your clubheads. It should have bristles that can handle dirt and debris without scratching the clubfaces or damaging the finish.

Toothbrush

A toothbrush can be handy for cleaning hard-to-reach areas on the clubheads or for giving the grooves extra attention. Choose a toothbrush with soft bristles to avoid any damage.

Bucket

A bucket will be used to hold the warm water for soaking your clubheads. Make sure it is large enough to accommodate the size of your clubs.

Towel

Having a towel on hand is necessary for drying your clubs after cleaning. It helps to remove excess water and provides a surface for polishing and final touches.

Golf club cleaning solution (optional)

A golf club cleaning solution can be used for stubborn dirt or grime that does not come off with warm water and mild dish soap. These specialized solutions are designed to dissolve dirt without damaging the clubheads’ finish.

Golf club cleaning brush (optional)

A golf club cleaning brush is a convenient tool that often comes with a built-in groove cleaner. This brush can simplify the cleaning process and provides a dedicated tool for maintaining your clubs.

The Ultimate Guide on How to Clean Golf Clubs

Simple steps to clean your golf clubs

Follow these simple steps to clean your golf clubs and keep them in pristine condition:

Preparation

Before you start cleaning your golf clubs, it is important to prepare the space and gather all the necessary tools and materials.

  1. Select a suitable cleaning area: Find a clean and spacious area where you can comfortably clean your clubs without any distractions. A workbench or a table covered with a towel can make an ideal cleaning station.

  2. Gather all the necessary tools and materials: Collect warm water, mild dish soap, a soft-bristled brush, a toothbrush, a bucket, a towel, and any optional cleaning solutions or brushes you may have.

  3. Fill a bucket with warm water: Fill the bucket with enough warm water to submerge the clubheads. The temperature should be comfortably warm but not too hot.

Soaking the clubs

Soaking your clubs is an effective way to loosen dirt and debris before scrubbing to ensure a thorough cleaning.

  1. Submerge the clubheads in warm water: Dip the clubheads into the bucket of warm water. Ensure that the water covers the clubheads entirely, but avoid soaking wooden clubheads.

  2. Leave them to soak for a few minutes: Allow the clubheads to soak in the warm water for a few minutes to loosen any dirt or grime. This will make the subsequent cleaning process easier and more effective.

  3. Avoid soaking wooden clubheads: If you have clubs with wooden heads, it is advisable to avoid soaking them. Instead, wipe the wooden parts clean with a damp cloth.

  4. Use a golf club cleaning solution for stubborn dirt: If you encounter any stubborn dirt or stains that do not come off with warm water, you can use a golf club cleaning solution. Apply the solution to the clubheads as directed and let it sit for a few minutes before proceeding to the next step.

Brushing the clubs

Brushing your clubheads effectively removes dirt and debris, ensuring a thorough cleaning.

  1. Gently scrub the clubheads with a soft-bristled brush: Take the soft-bristled brush and gently scrub the clubheads, paying close attention to the face, grooves, and any other areas with visible dirt or grime. Brush in small circular motions to effectively remove the debris.

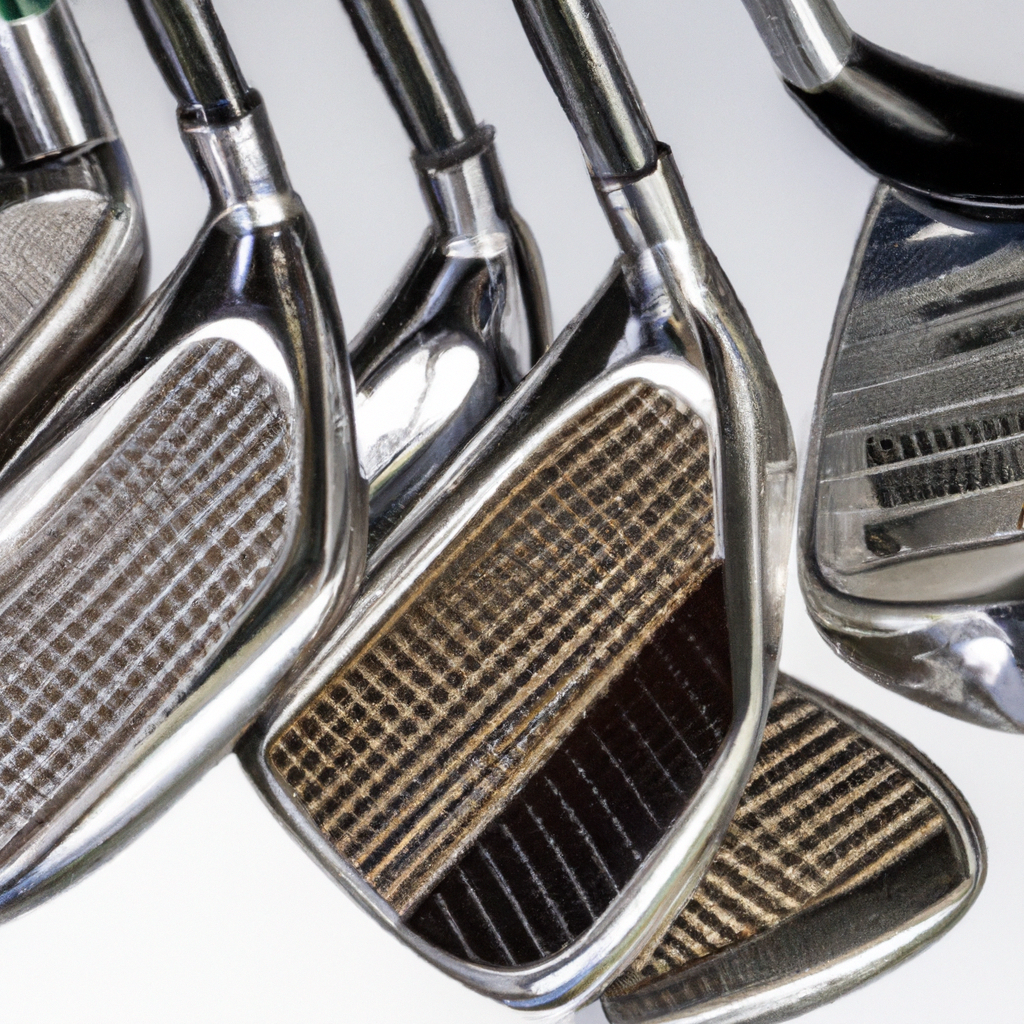
  2. Pay attention to grooves and face of the club: The grooves on your irons and wedges are essential for spin control. Ensure that you give them extra attention to remove any debris that may affect their performance.

  3. Use a toothbrush for hard-to-reach areas: If there are any hard-to-reach areas on the clubheads, such as tight corners or crevices, a toothbrush can be a useful tool. Its smaller size and bristles allow for more precision cleaning.

  4. Avoid using abrasive brushes on delicate clubheads: Be cautious when choosing a brush for your clubs. Avoid using brushes with abrasive bristles or metal wire brushes, as they can scratch or damage the clubheads’ finish.

Cleaning the grips

Cleaning the grips ensures that they remain in good condition and maintain their tackiness for a secure grip.

  1. Wet a towel or sponge with soapy water: Dampen a towel or sponge with warm water and a small amount of mild dish soap. Ensure that the towel or sponge is not overly saturated.

  2. Wipe down the grips: Gently wipe down the grips with the damp towel or sponge, ensuring that the entire surface is cleaned. Pay attention to any areas that may have accumulated dirt or sweat.

  3. Scrub any stubborn stains or dirt: For any stubborn stains or dirt on the grips, use a toothbrush or soft-bristled brush to scrub the affected areas. Avoid applying excessive force that may damage or wear down the grips.

  4. Rinse the grips with clean water: After cleaning the grips, rinse them thoroughly with clean water to remove any soap residue. Ensure that no soap remains on the grips, as it can make the grips slippery during your next round.

  5. Dry the grips thoroughly: Use a clean towel to dry the grips completely. Make sure there is no lingering moisture, as it can affect your grip and potentially lead to slipping.

Drying and polishing

After cleaning, it is important to dry and polish your golf clubs to ensure they are ready for use and protected from any residual moisture.

  1. Use a towel to dry the clubheads: Take a clean towel and gently pat the clubheads dry to remove any excess water. Ensure that all surfaces, including the clubfaces and grooves, are thoroughly dried.

  2. Remove excess moisture from grooves with a towel or tee: Since the grooves play a vital role in spin control, it is essential to remove all moisture from them. Use a towel or a tee to carefully wipe out any remaining dampness from the grooves.

  3. Polish the clubheads with a clean, dry cloth: Once the clubheads are dry, use a clean, dry cloth to polish them. This step enhances the appearance and further removes any remaining dirt or smudges.

  4. Inspect the clubs for any remaining dirt or grime: After drying and polishing, inspect the clubs to ensure they are clean and free of any remaining dirt or grime. If necessary, repeat any of the previous steps to address any missed areas or stubborn stains.

  5. Store the clubs in a clean and dry place: Finally, ensure that you store your clubs in a clean and dry place. Avoid leaving them exposed to moisture or extreme temperatures, as this can lead to rust, corrosion, or other damage. Consider using a golf bag with club dividers to keep your clubs organized and protect them from scratching or banging against each other.

Additional tips for maintaining clean golf clubs

In addition to regular cleaning, here are some bonus tips to help you maintain your golf clubs in top condition:

Clean your clubs after each round of golf

Make it a habit to clean your golf clubs after every round of golf. This prevents any stubborn dirt or grime from building up and ensures that your clubs are always ready for optimal performance.

Avoid using harsh chemicals or solvents

When cleaning your golf clubs, avoid using harsh chemicals or solvents that may damage the clubheads’ finish or grips. Stick to mild dish soap and water or specialized golf club cleaning solutions to ensure safe and effective cleaning.

Regularly inspect and clean the clubhead covers

If your clubs have clubhead covers, regularly inspect and clean them as well. Removing dirt and debris from the covers prevents any transfer of dirt onto the clubheads during storage or transportation.

Store the clubs in a golf bag with club dividers

To prevent your clubs from rubbing against each other and potentially getting scratched or damaged, store them in a golf bag with club dividers. This keeps each club separated and protected, ensuring their longevity and pristine condition.

Consider using a golf club cleaning brush for convenience

If you find yourself frequently cleaning your clubs, investing in a golf club cleaning brush can be a convenient option. These brushes often come with built-in groove cleaners and make the cleaning process quicker and more efficient.

Conclusion

Regularly cleaning your golf clubs is not only important for optimal performance but also crucial for extending their lifespan. By maintaining clean clubheads and grips, you ensure consistent ball striking, prevent corrosion, and enhance the overall appearance and feel of your clubs. Follow the simple steps outlined in this article, using the recommended tools and materials, to keep your clubs in pristine condition. Make it a habit to clean your clubs after each round of golf, and store them in a clean, dry place to enjoy their longevity and continued performance on the course.

How Long Do Golf Carts Last?

Discover the average lifespan of golf carts and factors affecting their longevity. Learn how to extend their lifespan and ensure optimal performance.

Have you ever wondered how long golf carts can last? Whether you’re a frequent golfer or just curious about the lifespan of these vehicles, this article will shed some light on the subject. Discover the average lifespan of golf carts, factors that can affect their longevity, and tips on how to extend their lifespan. Get ready to gain a better understanding of this essential piece of equipment in the world of golfing and leisure.

How Long Do Golf Carts Last?

Factors Affecting the Lifespan of a Golf Cart

When it comes to the lifespan of a golf cart, several factors come into play. From the type of batteries used to the overall build quality, each element contributes to determining how long your golf cart will last. In this comprehensive article, we will explore various factors that affect the lifespan of a golf cart, providing you with helpful insights and tips to prolong its longevity.

Battery Life

One of the most crucial factors that directly impact the lifespan of a golf cart is the battery life. Golf carts typically run on rechargeable batteries, and the type of battery used can significantly influence how long it will last. There are generally two types of batteries found in golf carts: lead-acid batteries and lithium-ion batteries.

Types of Batteries

Lead-acid batteries have been the conventional choice for golf carts for decades. They are economical but require regular maintenance. On the other hand, lithium-ion batteries offer longer lifespans and higher energy densities. Despite their higher initial cost, they require minimal maintenance and provide better performance.

Lifespan of Different Battery Types

The lifespan of a golf cart battery can vary depending on its type. Lead-acid batteries typically last around three to five years, depending on their usage and maintenance. On the other hand, lithium-ion batteries can last up to eight years or more, making them a more durable and long-lasting option for your golf cart.

Factors Affecting Battery Life

Several factors can impact the lifespan of golf cart batteries. These include regular usage, charging habits, and exposure to extreme temperatures. Overcharging or undercharging the batteries can also reduce their lifespan. It is essential to follow the manufacturer’s guidelines for optimal battery performance and consult a professional if you encounter any issues.

Maintenance and Care for Batteries

Proper maintenance and care play a vital role in extending the lifespan of your golf cart batteries. Regularly inspecting and cleaning battery terminals, ensuring proper water levels for lead-acid batteries, and performing routine battery checks are essential. It is also crucial to follow a regular battery charging and maintenance schedule to ensure the longevity of your batteries.

Replacing a Golf Cart Battery

Eventually, even the best-maintained batteries will need replacement. When it comes time to replace your golf cart battery, it is crucial to choose the right type and size for your cart. Consult with a professional, consider the specific requirements of your golf cart, and ensure that the replacements are compatible and meet the necessary performance standards.

Maintenance

Regular maintenance is key to ensuring the longevity of your golf cart. By following a proper servicing and care routine, you can prevent premature wear and tear of components and extend the overall lifespan of your golf cart.

Regular Cleaning and Inspection

Regularly cleaning your golf cart, both externally and internally, helps prevent the accumulation of dirt, grime, and debris. Additionally, routine inspections can identify any issues or potential problems before they worsen. Pay attention to the body, seats, tires, and electrical components to ensure they are in good condition.

Fluid Checks and Replacements

Regularly checking and replacing fluids, such as oil, coolant, and brake fluid, is essential for optimal performance and longevity. Follow the manufacturer’s recommendations for the appropriate fluid levels and intervals for replacement. Neglecting fluid maintenance can result in significant damage to your golf cart’s engine and other components.

Tire Maintenance

Proper tire maintenance is crucial for both safety and longevity. Regularly inspecting tire pressure and ensuring it is within the recommended range helps maintain optimal performance and efficiency. It is also important to check for any signs of wear, such as cracks or bulges, and replace tires as needed.

Brake and Suspension Maintenance

The brakes and suspension system are critical components of your golf cart, ensuring a safe and comfortable ride. Regularly inspecting, cleaning, and lubricating these components is necessary to maintain efficient braking and smooth suspension operation. If you notice any signs of wear or reduced performance, seek professional assistance promptly.

Electrical System Upkeep

The electrical system in a golf cart is responsible for powering various components, such as lights, horn, and accessories. Regularly inspecting electrical connections, cleaning terminals, and ensuring proper wiring can prevent electrical issues and ensure optimal performance. Address any electrical problems immediately to avoid further damage.

Routine Servicing

Periodically servicing your golf cart according to the manufacturer’s guidelines is essential for its overall health. This includes tasks such as oil changes, filter replacements, and general inspections. Following a regular servicing schedule helps identify and address minor issues before they escalate, preventing potential breakdowns and extending the lifespan of your golf cart.

Winterizing and Storage Preparations

If you live in an area with cold winters, proper winterizing and storage preparations are crucial. This includes draining and replacing fluids, such as coolant, stabilizing fuel, and protecting the golf cart from the elements. By properly preparing your golf cart for storage, you can prevent damage and ensure it remains in good condition during the off-season.

Dealing with Corrosion

Corrosion is a common issue that can affect the longevity of your golf cart. Regularly inspecting your cart for any signs of corrosion, such as rust or corrosion on electrical connections, is important. Promptly addressing any corrosion and applying preventive measures, such as utilizing corrosion-resistant coatings, can significantly extend the lifespan of your golf cart.

Effect of Poor Maintenance on Lifespan

Neglecting maintenance and care for your golf cart can have severe consequences on its longevity. Poor maintenance can lead to accelerated wear and tear, component failures, and overall decreased performance. By investing time and effort into proper maintenance, you can substantially increase the lifespan of your golf cart and avoid costly repairs.

How Long Do Golf Carts Last?

Usage Frequency

The frequency of usage plays a significant role in determining how long a golf cart will last. The more frequently a golf cart is used, the more stress it experiences, which can impact its overall lifespan.

Golf Course Usage

Golf carts primarily used on golf courses face consistent usage but generally operate in optimal conditions. With regular maintenance and care, golf carts used exclusively for golfing can last for many years. However, it is crucial to follow maintenance and usage guidelines provided by the golf course to ensure the longevity of the carts.

Street Legal Usage

Golf carts used as street-legal vehicles might experience heavier usage, including longer distances and higher speeds. Street legal usage can increase wear and tear on components, leading to a potentially shorter lifespan. Regular maintenance, adherence to traffic regulations, and cautious driving are essential for prolonging the life of a street-legal golf cart.

Industrial and Commercial Usage

Golf carts used for industrial or commercial purposes, such as maintenance on large properties or transportation within a facility, often endure heavy usage. These carts are subjected to demanding conditions, requiring regular maintenance and potentially shorter lifespans compared to carts used for recreational purposes. Proper maintenance and periodic inspections are vital in ensuring their durability.

Recreational or Personal Usage

Golf carts utilized for recreational or personal purposes might experience moderate to frequent usage, depending on individual needs. Their longevity largely depends on the maintenance and care provided. By following recommended servicing intervals and adopting good driving practices, recreational golf carts can last for several years.

Effect of Frequent Usage on Lifespan

Frequent usage increases the wear and tear on a golf cart’s components, leading to a higher risk of breakdowns or malfunctions. Proper maintenance, regular inspections, and addressing minor issues promptly are crucial when the frequency of usage is high. By taking proactive measures, you can mitigate the impact of frequent usage on your golf cart’s lifespan.

Terrain Conditions

The terrain on which a golf cart operates can have a significant impact on its lifespan. Varying terrains present different challenges and stressors, potentially leading to increased wear and tear on components.

Grass and Fairways

Golf carts primarily used on grass and fairways are subjected to relatively mild terrain conditions. The smooth and even surfaces minimize the strain on the cart’s components, leading to a potentially longer lifespan. Routine maintenance, such as tire inspections and cleaning, is still necessary to ensure optimal performance.

Hilly or Uneven Terrain

Golf carts operating on hilly or uneven terrain face increased stress on components such as the drivetrain, suspension, and batteries. Continuous inclines and uneven surfaces can accelerate wear and tear, potentially shortening the lifespan of the cart. Regular maintenance, including brake and suspension inspections, is vital to minimize the effects of such terrain conditions.

Rough or Off-Road Surfaces

Golf carts used on rough or off-road surfaces, such as gravel or dirt paths, are exposed to significant vibrations, shocks, and impacts. These conditions can take a toll on various components, including the suspension, tires, and frame. Strengthening the cart with appropriate accessories and opting for a cart designed for off-road use can help prolong its lifespan in such demanding terrain conditions.

Effect of Terrain Conditions on Lifespan

Different terrain conditions present varying challenges and stressors to a golf cart. The overall build quality and proper maintenance play a crucial role in determining how long a golf cart can withstand specific terrain conditions. By choosing a cart suitable for the intended terrain and taking necessary maintenance measures, you can maximize its lifespan.

Climate and Weather

Both climate and weather can significantly impact the lifespan of a golf cart. Extreme temperatures, exposure to rain and water, and other weather-related factors can affect various components and overall performance.

Extreme Temperatures

Extreme temperatures, whether excessively hot or cold, can negatively impact the lifespan of a golf cart. Batteries, in particular, are susceptible to temperature extremes. Extreme cold can reduce battery capacity and potentially lead to freezing, while extreme heat can accelerate battery degradation. It is vital to protect your golf cart from extreme temperatures to ensure optimal performance and longevity.

Exposure to Rain and Water

Golf carts exposed to rain, water, or other moisture are at a higher risk of corrosion and other moisture-related issues. Electrical components are particularly vulnerable to water damage. It is essential to keep your golf cart dry and minimize exposure to water whenever possible. When operating under wet conditions, regular inspections and applying appropriate protective measures can help mitigate potential damage.

Effect of Climate on Lifespan

The climate in which a golf cart operates plays a significant role in determining its lifespan. Harsh climates with extreme temperatures or excessive humidity can accelerate wear and corrosion, potentially shortening the overall lifespan of the cart. By providing proper protection and following recommended maintenance practices, you can minimize the impact of climate on your golf cart’s longevity.

Brand and Quality

The brand and overall quality of a golf cart can have a substantial influence on its lifespan. Reputable brands that prioritize quality construction materials and offer superior performance tend to provide longer-lasting carts.

Reputable Brands

Choosing a golf cart from a reputable brand can often ensure higher build quality and reliability. Well-established brands with a positive track record tend to have extensive experience and invest in research and development. These brands often offer warranties and reliable customer support, providing peace of mind and potentially longer lifespans for their golf carts.

Quality of Construction Materials

The quality of construction materials used in a golf cart greatly impacts its durability and overall lifespan. Carts made from high-quality materials, such as strong frames and premium components, tend to withstand wear and tear better. On the other hand, carts made from inferior materials may require frequent repairs or replacement, leading to shorter lifespans.

Performance and Durability

Golf carts known for superior performance and durability usually provide longer lifespans. Carts equipped with sturdy suspensions, durable tires, and well-designed electrical systems tend to withstand rigorous usage and terrain conditions. User reviews and expert opinions can often provide insights into the performance and durability of different golf cart models and brands.

Effect of Brand and Quality on Lifespan

Opting for a reputable brand with high-quality construction materials and superior performance can significantly affect the lifespan of a golf cart. Investing in a well-built cart from a trusted manufacturer can provide you with a more durable and long-lasting vehicle, saving you money on potential repairs and replacements in the future.

Storage and Protection

Proper storage and protection are essential factors in extending the lifespan of a golf cart. Whether indoor or outdoor, providing adequate shelter and routine maintenance during storage periods can significantly impact the cart’s longevity.

Indoor vs. Outdoor Storage

Indoor storage offers significant advantages over outdoor storage when it comes to protecting your golf cart. Indoor storage provides shelter from the elements, minimizing exposure to sun, rain, and other weather conditions. Storing your golf cart indoors can help prevent damage and slow down the aging process of various components, ultimately prolonging its lifespan.

Covering and Sheltering

If indoor storage is not possible, providing appropriate covering and sheltering for your golf cart is crucial. By using a waterproof cover, you can protect the cart from rain and other moisture. Additionally, utilizing a carport or custom-built shelter can offer additional protection from the sun’s harmful UV rays and other outdoor elements.

Battery Maintenance During Storage

During storage periods, proper battery maintenance is crucial. Lead-acid batteries should be fully charged before storage, and periodic charging during storage can help maintain their performance. Lithium-ion batteries, on the other hand, should be stored at approximately 50% charge for optimal storage conditions. Following manufacturer recommendations and taking necessary precautions can help ensure the longevity of your golf cart batteries.

Effect of Storage and Protection on Lifespan

Providing appropriate storage and protection for your golf cart when not in use is essential for prolonging its lifespan. Indoor storage or adequate covering and sheltering can prevent damage caused by weather, UV rays, and other outdoor elements. By being mindful of storage conditions and following maintenance guidelines, you can maintain the cart’s overall health and extend its longevity.

Upgrades and Modifications

Many golf cart owners consider upgrades and modifications to enhance their cart’s performance or aesthetics. While these modifications can add value and improve certain aspects, it is essential to consider their potential impact on the cart’s lifespan.

Adding Accessories

Adding accessories to your golf cart can enhance its functionality and personalization. Common accessories include light kits, drink holders, and rear seat kits. These modifications, if properly installed, typically do not significantly impact the cart’s lifespan. However, it is vital to ensure compatibility and proper installation to avoid potential issues in the future.

Lithium-Ion Battery Conversions

Converting your golf cart from lead-acid batteries to lithium-ion batteries is a popular upgrade. Lithium-ion batteries offer numerous advantages, including longer lifespans and higher energy densities. Converting to lithium-ion batteries can extend the overall lifespan of your golf cart and provide improved performance, but it is important to consult professionals for proper installation and compatibility.

Lift Kits and Larger Tires

Lift kits and larger tires are common modifications made to golf carts, particularly those used in off-road conditions. These modifications can enhance ground clearance and provide better traction. However, it is crucial to consider the strain these modifications can put on other components, such as the drivetrain and suspension. Proper installation and regular maintenance are essential when making lift kit and larger tire modifications.

Effect of Upgrades on Lifespan

Upgrades and modifications can both positively and negatively affect the lifespan of a golf cart. While some modifications, such as adding accessories, typically have minimal impact, others can strain components and potentially shorten the overall lifespan. Proper research, professional guidance, and regular maintenance are important when considering upgrades to ensure a balance between improved performance and cart longevity.

Overall Build and Construction

The overall build quality and construction of a golf cart significantly contribute to its lifespan. From structural integrity to frame materials and suspension systems, a well-constructed cart tends to provide better durability and longevity.

Structural Integrity

The structural integrity of a golf cart is paramount for long-lasting performance. A well-designed frame that can withstand stress and impacts without bending or warping is a crucial component. Carts with solid and reliable structures tend to have longer lifespans, even under demanding conditions.

Frame Material

The material used for the golf cart’s frame impacts its durability and overall lifespan. Common frame materials include steel and aluminum. Steel frames are known for their strength and resilience, while aluminum frames offer lightweight characteristics and corrosion resistance. Selecting a golf cart with a frame material that suits your usage conditions can help maximize its lifespan.

Suspension System

The suspension system of a golf cart plays a vital role in providing comfort and absorbing impacts. A sturdy and reliable suspension system helps minimize vibrations and reduce stress on other components. Well-maintained suspensions are essential for cart longevity, especially when frequently operating on uneven or rough terrains.

Effect of Build Quality on Lifespan

The build quality and construction of a golf cart are crucial considerations when assessing its potential lifespan. Golf carts manufactured with high-quality materials and robust construction techniques tend to offer better longevity. It is important to research and invest in a well-built cart that suits your specific needs to maximize its lifespan.

In conclusion, multiple factors affect the lifespan of a golf cart. From battery life to maintenance practices, usage frequency, terrain conditions, climate and weather exposure, and brand and construction quality, each element plays a role in determining how long your golf cart will last. By following proper maintenance routines, considering usage conditions, and selecting a well-built cart from a reputable brand, you can ensure that your golf cart provides you with years of reliable service and enjoyment.

5 Easy Steps to Charge Your Golf Cart Battery

Learn how to charge your golf cart battery in five easy steps. Get back on the green quickly with these simple instructions for a fully charged ride.

If you’re a proud owner of a golf cart, you probably know the importance of a fully charged battery for a smooth and enjoyable ride. It can be frustrating when your battery starts running low, but fear not, because we’ve got you covered! In this article, we’ll show you five easy steps to charge your golf cart battery. With these simple instructions, you’ll be back on the green in no time, experiencing the thrill of a fully charged ride. So, let’s get started and ensure that your golf cart battery is always ready for action!

5 Easy Steps to Charge Your Golf Cart Battery

Step 1: Prepare Your Golf Cart

Before you begin the charging process, it is essential to prepare your golf cart to ensure a safe and effective charging experience. Follow these three simple steps to get started:

Ensure a Safe Charging Environment

To ensure the safety of yourself and others around you, it is crucial to charge your golf cart battery in a safe environment. Find a well-ventilated area with a flat surface. Avoid charging near flammable materials or in extreme temperatures. Creating a safe charging environment is the first step towards a successful charging process.

Park Your Golf Cart

Before connecting the charger, park your golf cart in a designated area. Make sure the cart is on a level surface and engage the parking brake. This will prevent any unwanted movements during the charging process, keeping both you and your golf cart safe.

Turn Off All Electrical Accessories

To prevent any interference with the charging process, it is important to turn off all electrical accessories on your golf cart. This includes headlights, taillights, radio, and any other accessory that may drain the battery. By turning off these accessories, you can ensure that the battery is solely focused on receiving a complete charge.

Step 2: Check the Battery

Now that your golf cart is prepared for charging, it’s time to check the battery itself. Follow these steps to ensure the battery is in good condition before proceeding with the charging process.

Locate the Battery Compartment

The first step in checking your golf cart battery is to locate the battery compartment. Depending on the make and model of your golf cart, the battery compartment may be located in different areas. Common areas include under the seat, in the front or rear of the cart, or in a specific battery compartment at the back.

Inspect the Battery Terminals

Once you have located the battery compartment, inspect the battery terminals. The terminals are the metal connections on top of the battery. Make sure they are clean, free from corrosion, and securely connected to the battery. Corrosion can hinder the charging process, so it’s important to clean the terminals if necessary.

Clean any Corrosion

If you notice any corrosion on the battery terminals, it is important to clean them before proceeding with the charging process. Use a mixture of baking soda and water to create a paste. Apply this paste to the corroded areas and scrub gently with a wire brush. Once the corrosion is removed, rinse the terminals with clean water and dry them thoroughly.

Check the Battery Water Level

Some golf cart batteries require regular maintenance of the water level. Check your battery to see if water needs to be added. If it does, carefully remove the battery caps and add distilled water to the appropriate level. Be careful not to overfill the cells, as this can lead to electrolyte leakage and potential damage to the battery.

5 Easy Steps to Charge Your Golf Cart Battery

Step 3: Connect the Charger

Now that you have inspected and prepared the battery, it’s time to connect the charger. Follow these steps to ensure a proper connection and a successful charging process.

Choose the Appropriate Charger

Not all chargers are created equal. It’s important to choose the appropriate charger for your golf cart battery. Refer to the manufacturer’s recommendations or consult your golf cart manual to determine the correct charger for your specific battery type and voltage.

Position the Charger

Once you have the correct charger, position it near the golf cart battery. Ensure that the charger cables are long enough to reach the battery terminals without straining or bending. This will ensure a secure and stable connection, reducing the risk of any damage or interruptions during the charging process.

Connect the Charger to the Battery

With the charger in position, it’s time to connect it to the battery. Start by connecting the positive charger clamp, usually color-coded red, to the positive terminal of the battery. Then, connect the negative charger clamp, usually color-coded black, to the negative terminal of the battery. Make sure the clamps are securely attached to the terminals to establish a proper connection.

Double-Check the Connections

Before proceeding, it is crucial to double-check the connections. Ensure that the charger clamps are securely attached to the battery terminals. Loose connections can result in an inefficient charging process or even damage the battery. Take a moment to verify the connections to guarantee a smooth charging experience.

Step 4: Set the Charging Parameters

Now that the charger is connected, it’s time to set the charging parameters. Different golf cart batteries require specific charging settings to ensure optimal performance and longevity. Follow these steps to adjust the charging parameters accordingly.

Refer to the Battery Specifications

To determine the appropriate charging parameters, refer to the battery specifications provided by the manufacturer. This information typically includes the recommended charging voltage, amperage, and charging time. Consult the battery specifications to ensure you select the correct settings for your specific battery.

Adjust the Charging Voltage

Using the charger’s voltage adjustment settings, set the charging voltage to match the recommended voltage for your golf cart battery. This ensures that the battery receives the appropriate level of voltage during the charging process, preventing any potential damage or undercharging.

Select the Correct Amperage

Next, select the appropriate amperage setting on the charger. Amperage determines the rate at which the battery charges. Follow the battery specifications to determine the correct amperage for your specific battery. Selecting the correct amperage setting ensures a safe and efficient charging process.

Set the Charging Time

Lastly, set the charging time according to the manufacturer’s recommendations. This ensures that the battery is charged for the appropriate duration, allowing it to reach its full capacity without the risk of overcharging. Set the charging time accurately to achieve optimal performance and longevity for your golf cart battery.

Step 5: Monitor the Charging Process

With the charging parameters set, it’s time to monitor the charging process. Keeping an eye on the process ensures a safe and effective charge. Follow these steps to effectively monitor the charging process.

Switch on the Charger

Start by switching on the charger. This activates the charging process and allows the battery to receive the necessary charge. Ensure that the charger is securely connected to the power source and is functioning properly.

Observe the Charge Indicator

Most chargers come equipped with a charge indicator light or display. This provides valuable information about the charging status. Keep an eye on the charge indicator throughout the charging process to monitor its progress. Pay attention to any warning lights or changes in the indicator that may signal an issue.

Keep an Eye on the Charging Time

During the charging process, it is important to keep track of the charging time. Refer to the previously set charging time and monitor the progress against the expected completion time. This allows you to ensure that the battery is receiving the appropriate charge and prevents any risk of overcharging.

Ensure Proper Ventilation

While the charging process is underway, it is essential to ensure proper ventilation in the charging area. Some chargers or batteries may produce gases during the charging process, which need to be properly ventilated to avoid any potential hazards. Keep windows or doors open and avoid charging in enclosed spaces.

Tips and Precautions

To ensure a safe and effective charging process for your golf cart battery, consider the following tips and precautions:

Use a Dedicated Golf Cart Battery Charger

Using a dedicated golf cart battery charger is crucial in maintaining the battery’s performance and longevity. These chargers are specifically designed for golf cart batteries and provide the necessary charging parameters for optimal results.

Avoid Overcharging

Overcharging can lead to battery damage, reduced performance, and shortened battery life. Adhere to the recommended charging parameters and avoid leaving the battery on charge for longer than necessary. Once the battery reaches its full charge, disconnect the charger promptly.

Regularly Check the Battery

Regularly inspecting and maintaining your golf cart battery is essential for optimal performance. Check the battery terminals for corrosion, monitor the water level (if applicable), and ensure that the battery is clean and free from dirt or debris.

Follow Manufacturer’s Recommendations

Always follow the manufacturer’s recommendations and guidelines when it comes to charging and maintaining your golf cart battery. The manufacturer has the best knowledge of the specific battery requirements and can provide the necessary instructions to ensure its longevity and performance.

Be Cautious with Acidic Battery Fluid

Golf cart batteries contain acidic electrolytes, which can be harmful if mishandled. Exercise caution when working with the battery, wear protective gloves and goggles, and avoid contact with the battery fluid. In case of accidental contact, rinse the affected area with water immediately.

Do Not Interfere with the Charging Process

Once the charging process has begun, it is important not to interfere with it. Do not disconnect or move the charger, adjust the charging parameters, or touch any exposed wires. Any interference can disrupt the charging process and potentially damage the battery or other components of the golf cart.

Common Troubleshooting

While charging your golf cart battery, you may encounter some issues or face challenges. Here are some common troubleshooting tips to help you overcome these obstacles:

Charger Does Not Start

If the charger does not start when connected to the battery, check the power source and ensure it is functioning correctly. Verify that the charger is securely connected to the power outlet and that there are no loose connections or damaged cables.

Charger Shuts Off Prematurely

If the charger shuts off before the battery reaches its expected charge, check the charging parameters and make sure they are set correctly. Ensure that the charger is compatible with your golf cart battery and consult the manufacturer’s recommendations for troubleshooting specific shutdown issues.

Battery Not Holding a Charge

If your golf cart battery is not holding a charge, it may indicate an underlying issue with the battery itself. Inspect the battery for any signs of damage or deterioration. Consider having a professional check the battery or consult the manufacturer for further guidance.

Slow Charging

If the charging process is significantly longer than expected, it may be due to a low amperage setting or a problem with the charger. Verify that the amperage setting is appropriate for your battery and ensure that the charger is functioning correctly. If the issue persists, it may be necessary to seek professional assistance.

Charger Overheating

If the charger becomes excessively hot during the charging process, it may indicate a malfunction or an incompatible charger. Disconnect the charger immediately and allow it to cool down. Consult the manufacturer’s recommendations or seek professional assistance to diagnose and resolve any issues related to charger overheating.

Conclusion

Properly maintaining and charging your golf cart battery is essential for optimal performance and longevity. By following these five easy steps and adhering to the recommended charging parameters, you can ensure a safe and effective charging process. Remember to monitor the charging process diligently, keep an eye on the battery, and follow the manufacturer’s recommendations. With regular maintenance and care, your golf cart battery will provide reliable power for many rounds of golf.

The Cost of Maintaining a Golf Course

Discover the hidden costs of maintaining a golf course. From labor and equipment expenses to fertilizers and irrigation, explore the financial implications in this informative post.

Maintaining a golf course may seem like a breeze for the casual player, but the hidden costs behind its flawless greens and well-manicured fairways may surprise you. From carefully tending to the grass to managing irrigation systems, a golf course requires a significant amount of time, effort, and monetary investment. In this article, we will uncover the various aspects of maintaining a golf course and explore the financial implications that come with ensuring a memorable golfing experience for players of all skill levels. So, grab your clubs and join us as we delve into the intriguing world of golf course maintenance.

The Cost of Maintaining a Golf Course

Overall Maintenance Costs

Maintaining a golf course involves various aspects, each with its associated expenses. From labor costs to equipment and machinery costs, fertilizer and pesticide expenses, watering and irrigation costs, and other operational costs, these all contribute to the overall maintenance costs of a golf course. By understanding each category and the factors affecting maintenance costs, golf course owners and managers can effectively plan their budgets and ensure the course’s optimal condition for players to enjoy.

Labour Costs

One significant component of maintenance costs is labor. Golf courses require a dedicated workforce to carry out numerous tasks, ranging from groundskeeping and landscaping to management and administrative duties. The staffing needs of a golf course vary depending on its size, design, and level of usage.

Groundskeeping Staff

The backbone of golf course maintenance is the groundskeeping staff. These individuals are responsible for mowing, trimming, edging, and maintaining the course’s appearance. The labor costs associated with groundskeeping staff include salaries, benefits, training, and employment taxes. The larger the course and the more extensive the grounds, the more staff will be required, consequently increasing labor expenses.

Management and Administrative Staff

A well-run golf course also requires a capable management and administrative team. These professionals oversee operations, coordinate with other departments, manage budgets, and ensure the smooth functioning of the facility. Salaries, benefits, and administrative expenses are included in the labor costs for this category.

Seasonal Staff

Many golf courses hire seasonal staff during peak playing seasons or for specific maintenance projects. These temporary employees help with tasks such as aerating, overseeding, and other agronomic practices. Seasonal staff costs can vary depending on the size of the crew needed and the duration of their employment.

Equipment and Machinery Costs

To maintain a golf course, a wide range of equipment and machinery is required. These tools facilitate tasks such as mowing fairways, greens, and roughs, aerating the turf, and performing other essential maintenance operations.

Initial Capital Investment

The acquisition of the necessary equipment and machinery represents a significant upfront expense for golf course owners. This can include items such as mowers, aerators, utility vehicles, and irrigation systems. The initial capital investment cost depends on the course’s specific needs and the quality and quantity of equipment required.

Maintenance and Repair Costs

As with any equipment, maintenance and repair costs are inevitable. Regular maintenance, such as blade sharpening, oil changes, and equipment inspections, helps keep the machinery running smoothly and extends its lifespan. Additionally, unexpected repairs may be required due to unforeseen breakdowns or accidents, further contributing to maintenance costs.

Replacement Costs

Golf course equipment has a finite lifespan, and eventually, replacement becomes necessary. Factors such as usage, maintenance practices, and the quality of the original purchase influence the longevity of equipment. Planning and budgeting for future equipment replacements are crucial aspects of managing maintenance costs.

The Cost of Maintaining a Golf Course

Fertilizer and Pesticide Costs

Maintaining healthy turf and protecting it from pests and diseases are paramount for golf course management. Fertilizers and pesticides play a vital role in achieving these objectives. However, they can also represent a significant portion of the overall maintenance costs.

Types of Fertilizers and Pesticides

The specific types and formulations of fertilizers and pesticides used on a golf course depend on the turfgrass species, climate, and specific pest challenges. Different products have varying costs, and the selection should be based on efficacy, environmental considerations, and budgetary constraints.

Frequency of Application

Fertilizers and pesticides must be applied at the appropriate intervals to achieve optimal turf health and pest control. The frequency of application depends on factors such as the growth rate of the grass, pest pressures, and weather conditions. A more intense maintenance program may require more frequent applications, resulting in higher costs.

Costs of Application Services

In some cases, golf courses may outsource the application of fertilizers and pesticides to professional service providers. These companies have the expertise and equipment to efficiently apply the products. The costs associated with these services should also be factored into the overall maintenance budget.

Watering and Irrigation Costs

Water is a precious resource, and golf courses require a significant amount to maintain healthy turf and aesthetic appeal. Watering and irrigation costs encompass not only the actual water consumption but also the infrastructure required for distribution.

Water Source and Supply Costs

The cost of water depends on the source and supply arrangements of the golf course. Some courses may have access to a natural water source, while others rely on municipal water supplies or wells. The associated expenses may include water usage fees, pumping costs, and infrastructure maintenance.

Irrigation System Installation Costs

Installing a reliable and efficient irrigation system is essential for optimal turf health and water conservation. This includes the cost of materials, equipment, and labor required for system design and installation. Additionally, ongoing maintenance and repairs should be factored into the overall irrigation costs.

Maintenance and Repair Costs

Regular maintenance and occasional repairs are necessary to keep the irrigation system functioning effectively. Issues such as broken sprinkler heads, damaged pipes, or electrical malfunctions can contribute to increased maintenance costs. Proper monitoring and proactive maintenance can help mitigate these expenses over time.

Other Operational Costs

Beyond labor, equipment, fertilizers, pesticides, and water, there are various other operational costs that golf courses incur. These expenses are necessary to ensure a safe and enjoyable experience for golfers.

Utilities

Utilities such as electricity, gas, and sewer services are essential for the operation of facilities, including clubhouse, maintenance buildings, and amenities. Energy costs can fluctuate depending on factors such as the course’s size, level of usage, and energy efficiency measures in place.

Insurance

Golf courses must carry adequate insurance coverage to protect against potential liabilities, property damage, and other unforeseen events. Premiums can vary depending on factors such as the course’s location, coverage limits, and claims history.

Taxes

Property taxes are another operational expense that golf courses must consider. The amount of tax paid is typically based on the assessed value of the property and local tax rates.

Clubhouse and Amenities Maintenance

Golf courses often offer additional amenities to enhance the overall experience for members and guests. These may include clubhouse facilities, practice areas, swimming pools, and tennis courts. Maintenance and repair costs associated with these amenities should be accounted for separately from the primary golf course maintenance budget.

Factors Affecting Maintenance Costs

Several factors influence the overall maintenance costs of a golf course. Understanding these factors allows golf course owners and managers to make informed decisions and allocate resources effectively.

Course Size and Design

The size and design of a golf course can significantly impact its maintenance costs. Larger courses typically require more labor, equipment, and resources to maintain. Additionally, the complexity of the course’s design, including water features and landscaping, may contribute to increased maintenance expenses.

Location and Climate

The geographic location of the golf course influences maintenance costs due to varying weather patterns and environmental factors. Courses located in regions with extreme temperatures, high humidity, or frequent rainfall may require additional maintenance efforts to ensure optimal playing conditions. Water availability and costs also depend on the local climate.

Course Conditions and Soil Type

The condition of the course and the nature of its soil affect maintenance requirements. Courses with sandy soils may require more frequent irrigation and fertilization to promote healthy turf growth. Similarly, courses with challenging soil conditions may require specialized agronomic practices, further driving up maintenance costs.

Membership and Usage

The number of members and the frequency of play impact maintenance costs. Courses with a large membership or high usage rates may experience greater wear and tear, necessitating more frequent maintenance interventions and associated expenses.

Environmental Regulations

Compliance with environmental regulations and sustainability initiatives can influence maintenance costs. Implementing environmentally friendly practices or investing in renewable energy sources may initially incur additional expenses but can result in long-term cost savings and environmental benefits.

Course Size and Design

The size and design of a golf course have a significant impact on maintenance costs. The total acreage and the number of holes directly influence the extent of groundskeeping tasks required. Larger courses with more acreage demand additional labor and equipment resources to maintain the extensive greens, fairways, roughs, and other features. Moreover, the number of holes determines the overall maintenance workload and subsequently affects staffing needs and costs.

Total Acreage

The total acreage refers to the land area that a golf course occupies. The larger the acreage, the more expansive the course, and the greater the amount of maintenance work needed. Groundskeeping staff must mow, trim, and maintain a larger surface area, which translates to higher labor costs. Additionally, irrigation systems, fertilizers, pesticides, and water usage all increase with the increased acreage.

Number of Holes

The number of holes is a defining characteristic of a golf course. Maintenance costs are directly influenced by the number of holes, as each hole requires periodic mowing, aeration, and other maintenance practices. Courses with more holes generally require more groundskeeping staff, equipment, and resources, resulting in higher maintenance expenses.

Topography

The topography of a golf course affects maintenance costs due to its impact on drainage, irrigation, and accessibility. Courses situated on steep hills or uneven terrain may require additional measures to ensure proper water management and prevent erosion. Furthermore, the challenging topography can make maintenance tasks more time-consuming and physically demanding for the groundskeeping staff.

Presence of Water Features

Water features, such as ponds, lakes, and streams, can add aesthetic value to a golf course. However, they also require additional maintenance efforts and costs. Regular upkeep, water management, and potential filtration systems are necessary to maintain the water features’ cleanliness and prevent disruption to the course’s irrigation system.

Location and Climate

The location and climate of a golf course profoundly influence its maintenance costs. Different regions and climates present unique challenges, and adapting maintenance practices accordingly is vital.

Geographic Location

Golf courses located in different geographical regions may face diverse weather patterns and environmental conditions. Courses in coastal areas may be susceptible to saltwater intrusion or high winds, requiring additional measures to ensure turf health and structural stability. In contrast, courses in arid regions may have to contend with water scarcity and higher irrigation costs.

Seasonal Weather Variation

Seasonal weather variations can significantly impact maintenance costs. Regions with dramatic temperature fluctuations may require special attention to protect the turfgrass and irrigation systems from freeze-thaw cycles. Furthermore, excessive rainfall or drought conditions can necessitate adjustments in irrigation practices, potentially driving up water costs. Flexibility and adaptability are crucial in managing these seasonal variations effectively.

Water Availability and Costs

The availability and cost of water in a specific location directly affect maintenance expenses. Courses located in regions with abundant freshwater sources may have lower water costs compared to those relying on alternative sources such as wells or desalination. Additionally, courses facing water scarcity or strict water use regulations must implement conservation measures or invest in efficient irrigation technologies to manage costs effectively.

Optimized Staffing and Work Schedules

Efficient staffing and work schedules are essential for maximizing productivity and minimizing maintenance costs on a golf course. Proper task allocation, seasonal adjustments, and equipment use efficiency contribute to cost-effective management.

Task Allocation and Prioritization

Optimal task allocation ensures that the right staff with the appropriate skills are assigned to specific maintenance activities. By matching the workforce’s expertise to the required tasks, golf courses can improve efficiency and reduce labor costs. Prioritizing maintenance tasks based on urgency and impact on playing conditions further helps allocate resources effectively.

Seasonal Staffing Adjustments

Golf course maintenance needs can vary throughout the year, with peak periods of usage and seasonal agronomic practices. Adjusting staffing levels accordingly can help manage costs more efficiently. Hiring additional seasonal staff during busy periods or employing temporary workers for specific projects allows golf courses to meet demands without incurring unnecessary long-term labor expenses.

Training and Equipment Use Efficiency

Investing in staff training programs enhances their skills and efficiency in operating equipment and machinery. Well-trained staff can optimize equipment use, minimizing the risk of damage, and reducing repair costs. Furthermore, efficient equipment use and regular maintenance can extend machinery lifespan and reduce the need for premature replacements.

In conclusion, maintaining a golf course involves various expenses categorized under labor costs, equipment and machinery costs, fertilizer and pesticide costs, watering and irrigation costs, and other operational costs. Understanding the factors affecting maintenance costs, such as course size and design, location and climate, course conditions and soil type, membership and usage, and environmental regulations, allows golf course owners and managers to make informed decisions when budgeting for maintenance. By carefully managing expenses and implementing cost-effective practices, golf courses can maintain a high standard of playability while keeping maintenance costs under control.

Tips for Maintaining Golf Cart Batteries

Discover essential tips for maintaining golf cart batteries. Learn about proper charging, cleaning, inspecting, storing, disposing, watering, driving, and winter care.

Golf carts are a convenient and eco-friendly mode of transportation on the golf course, and taking proper care of their batteries is essential for optimal performance. In this article, we will guide you through some helpful tips on how to maintain your golf cart batteries, ensuring they stay charged and ready for your next round of golf. So, grab your iced tea, sit back, and let’s dive into the world of golf cart battery maintenance together!

Tips for Maintaining Golf Cart Batteries

1. Charging

When it comes to maintaining your golf cart batteries, proper charging is a crucial aspect. It ensures that your batteries perform optimally and have a long lifespan. Here are some tips to follow:

1.1 Regular charging

Make it a habit to charge your golf cart batteries regularly. After each use, plug in your charger and let it fully charge overnight. This will help prevent the batteries from discharging too much, which can lead to damage.

1.2 Avoid deep discharges

Deep discharges can be harmful to your batteries and significantly reduce their lifespan. Try to avoid allowing your batteries to discharge below 50% before recharging them. Regular charging will help in this regard as well.

1.3 Use the right charger

Using the right charger for your golf cart batteries is crucial. Ensure that the charger is compatible with your batteries and follows the manufacturer’s guidelines. Using the wrong charger can result in overcharging or undercharging, which can be detrimental to the batteries’ health.

1.4 Charge fully and avoid overcharging

It is essential to let your batteries charge fully before using them again. Avoid interrupting the charging process prematurely, as it can lead to incomplete charging cycles and reduced battery capacity. Similarly, overcharging your batteries can also be harmful. Once your batteries are fully charged, unplug the charger to prevent overcharging.

2. Cleaning

Regular cleaning of your golf cart batteries is essential to maintain their performance and prolong their lifespan. Follow these tips to keep your batteries clean and in top condition:

2.1 Regular cleaning

Make it a habit to clean your batteries regularly. Wipe away any dust, dirt, or debris that may have accumulated on the battery casing. This will prevent the buildup of grime, which can cause corrosion and hamper the battery’s performance.

2.2 Use water and mild detergent

When cleaning your golf cart batteries, use a mixture of water and mild detergent. Dip a soft cloth or sponge into the solution and gently scrub the battery casing to remove any stubborn dirt or stains. Avoid using harsh chemicals or abrasive materials that can damage the battery.

2.3 Dry thoroughly before use

After cleaning your batteries, ensure that they are thoroughly dried before using them again. Any leftover moisture can cause corrosion or damage to the battery terminals. Use a clean cloth to wipe away any remaining moisture and let the batteries air dry completely.

2.4 Prevent corrosion

Corrosion is one of the biggest enemies of golf cart batteries. To prevent corrosion, apply a thin layer of petroleum jelly or battery terminal protectant to the battery terminals after cleaning. This will create a barrier against moisture and minimize the risk of corrosion.

3. Inspecting

Regular inspection of your golf cart batteries is essential to identify any potential issues and address them promptly. Follow these tips to ensure that your batteries are in good condition:

3.1 Regular inspection

Set aside some time to inspect your golf cart batteries regularly. Look for any signs of damage, such as cracks, bulges, or leaks. Inspecting your batteries regularly will help you catch potential problems early on and prevent further damage.

3.2 Check for damages

During your inspection, pay close attention to the battery casing. Look for any visible damages or signs of wear and tear. If you notice any cracks or bulges, it might be an indication of internal damage, and the battery may need to be replaced.

3.3 Inspect for loose connections

Loose connections can impact the performance of your batteries and lead to poor electrical conductivity. Check the battery terminals and cables for any signs of loose connections. Tighten them if necessary to ensure a secure and reliable electrical connection.

3.4 Look out for leaks

Battery leaks can be a sign of internal damage and should be addressed immediately. Inspect your batteries for any signs of fluid leakage, such as wet spots or a pungent odor. If you notice any leaks, it is best to consult a professional and have the batteries replaced if necessary.

Tips for Maintaining Golf Cart Batteries

4. Storing

Proper storage of your golf cart batteries is crucial, especially during periods of non-use or the off-season. Follow these tips to ensure that your batteries remain in good condition while in storage:

4.1 Proper storage

When not in use, store your golf cart batteries in a dry and secure location. Consider investing in a battery storage box or rack to keep them organized and protected from any potential damage.

4.2 Store in a cool and dry place

Extreme temperatures can have a detrimental effect on your batteries. Store them in a cool and dry place, away from direct sunlight and any sources of heat or moisture. High temperatures can accelerate the self-discharge rate of the batteries and reduce their overall lifespan.

4.3 Keep batteries fully charged

Before storing your golf cart batteries, make sure they are fully charged. Batteries that are stored with a low charge can suffer from sulfate buildup, which can lead to irreversible damage. Keep an eye on the charge level and recharge as needed during prolonged periods of storage.

4.4 Use a battery maintainer

Consider using a battery maintainer or a trickle charger to keep your golf cart batteries properly maintained during storage. These devices provide a slow and steady charge to prevent the batteries from discharging and ensure they are ready for use when needed.

5. Disposing

At some point, you may need to dispose of your golf cart batteries due to age or irreparable damage. It is essential to follow proper disposal guidelines to ensure environmental safety. Here’s what you need to know:

5.1 Following disposal guidelines

When disposing of your golf cart batteries, always follow the disposal guidelines provided by your local authorities or recycling centers. Improper disposal of batteries can harm the environment and pose health risks.

5.2 Recycle batteries

Golf cart batteries are recyclable, and it is highly encouraged to recycle them instead of throwing them in the regular trash. Many recycling centers accept old batteries and have specific processes for handling and recycling them safely.

5.3 Contact local disposal facility

To find the nearest recycling center or appropriate disposal facility for your golf cart batteries, contact your local waste management or recycling authorities. They will be able to provide you with information on how to properly dispose of your batteries.

5.4 Properly remove and store in a safe place

Before disposing of your golf cart batteries, make sure to remove them from your cart safely. Follow the manufacturer’s instructions or seek professional assistance if needed. Once removed, store the batteries in a safe place, away from any potential hazards, until you can properly dispose of them.

6. Watering

Many golf cart batteries, particularly lead-acid batteries, require regular watering. Proper water levels are essential for the batteries to function optimally. Follow these tips for watering your golf cart batteries:

6.1 Checking water level

Regularly check the water level in your golf cart batteries. Open the battery caps and inspect the water level in each cell. It is crucial to maintain the water level above the minimum level indicated by the battery manufacturer.

6.2 Use distilled water

When adding water to your golf cart batteries, always use distilled water. Tap water or other types of water may contain impurities and minerals that can harm the battery cells. Distilled water ensures the purity and longevity of the batteries.

6.3 Add water after charging

To avoid dilution, it is recommended to add water to your batteries after the charging process. Once the batteries have been fully charged, check the water levels, and add distilled water if necessary. This helps maintain the integrity of the electrolyte solution within the battery cells.

6.4 Do not overfill

While it is essential to maintain the water levels in your golf cart batteries, be careful not to overfill the cells. Overfilling can lead to acid overflow during charging, causing damage to the battery and potentially hazardous situations. Follow the manufacturer’s guidelines for the appropriate water level height.

7. Driving

Proper driving habits can significantly impact the overall health and performance of your golf cart batteries. Follow these tips for safe and efficient driving:

7.1 Avoid excessive speeds

Excessive speeds can put a strain on your golf cart batteries, causing them to drain more quickly. Keep it at a reasonable speed level to preserve the battery capacity and ensure a longer runtime.

7.2 Do not overload the cart

Overloading your golf cart can put unnecessary stress on the batteries and impact their performance. Be mindful of the weight capacity of your cart and avoid exceeding it. Distribute the weight evenly to prevent uneven battery discharge.

7.3 Limit steep hill usage

Climbing steep hills can drain your batteries more rapidly due to increased power demand. Try to limit the usage of steep hills or inclines, as constant strain on the batteries can lead to reduced performance and a shortened lifespan.

7.4 Drive on designated paths

Stick to designated paths when driving your golf cart. Off-road driving or driving on uneven terrain can cause unnecessary vibrations, which can loosen connections and potentially damage the batteries. Following designated paths will ensure a smoother ride and minimize the risk of battery-related issues.

8. Maintenance

Regular maintenance is key to optimizing the performance and longevity of your golf cart batteries. Here are some maintenance tips to keep in mind:

8.1 Follow manufacturer’s instructions

Always refer to the manufacturer’s instructions or guidelines when performing maintenance tasks on your golf cart batteries. Each battery brand might have specific requirements or recommendations, and following them will ensure that you maintain your batteries correctly.

8.2 Regularly check battery voltage

Checking the battery voltage regularly can help you stay on top of the battery’s health and detect any potential issues. Use a digital voltmeter or a battery load tester to measure the voltage. Consult the battery manufacturer’s specifications to ensure the voltage is within the recommended range.

8.3 Clean terminals

Regularly cleaning the battery terminals is critical for maintaining good electrical conductivity. Use a battery terminal cleaner or a mixture of baking soda and water to remove any corrosion or buildup on the terminals. Ensure that the terminals are clean and free from any residue before reattaching the cables.

8.4 Test capacity

Periodically testing the capacity of your golf cart batteries can provide insights into their health and performance. Battery capacity tests can be conducted using specialized equipment or with the help of a professional. Knowing the battery capacity can help you assess when it’s time for replacement or other necessary actions.

9. Winter Care

When the colder months approach, it’s important to take extra precautions to care for your golf cart batteries. Follow these tips for winter care:

9.1 Store batteries indoors during extreme cold

Extreme cold temperatures can be detrimental to your golf cart batteries. If possible, store your batteries indoors during the winter months to protect them from freezing temperatures. Garages or storage areas with temperature control are ideal options.

9.2 Keep batteries fully charged

During winter storage, it is crucial to keep your golf cart batteries fully charged. Batteries that are left uncharged or at a low charge during the colder months can quickly lose capacity and suffer from irreversible damage. Monitor the charge level regularly and recharge if necessary.

9.3 Use insulation or battery blankets

To further protect your golf cart batteries from the cold, consider using insulation or battery blankets. These accessories provide additional insulation and keep the batteries at a more optimal temperature, reducing the risk of capacity loss due to extreme cold.

9.4 Keep the cart in a warm area before use

Before taking your golf cart out for a winter ride, make sure it has been stored in a warm area for a sufficient period. Cold batteries can hinder performance, and allowing the cart to warm up before use helps ensure that the batteries are operating at their best.

10. Troubleshooting

Even with proper maintenance, occasional issues may arise with your golf cart batteries. Here are some troubleshooting tips to help you identify and address common battery problems:

10.1 Identify common battery issues

Familiarize yourself with common battery issues, such as low capacity, slow charging, or excessive self-discharge. Knowing the symptoms can help you identify potential problems and take appropriate actions.

10.2 Check for loose or corroded connections

Loose or corroded connections can adversely affect the performance of your golf cart batteries. Regularly check the battery terminals and cable connections for any signs of looseness or corrosion. Clean the terminals if necessary and ensure a secure and reliable electrical connection.

10.3 Test battery voltage

If you are experiencing performance issues with your batteries, test the voltage to assess their health. A significant drop in battery voltage or voltage below the manufacturer’s recommended range might indicate a problem with the batteries.

10.4 Consult a professional if necessary

If you are unable to diagnose or address any battery issues on your own, do not hesitate to seek the assistance of a professional. A qualified technician or golf cart battery expert will be able to provide you with further guidance and help resolve any complex problems.

By following these comprehensive tips for maintaining your golf cart batteries, you can ensure their longevity, optimal performance, and a longer overall lifespan. Remember to always prioritize safety and, if unsure, seek professional advice for any concerns or issues related to your golf cart batteries. Happy golf carting!

5 Tips to Increase the Speed of Your Electric Golf Cart

Increase the speed of your electric golf cart with these 5 tips! Upgrade the motor, batteries, and controller, optimize gear ratio, reduce weight, and enhance aerodynamics. Zip around the course in no time!

If you’re looking to make your electric golf cart go faster, you’re in luck! We’ve got 5 tried and tested tips that will help you increase its speed and enhance your golfing experience. From optimizing the battery power to upgrading the motor, we’ve got you covered. So strap in and get ready to zip around the course in no time!

Upgrade Your Electric Golf Cart for Speed!

Is your electric golf cart lacking the speed and performance you desire? Don’t worry! There are several ways you can upgrade your cart to make it go faster and enhance your overall golfing experience. In this comprehensive guide, we’ll walk you through ten key areas to focus on for maximum speed improvement. Let’s dive in!

5 Tips to Increase the Speed of Your Electric Golf Cart

1. Upgrade the Motor

1.1 Replace the stock motor

One of the easiest ways to boost your golf cart’s speed is by replacing the stock motor. Stock motors are typically designed for average performance, so upgrading to a more powerful motor can make a noticeable difference. Look for motors specifically made for golf carts to ensure a proper fit and optimal performance.

1.2 Install a high-performance motor

For even greater speed gains, consider installing a high-performance motor. These motors are typically designed for racing applications and can significantly increase your cart’s top speed. Keep in mind that high-performance motors may require additional modifications, so ensure compatibility with your cart before proceeding.

1.3 Consider a brushless motor

Brushless motors offer several advantages over traditional brushed motors, including increased efficiency and power output. Consider upgrading to a brushless motor to further enhance your golf cart’s speed and performance. However, it is essential to verify compatibility with your cart’s electrical system before making the switch.

1.4 Opt for a more powerful motor

If you’re looking to maximize your golf cart’s speed potential, opting for a more powerful motor is crucial. Look for motors with higher horsepower ratings and torque capabilities to achieve the speed boost you desire. Remember to consider the limitations of your cart’s electrical system to ensure safe and optimal performance.

1.5 Ensure compatibility with the cart’s voltage

Before selecting a new motor, ensure compatibility with your cart’s voltage. Electric golf carts typically operate on either 36 volts or 48 volts. Choosing a motor that matches your cart’s voltage ensures seamless integration and prevents any electrical issues that may arise from mismatched components.

2. Upgrade the Batteries

2.1 Upgrade to higher voltage batteries

Upgrading your golf cart’s batteries to higher voltage options can provide a substantial speed boost. Higher voltage batteries can deliver more power to the motor, allowing it to operate at higher speeds. However, ensure that your cart’s electrical system is compatible with the upgraded voltage before making any changes.

2.2 Install lithium-ion batteries

Another battery upgrade option is to replace your existing batteries with lithium-ion batteries. Lithium-ion batteries offer several advantages, including higher energy density, lighter weight, and longer lifespan. These batteries can deliver consistent power and enhance your cart’s speed and overall performance.

2.3 Optimize battery connections

To ensure maximum power delivery and prevent any voltage drops, it’s crucial to optimize the battery connections. Clean the battery terminals regularly and ensure a secure connection between the batteries and the cart’s electrical system. Loose or corroded connections can hinder performance and reduce speed.

2.4 Maintain proper battery charging and care

Proper battery charging and care are essential for optimal performance. Follow the manufacturer’s guidelines for charging your batteries and avoid overcharging or undercharging them. Additionally, keep your batteries clean and check for any signs of damage or wear regularly. Maintaining your batteries’ health will ensure consistent power delivery and keep your golf cart running at its best.

2.5 Consider a battery management system (BMS)

For advanced battery performance monitoring and protection, consider installing a battery management system (BMS). A BMS monitors individual battery cells, balances the charge distribution, and protects against overcharging and over-discharging. Integrating a BMS in your golf cart can optimize battery performance and enhance overall speed and efficiency.

3. Modify the Controller

3.1 Replace the stock controller

Upgrading the stock controller is another effective way to increase your golf cart’s speed. Stock controllers often have conservative settings to prioritize safety and battery life. By replacing the controller with a higher-performance option, you can unlock your cart’s speed potential and customize its performance to suit your preferences.

3.2 Install a programmable controller

For more control over your golf cart’s speed and acceleration, consider installing a programmable controller. Programmable controllers allow you to adjust settings such as acceleration rate, maximum speed, and torque output. With a programmable controller, you can fine-tune your cart’s performance to meet your specific needs and preferences.

3.3 Adjust controller settings

Once you’ve upgraded to a new controller, spend some time adjusting the settings to optimize your golf cart’s speed. Experiment with different acceleration rates and maximum speed limits to find the perfect balance between performance and safety. Keep in mind that pushing your cart to its maximum speed may reduce battery life and require more frequent charging.

3.4 Optimize throttle response

Fine-tuning the throttle response is essential for a smooth and responsive driving experience. Adjust the controller settings to achieve optimal throttle response, ensuring that your cart accelerates quickly and effortlessly. Finding the right balance can significantly enhance your cart’s speed and overall performance.

3.5 Ensure compatibility with other modifications

When upgrading the controller, it’s crucial to ensure compatibility with other modifications you’ve made or plan to make. Verify that the new controller can handle the increased power output from upgraded motors or batteries. Compatibility between components is essential for a reliable and efficient golf cart.

5 Tips to Increase the Speed of Your Electric Golf Cart

4. Upgrade the Gear Ratio

4.1 Install a higher gear ratio

Upgrading your golf cart’s gear ratio can have a significant impact on its speed. Installing a higher gear ratio, such as a higher number of teeth on the driven gear, allows the motor to rotate at a higher speed per revolution of the wheels. This modification effectively increases your cart’s top speed without the need for additional power upgrades.

4.2 Consider a differential upgrade

If you’re looking to maximize your cart’s speed potential, consider upgrading the differential. A performance differential with a limited-slip or locking mechanism can distribute power more efficiently between the wheels, improving acceleration and overall speed. Upgrading the differential is a more involved modification, so seek professional advice for proper installation and compatibility.

4.3 Optimize tire size

Choosing the right tire size is essential for speed optimization. Larger-diameter tires can increase your cart’s top speed by covering more ground with each revolution. However, keep in mind that larger tires may affect your cart’s torque and acceleration. Find the right balance between speed and performance to suit your specific needs.

4.4 Fine-tune gear adjustments

After upgrading the gear ratio or making changes to the differential, fine-tuning gear adjustments may be necessary. Proper gear alignment and adjustments ensure optimal power transfer from the motor to the wheels and prevent any unnecessary drag or friction. Seek professional assistance or refer to your cart’s manufacturer guidelines for proper gear adjustments.

4.5 Seek professional advice for specialized modifications

If you’re considering specialized modifications or advanced gear ratio changes, it’s best to consult with a professional golf cart specialist. They can provide expert guidance tailored to your specific needs and ensure that your modifications are compatible, safe, and compliant with regulations.

5. Reduce Weight and Increase Aerodynamics

5.1 Remove unnecessary accessories

An easy and effective way to increase your golf cart’s speed is by reducing unnecessary weight. Remove any accessories or items that you don’t need during your golf rounds. Extra weight puts a strain on your cart’s motor and batteries, reducing overall speed and performance. Travel light and only carry the essentials for a faster and smoother ride.

5.2 Use lightweight materials

Consider using lightweight materials when making any modifications or upgrades to your golf cart. Lighter components, such as aluminum frames or fiberglass bodies, can significantly reduce the overall weight of your cart without compromising structural integrity. This weight reduction translates into improved acceleration and higher top speed.

5.3 Optimize body and frame design

While changing the body and frame design may not be feasible for everyone, modifying or optimizing the existing design can improve aerodynamics. Smooth out any rough edges, streamline the body shape, and consider adding fairings or windshields designed to reduce drag. Optimizing the body and frame design can increase your cart’s top speed by minimizing air resistance.

5.4 Install aerodynamic elements

Another way to enhance your golf cart’s aerodynamics is by installing specific aerodynamic elements. Rear spoilers or airfoils can redirect airflow more efficiently, reducing drag and increasing stability at higher speeds. However, be mindful of any local regulations or course rules regarding modifications to your cart’s appearance.

5.5 Improve airflow and reduce drag

In addition to modifying the body and installing aerodynamic elements, ensure optimal airflow throughout your cart. Remove any obstructions that may disrupt the airflow, such as unnecessary covers or grilles. Creating smooth and uninterrupted airflow will reduce drag and contribute to increased speed and performance.

6. Enhance Airflow and Cooling

6.1 Install a cooling system for the motor

Heat can negatively affect your golf cart’s performance and lead to reduced speed and power output. Installing a cooling system specifically designed for the motor can ensure optimal temperature regulation and prevent overheating. Improved motor cooling will enable consistent performance, especially during prolonged use or in hot weather conditions.

6.2 Upgrade the cooling system for batteries

Battery temperature also plays a crucial role in maintaining consistent speed and performance. Consider upgrading the cooling system for your batteries to prevent overheating and extend their lifespan. Cooling fans or heat sinks can help dissipate heat and ensure that your batteries operate within the optimal temperature range.

6.3 Optimize air intake and exhaust

Ensuring a proper air intake and exhaust system is essential for efficient motor performance and cooling. Clear any debris or obstructions that may hinder airflow, such as dirt or leaves. Keep the air intakes and exhaust vents clean and ensure they are positioned for maximum airflow. Optimizing the air intake and exhaust will contribute to better motor performance and increased speed.

6.4 Add ventilation for controller and electrical components

Aside from motor and battery cooling, it’s crucial to provide sufficient ventilation for the controller and other electrical components. Overheating of these components can lead to reduced performance and even system failures. Install ventilation fans or openings to promote airflow and keep these components operating at optimal temperatures.

6.5 Regularly monitor and maintain cooling systems

Maintaining your cooling systems is essential for long-term speed and performance gains. Regularly monitor the cooling system components, clean or replace air filters, and ensure proper functioning of fans or other cooling mechanisms. Preventive maintenance and regular inspections will help identify any issues before they impact your golf cart’s speed and performance.

7. Perform Regular Maintenance

7.1 Check and replace worn-out parts

Regular maintenance is crucial for keeping your golf cart in top shape. Check all parts regularly, including belts, bearings, and other moving components. Replace any worn-out or damaged parts promptly to prevent further damage and maintain optimal performance.

7.2 Lubricate moving components

Proper lubrication is essential for reducing friction and ensuring smooth operation of moving components. Regularly lubricate the cart’s axles, suspension components, and other moving parts to minimize wear and extend their lifespan. Smoothly operating components will contribute to a smoother ride and maintained speed.

7.3 Keep the cart clean

A clean golf cart not only looks great but also performs better. Regularly clean your cart, removing any dirt, mud, or grass that may accumulate. Pay special attention to the undercarriage and wheel wells, as a buildup of debris in these areas can hinder performance and reduce speed.

7.4 Inspect and inflate tires

Properly inflated tires are crucial for optimal performance and speed. Regularly inspect your tires for signs of wear, cuts, or punctures. Ensure they are inflated to the manufacturer’s recommended pressure levels. Underinflated tires can result in increased rolling resistance and reduced speed, so keep them properly inflated for maximum performance.

7.5 Maintain proper alignment

Maintaining proper wheel alignment is essential for efficient and safe operation of your golf cart. Misaligned wheels can lead to increased tire wear, reduced speed, and poor handling. Regularly check and adjust the wheel alignment as needed to ensure optimal performance and extend the lifespan of your tires.

8. Consider Professional Tuning

8.1 Consult with a golf cart specialist

If you’re unsure how to proceed with your speed upgrades or feel overwhelmed by the options, it’s best to consult with a golf cart specialist. They can assess your cart’s current state, discuss your goals, and provide expert advice on the most effective modifications for your specific needs.

8.2 Get a performance assessment

Before making any upgrades, consider getting a performance assessment from a professional. They can evaluate your cart’s current speed, acceleration, and overall performance. This assessment will help you set realistic expectations and determine the areas that require the most attention to achieve your desired speed improvements.

8.3 Seek expert advice for modifications

Making modifications or upgrades to your golf cart can be a complex process, especially if you’re unfamiliar with the technical aspects. Seek expert advice for guidance on specific modifications and ensure that you’re following proper installation and safety procedures. Expert advice will save you time, money, and potential headaches down the road.

8.4 Professional tune-up and fine-tuning

Consider scheduling a professional tune-up for your golf cart, especially after major upgrades or modifications. A professional tune-up ensures that all components are functioning correctly, optimizes performance settings, and fine-tunes the cart for maximum speed and efficiency. Regular professional maintenance will help keep your cart operating at its best.

8.5 Ensure modifications comply with regulations

When making modifications to your golf cart, it’s essential to ensure compliance with local regulations and course rules. Some modifications, especially those affecting the appearance or safety features of the cart, may be restricted or require specific approvals. Research and confirm that your modifications are compliant before proceeding.

9. Upgrade the Suspension

9.1 Install heavy-duty shocks

Upgrading your golf cart’s shocks to heavy-duty options can significantly improve stability and handling, especially at higher speeds. Heavy-duty shocks offer increased dampening capabilities and minimize suspension movement, allowing for more confident and controlled driving experiences.

9.2 Opt for adjustable suspension components

Adjustable suspension components provide the flexibility to fine-tune your cart’s suspension settings to match your preferences and driving conditions. Consider upgrading to adjustable shocks, springs, or sway bars to optimize your cart’s performance at different speeds and terrains.

9.3 Improve stability and handling

Enhancing your cart’s stability and handling is crucial for safe and enjoyable rides. Consider adding braces or stabilizer bars to reduce body roll and improve overall stability. Upgrading your cart’s suspension components will contribute to better handling, allowing you to navigate corners and uneven terrains with ease.

9.4 Consider specialized suspension systems

For golfers who plan to drive their carts in challenging terrains or off-road conditions, specialized suspension systems may be worth considering. Off-road suspension kits or independent front suspensions are designed to handle rough terrains and provide greater stability and agility. Consult with a specialist to determine the best suspension options for your specific needs.

9.5 Seek professional assistance for complex upgrades

Upgrading your golf cart’s suspension system can be a complex task, especially for those without technical expertise. Seek professional assistance for complex suspension upgrades to ensure proper installation, compatibility, and compliance with regulations. Professionals can guide you on the best suspension options and modifications for your cart’s specific requirements.

10. Practice Safe Driving

10.1 Adhere to speed limits and regulations

While it’s exciting to have a faster golf cart, it’s crucial to prioritize safety. Adhere to speed limits and regulations set by your local authorities and golf courses. Excessive speed poses risks to yourself, other golfers, and course staff. Always drive responsibly and within designated speed limits to ensure a safe and enjoyable golfing experience.

10.2 Be mindful of other golfers on the course

Respect other golfers on the course and drive responsibly. Be mindful of your speed and avoid sudden maneuvers or excessive acceleration that may startle or distract other players. Maintain a safe distance from other golfers and prioritize their safety and enjoyment during your rounds.

10.3 Drive responsibly and be cautious

Even with modifications and upgrades, it’s essential to drive your golf cart responsibly. Be cautious of your surroundings and anticipate potential hazards or obstacles. Adjust your speed and driving style accordingly to maintain control and prevent accidents or damage to the cart.

10.4 Use appropriate safety equipment

Wearing appropriate safety equipment, such as helmets or seat belts, is important when operating a high-speed golf cart. While golf carts may not require the same safety measures as vehicles on public roads, taking precautions will reduce the risk of injury in the event of an accident or sudden stop.

10.5 Keep up with regular safety inspections

Regular safety inspections are essential for maintaining a safe golf cart. Ensure that all safety features, such as lights, brakes, and horn, are functioning correctly. Additionally, check your cart’s tires, suspension, and any other key components regularly to prevent any safety hazards or potential speed impediments.

By following these ten areas of focus and making the recommended upgrades and modifications, you’ll be well on your way to enjoying a faster and more exciting golf cart experience. Remember to prioritize safety, adhere to any local regulations, and seek the assistance of professionals when needed. Get ready to hit the golf course in style and speed!

The Ultimate Guide: Properly Cleaning Your Golf Clubs

Learn how to properly clean your golf clubs with this ultimate guide. From step-by-step instructions to essential tools and helpful tips, keep your clubs in pristine condition and improve their performance. Grab your cleaning supplies and get ready to make your clubs shine!

Have you ever wondered how to give your golf clubs the TLC they deserve? Look no further! In this article, we will provide you with the ultimate guide on properly cleaning your golf clubs. From simple step-by-step instructions to helpful tips and tricks, you’ll be equipped with all the knowledge you need to keep your clubs in pristine condition. So grab your cleaning supplies and get ready to make your golf clubs shine like never before!

The Ultimate Guide: Properly Cleaning Your Golf Clubs

Why Cleaning Your Golf Clubs is Important

Cleaning your golf clubs is an essential part of maintaining their performance, extending their lifespan, and preserving their aesthetics. Regular cleaning not only improves the overall performance of your clubs but also ensures that they last for a long time. Additionally, keeping your clubs clean and well-maintained enhances their appearance, making you look more professional on the course. In this article, we will discuss the importance of cleaning your golf clubs and provide you with a comprehensive guide on how to properly clean them.

Essential Tools for Cleaning Golf Clubs

Before we dive into the cleaning process, let’s take a look at the essential tools you’ll need to properly clean your golf clubs. These tools will help you remove dirt, debris, and grime from your clubs without causing any damage.

  1. Soft-bristled Brush: A soft-bristled brush is the perfect tool for removing dirt and debris from your clubheads and grooves without scratching them.

  2. Towel or Microfiber Cloth: A towel or microfiber cloth is essential for wiping down your clubs and ensuring they are dry after cleaning.

  3. Warm Water: Warm water is the ideal medium for cleaning your golf clubs as it helps to loosen dirt and grime.

  4. Gentle Soap or Golf Club Cleaner: You can use a mild soap or a specifically formulated golf club cleaner to help remove stubborn stains and keep your clubs looking their best.

  5. Toothpicks or Pipe Cleaners: Toothpicks or pipe cleaners are handy tools for clearing out any dirt or grass that may be stuck in the clubhead grooves.

  6. Wire Brush: A wire brush can be used sparingly to remove any rust or corrosion from the clubhead, but caution must be taken to avoid damaging the club’s finish.

The Ultimate Guide: Properly Cleaning Your Golf Clubs

Regular Cleaning Routine

To ensure your golf clubs stay in the best possible condition, it is important to establish a regular cleaning routine. This routine should include pre-round maintenance, post-round cleaning, and monthly deep cleaning.

Pre-Round Maintenance

Before heading out to the golf course, it is a good idea to inspect and prepare your clubs for optimal performance. Here are the steps you can take for pre-round maintenance:

  1. Inspecting the Clubs: Take a close look at each club to ensure there are no visible signs of damage or wear. Check for any loose heads, cracked shafts, or worn grips.

  2. Removing Debris: Use a soft-bristled brush to gently remove any dirt, grass, or debris from the clubheads and grooves. Pay attention to the grooves as they play a crucial role in the club’s performance.

  3. Wiping Down Grips: Wipe down the grips of your clubs with a damp towel or microfiber cloth. This will remove any sweat, dirt, or oils that may have built up and ensure a firm grip during your round.

  4. Checking Shaft Flexibility: Take a moment to flex each club’s shaft gently. If you notice any stiffness or bending, it may be a sign of damage that needs to be addressed before playing.

  5. Ensuring Clubhead Alignment: Look at the clubheads and ensure they are properly aligned. If you notice any misalignment, it could affect your shots, and the club may need to be adjusted or repaired.

Post-Round Cleaning

Once you’ve finished your round, it’s time to give your clubs a thorough cleaning to remove any dirt, grass, or moisture that may have accumulated during play. Follow these steps for post-round cleaning:

  1. Cleaning Clubhead: Take a damp towel or cloth and gently wipe down the clubheads to remove any dirt or grass. Pay special attention to the grooves, as they can easily accumulate debris.

  2. Cleaning Grooves: Use a soft-bristled brush or a toothpick to clean out the grooves on the clubface. Clearing out any debris will ensure optimal ball contact and spin control during your next round.

  3. Drying the Clubs: After cleaning, use a dry towel or microfiber cloth to thoroughly dry your clubs. Moisture can lead to rust or corrosion, so it is crucial to remove any excess moisture.

  4. Polishing Metal Shafts: If your clubs have metal shafts, you can use a metal polish specifically made for golf clubs. Apply a small amount to a cloth and gently rub it onto the shafts to restore their shine.

  5. Conditioning Leather Grips: For golf clubs with leather grips, it is essential to regularly condition them to maintain their suppleness and prevent cracking. Apply a leather conditioner and wipe off any excess.

Monthly Deep Cleaning

In addition to regular pre-round and post-round cleaning, it is important to perform a monthly deep cleaning to keep your clubs in top condition. Here’s how to do it:

  1. Soaking the Clubs: Fill a bucket or sink with warm water and add a mild soap or golf club cleaner. Allow the clubs to soak for 15-20 minutes to loosen any built-up dirt or grime.

  2. Scrubbing Stubborn Dirt: Use a soft-bristled brush to scrub away any stubborn dirt or stains on the clubheads and grips. Be gentle to avoid damaging the club’s finish or grips.

  3. Cleaning the Grips Thoroughly: Submerge the grips in the soapy water and scrub them with a brush or cloth. Rinse them well and ensure they are free from any soap residue before drying.

  4. Removing Rust or Corrosion: If you notice any rust or corrosion on the clubheads, use a wire brush to gently remove it. Take care not to scratch the club’s finish and rinse off any debris thoroughly.

  5. Inspecting for Damage: Once the clubs are clean, take the time to inspect them for any signs of damage. Check the clubheads, shafts, and grips for cracks, dents, or other issues that may require attention.

Tips for Properly Cleaning Golf Clubs

While you now have a comprehensive understanding of the cleaning process, here are some additional tips to keep in mind to ensure you clean your golf clubs properly:

  1. Avoid Using Abrasive Cleaners: Harsh, abrasive cleaners can damage the finish of your clubs. Stick to mild soap or golf club cleaners to prevent any unwanted scratches or discoloration.

  2. Don’t Neglect the Clubheads: The clubheads are the most critical part of the club when it comes to performance. Clean the grooves thoroughly to maintain maximum ball control and spin.

  3. Pay Attention to Grooves: The grooves on the clubface are designed to create backspin and heighten control. Regularly cleaning the grooves will enhance your ability to generate spin and accuracy.

  4. Dry Clubs Thoroughly: Moisture can lead to rust or corrosion, so it is important to dry your clubs thoroughly after cleaning. Pay special attention to the grooves and the grips, ensuring they are completely dry.

  5. Store Clubs Properly: When not in use, keep your clubs in a clean and dry environment. Use a golf bag with individual club dividers to prevent them from banging against each other, causing damage.

Maintaining Long-term Durability

To ensure your golf clubs remain in optimal condition for the long run, here are a few additional tips to maintain their durability:

  1. Avoiding Extreme Temperatures: Avoid exposing your clubs to extreme temperatures, as this can cause materials such as graphite to expand or contract, potentially leading to damage.

  2. Regularly Inspect and Repair: Perform regular inspections of your clubs to catch any signs of damage early. Address any cracks, dents, or loose components promptly to prevent further deterioration.

  3. Replacing Grips When Necessary: Over time, golf club grips can wear out and lose their effectiveness. Replace them as needed to maintain a firm and comfortable grip during your swings.

  4. Periodically Regroove Clubfaces: The grooves on your club’s face can become worn down over time, affecting the spin and control you can generate. Consider regrooving your clubfaces to restore their performance.

Common Mistakes to Avoid

While cleaning your golf clubs, it’s important to avoid these common mistakes that can undermine your efforts to keep them in top condition:

  1. Using Harsh Cleaning Chemicals: Harsh chemicals can damage the finish of your clubs and corrode their components. Stick to mild soap or golf club cleaners to ensure safe and effective cleaning.

  2. Scrubbing Too Aggressively: Scrubbing your clubs too aggressively can lead to scratches, dents, or other forms of damage. Take a gentle approach to cleaning, especially when dealing with delicate club components.

  3. Overlooking Drying Process: Failing to dry your clubs thoroughly after cleaning can lead to rust, corrosion, or mold growth. Take the time to dry each club, paying attention to the grooves and grips.

  4. Not Consistently Maintaining Clubs: Regular maintenance is key to the longevity of your clubs. Neglecting to clean them on a regular basis can lead to a build-up of dirt and grime, affecting their performance.

  5. Storing Clubs in Damaging Conditions: Avoid storing your clubs in extreme conditions, such as a hot trunk or a damp basement. Proper storage in a clean and dry environment will prolong their lifespan.

Conclusion

Properly cleaning your golf clubs is crucial for maintaining their performance, extending their lifespan, and preserving their aesthetics. By following a regular cleaning routine, including pre-round maintenance, post-round cleaning, and monthly deep cleaning, you can ensure your clubs are always in top condition. Additionally, by utilizing the essential tools and tips mentioned in this guide, you’ll be able to clean your clubs effectively and keep them in peak performance for years to come. So, make it a priority to clean your golf clubs regularly, and enjoy the benefits of having clubs that look and perform their best every time you step onto the course.

The Ultimate Guide: How to Wash Golf Shoes

Learn how to properly wash your golf shoes in this ultimate guide. From removing dirt and stains to choosing the right cleaning products, follow our expert tips to keep your shoes looking brand new.

If you’re an avid golfer, you know how important it is to have clean and well-maintained golf shoes. Not only do they enhance your performance on the course, but they also keep your feet comfortable and protected. In this ultimate guide, we will walk you through the step-by-step process of washing your golf shoes to ensure they stay in great condition and last for many rounds to come. From removing dirt and stains to choosing the right cleaning products, follow our expert tips and tricks to keep your golf shoes looking brand new.

The Ultimate Guide: How to Wash Golf Shoes

Golf shoes are an essential part of any golfer’s equipment, but they can get dirty and smelly after countless rounds on the course. To keep your golf shoes looking and smelling fresh, it’s important to know how to properly clean and care for them. This comprehensive guide will walk you through the step-by-step process of washing your golf shoes and offer tips for maintaining them in the long run.

The Ultimate Guide: How to Wash Golf Shoes

Materials Needed

Before you begin cleaning your golf shoes, gather the necessary materials. Here’s what you’ll need:

  • Soft brush: for removing dirt and debris from the shoe’s exterior
  • Mild detergent: for handwashing or machine washing
  • Water: for rinsing the shoes
  • Soft cloth: for drying the shoes
  • Old toothbrush: for scrubbing stubborn stains
  • Towel: for drying the shoes
  • Shoe deodorizer: for eliminating odors
  • Newspaper: for stuffing the shoes while they dry

Preparation

Before you start cleaning your golf shoes, take a few minutes to prepare them for the washing process. Follow these steps:

  1. Remove shoelaces: Take out the shoelaces from your golf shoes. This will allow you to clean them separately and also provide better access to the shoe’s exterior and tongue.

  2. Remove insoles: Take out the insoles from your golf shoes. This will make it easier to clean the inside of the shoe and prevent any damage to the insoles during the washing process.

  3. Brush off excess dirt: Use a soft brush to gently remove any excess dirt and debris from the shoe’s exterior. Pay attention to the crevices and hard-to-reach areas.

  4. Stuff shoes with newspaper: Fill the inside of your golf shoes with newspaper to help them maintain their shape during the cleaning and drying process. This will also absorb excess moisture and help speed up the drying time.

Handwashing Method

If you prefer to handwash your golf shoes, follow these steps:

  1. Prepare mild detergent solution: Fill a basin or sink with lukewarm water and add a small amount of mild detergent. Mix until suds form.

  2. Dip soft brush in the solution: Dip a soft brush into the mild detergent solution and gently scrub the shoe’s exterior. Start from the top and work your way down, focusing on any areas with visible dirt or stains.

  3. Pay extra attention to the soles: The soles of your golf shoes are likely to collect the most dirt and debris. Use the soft brush to scrub the soles thoroughly, ensuring that all dirt is removed.

  4. Clean laces and insoles separately: Use the mild detergent solution to clean the laces and insoles separately. Gently scrub them with the soft brush and rinse thoroughly.

  5. Rinse shoes with water: After scrubbing the shoes, rinse them with clean water to remove any traces of detergent.

  6. Dry the shoes with a towel: Use a soft cloth or towel to gently pat the shoes dry. Avoid rubbing, as this can damage the shoe’s material.

  7. Air dry the shoes: Place the shoes in a well-ventilated area and allow them to air dry completely. Avoid placing them in direct sunlight or near a heat source, as this can cause the material to warp or crack.

  8. Reinsert insoles and laces: Once the shoes are dry, reinsert the insoles and laces. Make sure they are properly aligned and secured.

The Ultimate Guide: How to Wash Golf Shoes

Machine Washing Method

If you prefer to use a washing machine, follow these steps:

  1. Check manufacturer’s instructions: Before machine washing your golf shoes, check the manufacturer’s instructions to ensure that it is safe to do so. Some golf shoes may not be suitable for machine washing.

  2. Remove insoles and laces: Just like with the handwashing method, remove the insoles and laces from your golf shoes before machine washing.

  3. Place shoes in a laundry bag: To protect your golf shoes during the machine washing process, place them in a laundry bag. This will prevent any damage to the shoe’s material and keep the laces and insoles from getting tangled.

  4. Add mild detergent: Add a small amount of mild detergent to the washing machine, following the manufacturer’s instructions.

  5. Set the machine to a gentle cycle: Select the gentle cycle on your washing machine to prevent any unnecessary agitation or damage to the shoes.

  6. Air dry the shoes: After the machine wash cycle is complete, remove the shoes from the laundry bag and let them air dry completely. Again, avoid exposing them to direct sunlight or heat sources.

  7. Reinsert insoles and laces: Once the shoes are dry, reinsert the insoles and laces.

Removing Stubborn Stains

If your golf shoes have stubborn stains that won’t come off with regular cleaning, follow these steps:

  1. Remove excess dirt and debris: Before treating the stain, use a soft brush to remove any excess dirt or debris from the affected area.

  2. Spot treat the stain: Apply a small amount of mild detergent directly to the stain. Let it sit for a few minutes to penetrate the stain.

  3. Use an old toothbrush to scrub: Gently scrub the stain with an old toothbrush in a circular motion. Be careful not to scrub too hard, as this can damage the shoe’s material.

  4. Rinse with water: After scrubbing the stain, rinse the shoe with water to remove any traces of detergent.

  5. Air dry the shoes: Allow the shoes to air dry completely before wearing them or storing them.

Drying and Caring

Proper drying and care are essential to prolong the life of your golf shoes. Follow these tips:

  1. Avoid direct sunlight or heat sources: When drying your golf shoes, avoid placing them in direct sunlight or near heat sources, as this can cause the material to warp or crack.

  2. Allow shoes to air dry completely: It’s important to allow your golf shoes to air dry completely before wearing them or storing them. This helps prevent mold and mildew from forming.

  3. Use a shoe deodorizer: To keep your golf shoes smelling fresh, use a shoe deodorizer. This will help eliminate any odors and prolong the freshness of your shoes.

  4. Store shoes in a cool, dry place: When not in use, store your golf shoes in a cool, dry place. Avoid storing them in damp areas, as this can promote mold and mildew growth.

  5. Clean regularly to maintain: To keep your golf shoes in the best condition, make it a habit to clean them regularly. Remove excess dirt and debris after each round of golf and clean any visible stains promptly.

Washing Golf Shoe Inserts

Golf shoe inserts can accumulate dirt and sweat over time. Follow these steps to wash them:

  1. Remove inserts from the shoes: Take out the inserts from your golf shoes before washing them.

  2. Hand wash or machine wash: Depending on the material and manufacturer’s instructions, either hand wash or machine wash the inserts using mild detergent.

  3. Air dry completely: After washing, let the inserts air dry completely before reinserting them into your golf shoes.

  4. Reinsert into shoes: Once dry, reinsert the inserts into your golf shoes. Make sure they are properly aligned and secured.

Cleaning Spiked Golf Shoes

Spiked golf shoes require special attention when it comes to cleaning. Here’s how to do it:

  1. Remove loose dirt and debris: Use a soft brush to remove any loose dirt and debris from the exterior of the shoe, including the spikes.

  2. Spot treat stains: If there are any stains on the shoe, spot treat them using mild detergent and a soft brush.

  3. Use a soft brush to clean spikes: Take an old toothbrush or a soft brush and gently clean the spikes. Pay attention to any dirt or grass that may be stuck between the spikes.

  4. Rinse shoes with water: After cleaning, rinse the shoes with water to remove any traces of detergent.

  5. Air dry the shoes: Allow the shoes to air dry completely before wearing them or storing them.

  6. Reinsert any removable spikes: If your golf shoes have removable spikes, reinsert them once the shoes are fully dry. Ensure that they are securely attached.

Tips for Maintaining Golf Shoes

To keep your golf shoes in excellent condition, here are some additional tips:

  1. Wipe shoes after each round of golf: After playing a round of golf, wipe down your shoes with a soft cloth to remove any dirt or grass.

  2. Store shoes in a shoe bag: When traveling or storing your golf shoes, use a shoe bag or shoe box to keep them protected from dust and damage.

  3. Avoid extreme temperatures: Extreme temperatures can damage the material of your golf shoes. Avoid leaving them in a hot car or exposing them to freezing temperatures for extended periods.

  4. Replace worn-out spikes: Over time, the spikes on your golf shoes will wear down. Regularly check the condition of the spikes and replace them as needed to maintain traction on the course.

  5. Regularly clean and dry shoes: Make it a habit to regularly clean and dry your golf shoes to prevent dirt buildup and maintain their appearance and performance.

When to Wash Golf Shoes

Knowing when to wash your golf shoes is crucial to their longevity and performance. Here are some signs that indicate it’s time for a thorough cleaning:

  • After playing in wet or muddy conditions: Golf shoes are bound to get dirty after playing in wet or muddy conditions. It’s important to wash them to prevent dirt and mud from drying and affecting the shoe’s material.

  • When shoes start to smell: If your golf shoes develop a foul odor, it’s a telltale sign that they need to be washed. Use mild detergent and deodorizer to eliminate any unpleasant smells.

  • Significant dirt buildup: If there is a visible buildup of dirt and debris on your golf shoes, it’s time for a thorough cleaning. This will not only improve their appearance but also maintain their performance on the course.

  • Stains that are difficult to remove: Stubborn stains that won’t come off with regular cleaning methods indicate that your golf shoes need a more intensive wash. Spot treat the stains and follow the appropriate cleaning method to remove them effectively.

By following this comprehensive guide, you can ensure that your golf shoes remain clean, fresh, and in top condition for many rounds to come. Proper cleaning and care will not only prolong their lifespan but also enhance your performance on the golf course. So, grab your soft brush, mild detergent, and some water, and get ready to give your golf shoes the cleaning they deserve!

10 Steps to Clean Your Golf Cart

Discover 10 simple steps to clean your golf cart and keep it looking fresh and ready for the next round. From gathering supplies to tackling the exterior and interior, we’ll guide you through each step for a shiny, like-new cart!

So, you’ve just finished a great round of golf and now it’s time to give your trusty golf cart some much-needed TLC. Whether it’s covered in dirt, grass stains, or even the remnants of a leafy adventure, keeping your golf cart clean is essential for maintaining its performance and aesthetics. In this article, you’ll discover 10 simple steps that will have your golf cart looking fresh and ready for the next round in no time. From gathering the necessary supplies to tackling both the exterior and interior, we’ll guide you through each step to ensure your golf cart shines like new. So let’s roll up our sleeves and get started on giving your golf cart the cleaning it deserves!

10 Steps to Clean Your Golf Cart

If you own a golf cart, you probably spend a lot of time enjoying the open air and the freedom it provides. However, with regular use, your golf cart can quickly become dirty and in need of a thorough cleaning. Cleaning your golf cart not only keeps it looking its best, but it also helps to protect its surfaces and maintain its longevity. In this article, we will walk you through the 10 steps to clean your golf cart, ensuring that it is sparkling clean and ready for your next joyride. So let’s gather our supplies and get started!

10 Steps to Clean Your Golf Cart

Supplies Needed

Before we dive into the cleaning process, it’s important to gather all the necessary supplies. Here’s a list of the items you will need:

  1. Hose with Nozzle
  2. Bucket
  3. Mild Soap or Golf Cart Cleaner
  4. Soft-Bristled Brush
  5. Microfiber Cloths
  6. Glass Cleaner
  7. Wheel Cleaner
  8. Rubbing Alcohol
  9. Polish or Wax
  10. Tire Shine

Having these supplies ready will make the cleaning process much smoother and more efficient.

Step 1: Remove Loose Debris

First things first, it’s important to remove any loose debris from your golf cart before you start cleaning. Begin by removing any personal items such as golf clubs, umbrellas, or towels. Once the personal items are clear, take a moment to clear out any trash or empty bottles that may have accumulated. Next, use a soft-bristled brush to gently brush off any dirt and leaves that may be stuck on the surface of your cart. For hard-to-reach areas, consider using a blower to blow out any debris that may be lodged in crevices. By removing loose debris, you’ll be able to effectively clean your golf cart without any obstacles.

Step 2: Pre-Soak the Cart

Preparing your golf cart for a deep cleaning involves pre-soaking it with a soapy water solution. Fill a bucket with soapy water by adding mild soap or a golf cart cleaner. Once the bucket is ready, use a hose with a nozzle to wet the entire cart. This helps to loosen any dirt or grime that may be stuck on the surface. Next, apply the soapy water solution to the cart, making sure to cover all areas. Allow the cart to soak for a few minutes, allowing the soap to work its magic in loosening any stubborn dirt.

Step 3: Clean the Body

Now that your golf cart has had a chance to pre-soak, it’s time to start cleaning the body. Begin cleaning from the top of the cart and work your way down. Using a soft-bristled brush, gently scrub the surface of your cart in circular motions. Pay close attention to details such as handles, hinges, and corners, as these areas tend to accumulate dirt and grime. Be careful not to scrub too aggressively, as this can damage the paint or finish of your cart. By taking your time and focusing on each section, you’ll ensure that the body of your golf cart is thoroughly clean and free from any dirt or debris.

10 Steps to Clean Your Golf Cart

Step 4: Wash the Seats

The seats of your golf cart are not only important for comfort but also add to the overall appearance of your cart. To clean the seats, start by checking the manufacturer’s instructions on how to properly care for your specific seats. Once you have a suitable cleaning method, prepare a mild soap solution and use a soft-bristled brush to gently scrub the seats. Avoid using excessive force, as this can damage or tear the upholstery. For any stubborn stains, consider using rubbing alcohol to remove them. Remember to always test any cleaning solution on a small, inconspicuous area before applying it to the entire seat. By following these steps, your seats will be clean and ready for your next round of golf.

Step 5: Scrub the Wheels

The wheels of your golf cart are not only functional but also a prominent part of its overall appearance. To keep them looking their best, it’s important to give them a thorough cleaning. Start by applying a wheel cleaner of your choice to the wheels. Use a soft-bristled brush to scrub the wheels, paying close attention to the areas around the lug nuts. This is where dirt and brake dust tend to accumulate the most. Rinse the wheels thoroughly with water, ensuring that all the cleaning solution is removed. By taking the time to clean your wheels properly, you’ll ensure that they remain in good condition and enhance the overall look of your golf cart.

Step 6: Clean the Windshield

A clear and clean windshield is not only important for visibility but also adds to the overall safety of your golf cart. To clean the windshield, start by spraying a glass cleaner onto its surface. Using a microfiber cloth, wipe the windshield in a circular motion, paying attention to any streaks. If you notice any water spots on the windshield, use the glass cleaner or a mixture of vinegar and water to remove them. By cleaning the windshield thoroughly, you’ll have a clear line of sight while driving your golf cart.

Step 7: Rinse Off the Cart

At this point, it’s time to rinse off the soap and residue from your golf cart. Use the hose with a nozzle to thoroughly rinse off the entire cart. Make sure to remove all the soap residue, as it can leave streaks or spots on the surfaces. Take a moment to check for any missed spots or areas that need further cleaning. Once you are satisfied with the rinsing, dry the cart using a microfiber cloth. This step ensures that your cart is left spotless and ready for the finishing touches.

Step 8: Dry the Cart

Drying your golf cart is an essential step to prevent water spots and to maintain its shine. Use a microfiber cloth to dry the entire cart, ensuring that all surfaces are free from water or streaks. Pay extra attention to details such as handles, crevices, and the windshield. By thoroughly drying your cart, you’ll achieve a clean and polished look.

Step 9: Polish and Wax

To give your golf cart that extra shine and protection, it’s important to polish and wax the body. Apply a suitable polish or wax to a clean microfiber cloth and work it into the surface of your cart. Make sure to follow the manufacturer’s instructions and apply the product in a circular motion. This helps to protect the paint and finish while enhancing its overall appearance. By taking the time to polish and wax your golf cart, you’ll ensure that it remains in pristine condition for years to come.

Step 10: Reassemble and Final Touches

Now that your golf cart is clean and shining, it’s time to reassemble any personal items and give it the final touches. Put back any golf clubs, towels, or other items that you removed earlier. Take a moment to reattach any accessories such as cup holders or side mirrors that were temporarily removed during the cleaning process. Additionally, make sure to check the battery connections and ensure they are secure. Finally, apply a tire shine product to the tires to give them a glossy and polished look. By completing these final touches, your golf cart will be looking its absolute best.

Cleaning your golf cart may seem like a time-consuming task, but by following these 10 steps, you can make the process efficient and enjoyable. With the right supplies and a friendly tone of voice, your golf cart will be the envy of the golf course. So grab those supplies and get ready to clean your golf cart to perfection! Happy cleaning!

A Complete Guide to Adjusting Golf Cart Brakes

A Complete Guide to Adjusting Golf Cart Brakes. Learn how to adjust your golf cart brakes for optimal performance and safety on the course.

If you own a golf cart and want to make sure it’s operating safely and smoothly, then learning how to adjust the brakes is an important skill to have. This complete guide will walk you through the step-by-step process of adjusting your golf cart brakes, ensuring that they are working optimally and providing you with a reliable stopping mechanism on the golf course. Whether you’re a seasoned pro or a beginner, this guide is here to help you gain the knowledge and confidence to tackle this task efficiently. So grab your tools and let’s get started on fine-tuning those brakes!

A Complete Guide to Adjusting Golf Cart Brakes

1. Understanding Golf Cart Brakes

Golf cart brakes are a crucial component of the vehicle that ensure safe and efficient stopping power. Without properly functioning brakes, you put yourself and others at risk on the golf course or wherever you may be driving your cart. Understanding the different types of golf cart brakes, the importance of properly adjusted brakes, and being aware of common signs of brake issues are essential for maintaining the overall performance and safety of your golf cart.

1.1 Types of Golf Cart Brakes

Golf carts typically have two types of brakes: mechanical brakes and hydraulic brakes. Mechanical brakes are commonly found in older models and consist of brake drums, brake shoes, and a mechanical linkage. On the other hand, hydraulic brakes are more prevalent in newer models and utilize hydraulic fluid to transmit force from the brake pedal to the brake calipers.

1.2 Importance of Properly Adjusted Brakes

Keeping your golf cart brakes properly adjusted is vital to ensure optimal braking performance. When brakes are out of adjustment, they may not engage properly, resulting in longer stopping distances or even failure to stop completely. Additionally, improperly adjusted brakes can lead to uneven braking, premature wear of brake components, and potential damage to other vital parts of the cart’s braking system. Therefore, regular brake adjustments are essential not only for your safety but also the longevity of your golf cart.

1.3 Common Signs of Brake Issues

Recognizing the signs of brake issues is crucial for addressing them before they escalate into more significant problems. Some common indicators of potential brake problems in golf carts include squeaking or grinding noises when braking, a spongy brake pedal, a brake pedal that goes to the floor, uneven braking, or difficulty in applying the brakes. If you notice any of these signs, it’s essential to take prompt action to diagnose and rectify the issue.

2. Necessary Tools and Equipment

Before you begin adjusting your golf cart brakes, it’s essential to have the right tools and equipment at your disposal. This will ensure that the process goes smoothly and that you can maintain the safety of the working environment.

2.1 Basic Tools

Some of the basic tools you’ll need for adjusting golf cart brakes include a socket set, wrench set, pliers, screwdrivers (both flathead and Phillips), and a brake adjustment tool or brake spoon. These tools are commonly found in most toolboxes and should be sufficient for basic brake adjustments.

2.2 Specialized Golf Cart Brake Tools

In addition to the basic tools, there are specialized tools designed explicitly for golf cart brake adjustments. These tools may include a brake drum puller, brake spring pliers, brake lining gauge, and a brake fluid pressure tester. While not strictly necessary for regular brake adjustments, these specialized tools can make the process easier and more efficient, especially if you plan on performing more in-depth maintenance or repairs on your golf cart’s braking system.

2.3 Safety Equipment

Ensuring your safety while working on your golf cart’s brakes is of utmost importance. Therefore, it’s essential to have the appropriate safety equipment on hand. This includes safety goggles to protect your eyes from debris, gloves to protect your hands, and closed-toe shoes for foot protection. Additionally, having a fire extinguisher nearby is always a wise precautionary measure when working with any mechanical components.

3. Preparing for Brake Adjustment

Before jumping into adjusting your golf cart brakes, it’s crucial to properly prepare the cart and create a safe working environment.

3.1 Parking the Golf Cart

First, ensure that your golf cart is parked on a level surface and the engine is turned off. This will prevent any unwanted movement or accidental starting of the cart while you are working on the brakes.

3.2 Engaging Parking Brake

Once the golf cart is parked, engage the parking brake to prevent any unintentional rolling or movement. The parking brake will help keep the golf cart stable during the brake adjustment process.

3.3 Lifting the Cart Safely

To access the brakes for adjustment, you may need to lift the golf cart. It’s crucial to lift the cart safely using an appropriate jack or lift. Make sure to consult your golf cart’s manufacturer guidelines to determine the correct lifting points and methods to avoid any damage or injury. Always prioritize safety and use caution when lifting heavy machinery.

4. Adjusting Mechanical Brakes

If your golf cart is equipped with mechanical brakes, follow these steps to adjust them properly.

4.1 Locating Brake Adjustment Points

Start by locating the brake adjustment points on your golf cart. These are typically accessible from the wheel well or near the brake drum. Depending on the specific model of your golf cart, you may need to remove a small cover or access panel to reach the adjustment points.

4.2 Loosening or Tightening Brake Adjustment

Using the appropriate tools, gently loosen the brake adjustment by turning the adjustment nut counterclockwise. Start with a small adjustment to avoid over-tightening the brakes. If the brakes are too loose, adjust them in the opposite direction by turning the adjustment nut clockwise. Repeat this process for all the wheels.

4.3 Testing the Brake Operation

After making the necessary brake adjustments, it’s crucial to test the brake operation before using the golf cart. Slowly press the brake pedal and ensure that the wheels lock up slightly without skidding. You should feel a firm and responsive brake pedal. If the brakes still feel loose or ineffective, further adjustment may be necessary.

5. Adjusting Hydraulic Brakes

If your golf cart is equipped with hydraulic brakes, follow these steps to adjust them properly.

5.1 Bleeding the Brake System

Start by bleeding the brake system to remove any air bubbles or contaminants from the hydraulic lines. Begin with the wheel farthest from the master cylinder and work your way closer. Refer to your golf cart’s manual or follow the manufacturer’s instructions for the correct bleeding procedure.

5.2 Adjusting Brake Fluid Level

Next, check and adjust the brake fluid level in the master cylinder reservoir. Ensure that the fluid is at the recommended level specified by the manufacturer. Using a brake fluid pressure tester, verify that the pressure is within the acceptable range. If the pressure is too low, add more brake fluid to the reservoir.

5.3 Testing the Brake Pedal

After adjusting the brake fluid level and bleeding the brake system, it’s crucial to test the brake pedal for proper operation. Ensure that the pedal feels firm and doesn’t sink to the floor when pressed. If the pedal feels spongy or there is a lack of response, further adjustments or bleeding may be required.

6. Troubleshooting Common Brake Problems

Even with proper maintenance and regular adjustments, occasional brake issues may arise. Here are some common brake problems golf cart owners may encounter and possible solutions:

6.1 Spongy Brake Pedal

If you experience a spongy brake pedal that requires excessive travel before engaging, it may indicate air in the hydraulic system or a leak. Start by bleeding the brakes to remove any trapped air. If the issue persists, inspect the brake lines and connections for any signs of damage or leaks. Replace any faulty components and retest the brakes.

6.2 Uneven Braking

If your golf cart exhibits uneven braking, where one wheel brakes more or less than the others, it may indicate a hydraulic fluid imbalance or a mechanical issue with the brake linkage. Check the brake fluid levels and adjust as necessary. Inspect the brake shoes, drums, and mechanical components for any signs of damage or misalignment. Correct any issues found and retest the brakes.

6.3 Noisy Brakes

Noisy brakes can be caused by a variety of factors, such as worn brake pads, loose or improperly adjusted components, or contamination on the braking surface. Begin by inspecting the brake pads for excessive wear and replace if necessary. Check for any loose or misaligned components and tighten or adjust them accordingly. Clean the brake drums and shoes to remove any dirt or debris that may cause noise.

7. Maintenance Tips for Golf Cart Brakes

To ensure optimal performance and longevity of your golf cart brakes, it’s essential to incorporate regular maintenance into your routine.

7.1 Regular Cleaning and Inspection

Clean your golf cart brakes regularly to remove any dirt, grime, or debris that can affect their performance. Use a soft cloth or brush to carefully clean the brake drums, brake shoes, and other brake components. While cleaning, inspect the components for any signs of wear, damage, or misalignment. Address any issues promptly to prevent further damage.

7.2 Lubrication of Brake Components

Proper lubrication is essential to ensure smooth and efficient brake operation. Apply a small amount of high-temperature brake lubricant to the pivot points, sliding surfaces, and contact points of the brake shoes. Be cautious not to apply excessive lubricant, as it can attract dirt and lead to brake noise or reduced performance.

7.3 Replacing Worn Brake Pads

Brake pads wear down over time and need to be replaced periodically. Inspect the brake pads regularly for wear and measure the thickness. If the pads are worn beyond the manufacturer’s recommended limits, replace them promptly. Worn brake pads not only compromise braking performance but can also damage other components, leading to costlier repairs.

8. Brake Adjustments for Different Golf Cart Models

Different golf cart models may have specific procedures or adjustment points for their brakes. Here are some general guidelines for adjusting brakes on popular golf cart models:

8.1 Ezgo Golf Cart Brake Adjustment

For Ezgo golf carts, start by locating the access hole on the brake drum. Use a brake adjustment tool or brake spoon to adjust the brake shoes by turning the star wheel adjuster. Rotate it in either direction to tighten or loosen the brakes as needed. Repeat the process for all four wheels, test the brake operation, and make additional adjustments if necessary.

8.2 Yamaha Golf Cart Brake Adjustment

On Yamaha golf carts, the brake adjustment is generally performed by adjusting the nut on the brake cable. Locate the adjustment nut on the cable near the brake pedal. Loosen the lock nut and then turn the adjustment nut to tighten or loosen the brakes. Once adjusted, tighten the lock nut, test the brakes, and readjust if needed.

8.3 Club Car Golf Cart Brake Adjustment

Club Car golf carts typically have self-adjusting brakes, which means they automatically adjust as the brake pads wear down. However, periodic manual adjustments may still be required. Refer to your Club Car’s manual for instructions specific to your model. In general, you may need to locate the brake adjustment hole and use a brake adjustment tool to rotate the star wheel and adjust the brakes.

9. Seeking Professional Help

While adjusting your golf cart brakes can be a DIY task, there may be instances where seeking professional help from a golf cart mechanic is necessary.

9.1 When to Consult a Golf Cart Mechanic

If you encounter complex or persistent brake issues that you are unable to resolve, it’s advisable to consult a golf cart mechanic. They have the expertise and experience to diagnose and repair more intricate brake problems. Additionally, if you are uncomfortable or unfamiliar with working on mechanical components, it’s best to leave the job to a professional to ensure your safety and prevent further damage to the golf cart.

9.2 Choosing a Reliable Golf Cart Service Center

When choosing a golf cart service center, it’s important to consider their reputation, experience, and customer reviews. Look for a service center that specializes in golf carts or has a dedicated team of mechanics with expertise in golf cart maintenance and repairs. Ask for recommendations from fellow golf cart owners or consult your manufacturer for authorized service centers.

10. Safety Precautions

When working on your golf cart brakes, it’s essential to prioritize safety and take appropriate precautions to protect yourself and others.

10.1 Use of Personal Protective Equipment

Always wear appropriate personal protective equipment, such as safety goggles and gloves, to protect yourself from potential injuries during the brake adjustment process. While working with mechanical components, there is a risk of debris or sharp edges causing harm. Safeguarding your eyes and hands is crucial to prevent accidents.

10.2 Properly Securing the Golf Cart

Ensure that the golf cart is securely parked and the parking brake is engaged before initiating any brake adjustments. This will prevent the cart from rolling or moving unexpectedly, reducing the risk of accidents or injuries. If required, use wheel chocks to further secure the cart and prevent unintentional movement.

10.3 Following Manufacturer Guidelines

Always refer to your golf cart’s manufacturer guidelines or service manual for specific instructions and recommendations regarding brake adjustments. Each golf cart model may have unique specifications or procedures that need to be followed. By adhering to the manufacturer’s guidelines, you can ensure the safety and optimal performance of your golf cart brakes.

By following this comprehensive guide, you should have a good understanding of how to adjust golf cart brakes properly. Remember to prioritize safety, use the necessary tools and equipment, and seek professional assistance when needed. Properly adjusted and maintained brakes will not only enhance your golf cart’s performance but also ensure your safety and the safety of those around you.

How to Revive Dead Golf Cart Batteries

Learn how to revive dead golf cart batteries with our simple guide. Say goodbye to frustrating power outages and enjoy uninterrupted golfing adventures!

Imagine you’re out on the lush green fairways, eagerly preparing for a day of golfing with friends. As you reach for your golf cart keys, you come to a dreaded realization – the batteries are dead! Don’t fret, as I’m here to guide you through the simple yet effective steps to revive those lifeless golf cart batteries. In this article, you’ll discover the secrets to bringing your dead batteries back to life and uncover the joy of uninterrupted golfing adventures. So, prepare to say goodbye to frustrating power outages and hello to endless hours of smooth rides on the golf course.

How to Revive Dead Golf Cart Batteries

1. Understanding Golf Cart Batteries

What are golf cart batteries?

Golf cart batteries are specialized batteries designed to provide power for electric golf carts. They are typically deep-cycle batteries, which means they are designed for long, slow discharges over time. This is essential for powering the electric motors in golf carts, as they require consistent and sustained power output.

Types of golf cart batteries

There are two main types of golf cart batteries: lead-acid batteries and lithium-ion batteries. Lead-acid batteries are the most common and affordable option, while lithium-ion batteries offer advantages in terms of weight, lifespan, and efficiency. The choice between the two depends on individual preferences and budget considerations.

Importance of maintaining golf cart batteries

Proper maintenance of golf cart batteries is essential for ensuring their longevity and optimal performance. Regular maintenance helps prevent premature battery failure, improves overall battery life, and enhances the performance of the golf cart. Neglecting battery maintenance can lead to diminished performance, decreased range, and ultimately the need for battery replacement.

2. Signs of Dead Golf Cart Batteries

Dim or no lights

One of the most common signs of a dead golf cart battery is dim or no lights. If you notice that the headlights, taillights, or any other electric accessories on your golf cart are considerably dimmer or do not work at all, it may be an indication of a dying or dead battery.

Slow or no acceleration

If your golf cart is experiencing sluggish or reduced acceleration, it could be a sign of dead batteries. The lack of sufficient power from the batteries can result in slower speeds and decreased performance. If your golf cart is struggling to climb hills or feels unusually sluggish, it may be time to check the battery health.

Clicking or no sound when starting

When you attempt to start your golf cart and hear a clicking noise or no sound at all, it is likely that your batteries are dead or nearly dead. This indicates that the battery voltage is too low to power the electric motor, preventing the cart from starting. It is important to address this issue promptly to prevent further damage to the batteries.

Battery gauge shows low charge

Most golf carts are equipped with a battery gauge that indicates the charge level of the batteries. If the battery gauge consistently shows a low charge, even after a full charge, it could be a sign of dead or failing batteries. This indicates that the batteries are no longer holding a charge effectively and may need to be replaced or revived.

Golf cart not holding a charge

If your golf cart’s batteries are unable to hold a charge for a sufficient period, it is a clear indication of dead or dying batteries. Even after a full charge, if the batteries quickly lose their charge or are unable to provide the expected range, it is a strong indication that the batteries need attention or replacement.

3. Basic Maintenance for Golf Cart Batteries

Regular cleaning of battery terminals

To maintain optimal battery performance, it is important to regularly clean the battery terminals. Over time, corrosion and dirt can build up on the terminals, hindering the flow of electricity. Using a mixture of baking soda and water, gently clean the terminals with a wire brush or battery terminal cleaner. This helps ensure a clean connection and prevents any potential loss of power.

Checking and refilling electrolyte levels

For lead-acid golf cart batteries with removable caps, it is crucial to regularly check the electrolyte levels. Ensure the battery is properly charged before removing the caps. If the electrolyte levels are low, carefully add distilled water to bring them up to the recommended level. Avoid overfilling, as it can lead to electrolyte overflow during charging.

Inspecting and replacing damaged cables

Regularly inspect the battery cables for any signs of damage or corrosion. Damaged cables can impede the flow of electricity and affect battery performance. If you notice any frayed wires, corrosion, or loose connections, it is important to replace or repair the cables promptly to maintain optimal battery function.

Maintaining proper water levels

In addition to checking electrolyte levels, it is essential to maintain proper water levels in lead-acid golf cart batteries. If the water levels are too low, the battery plates may become exposed, leading to reduced battery life and performance. Regularly check the water levels and add distilled water as necessary to keep the cells adequately submerged.

4. Charging Dead Golf Cart Batteries

Using a golf cart charger

Charging dead golf cart batteries requires the use of a compatible golf cart charger. It is recommended to invest in a charger specifically designed for golf cart batteries to ensure optimal charging and prevent any potential damage. Using the wrong charger can lead to overcharging or undercharging, affecting battery performance and longevity.

Steps for proper charging

To charge dead golf cart batteries properly, follow these steps:

  1. Ensure the golf cart charger is unplugged and turned off.
  2. Connect the charger’s cables to the positive and negative terminals of the golf cart batteries.
  3. Once connected, plug in the charger and turn it on.
  4. Allow the charger to complete its charging cycle. The duration will vary depending on the charger and the state of the batteries.
  5. Once the charging cycle is complete, unplug the charger and disconnect the cables from the batteries.

Time required for fully charging

The time required to fully charge dead golf cart batteries depends on several factors, including the charger’s capacity and the condition of the batteries. In general, it can take anywhere from a few hours to overnight to complete a full charge. It is important to refer to the manufacturer’s instructions and recommendations for the specific charger being used.

Preventing overcharging

Overcharging golf cart batteries can lead to decreased battery life and potential damage. To prevent overcharging, it is essential to use a charger with an automatic shut-off feature. This feature detects when the batteries are fully charged and automatically stops the charging process. It is also advisable to monitor the charging progress and avoid leaving the batteries connected to the charger for extended periods after they reach a full charge.

5. Using a Battery Desulfator to Revive Dead Golf Cart Batteries

Understanding battery sulfation

Battery sulfation refers to the accumulation of lead sulfate crystals on the battery plates, which occurs naturally over time. Excessive sulfation can diminish battery performance and capacity. Reviving dead golf cart batteries often involves addressing this sulfation buildup.

How a battery desulfator works

A battery desulfator is a device designed to break down and dissolve the lead sulfate crystals that contribute to battery sulfation. By emitting high-frequency pulses or waves into the battery, the desulfator helps to reverse and reduce the sulfation process. This can potentially revive dead or deeply discharged golf cart batteries and improve their overall performance.

Steps for using a battery desulfator

To use a battery desulfator to revive dead golf cart batteries, follow these steps:

  1. Ensure the golf cart batteries are disconnected from the cart and any charging sources.
  2. Connect the battery desulfator to the batteries’ positive and negative terminals, adhering to the device’s instructions.
  3. Activate the battery desulfator by turning it on or following the provided guidelines.
  4. Allow the desulfator to work on the batteries for the recommended duration.
  5. Once the recommended time has passed, disconnect the desulfator and reconnect the batteries to the golf cart.
  6. Proceed with charging the batteries using a compatible golf cart charger.

It is important to note that while a battery desulfator can help revive dead batteries in some cases, it may not be effective for severely damaged or aged batteries.